Subscribe to Our Youtube Channel
Summary of Contents for Recsea RVH-AX100 SD
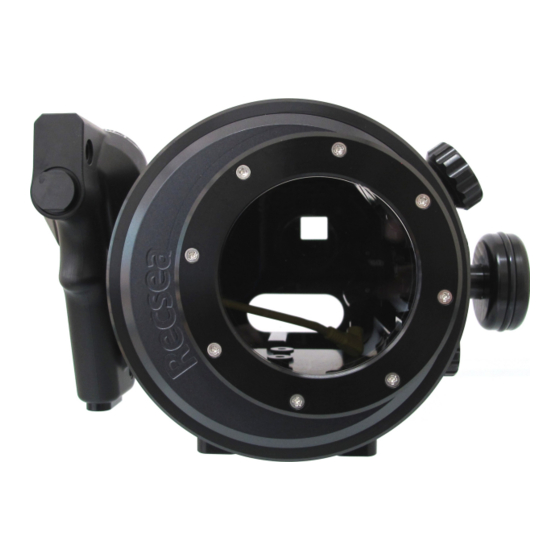
- Page 1 SONY FDR-AX100 / HDR-CX900 Underwater Housings Recsea RVH-AX100 SD RVH-AX100 PRO MANUAL Please read this manual before use. NTF CORPORATION UH Division http://www.seatool.net...
-
Page 2: Features Of This Product
1: INTRODUCTION Thank you for purchasing the RVH-AX100 Underwater Housing for SONY FDR-AX100 and HDR-CX900 camcorders. FEATURES OF THIS PRODUCT ※ Compact, lightweight yet durable, CNC precision machined corrosion-resistant aluminum housing ergonomically designed with maximum operating depth of 100 meters (328 feet). ※... -
Page 3: Specifications
※ Please keep inside of housing dry. Humidity, environment and temperature difference may cause condensation. To prevent condensation please use commercially available silica gel packets. ※ For replacement of consumable parts such as O-rings please contact your dealer or Seatool/Recsea. -
Page 4: Maintenance
2: O-RING GREASING & MAINTENANCE CAUTION! DO NOT use silicone grease other than that provided by Seatool/Recsea. 1. Using the O-ring Removal Pick, remove Back Cover O-ring. 2. Clean sand, salt, other contaminants and old grease from O-ring. 3. Clean O-ring groove and O-ring contact surface using a clean cotton swab. - Page 5 10 to 20 minutes. Manipulate all buttons, dials, and levers several times. Using a soft, dry cloth wipe away water. 2. Remove Back Cover and using the O-ring Removal Pick, remove the O-ring. 3. Clean O-ring groove and housing contact surfaces using a clean cotton swab. DO NOT clean housing with volatile organic solvents or chemical cleaning agents such as thinner, gasoline, and benzine, etc.
- Page 7 IMPORTANT NOTE: RVH-AX100 housings delivered to international RECSEA dealers are...
- Page 8 equipped with a IR Control Battery Box which requires a CR2032 3V battery to power the housing Control Grip IR Remote. Prior to installing video camera into housing, install button battery making sure the positive (+) side of the battery is visible. ※...
-
Page 9: Handling Precautions
・ON/OOFF Power On/Off (Camera only. Monitor power button is located on top of the Monitor). ・T/W Power Zoom Buttons T/W (Velocity is constant) ・ENTER Press ENTER to access camera MENU and set selections ・ ←→↑↓ Press Arrow Buttons to navigate MENU (For MENU details, please refer to camera instruction manual) ・PHOTO Camera shutter button... -
Page 10: Ins Talling Camera In Housing
※ Remove O-ring or leave housing slightly open by placing a strip of paper between the housing body and back cover when transporting by plane. Pressurization of a sealed housing during transport may cause damage or make it difficult to open. 4: INS TALLING CAMERA IN HOUSING ※Please conduct the following operations in a clean place with low humidity and dust. - Page 11 Making sure the D Terminal Cables and camera's Grip Belt do not cause an obstruction, set camera (Camera Tray attached) into position lining up the Camera Tray Posts with the grooves on the Camera Tray and slowly push forward into the housing until it stops.
- Page 12 Closing the back cover. Prior to attaching housing back cover please perform proper housing O-ring and back cover contact surface maintenance. Carefully place back cover onto housing main body. Press Secure-Latch on both sides of the back cover into place making sure the latch on the underside is properly placed in the Secure-Latch groove attached to the main body.
- Page 13 10. After use in salt water, wash off salt and other contaminants by soaking empty Housing, with Back Cover properly attached, thoroughly in a bucket of fresh water (lukewarm) for 10 to 20 minutes. Manipulate all buttons and dials several times to flush out salt deposits and other contaminants.
- Page 14 ・Battery Cover Double O-ring and contact surfaces. CAUTION! The O-rings are of different sizes. Take care when replacing after conducting O-ring maintenance. ・Battery Cover Lock Dial CAUTION! Close Back Cover and be sure the lock is secured prior to prior to submerging monitor in water. ・Battery Cover Lock Dial Lever Push down and turn Battery Cover Lock Dial to counter-clockwise to open Battery Cover.
-
Page 15: Using The Monitor
Insert EO cable male plug into into EO bulkhead hole. USING THE MONITOR ※ Test monitor prior to use in water. Properly install camera in housing. Turn camera and monitor ON. If monitor is operating normally you will see the subject in the monitor. -
Page 16: Using The Viewfinder
※ Warranty does not cover any losses resulting from inoperability of this product, including those related to lost profits or any related expenses. ※ Recsea will stock parts necessary for repair for five (5) years from stop of production. ※ This product uses some degradable parts, such as buttons and O-Rings. Recsea recommends overhauling the housing once per year, more frequently if used often. - Page 17 MEMO...
- Page 18 MEMO...
- Page 19 MEMO...
-
Page 20: Warranty Information
Dealer Name Serial Number ※Dealer: Stamp your company name and contact information, purchase date, model and serial number. Seatool/Recsea Manufacturing & Sales NTF CORPORATION UN Division 390-1 Mii, Midori-Ku, Sagamihara-Shi Kanagawa 252-0151, Japan T: +81 (0)50-7541-0294 F: +81 (0)42-780-5720...


Need help?
Do you have a question about the RVH-AX100 SD and is the answer not in the manual?
Questions and answers