Table of Contents
Advertisement
Advertisement
Table of Contents

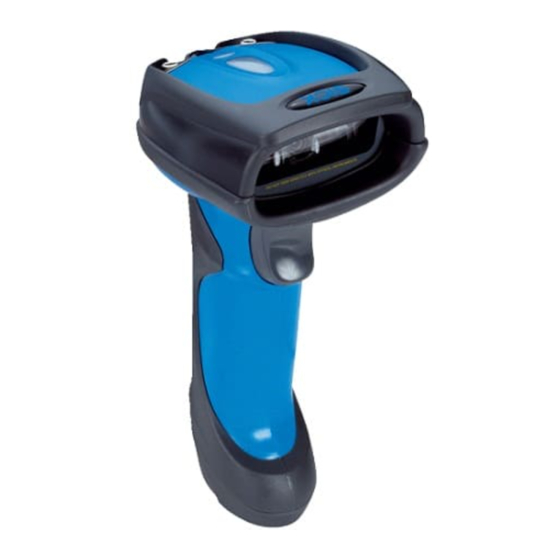
Summary of Contents for SICK IDM140BT Series
- Page 1 QUICK Start IDM1xx Bluetooth Hand-held Scanners Hand-held Line...
-
Page 2: How To Use This Guide
1. How to use this guide This document provides a quick reference for installation and operation IDM Bluetooth scanners. A complete user guide can be found on www.sick.com. The document contains a collection of codes that allow you to configure the IDM. -
Page 3: Preparations Before Using
3. Preparations before Using Install the Battery Ensure the battery contacts of the battery pack are facing the charging contacts inside the battery cavity. Slide the battery pack into the battery cavity until hearing a click sound before locking it with the end cap. The scanner will give 4 beeps when the battery pack is installed properly if the battery pack still has power. -
Page 4: Decide Your Radio Link Mode
4. Decide Your Radio Link Mode The IDM Bluetooth image scanners provide several radio link modes to communicate with most host devices. When the Bluetooth-enabled host device is not available, it can work with the smart cradle in PAIR mode (one to one connection) or PICO mode (multiple connections) to provide a plug-and-play cordless migration of your existing non-Bluetooth-enabled IT assets. - Page 5 USB COM, you have to install the USB virtual COM software driver (available on www.sick.com) into your host device before using the scanner. All host interface quick set codes can be found on page 13 of this guide.
- Page 6 4.2 Using IDM BT in PICO Mode Ensure the battery is fully charged and choose your desired interface cable, then plug it into the host interface port of the smart cradle and connect it to the host device. PS/2 RS232 Turn on the power of your host device.
- Page 7 4.3 Using IDM BT in HID Mode Ensure the battery is fully charged. Power on the scanner within radio range and ensure the status indicator of scanner gives alternating red and green blinks (in “Uninstall” state). If the scanner is not in uninstall state, please scan the “Uninstall”...
-
Page 8: Establish Spp Master Connection
4.4 Using IDM BT in SPP Mode Establish SPP Master Connection Ensure the battery is fully charged. Please go to the folder of “Hardware” located in Bluetooth Advanced Setting of the remote host device to check its device MAC address. Then prepare a 12-character Code 128 barcode of the remote host device MAC address, or follow the step 4 to input MAC address by scanning 12 option codes (see back of quick start guide). -
Page 9: Establish Spp Slave Connection
Establish SPP Slave Connection Ensure the battery is fully charged and a virtual COM port is available in your remote host for connecting the scanner. If not, please go to the folder of “Client Applications” located in Bluetooth Advanced Setting. Click the “Add COM Port”... -
Page 10: Presentation Scanning
5. Out-of-range Scanning When the radio is connected between the scanner and the remote host device, the scanner will transmit each scanned data right after scanning the barcode. However, the scanner is preset for being unable to scan any barcode data when it loses the radio connection with the remote host device. If you enable the out-of-range scanning function, the scanner is able to continue scanning barcode data while it is out of working range. -
Page 11: Batch Scanning (Inventory Mode)
8. Batch Scanning (Inventory Mode) Thanks to the specially designed Batch Scanning function, the scanner is capable of storing the barcode data up to 20,000 EAN-13 labels. It is an ideal cost-saving solution for inventory applications. Once you scan the “Enter Batch Scanning” command to activate this function, all scanned barcode data will be stored into the memory storage, and the status indicator of scanner will give green blink at regular interval during batch scanning. - Page 12 2.) Stored data is transmitted together with quantity information in two fields. Please scan “Enable Quantity Field Transmission” command to enable this function. The preset delimiter is “,“, but you are also able to choose your desired delimiter using IDM Bluetooth Reference Manual (available on www.sick.com). Disable Quantity Field Transmission ◆...
-
Page 13: Host Interface Quick Set
9. Link Mode Quick Set Uninstall SPP Master Mode PICO Mode PAIR Mode SPP Slave Mode HID Mode 10. Host Interface Quick Set (Work with Smart Cradle only) RS232 Serial Keyboard Replacement PS/2 (DOS/V) KBW Standard Mode PS/2 (DOS/V) KBW Turbo Mode USB HID Standard Mode ◆... -
Page 14: System Commands
12. System Commands System Information Factory Default IDM Set Up Link Master Default Paging Save Configuration Factory Default: After scanning” Factory Default” command, all parameters will be returned to factory default value (The radio link will be disconnected and the scanner will revert to uninstall state). Master Default: After scanning “Master Default”... -
Page 15: Status Indicator
15. Indications IDM160BT IDM140BT Link Indicator Status Indicator Descriptions Link Indicator Beeper Radio connected 1 blue blink per 2.5 sec. Radio disconnected 3 blue blinks per 2 sec. During connection Quick blue blinks Short clicks Radio connection built 1 blue blink per 2.5 sec. 4 beeps in ascending tone Radio connection lost 3 blue blinks per 2 sec. - Page 16 Phone +81 (0)3 3358 1341 Magyarország Phone +36 1 371 2680 Nederlands Phone +31 (0)30 229 25 44 Detailed addresses and additional Norge representatives and agencies Phone +47 67 81 50 00 at www.sick.com SICK AG | Waldkirch | Germany | www.sick.com...


Need help?
Do you have a question about the IDM140BT Series and is the answer not in the manual?
Questions and answers