Table of Contents
Advertisement
Quick Links
INSTALLATION AND OPERATION MANUAL
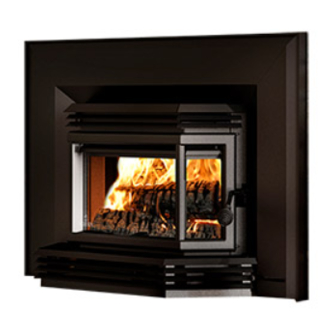
2200 Insert
(OB02201 Model)
250, rue de Copenhague, St-Augustin-de-Desmaures (Quebec) Canada G3A 2H3
After-sale service: 418-908-8002
This manual is available for free download on the manufacturer's web site. It is a copyrighted
document. Re-sale is strictly prohibited. The manufacturer may update this manual from time to
time and cannot be responsible for problems, injuries, or damages arising out of the use of
information contained in any manual obtained from unauthorized sources.
Printed in Canada
www.osburn-mfg.com
Stove Builder International Inc.
READ AND KEEP THIS MANUAL FOR REFERENCE
US ENVIRONMENTAL PROTECTION
AGENCY PHASE II CERTIFIED WOOD
Safety tested according to ULC S628
and UL 1482 Standards
by an accredited laboratory
E-mail: tech@sbi-international.com
INSERT
45056A
12-06-2015
Advertisement
Table of Contents

Related Manuals for Osburn 2200 OB02201


Summary of Contents for Osburn 2200 OB02201
- Page 1 AGENCY PHASE II CERTIFIED WOOD INSERT Safety tested according to ULC S628 and UL 1482 Standards by an accredited laboratory www.osburn-mfg.com Stove Builder International Inc. 250, rue de Copenhague, St-Augustin-de-Desmaures (Quebec) Canada G3A 2H3 After-sale service: 418-908-8002 E-mail: tech@sbi-international.com This manual is available for free download on the manufacturer’s web site. It is a copyrighted document.
- Page 2 2200 Insert Installation and Operation Manual THANK YOU FOR CHOOSING THIS OSBURN WOOD INSERT As one of North America’s largest and most respected wood stove and fireplace manufacturers, Stove Builder International takes pride in the quality and performance of all its products. We want to help you get maximum satisfaction as you use this product.
-
Page 3: Table Of Contents
2200 Insert Installation and Operation Manual Table of content PART A - OPERATION AND MAINTENANCE ........... 6 1 Safety Information ................. 6 Summary of Operation and Maintenance Cautions and Warnings ........6 2 General Information ..............7 2200 Insert Specifications ...................... 7 Zone Heating and How to Make it Work for You .............. - Page 4 2200 Insert Installation and Operation Manual 5 Maintaining Your Wood Heating System ........22 Insert Maintenance ......................22 5.1.1 Plated Finish Maintenance....................22 5.1.2 Cleaning Door Glass ......................22 5.1.3 Door adjustment ......................23 5.1.4 Replacing the Door Gasket ....................24 5.1.5 Replacing the Glass Gasket and/or the Glass ..............
- Page 5 Appendix 2: Air Control Mechanism and Optional Faceplate Installation ............... 46 Appendix 3: Installation of Secondary Air Tubes and Baffle ... 54 Appendix 4: Removal instructions ..........57 Appendix 5: Exploded Diagram and Parts List ......58 OSBURN LIMITED LIFETIME WARRANTY ........61 _______________________________________________________________________________ 5...
-
Page 6: Part A - Operation And Maintenance
2200 Insert Installation and Operation Manual PART A - OPERATION AND MAINTENANCE Please see Part B for installation instructions. 1 SAFETY INFORMATION 1.1 SUMMARY OF OPERATION AND MAINTENANCE CAUTIONS AND WARNINGS HOT WHILE IN OPERATION, KEEP CHILDREN, CLOTHING AND FURNITURE AWAY. CONTACT •... -
Page 7: General Information
2200 Insert Installation and Operation Manual GENERAL INFORMATION 2.1 2200 INSERT SPECIFICATIONS Fuel Type Cordwood Test Standards (safety) ULC S628 and UL 1482 Test Standard (emissions) EPA Method 28 (40 CFR Part 60) Heating capacity range* 750 to 2000 sq. ft. (69 to 186 m Maximum heat output** 30,425 BTU/h (8.9 kW/h). - Page 8 2200 Insert Installation and Operation Manual 8 _______________________________________________________________________________...
-
Page 9: Zone Heating And How To Make It Work For You
2200 Insert Installation and Operation Manual 2.2 ZONE HEATING AND HOW TO MAKE IT WORK FOR YOU Your new 2200 wood insert is a space heater, which means it is intended to heat the area it is installed in, as well as spaces that connect to that area, although to a lower temperature. This is called zone heating and it is an increasingly popular way to heat homes or spaces within homes. -
Page 10: The Sbi Commitment To You And The Environment
2200 Insert Installation and Operation Manual 2.4 THE SBI COMMITMENT TO YOU AND THE ENVIRONMENT The SBI team is committed to protecting the environment, so we do everything we can to use only materials in our products that will have no lasting negative impact on the environment. 2.4.1 WHAT IS YOUR NEW INSERT MADE OF? The body of your insert, which is most of its weight, is carbon steel. -
Page 11: Fuel
2200 Insert Installation and Operation Manual 3 FUEL 3.1 MATERIALS THAT SHOULD NOT BE BURNED GARBAGE OF ANY KIND, • COAL OR CHARCOAL, • TREATED, PAINTED OR COATED WOOD, • PLYWOOD OR PARTICLE BOARD, • • FINE PAPER, COLORED PAPER OR CARDBOARD, SALT WATER DRIFTWOOD, •... -
Page 12: Log Length
2200 Insert Installation and Operation Manual 3.2.3 LOG LENGTH Logs should be cut at least 1” (25 mm) shorter than the firebox so they fit in easily. Pieces that are even slightly too long make loading the insert very difficult. The most common standard length of firewood is 16”... -
Page 13: How To Dry Firewood
2200 Insert Installation and Operation Manual 3.2.5 HOW TO DRY FIREWOOD Firewood that is not dry enough to burn is the cause of most complaints about wood inserts. Continually burning green or unseasoned wood produces more creosote and involves lack of heat and dirty glass door. -
Page 14: Judging Firewood Moisture Content
2200 Insert Installation and Operation Manual 3.2.6 JUDGING FIREWOOD MOISTURE CONTENT You can find out if some firewood is dry enough to burn by using these guidelines: • cracks form at the ends of logs as they dry as it dries in the sun, the wood turns from white or cream colored to grey or yellow, •... -
Page 15: Operating Your Insert
2200 Insert Installation and Operation Manual 4 OPERATING YOUR INSERT 4.1 YOUR FIRST FIRES Two things will happen as you burn your first few fires; the paint cures and the internal components of the insert are conditioned. As the paint cures, some of the chemicals vaporize. The vapors are not poisonous, but they do smell bad. -
Page 16: The Top Down Fire
2200 Insert Installation and Operation Manual 4.2.2 THE TOP DOWN FIRE The top down fire starting method solves two problems with the conventional method: first, it does not collapse and smother itself as it burns; and second, it is not necessary to build up the fire gradually because the firebox is loaded before the fire is lit. -
Page 17: Ash Removal
2200 Insert Installation and Operation Manual Wood burns best in cycles. A cycle starts when a new load of wood is ignited by hot coals and ends when that load has been consumed down to a bed of charcoal about the same size as it was when the wood was loaded. -
Page 18: Firing Each New Load Hot
2200 Insert Installation and Operation Manual Remove ash first, and then rake charcoal towards the front of the firebox before loading so that it will ignite the new load. 4.3.4 FIRING EACH NEW LOAD HOT Place the new load of wood on and behind the charcoal, and not too close to the glass. Close the door and open the air control fully. -
Page 19: Blower Operation
2200 Insert Installation and Operation Manual 4.4 BLOWER OPERATION Allow the insert to reach operating temperature (approximately one hour), before turning on the blower, since increased airflow from the blower will remove heat and affect the start-up combustion efficiency. NOTE: ENSURE THE BLOWER CORD IS NOT IN CONTACT WITH ANY SURFACE OF THE INSERT TO PREVENT ELECTRICAL SHOCK OR FIRE DAMAGE. - Page 20 2200 Insert Installation and Operation Manual 4.4.1.2 Long Lasting Low Output Fires Sometimes you will want to build a fire to last up to eight hours, but don’t need intense heat. In this case use soft wood species and place the logs compactly in the firebox so the pieces are packed tightly together.
- Page 21 2200 Insert Installation and Operation Manual 4.4.1.5 North-South Fires Versus East-West Fires In fireboxes that are roughly square, wood can be loaded so that looking through the glass door you see the ends of the logs (north-south) or the sides of the logs (east-west). East-west loads that are built compactly break down slowly when heated, but the amount of wood you can load is limited because if you put in too many pieces, one may fall against the glass.
-
Page 22: Maintaining Your Wood Heating System
2200 Insert Installation and Operation Manual 5 MAINTAINING YOUR WOOD HEATING SYSTEM 5.1 INSERT MAINTENANCE Your new insert will give many years of reliable service if you use and maintain it correctly. Some of the internal components of the firebox, such as firebricks, baffles and air tubes, will wear over time under intense heat. -
Page 23: Door Adjustment
2200 Insert Installation and Operation Manual 5.1.3 DOOR ADJUSTMENT In order for your insert to burn at its best efficiency, the door must provide a perfect seal with the firebox. Therefore, the gasket should be inspected periodically to check for a good seal. The gasket seal may be improved with a simple latch mechanism adjustment. -
Page 24: Replacing The Door Gasket
2200 Insert Installation and Operation Manual 5.1.4 REPLACING THE DOOR GASKET It is important to maintain the gasket in good condition. After a year or more of use, the door gasket will compress and become hard, which may allow air to leak past it. You can test the condition of the door gasket by closing and latching the door on a strip of paper. -
Page 25: Cleaning And Painting The Insert
2200 Insert Installation and Operation Manual Do not abuse the glass door by striking or slamming shut. Do not use the insert if the glass is broken. To change the glass, perform the same operation described above. 5.1.6 CLEANING AND PAINTING THE INSERT Do not attempt to clean or paint the insert when the unit is hot. -
Page 26: Cleaning The Chimney
2200 Insert Installation and Operation Manual It is recommended to clean thoroughly the chimney system at the end of every heating season. During summer, the air is damper and with minimal air circulation within the stove or furnace, it can mix with creosote and/or sooth deposits in the chimney system to form an acid that could accelerate the corrosion process and induce premature decay of the steel. -
Page 27: Part B - Installation
2200 Insert Installation and Operation Manual PART B - INSTALLATION 6 PRE-INSTALLATION MASONRY FIREPLACE REQUIREMENTS The masonry fireplace must meet the minimum requirements found in the building code enforced locally, or the equivalent for a safe installation. Contact your local Building Inspector for requirements in your area. - Page 28 2200 Insert Installation and Operation Manual 3. CHIMNEY CAPS: Mesh type chimney caps must have provision for regular cleaning, or the mesh should be removed to eliminate the potential of plugging. 4. ADJACENT COMBUSTIBLES: The fireplace should be inspected to make sure that there is adequate clearance to combustibles, both exposed combustibles to the top, side, and front as well as concealed combustibles, in the chimney and mantle area.
-
Page 29: Safety Information
2200 Insert Installation and Operation Manual 7 SAFETY INFORMATION 7.1 SUMMARY OF INSTALLATION CAUTIONS AND WARNINGS THE INFORMATION GIVEN ON THE CERTIFICATION LABEL AFFIXED TO THE APPLIANCE • ALWAYS OVERRIDES THE INFORMATION PUBLISHED, IN ANY OTHER MEDIA (OWNER’S MANUAL, CATALOGUES, FLYERS, MAGAZINES AND/OR WEB SITES). •... -
Page 30: Clearances To Combustible Material
2200 Insert Installation and Operation Manual 8 CLEARANCES TO COMBUSTIBLE MATERIAL The clearances shown in this section have been determined by test according to procedures set out in safety standards ULC S628 (Canada) and UL 1482 (U.S.A.). When the insert is installed so that its surfaces are at or beyond the minimum clearances specified, combustible surfaces will not overheat under normal and even abnormal operating conditions. -
Page 31: Compliance Of A Combustible Mantel Shelf
2200 Insert Installation and Operation Manual 8.3 COMPLIANCE OF A COMBUSTIBLE MANTEL SHELF To ensure compliance of an existing mantel shelf or to install a combustible mantel shelf, refer to table and figure below. For example, a mantel shelf with a 9.5’’ depth (241 mm) ((X) value) must be installed at least 22"... -
Page 32: Positioning The Unit
2200 Insert Installation and Operation Manual 8.4 POSITIONING THE UNIT It is necessary to have a floor protection made of non-combustible materials that meets the measurements specified in table FLOOR PROTECTION (see Section 8.5. To determine the need to add floor protection (D) beyond the hearth extension, you must do the following calculation using the data in Table Data for floor protection calculation of this section: D = B - (A - C). - Page 33 2200 Insert Installation and Operation Manual If the extension of the masonry hearth is raised at least 4" from the floor protection, a non- combustible material without an R factor is sufficient. If non-combustible material floor protection needs to be added in front of and level with the hearth extension of the masonry fireplace, an R factor equal to or greater than 1.00 is required.
- Page 34 2200 Insert Installation and Operation Manual The use of an R value is convenient when more than one material is going to be used in the hearth extension to cover the combustible surface. This is because R values are additive, whereas K values are not.
- Page 35 2200 Insert Installation and Operation Manual Thermal Characteristics of Common Floor Protection Materials* MATERIAL CONDUCTIVITY (k) RESISTANCE (R) PER INCH PER INCH THICKNESS ® Micore 0.39 2.54 ® Micore 0.49 2.06 ® Durock 1.92 0.52 ® Hardibacker 1.95 0.51 ® Hardibacker 0.44 ®...
- Page 36 2200 Insert Installation and Operation Manual Data for Floor Protection Calculation (Note 1) INCHES 21 5/8" 5 1/4" D = B - (A - C) 11 7/8" Dimension of the hearth extension MILLIMETRES 549 mm 133 mm D = B - (A - C) 302 mm 36 ______________________________________________________________________________...
-
Page 37: Minimum Masonry Opening, Clearances To Combustibles, And Floor Protector
2200 Insert Installation and Operation Manual 8.5 MINIMUM MASONRY OPENING, CLEARANCES TO COMBUSTIBLES, AND FLOOR PROTECTOR ______________________________________________________________________________ 37... - Page 38 2200 Insert Installation and Operation Manual CLEARANCES MINIMUM MASONRY OPENING 17" (?? mm) 10" (?? mm) 22 5/8" (575 mm) 14" (?? mm) 26 1/4" (667 mm)** 22" (?? mm)* 17 3/8" (441 mm) 1.5" (?? mm) FLOOR PROTECTION CANADA 18’’...
-
Page 39: The Venting System
2200 Insert Installation and Operation Manual 9 THE VENTING SYSTEM 9.1 GENERAL The venting system, made up of the chimney and the liner inside the chimney, acts as the engine that drives your wood heating system. Even the best insert will not function safely and efficiently as intended if it is not connected to a suitable chimney and liner system. -
Page 40: Suitable Chimneys
2200 Insert Installation and Operation Manual 9.3 SUITABLE CHIMNEYS Your wood insert will provide optimum efficiency and performance when connected to a 6-inch diameter chimney liner. The connection to a chimney having a diameter of at least 5 inches (Canada only) is permitted, if it allows the proper venting of combustion gases and that such application is verified and authorized by a qualified installer. -
Page 41: Chimney Liner Installation
2200 Insert Installation and Operation Manual 9.5 CHIMNEY LINER INSTALLATION The preferred methods for installing the chimney liner are found in Section 9.5.1. Use a liner offset adapter (Section 9.5.2) only as a last resort. 9.5.1 IF THE CHIMNEY LINER DOES ALIGN WITH THE INSERT’S FLUE OUTLET, YOU HAVE TWO OPTIONS A) Install the chimney liner starter adapter, provided with the chimney liner. -
Page 42: If The Chimney Liner Does Not Align With The Insert's Flue Outlet
2200 Insert Installation and Operation Manual B) Your dealer may offer a liner fastening system (AC02006), sold separately. Follow the installation instructions provided with the liner fastening system. 9.5.2 IF THE CHIMNEY LINER DOES NOT ALIGN WITH THE INSERT’S FLUE OUTLET You can install a liner offset adapter (AC01370), which is sold separately. -
Page 43: Minimum Chimney Height
2200 Insert Installation and Operation Manual 9.6 MINIMUM CHIMNEY HEIGHT The top of the chimney should be tall enough above turbulence caused when wind blows against the house and its roof. The chimney must extend at least 1 m (3 ft.) above the highest point of contact with the roof, and at least 60 cm (2 ft.) higher than any roof line or... -
Page 44: Supply Of Combustion Air
2200 Insert Installation and Operation Manual 9.8 SUPPLY OF COMBUSTION AIR In Canada, wood inserts are not required to have a supply of combustion air from outdoors because research has shown that these supplies do not give protection against house depressurization and may fail to supply combustion air during windy weather. -
Page 45: Appendix 1: Installing The Optional Door Overlay
2200 Insert Installation and Operation Manual APPENDIX 1: INSTALLING THE OPTIONAL DOOR OVERLAY In order to complete the assembly of your wood insert, you need to install the door overlay. See figure below for installation instructions: Remove the four screws (A) from the top and the bottom of the door. Install the overlay (B) on the door. -
Page 46: Appendix 2: Air Control Mechanism And Optional Faceplate Installation
2200 Insert Installation and Operation Manual APPENDIX 2: AIR CONTROL MECHANISM AND OPTIONAL FACEPLATE INSTALLATION Note: The illustrations may vary from one model to another, but the method of assembly remains the same. Air control mechanism: Fix the air control plate (A) to the air control extension lever (B) using the 1/4"... - Page 47 2200 Insert Installation and Operation Manual Mount the metal corner gussets components (G) and (H) with screws (F). Set aside. Mount finish trims (I), (J) and (K) using previously pre-mounted metal corner gussets (L) ______________________________________________________________________________ 47...
- Page 48 2200 Insert Installation and Operation Manual Slide the mounted finish trims (M) down previously mounted faceplate. Secure the finish trim onto the faceplate using “U” shaped retainers (N) as shown. 48 ______________________________________________________________________________...
- Page 49 2200 Insert Installation and Operation Manual Installation of the faceplate and air control plate on the insert Step Using Philips screwdriver, remove screw holding upper louvers assembly. Step 2: Remove the door from its hinges. ______________________________________________________________________________ 49...
- Page 50 2200 Insert Installation and Operation Manual Step 3: Remove the lower louvers assembly by lifting it Step 4: Slide the air control mechanism into the sliding channels below the firebox through lower right opening of the unit. 50 ______________________________________________________________________________...
- Page 51 2200 Insert Installation and Operation Manual Step 5: Install the mounted faceplate on the unit. Step 6: Put back in place the blower assembly. ______________________________________________________________________________ 51...
- Page 52 2200 Insert Installation and Operation Manual Step 7: Put back the door in place. Step 8: Put back in place the upper louvers assembly and secure it with the previously removed screw. 52 ______________________________________________________________________________...
- Page 53 2200 Insert Installation and Operation Manual Step 9: Secure the faceplate to the unit using four screws #10 x 3/8” provided with the faceplate kit. Make sure the air control mechanism rod moves freely through the lower horizontal slot in the faceplate assembly.
-
Page 54: Appendix 3: Installation Of Secondary Air Tubes And Baffle
2200 Insert Installation and Operation Manual APPENDIX 3: INSTALLATION OF SECONDARY AIR TUBES AND BAFFLE ITEM DESCRIPTION QUANTITY BAFFLE EXTENSION SECONDARY AIR TUBE 1/8" X 1/2" COTTER PIN C-CAST BAFFLE BOARD INSULATION WOOL BLANKET 54 ______________________________________________________________________________... - Page 55 2200 Insert Installation and Operation Manual 1. Starting with the rear tube, lean and insert the right end of the secondary air tube into the rear right channel hole. 2. Lift and push the tube into the corresponding opposite nozzle. Align both nozzle and tube locking holes together and secure using a cotter pin with a pair of pliers.
- Page 56 2200 Insert Installation and Operation Manual 3. Repeat steps 1 and 2 for the two middle tubes. Install the baffle boards and insulation wool blankets (A) and then install the front secondary air tube (B). Finally, install the baffle extension (C) in between the front baffle board (A) and the front secondary air tube (B).
-
Page 57: Appendix 4: Removal Instructions
2200 Insert Installation and Operation Manual APPENDIX 4: REMOVAL INSTRUCTIONS For the purpose of inspecting the insert itself or the fireplace, your insert may need to be removed. To remove your insert follow these instructions: • Remove the upper louvers assembly (A) held in place by the screw (B). •... -
Page 58: Appendix 5: Exploded Diagram And Parts List
2200 Insert Installation and Operation Manual APPENDIX 5: EXPLODED DIAGRAM AND PARTS LIST 58 ______________________________________________________________________________... - Page 59 AC06400 BLACK SELF-ADHESIVE GLASS GASKET (6') SE35108 REMPLACEMENT GLASS WITH GASKET 17 1/2" X 11 23/32" PL35103 TOP OR BOTTOM GLASS RETAINER OSBURN 2200 PL35102 SIDE GLASS RETAINER OSBURN 2200 30026 THREAD CUTTING SCREW 10-24 F 5/8" HEX WASHER HEAD OA11390 SILICONE &...
- Page 60 2200 Insert Installation and Operation Manual Item Description PL35017 DOOR STOP PL35056 SHIM SE35021 HINGE ASSEMBLY PL34052 LINER FIXATION BRACKET PL36111 2 3/8" X 6'' X 1 1/4'' REFRACTORY BRICK 29005 6" X 8 1/4" X 1 1/4'' REFRACTORY BRICK HD 29011 4'' X 9"...
-
Page 61: Osburn Limited Lifetime Warranty
Labour cost and repair work to the account of the manufacturer are based on a predetermined rate schedule and must not exceed the wholesale price of the replacement part. Shall your unit or a components be defective, contact immediately your OSBURN dealer. To accelerate processing of your warranty claim, make sure to have on hand the following information when calling: •...
Need help?
Do you have a question about the 2200 OB02201 and is the answer not in the manual?
Questions and answers