Table of Contents

Subscribe to Our Youtube Channel
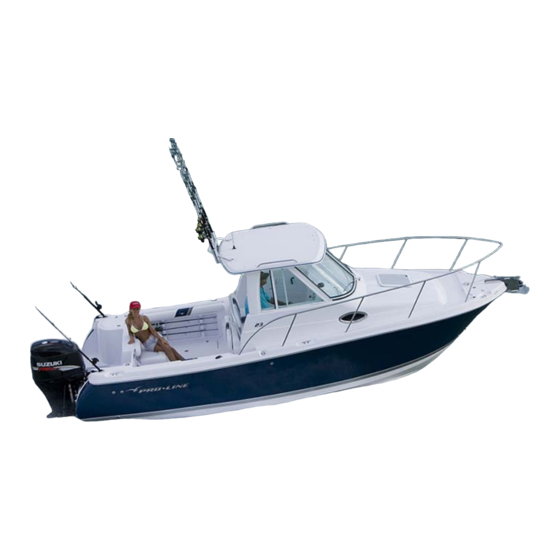
Related Manuals for Pro-Line Boats 2010 23 XP


Summary of Contents for Pro-Line Boats 2010 23 XP
- Page 1 2010 Owner’s Manual 23 XP Specifications subject to change without notice. Actual boats may vary from drawings and/or photos. Copyright 2007 Pro-Line Boats Inc., PO Box 1348, Crystal River, FL 34423 All rights reserved. July 14, 2009...
-
Page 3: Table Of Contents
Table of Contents Page Introduction ........................Specifications Customer Responsibilities ..........................................Dealer Responsibilities ..........................Capacity Insurance and Registration ............................................. Owner’s Package ..........................Warranty Safety ........................Carbon Monoxide Emergency Treatment for CO Poisoning ..............Where CO May Accumulate ................................How To Protect Others and Yourself Fire ............................ - Page 4 Page Lighting Systems ........................Baitwell Light ............................................Cabin Light .................. Navigation and Anchor Lights ................... Remote Spot Light (Optional) Courtesy/Dome Light ....................Spreader Light (Optional) ....................................Cockpit Lights (Optional) ........................Instrumentation ...................... Compass Horn – Electric ......................Full Instrumentation / Gauges ..................
- Page 5 Page Anchor Roller ......................Storage ......................................Dive Platform - Integrated with Ladder ..........................Seating ..........................Hard Top Cabin Interior ......................... Cabin Sink and Cabinet ........................................Cabin V-Berth ......................... Upholstery ......................Stove (Optional) Vinyl Upholstery ........................Electronics (Optional) ......................Bonding System ........................
- Page 6 Page Windows ..........................Windshield ............................................. Curtain (Aft Canvas Curtain) ........................Canvas ........................Isinglass Vinyl ............................Interior Vinyl – Cabin Headliner and Cabin Bolsters ..................Exterior Vinyl – Upholstered Seats and Cockpit Bolsters ............................Cloth ......................Cabin Cushions Single Burner Butane Stove ....................
-
Page 7: Introduction
Introduction Congratulations on the purchase of your new Pro-Line Boats 23 XP sport fishing boat. Welcome into the proud family of satisfied Pro-Line owners. Every expedition lets you enjoy the outstanding features designed into every boat we construct. Your new Pro-Line is more than just a boat, it's a whole new lifestyle. -
Page 8: Dealer Responsibilities
Dealer Responsibilities Your dealer's responsibilities include but are not limited to: Pre-delivery verification of proper rigging and operation. Deliver the boat in water ready condition unless you and your dealer have agreed upon other arrangements. Complete the pre-delivery checklist with the customer at the time of delivery. ... -
Page 9: Warranty
The Pro-Line Boats Limited Warranty is attached to the warranty card. After signing the warranty card, your dealer will provide you with your copy of the warranty and mail the warranty card to Pro-Line Boats, Inc. A copy of the Pro-Line Boats Limited Warranty is also included in this chapter. - Page 10 The Ten Year Limited Hull Structural Warranty is transferable to subsequent owners for a nominal fee. Please contact your dealer or Pro-Line Boats to obtain the applicable transfer form so that the new owner will have piece of mind knowing that their pre-owned boat comes with the same structural hull warranty protection that was...
-
Page 11: Safety
Safety Your Pro-Line boat has been constructed with safety in mind. But, remember, boating safety and the safety of your passengers is YOUR ultimate responsibility. You should fully understand the operations of your vessel as well as the basics in boating safety. Your local U.S. -
Page 12: Where Co May Accumulate
Shut off potential sources of CO, if possible. Correct ventilation problems and/or repair exhaust problems as appropriate. Investigate the source of CO and take corrective action, such as evacuating and ventilating the area, or shutting off the source of the CO, while at the same time evacuating and ventilating the area. -
Page 13: Fire
“teak” swim platform of a vessel while a wake builds up then lets go to body surf on the wave created by the boat; hence the term - Teak Surfing.) Teak surfing is never a safe activity. Never enter areas under swim platforms where exhaust outlets are located unless the area has been properly ventilated. -
Page 14: Hazardous Conditions
Be aware of and avoid conditions that can cause your boat to flood with water. Possible causes of flooding include: Damage to the hull or thru-hull fitting Waves washing into the boat Water entering cockpit due to improper loading ... -
Page 15: Alcohol
The United States Coast Guard Info Line (800)-368-5647 The USCG Headquarters by logging on to uscg.mil The information here is only a “brief” overview. Please contact the USCG for detailed information. Audible warning signals: One short horn blast: starboard course change. Two short horn blasts: port course change. -
Page 16: Controls
Controls Controls and engine systems vary greatly from one engine manufacturer to another. Please read your engine owner’s manual carefully. Note: If your engine package was not factory installed, some components that are normally standard installations may not be included. Throttle and Shift Controls Ignition –... -
Page 17: Steering
The throttle lever has three range positions: “Forward”, “Neutral”, and “Reverse”. The shift function occurs in the first portion of the lever travel. After the transmission is shifted into gear, further movement of the lever advances the throttle. Push the throttle lever ahead to move forward and pull it back for reverse. Centralize the lever to the detent position for neutral. -
Page 18: Trim Tabs With Indicators (Optional)
Trim Tabs with Indicators (Optional) The trim tabs come equipped with auto retract. The planing tabs are located on each side of the transom on the bottom of the hull. The trim tabs operate independently, up or down, to correct for differing conditions of wind or load. -
Page 19: Systems And Accessories
Systems and Accessories Electrical System 12 Volt Receptacle (Optional) The 12-volt receptacle is installed on the console. It is easily accessible and can be used to charge your cell phone, operate a hand held remote spotlight, etc. Circuit Breakers Circuit breakers and/or fuses protect the wiring. In the event a device stops working, check to see if the circuit breaker is tripped or if the fuse is blown. -
Page 20: Switch And Breaker Panel
Air conditioning vent Verify that the fan is running and that there is steady airflow out of (air supply grille) the air conditioning vent. Turn the mode control knob to run. This will start the compressor and seawater pump. ... - Page 21 If you have Faria gauges on the dash panel, this function will illuminate the gauge lights. If the gauges were provided by the engine manufacturer (i.e., Mercury, Honda, etc.), this switch will not illuminate the gauge lights. Instead, your gauge lights will be illuminated when the ignition switch is turned on. ...
-
Page 22: Battery Switch For Dual Batteries (Optional)
Windshield Wiper(s) – Press the switch in the forward or up position to activate the starboard wiper. Depressing the 3-position switch to the down or aft position will activate both the port and starboard wipers. The center position on the switch is the off position for both wipers. Accessory - This 5 amp accessory switch can be used for additional dealer installed accessories. -
Page 23: Courtesy/Dome Light
The switch on the right side of the panel allows you to turn Remote Spot Light Remote Spot Light Control Panel the light on and off. The red LED light located in the center of the panel will be lit when the spot light is turned on. -
Page 24: Horn - Electric
Horn - Electric The horn is used to signal, warn or alert other boats or persons on shore. The horn switch is located on the switch panel. The horn device is located on the gunwale at the starboard side of the bow area. Depress the horn switch to the up or forward position to activate the horn, then release the horn switch to deactivate the horn. -
Page 25: Head Waste System
Head Waste System WHAT IS THE LAW? Congress enacted the Clean Water Act of 1972 (amended in 1987). This law addresses a wide spectrum of water pollution problems, including marine sewage from boats in navigable U.S. waters including coastal waters up to three miles offshore. The law further provides for "no discharge" by boats operated in enclosed lakes and reservoirs or in rivers not capable of interstate navigation. -
Page 26: Bilge Pumps
To operate the baitwell system: Locate the baitwell switch Lever on the aerator fitting Lever on the aerator fitting on the console and press the switch to the forward position is closed is open to turn on the pump. When the baitwell pump is operating, go to the baitwell tub, open the baitwell lid and visually check to see if water is pumping into the tub through the aerator fitting. -
Page 27: Fish Boxes With Macerator Pump
Keep the bilge area clean and free from debris that could clog ports or inhibit float movement. Also, keep the battery (starboard) that provides power to the bilge pump charged. If the battery is not charged and flooding occurs, the boat could swamp causing damage and possible loss of life or property. Fish Boxes with Macerator Pump Your boat is equipped with two 40-gallon aft fish boxes with a total capacity of 80 gallons. -
Page 28: Fresh Water Tank And Fill (Optional)
Fresh Water Tank and Fill (Optional) The 10-gallon capacity fresh water tank can be filled via the stainless steel fresh water tank fill (labeled water) located on the starboard aft corner of the transom. The stainless steel vent is located just forward of the transom door. The Hose to the Fresh water tank, which is installed on a shelf in the bilge area, Water Pump... -
Page 29: Fuel Fill Fitting
Inspect all hose connections on a regular basis. You can access the other end of the fuel fill and vent hoses via the 6” deck plate that is installed just below the fuel fill on the inside the cockpit. Fuel Fill Fitting The fuel fill fitting is labeled “Gas”... -
Page 30: Oil Tank And Fill
Oil Tank and Fill Depending on your selection of the various optional engine packages (i.e., oil injected outboard engines), your boat may be equipped with a remote oil tank. If your engine package requires the installation of an oil tank, it will be mounted in the bilge and can be accessed via the hatch for the bilge and/or motor well. -
Page 31: Xm Stereo Upgrade (Optional)
XM Stereo Upgrade (Optional) When activating your satellite service, your service provider will request that you provide them with the “Radio ID #”. You will find this 8 character ID # 8 character (alpha numeric) on the paperwork in your owner’s package. (alpha numeric) If you cannot locate the paperwork, you will find the controller head unit (XM... -
Page 32: Hatches And Latches
Hatches and Latches To open the hatches just lift the handle of the latch from the recessed area of the hatch, twist it and lift the hatch open. Make sure that all hatches are closed and secured before you get underway. In addition to the deck hatches, there are round access pies installed on the boat that provide access to components. -
Page 33: Cabin/Companionway Door
Cabin/Companionway Door The poly bi-fold cabin/companionway door comes equipped with a latch, strap and poly hatch. To open the door, twist the latch to the left to disengage the latch, lift the hatch and pull the door open. Use the black strap and snap to secure the door when it is open. -
Page 34: Thru Hull Fittings
Thru Hull Fittings Thru hull fittings provide overboard drainage. The following photos indicate the source of drainage for each of the thru hulls. Port Side Upper Fitting Baitwell Drain Lower Fittings Port Cockpit/Deck Drain Bilge Hatch Drain Cabin Sink Drain (Optional Fresh Cockpit deck drain... -
Page 35: Cockpit / Deck Drains
Cockpit / Deck Drains There are three (3) cockpit/deck drains in the aft area of the cockpit that allow excess water in the cockpit to drain overboard via thru hulls on each side of the boat. To ensure that there is no blockage in any of the hoses connected to the drains, it is recommended that you occasionally run water through each of the cockpit drains and visually inspect the thru hulls to verify that water flows freely and that there is no blockage. -
Page 36: Hard Top
Helm Bench Seat with Storage and Folding Aft Facing Seat (Optional) Storage Below Helm Seat Aft Facing Folding Bench Seat Hard Top The fiberglass hard top is permanently installed on the top cap. A set of 4 rocket launchers is mounted Optional Spreader Light to the aft edge of the top;... -
Page 37: Upholstery
Upholstery Cabin interiors are outfitted in your choice of patterns and the rest of the cabin is decorated with coordinating pillows, curtains and bolsters. Patterns available for boats built in early model year 2009 are outfitted in your choice of Geometric Spice or Cosmic Caribbean. -
Page 38: Stove (Optional)
Please see the Service and Care section of this manual for information on how to clean and care for your cabin cushions, pillows vinyl upholstery. Stove (Optional) An optional single burner butane stove can be installed in the cabin. See the Service and Care section of this manual for cleaning recommendations. -
Page 39: Operation And Performance
Operation and Performance Trim / Tilt The power trim system allows the operator to raise and lower the motor(s) throughout an infinite number of settings between its upper and lower limits. There is a trim setting that will yield maximum speed, stability or maneuverability for every throttle setting. -
Page 40: Starting
it may be desirable to re-prop your Pro-Line to enhance the desired performance needs for your area. For instance: Decreasing the pitch will enhance acceleration and power at high loads. Increasing the pitch will increase speed at light loads. ... -
Page 41: While Fueling
Close doors and hatches so fumes do not enter boat. Disembark all persons not necessary for the fueling operation. Prohibit all smoking and open flames on board and nearby. Have a fire extinguisher close by. While Fueling: ... -
Page 42: Trailering And Launching
Trailering and Launching Selecting A Trailer Choose the proper trailer for your boat and make sure the trailer you use is certified. Consult your state authority for state regulations pertaining to trailering a boat. More damage can be done to a boat by the stress of road travel than by normal water operation. -
Page 43: Backing A Trailer
The safety chains are attached crisscrossing under the coupler to the frame of the tow vehicle. If the ball were to break, the trailer would follow in a straight line and prevent the coupler from dragging on the road. ... -
Page 44: Pre-Launching Preparations
Pre-Launching Preparations For the courtesy of others and to prevent rushing, prepare your boat for launching away from the ramp. Check the boat to ensure that no damage was caused by the trip. Remove any covers and tie downs. ... -
Page 45: Retrieval
Retrieval The steps for removing your boat from the water are basically the reverse of those taken to launch it. However, keep in mind that certain conditions may exist during retrieval that did not exist during launching. As you approach the takeout ramp, take special care to note such factors as the change in wind direction and/or velocity, the change in current and/or tide, any increase in boating traffic, visibility, etc. -
Page 46: Service And Care
Service and Care To enjoy trouble free use of your Pro-Line, follow the recommended procedures and instructions relating to the service and care of your boat. Failure to follow proper maintenance practices will result in shorter life of your equipment and may void your warranty. Much of the installed equipment on your Pro-Line is warranted separately. -
Page 47: Graphics
This is done so that the epoxy coat will properly adhere to the hull, and when done correctly, will not void the hull warranty. Pro-Line Boats does not recommend using an etching primer in lieu of sanding the bottom. -
Page 48: Compass
Compass During periods of long storage, it is recommended that you remove the compass from the boat and store it in a location providing normal room temperature. At low temperatures, an air bubble may form on the top of the dome. -
Page 49: Corrosion Protection
Always clean stainless frequently with soap and water. Any cleaner safe for glass is usually safe for stainless Always remove rust spots as soon as possible with a stainless, brass, silver or chrome cleaner. Irreversible pitting will develop under rust that remains on stainless for any period of time. ... -
Page 50: Curtain (Aft Canvas Curtain)
Glass - Use commercially available glass cleaners or a mixture of fresh water and vinegar. Do not use abrasives, harsh chemicals or metal scrapers. Regular cleaning will help assure clarity of the glass for safe boating. Window Channels - Clean window channels with mild detergent only. Channels can be sprayed with silicon aerosol while sliding the glass back and forth. -
Page 51: Isinglass
results, Glen Raven recommends 303 High Tech Fabric Guard™ as the preferred re-treatment product for Sunbrella fabrics. Fabrics should be retreated after thorough cleaning or after five years of use. Check with your local Sunbrella dealer or distributor for additional information. For more information, visit the Sunbrella website at www.sunbrella.com for specific recommendations. -
Page 52: Single Burner Butane Stove
Note: Water extraction or steam cleaning is not a recommended cleaning method. Cushion covers should not be removed and laundered. To prevent overall soiling, frequent vacuuming or light brushing with a non-metallic, stiff bristle brush to remove dust and grime is recommended. When cleaning a spill, blot immediately to remove spilled material. -
Page 53: Resealing
Fitting Out After Storage Check entire fuel system for loose fittings, leaks and damage. Clean battery terminals; install battery(s), and coat terminals with a deoxidizing agent. Check all thru hull fittings and hoses for obstructions, water tightness and condition. ... -
Page 54: Appendix
Appendix Helpful Check Lists Print and use these checklists, and do not operate your boat without doing the following: Each Time You Go On a Boat Trip Make sure you know where CO exhaust outlets are located on your vessel. ... -
Page 55: Boat Identification Information
Boat Identification Information Owner: Home Port: Dealer: Boat Name: Registration Number: Hull ID Number: Boat Model: LOA: Beam: Draft: Vertical Clearance: Hull: Deck: Interior: Warranty Registration Date: Fuel Capacity (Gallons): Ignition Key #: Cabin/Head Door Key #: Other Key #: Radio Call Letters: Bat.: Engine Make:... -
Page 56: Trouble Shooting Chart
Trouble Shooting Chart PROBLEM: POSSIBLE CAUSE Poor speed or fuel Wrong propeller for load or conditions. economy: Trim is in too far. Load is too far forward or too heavy. Boat has taken on water. Marine growth on hull. Line or anchor is dragging. Fuel is stale or partially blocked.
Need help?
Do you have a question about the 2010 23 XP and is the answer not in the manual?
Questions and answers