Table of Contents
Advertisement
Advertisement
Table of Contents

Subscribe to Our Youtube Channel
Related Manuals for IAG IOE6SE1


Summary of Contents for IAG IOE6SE1
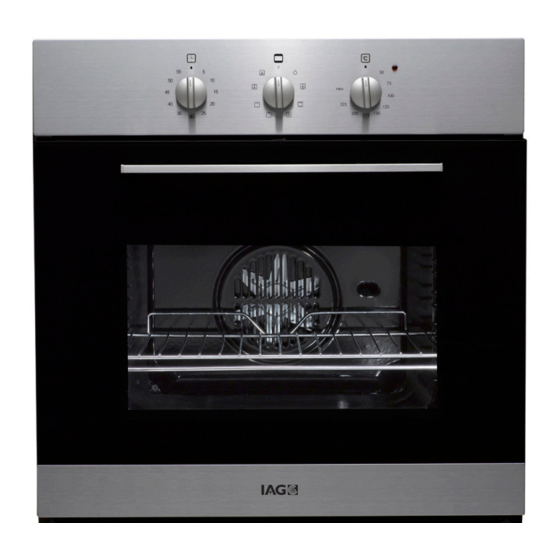
- Page 1 600mm Oven Manual MODEL IOE6SE1 Installation and Operation...
- Page 2 Installation & Operation Manual for 600mm Multifunction ovens USER INSTRUCTIONS SPECIAL NOTE This Installation and Operation Manual is utilised for many different models throughout the world and not all the instructions or features covered within this manual will relate to your specific model. GENERAL WARNINGS Read carefully all the instructions contained in this booklet.
- Page 3 Installation & Operation Manual for 600mm Multifunction ovens IMPORTANT: do not use the oven door handle to move the appliance, such as to remove it from the packaging ATTENTION The oven is an appliance which, for its nature, becomes hot, especially in correspondence of the glass door.
- Page 4 Installation & Operation Manual for 600mm Multifunction ovens WARNING- Accessible parts will become hot when in use. To avoid burns and scalds children should be kept away During use the appliance becomes hot, Care should be taken to avoid touching heating elements inside the oven.
- Page 5 Installation & Operation Manual for 600mm Multifunction ovens INDICATOR LIGHTS The indicator lights situated above the control panel go on and off when the heating elements are inserted or removed. During the thermostatic functioning of the oven, the neon light remains on until the pre-chosen temperature is reached and when it goes out, this is a sign that the temperature has been reached.
- Page 6 Installation & Operation Manual for 600mm Multifunction ovens Ensure that the appliance is switched off before replacing the lamp to avoid the possibility of electric shock. CONNECTION TO THE MAINS SUPPLY THE APPLIANCE MUST BE CONNECTED ACCORDANCE WITH THE RULES CURRENTLY. IN FORCE, AND ONLY BY AN AUTHORIZED ELECTRICAL INSTALLER.
- Page 7 Installation & Operation Manual for 600mm Multifunction ovens INSTRUCTIONS FOR USE: to switch off the oven, turn the knobs on position...
- Page 8 Installation & Operation Manual for 600mm Multifunction ovens ) and ( CONVECTIONAL OVENS 4 FUNCTIONS N.B.: functions will start after selecting temperature with the thermostat knob. The oven is fitted with: a lower heating element; an upper heating element, which according to the ...
- Page 9 Installation & Operation Manual for 600mm Multifunction ovens MULTIFUNCTIONAL OVENS 8 FUNCTIONS N.B.: All functions will start after selecting the temperature with the thermostat knob. N.B.: All functions will start after selecting the oven temperature with the thermostat knob. The oven is fitted with: a lower heating element;...
- Page 10 Installation & Operation Manual for 600mm Multifunction ovens Fan assisted total grill The air which is heated by the grill heating element is circulated by the fan and so helps to distribute the heat 50 - MAX between 50 and 200 . This function can be used for sterilizing glass jars.
- Page 11 Installation & Operation Manual for 600mm Multifunction ovens INSTRUCTIONS FOR USE OF CONTROL DEVICES Timers Our ovens can be fitted with different types of timers: MINUTES COUNTERS Turn the knob clockwise to set the desired cooking time. The minutes minder can be adjusted from 1 to 60 minutes (Fig. 8) or 1 to 120 minutes (Fig. 9) A sound signal will inform you that the chosen time is up.
- Page 12 Installation & Operation Manual for 600mm Multifunction ovens Fig.10 Tasto +e- +and buttons . the +and –buttons increase or decrease the time at a speed depending on how long button is pressed Setting the time press any two buttons (cooking time ,end time ,minutes counter) at the same time ,and +or –button to set the desired time .this deletes any previously set programme.
- Page 13 Installation & Operation Manual for 600mm Multifunction ovens Minutes counter Press the minutes counter button and set the cooking time with +or –button. The bell symbol lights up when the minutes counter is operating, when the set time is up, the sound rings and the bell symbol switches off.
- Page 14 Installation & Operation Manual for 600mm Multifunction ovens New picture with frame outside L1: Operation period L2: Operation end L3: Minute minder L4: Adjust time-of-day Depending on the variant in hand either the 4 LEDs at the side of the display or the 4 LEDs below are active for displaying the mode.
- Page 15 Installation & Operation Manual for 600mm Multifunction ovens stopped manually, it termiantes automatically after 2 minutes. Operation stop In order to set an operation stop, the mode button has to be pressed repeatedly until the LED L2 is flashing. Then the desired operation stop, which is limited to a ponit being maximally 23.59 h in the future, can be set using the plus and minus buttons.
- Page 16 Installation & Operation Manual for 600mm Multifunction ovens 2.1 MANUAL Mode BT-01 remains in MANUAL Mode if no COOKING TIME or END of COOKING TIME is selected. The relay contact is closed and the symbol Man is displayed. The TIME of DAY is shown on the 7-segment display uniess the MINDER is active.
- Page 17 Installation & Operation Manual for 600mm Multifunction ovens SELECT END of COOKING TIME setting SELECT Current TIME of DAY setting SELECT Setting value of ACOUSTIC SIGNAL Touching Touchpad SELECT momentarily, the next following function is chosen. Touching Touchpad SELECT permanently causes no automatic change. Touching Touching Touchpad SELECT for more than 10 seconds an ACOUSTIC SIGNAL according chapter 5.2 occurs and the SELECT mode terminates automatically.
- Page 18 Installation & Operation Manual for 600mm Multifunction ovens Set TIME of DAY by SET (+) or SET (-) as described in chapter 3.4 Display : 0…..24h Fomat : h:min 4.4 Set ACOUSTIC SIGNAL volume Step through the sequences of function until the display shows the chosen ACOUSTIC SIGNAL L1,L2 or L3.
- Page 19 Installation & Operation Manual for 600mm Multifunction ovens After 7 min. at the latest or after touching any of the Touchpads the ACOUSTIC SIGNAL stops. The symbol Man flashes further on. Touching SELECT again, causes a change to the MANUAL mode. The symbol Man is displayed continuously, the relay contact closes and the current TIME of DAY is displayed except the MINUTE MINDER is active.
- Page 20 Installation & Operation Manual for 600mm Multifunction ovens COOKING TIME is 11:15 h:min. COOKING TIME starts as soon as the START TIME is reached. The relay is closed and the symbol COOKING POT is displayed. 4.8.1 Set DELAYED COOKING Set desired COOKING TIME acc. Chapter 4.6.1. Set desiret END of COOKING TIME acc.
- Page 21 Installation & Operation Manual for 600mm Multifunction ovens Main Plus Minus Light Timer Info Minus Plus Rapid on/off heat-up switch 1. Time of Day / Minute Minder / Cooking time / End of time setting 1) Time of Day: press to adjust the time before you swith the on/off key 2) Minute Minder : press...
- Page 22 Installation & Operation Manual for 600mm Multifunction ovens Display when Mode 1 Time display Display always oven is working “Beep” sound after the time Mode 2 Short Medium Long count down Mode 3 Duration of time setting Short Medium Long Cooling fan working time Mode 4 Short...
- Page 23 Installation & Operation Manual for 600mm Multifunction ovens ◎ Wash all accessories in hot sudsy water or in a dishwasher, wipe dry with a paper or cloth towel. ◎ If you use your oven for an extended period of time, condensation may form. Dry it using a soft cloth.
- Page 24 Installation & Operation Manual for 600mm Multifunction ovens Put the cake on a higher shelf outside Too high temperature Lower the temperature and increase cooked and the inside the cooking time not cooked enough The outside is too dry Too low temperature Increase temperature even though of the...
- Page 25 Installation & Operation Manual for 600mm Multifunction ovens Fig.11-1 Fig.11-2 the side door can be removed , by proceeding as follows (fig.12): Fig.12-1 Fig.12-2 Fig.12-3...
- Page 26 Installation & Operation Manual for 600mm Multifunction ovens Fig.12-4 Removal of Side-door oven a) by opening the door, take out the screw at position A by a screwdriver, then you can take the whole oven door separately.(fig.12-1, fig.12-2) b) put the oven door on a flat surface, use a flatten objects, such as coins, to levering the glass at the position B.(fig.12-3) c) make the glass on the postion of with about 40mm height, DO NOT take it too high as it will broken the frame.
Need help?
Do you have a question about the IOE6SE1 and is the answer not in the manual?
Questions and answers