Table of Contents
Advertisement
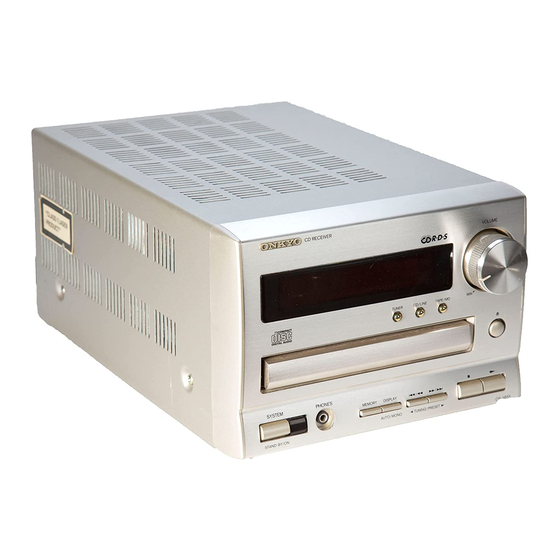
CR-185X
CD Receiver
Instruction Manual
Features ................................................ 2
Important safeguards ........................... 3
Special cautions for CD player ............ 4
Precautions .......................................... 5
Before operation this unit .................... 5
System connections ............................. 6
Control Positions and Names ............ 10
Setting the Time and Day .................. 12
CD RECEIVER
TUNER
CD/LINE
SYSTEM
PHONES
MEMORY
DISPLAY
AUTO / MONO
TUNING / PRESET
STAND-BY/ ON
CONTENTS
Operating the Amplifier..................... 13
Listen to the Radio ............................. 15
Receiving RDS .................................. 18
Playing CDs ....................................... 19
Using the Timer ................................. 24
Handling CDs .................................... 29
Troubleshooting Guide ...................... 30
Specifications..................................... 31
VOLUME
TAPE/MD
MIN
MAX
CR-185X
1
Advertisement
Table of Contents

Related Manuals for Onkyo CR-185X


Summary of Contents for Onkyo CR-185X
-
Page 1: Table Of Contents
CR-185X CD Receiver Instruction Manual CD RECEIVER VOLUME TUNER CD/LINE TAPE/MD SYSTEM PHONES MEMORY DISPLAY AUTO / MONO TUNING / PRESET STAND-BY/ ON CR-185X CONTENTS Features ..........2 Operating the Amplifier..... 13 Important safeguards ......3 Listen to the Radio ......15 Special cautions for CD player .... -
Page 2: Features
Line-In Input for quick, easy connection to a TV, VCR or any other analog component declare in own responsibility, that the ONKYO product described in this instruction manual is in compliance with the corresponding Costly Discrete Output Stage Circuits for superior sonic... -
Page 3: Important Safeguards
“WARNING” WARNING AVIS “TO REDUCE THE RISK OF FIRE OR ELECTRIC SHOCK, RISK OF ELECTRIC SHOCK RISQUE DE CHOC ELECTRIQUE DO NOT EXPOSE THIS APPLIANCE TO RAIN OR MOIS- DO NOT OPEN NE PAS OUVRIR TURE.” CAUTION: The lightning flash with arrowhead symbol, within an equilateral triangle, is intended to alert the user “TO REDUCE THE RISK OF ELECTRIC SHOCK, DO NOT to the presence of uninsulated “dangerous voltage”... -
Page 4: Special Cautions For Cd Player
Special cautions for CD player This unit contains a semiconductor laser system and is classified as FOR CANADIAN MODEL: a “CLASS 1 LASER PRODUCT”. So, to use this model properly, read (POUR LE MODELE CANADIEN) this Instruction Manual carefully. In case of any trouble, please contact the store where you purchased the unit. -
Page 5: Precautions
• Be sure this unit is placed in a horizontal position. The fuse is located inside the chassis and is not user-serviceable. Never place it on its side or on a slanted surface as it may If power does not come on, contact your Onkyo authorized service malfunction. station. -
Page 6: System Connections
If a component, such as a cassette tape deck or MD recorder, from deck or any other audio or video components with an analog audio the Onkyo Separate Collection Series is connected to this unit, the output. Connect the output of the other component to this jack. - Page 7 Refer to the instruction manual of each component when making connections. Do not place the MD recorder or cassette deck on top of the CR-185X. Fully insert all plugs. Improper insertion of plugs may cause noise or a malfunction of the system.
- Page 8 This is very dangerous. This adapter is only supplied 75Ω with models other than the European model. Remote control connections Cassette tape decks and MD recorder that are ANTENNA equipped with an Onkyo jack can be 75Ω OPTICAL DIGITAL SPEAKERS CAUTION:SPEAKER IMPEDANCE OUTPUT...
- Page 9 If so, use a wall outlet on a different circuit. TUNER CD/LINE TAPE/MD Plugging the CR-185X’s power cord into an AC outlet puts the unit in stand-by status (the SYSTEM PHONES MEMORY DISPLAY time flashes in the display).
-
Page 10: Control Positions And Names
Control Positions and Names CD RECEIVER VOLUME TUNER CD/LINE TAPE/MD SYSTEM PHONES MEMORY DISPLAY AUTO / MONO TUNING / PRESET STAND-BY/ ON CR-185X TIMER TRACK AUTO MONO STEREO W.DAY MUTING W.END MEMORY S.BASS REPEAT DIRECT SLEEP RANDOM • If there is a protective film covering the... - Page 11 : Clear button [23] REMOTE CONTROLLER RC-332S DISC MODE These buttons cannot be DISC 1, 2, 3 used with the CR-185X. 7. DIRECT button [14] 8. S.BASS (super bass) button [14] 9. MUTING button [13] 10. VOLUME buttons [13] 11. Number buttons [12,20,22,25]...
-
Page 12: Setting The Time And Day
Setting the Time and Day (for remote control only) • The time display flashes when you plug the power cord into an AC outlet. The time will flash until you set the clock. • The clock is displayed in 24 hours. SLEEP LINE TUNER... -
Page 13: Operating The Amplifier
Operating the Amplifier Listening to your favorite source 1. Select the source you wish to listen to using the input selector (e.g. CD). Also check that the MUTING indicator is CD RECEIVER VOLUME not lit. 2. Start playing the selected input source. Follow the operating instructions for that TUNER CD/LINE... - Page 14 Operating the Amplifier Adjusting the tone and balance (remote control only) Adjusting the bass: 1. Press the TONE button repeatedly until TONE UP/DOWN “BAS” is displayed. 2. Press the π or † button to adjust the bass. The bass can be adjusted from –10 to +10. •...
-
Page 15: Listen To The Radio
Auto memory This convenient function allows FM stations to easily be preset. 1. Select the FM band. TUNER Press the TUNER button on the CR-185X. 2. Start the auto memory. Hold down the MEMORY button for 2 or AUTO MONO STEREO 3 seconds until “AUTO”... - Page 16 Remote control TUNER 1. Select the FM band. Press the TUNER button on the CR-185X. 2. Select the frequency. By holding down either √ TUNING/ PRESET ® button (for a second or more), the auto tuning system will work and the frequency display automatically stops when a station is tuned in.
- Page 17 Listen to the Radio CD RECEIVER VOLUME TUNER CD/LINE TAPE/MD SYSTEM PHONES MEMORY DISPLAY AUTO / MONO TUNING / PRESET STAND-BY/ ON AUTO/MONO MEMORY Selecting a preset station 1. Select the FM band. Remote control TUNER Press the TUNER button. 2.
-
Page 18: Receiving Rds
In some cases, the characters displayed on the SYSTEM PHONES MEMORY DISPLAY display of the CR-185X may not be exactly AUTO / MONO TUNING / PRESET STAND-BY/ ON the same as the ones broadcast by the radio station. If strange characters appear in the... -
Page 19: Playing Cds
Playing CDs When there is a CD in the tray, pressing the ® button automatically switches the input source to “CD” and starts playing even if another source is selected. INPUT SELECTOR CD RECEIVER POWER TAPE VOLUME SLEEP LINE TUNER TAPE PRESET CLOCK... - Page 20 Playing CDs INPUT SELECTOR POWER TAPE CD RECEIVER SLEEP LINE VOLUME TUNER TAPE PRESET CLOCK CALL REPEAT SCROLL TUNER CD/LINE TAPE/MD PLAY MODE CLEAR REPEAT RANDOM DISC MEMORY CLEAR MODE DISC TONE DIRECT SYSTEM PHONES TIMER S.BASS MEMORY DISPLAY MUTING AUTO / MONO TUNING / PRESET Number buttons...
- Page 21 Playing CDs INPUT SELECTOR POWER TAPE SLEEP LINE TUNER TAPE PRESET CLOCK CALL REPEAT SCROLL RANDOM PLAY MODE CLEAR REPEAT RANDOM REPEAT DISC MEMORY CLEAR MODE DISC TONE DIRECT TIMER S.BASS MUTING UP/DOWN – – – – – 10 / 0 ENTER VOLUME Random play...
- Page 22 Playing CDs POWER TAPE SLEEP LINE TUNER TAPE PRESET CLOCK CALL CD RECEIVER VOLUME REPEAT SCROLL PLAY MODE CLEAR REPEAT RANDOM DISC MEMORY CLEAR MODE TUNER CD/LINE TAPE/MD DISC TONE DIRECT TIMER S.BASS MUTING UP/DOWN SYSTEM PHONES MEMORY DISPLAY – – – – – ENTER 10 / 0 VOLUME...
- Page 23 Clearing the last program Remote control Press the button on the CR-185X or the CLEAR CLEAR button on the remote control. Pressing this button repeatedly clears the tracks one by one in the reverse order (from the last to the first programmed track).
-
Page 24: Using The Timer
DISPLAY buttons to enter timer setting mode. Then, use the SLEEP LINE buttons shown below to perform the appropriate operations. TUNER TAPE PRESET CLOCK CALL Remote control CR-185X main unit REPEAT SCROLL PLAY MODE CLEAR DISPLAY TIMER REPEAT RANDOM DISC... - Page 25 Using the Timer INPUT SELECTOR The initial factory settings are: POWER TAPE SLEEP LINE WEEKDAY: Monday – Friday TUNER TAPE PRESET WEEKEND: Saturday and Sunday CLOCK CALL REPEAT SCROLL PLAY MODE CLEAR REPEAT RANDOM DISC MEMORY CLEAR MODE DISC TONE DIRECT TIMER S.BASS...
- Page 26 Using the Timer INPUT SELECTOR POWER TAPE SLEEP LINE TUNER TAPE PRESET CLOCK CALL REPEAT SCROLL PLAY MODE CLEAR REPEAT RANDOM DISC MEMORY CLEAR MODE DISC TONE DIRECT TIMER S.BASS MUTING UP/DOWN 2,3,4 – – – – – ENTER 10 / 0 VOLUME C D / M D / PRESET / TIMER REMOTE CONTROLLER...
- Page 27 Using the Timer Note: • For timer recording to a tape, this unit must be connected to the K-185X. • For timer recording to an MD, the system must be connected to the MD-185X. INPUT SELECTOR POWER TAPE SLEEP LINE TUNER TAPE PRESET...
- Page 28 Using the Timer INPUT SELECTOR POWER TAPE SLEEP LINE SLEEP TUNER TAPE PRESET CLOCK CALL REPEAT SCROLL PLAY MODE CLEAR REPEAT RANDOM DISC MEMORY CLEAR MODE DISC TONE DIRECT TIMER S.BASS MUTING UP/DOWN – – – – – ENTER 10 / 0 VOLUME C D / M D / PRESET / TIMER Using the sleep setting...
-
Page 29: Handling Cds
Handling CDs Important notes on handling CDs 1. Carefully lift the disc from the disc case, making sure to hold the disc by its edges or the hole in the middle. 2. A dry, soft cloth may be used to wipe dust and fingerprints off the surface of CDs. -
Page 30: Troubleshooting Guide
Remedy: Cancel muting by pressing the MUTING button exist, please disconnect your unit from the wall outlet and contact on the remote control. your ONKYO authorized service station. • Please make sure that the system has been connected properly, • “0:00” on the time display is flashing. -
Page 31: Specifications
Specifications AMP SECTION Power Output: 2 x 20 watts at 4 ohms 1 kHz DIN 2 x 17 watts at 6 ohms 1 kHz DIN 2 x 15 watts at 8 ohms 1 kHz DIN 2 x 15 watts min, RMS at 8 ohms 1 kHz no more than 0.2 % THD 2 x 25 watts at 4 ohms EIAJ Dynamic Power:... - Page 32 Tel: 201-825-7950 Fax: 201-825-8150 E-mail: onkyo@onkyousa.com ONKYO EUROPE ELECTRONICS GmbH Industriestrasse 20, 82110 Germering, GERMANY Tel: 089 84 93 20 Fax: 089 84 93 226 E-mail: info@onkyo.de ONKYO EUROPE FRANCE BRANCH Domaine Technologique de Saclay 4, Rue René Razel, SACLAY-91892...
Need help?
Do you have a question about the CR-185X and is the answer not in the manual?
Questions and answers