
Subscribe to Our Youtube Channel
Related Manuals for Craftex CX204N


Summary of Contents for Craftex CX204N
- Page 1 MODEL CX204N 10” SCORING TABLE SAW WITH RIVING KNIFE & 30" RIP FENCE User Manual VER 1.1...
-
Page 2: Table Of Contents
TABLE OF CONTENTS General Safety Instructions for Machines ............... 3 Specific Safety Instructions..................4 CX204N Features ....................5 Physical Features ....................6 Set Up........................7 Un-Packing & Inventory ..................7 Proper Grounding ....................8 Assembly ........................ 9 Installing Saw Blade....................11 Installing the Scoring Blade .................. -
Page 3: General Safety Instructions For Machines
GENERAL SAFETY INSTRUCTIONS FOR MACHINES Extreme caution should be used when operating all power tools. Know your power tool, be familiar with its operation, read through the owner’s manual and practice safe usage procedures at all times. ALWAYS read and understand the NEVER leave a tool unattended while it user manual before operating the is in operation. -
Page 4: Specific Safety Instructions
CX204N SCORING TABLE SAW SPECIFIC SAFETY INSTRUCTIONS NEVER use a saw blade that has DO NOT attempt to remove jammed missing carbide teeth, loose teeth, or pieces unless the table saw has come to chipped or broken teeth. a complete stop and the power switch... -
Page 5: Cx204N Features
FEATURES MODEL CX204N – 10” SCORING TABLE SAW As part of the growing line of Craftex woodworking equipment, we are proud to offer the CX204N a 10” Scoring Table Saw with Riving Knife. The Craftex name guarantees Craft Excellence. By following the instructions and procedures laid out in this user manual, you will receive years of excellent service and satisfaction. -
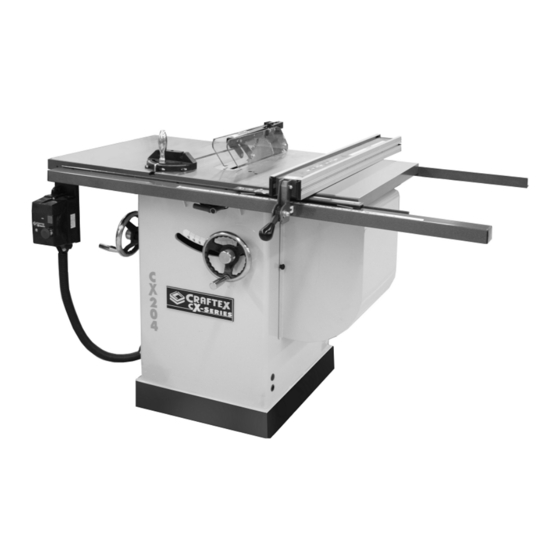
Page 6: Physical Features
CX204N – SCORING TABLE SAW PHYSICAL FEATURES Blade Extension Guard Wing Miter Fence Gauge Extension Rail Wing Fence Fence Rail Tube Motor Cover Blade Tilt Lock ON / OFF Magnetic Switch Blade Height Blade Tilt Hand Wheel Hand Wheel Table Tilt... -
Page 7: Setup
Use a solvent cleaner that H. Push Stick ........1 will not damage painted surfaces. WARNING! CX204N is a heavy machine, do not over-exert yourself. For safe moving method use fork truck or get the help of an assistant or friend. -
Page 8: Proper Grounding
12-gauge to prevent motor damage. properly wired. Your CX204N should be wired with a plug having 3-prongs to fit a 3 prong grounded receptacle as shown in figure-3. Do not remove the grounding prong to fit it into a 2-pronged outlet. -
Page 9: Assembly
ASSEMBLY Attach the extension wings to the two sides Slide the hand wheel onto the hand wheel of the table using nuts, bolts and washers shaft in front of the saw so that the tab on provided. See figure-6. the shaft is aligned with the key way on the hand wheel. - Page 10 If the mating surface of the extension wing tilts up, use a masking tape along the top edge if the main table to shim the extension wing down. See figure-8. Figure-10 Installing front fence rail Now, install the fence rail tube onto the Figure-8 Using masking tape to shim the front rail using cap screws, washers and flat extension wing down...
-
Page 11: Installing Saw Blade
Install the magnetic switch to the extension wing attached to the left side of the table as shown in figure-13. Figure-14 Installing the blade Figure-13 Installing the magnetic switch INSTALLING THE SCORING BLADE To install the scoring blade make sure the INSTALLING SAW BLADE switch is in the OFF position and the cord is disconnected from the power source. -
Page 12: Installing The Fence Scale
Remove the washer and the nut on the Adjust the pointer if required by loosening arbor and install the scoring blade. Install the two screws holding the pointer to the the washer and the nut and secure the fence. blade by tightening the nut. Make sure to install the scoring blade with the teeth facing opposite to the main blade’s teeth. -
Page 13: Installing The Blade Guard
INSTALLING THE BLADE GUARD Attach the blade guard to the spreader as shown in figure-20. Figure-18 Using masking tape to shim the extension wing up Figure-20 Installing the blade guard TABLE INSERT Make sure to clean the dust or the dirt on Once the blade guard is attached to the the table throat before installing the insert. -
Page 14: Basic Controls
Figure-22 Basic controls on CX204N ON / OFF Magnetic Switch The ON / OFF magnetic switch on your READ THE CX204N has a green button to turn the machine “ON” and a red button to turn the MANUAL machine “OFF”,... -
Page 15: Connecting To A Dust Collector
BLADE GUARD COLLECTOR The blade guard assembly on your CX204N consists of a clear polycarbonate shield, CX204N features a 4” diameter dust port to spreader and anti-kickback pawls. connect to a dust collector. The clear polycarbonate guard allows the When connecting to a dust collector, use a... -
Page 16: Riving Knife
SCORING SAW BLADE blade and for the cutting operations when the blade does not cut all the way through The CX204N can run two blades at the thickness of the work-piece. same time. One is a regular circular saw blade and the other is a small blade that is installed in front of the main one. -
Page 17: Work-Piece Inspection
WORK-PIECE INSPECTION Before cutting the work-piece, make sure to inspect it for nails, staples, small pieces of stone or metal and any other foreign object which is dangerous to come on contact with the blade. If the wood contains any of these objects and it comes in contact with the blade, the object might fly and hit the operator or damage the blade. -
Page 18: Operations
OPERATIONS Since the blade guard can not be used Before doing the operation, make sure all when doing non-through cuts, there is great the parts of the machine are assembled possibility of kickback. Make sure to have properly and you have done the test run. the riving knife installed, when using Make sure you have read the manual and standard saw blade to perform non-through... -
Page 19: Crosscutting
Connect the cord to the power source and point is aligned with the blade and the blade turn the table saw “ON”. Let the blade reach is cutting the waste side of the line. the full speed and feed the work-piece through the blade using a push stick, until Connect the cord to the power source and the work-piece completely passes the saw... -
Page 20: Bevel Cuts
MAIN TABLE TO BLADE PARALLELISM Your CX204N will give a better result if the main table is parallel to the blade. If it is not parallel, the result you will get will be poor and low quality. To check if the table is parallel to the blade,... -
Page 21: Spreader & Riving Knife Alignment
To adjust the table: SPREADER AND RIVING KNIFE ALIGNMENT Make sure the switch is in the “OFF” position and the cord is unplugged from the power source. The blade guard spreader and riving knife must be aligned with the blade for safe and Loosen the four mounting bolts (shown in accurate cutting operation. -
Page 22: Replacing The V-Belts
Figure-35 Removing the small belt ADJUSTMENT Now, loosen the motor mounting bolt as The miter gauge provided with CX204N can shown in figure-36 and push the motor up be set at 0° and plus or minus 45° with the to loosen the tension on the main belt. -
Page 23: Maintenance
Place a 90° square against the miter gauge MAINTENANCE rod and the miter gauge base. If the rod is not square, loosen the knob, adjust the rod, 1. The unpainted components such as the and retighten the knob. precision-ground cast-iron table should be protected with a coat of paste Adjust the 0°... -
Page 24: Parts Breakdown & List
CX204N PARTS BREAKDOWN... -
Page 29: Parts List
CX204N PARTS LIST REF. NO. DESCRIPTION Q'TY 13100001 CABINET 13100002 TABLE 13100003 TABLE INSERT E1210005 SOLID EXTENSION WING S0040520M FLAT HD. SCREW M5xP0.8x20 12700002B HAND WHEEL 10108004 HANDLE 13100004 MOTOR COVER S0050508M SOCKET SCREW M5xP0.8x8 13100005 BODY PANEL 12900007 12900008... - Page 30 13100009 RIVING KNIFE BRACKET 12300118J SLIDE PLATE 12300125J PLATE FIXER 13100010 POINTER M1290002 MOTOR 12100019 BRACKET SPINDLE 12500015A MOTOR PULLEY V12912190 DITCH BELT 12300129 SCORING BLADE CONNECTOR C1206002 BEARING 6002 12300127 SCORING BLADE SPINDLE B1230002 SCORING BLADE (OPTIONAL) 1200126J SCORING BLADE DEPRESSOR 12300182J SPINDLE SLEEVE 12900020...
- Page 31 S0010502 HEX. SCREW 5/16"-18UNC*3/4" 10102030 PIN Ø6.3*20 C5151102 BEARING 51102 S0050610M SET SCREW M6*P10*10 S0310426 PIN Ø4*26 S0030510M ROUND HEAD SCREW M5*P0.8*10 S0220500M TEETH WASHER 5mm S0210303a FLAT WASHER 5.2*12*1t 20701006 BEARING S0110800M HEX. NUT M8*P1.25 S0030408M ROUND HEAD SCREW M4*P0.7*8 W2092301 MAGNETIC SWITCH S0110900...
- Page 32 11303020 SWITCH PLATE S0010820 CAP SCREW M8*P1.25*20L S0030415M ROUND HEAD SCREW M4*P0.7*15L S0210500b FLAT WASHER 8.5*22*3 S05ETW09 RING ETW-09 11105081 LOCKING SPRING 12700029 LOCKING BOLT 12702019r HANDLE ASSEMBLY 11102019b S0300545 KEY 5*5*45L S0400414 KEY 4*4*14L S0520015 RING STW-15 S0530026 RING RTW-26 S0533200 RING...
- Page 33 SAW BLADE GUARD PARTS LIST 13100011 RIVING KNIFE 12700005 SUPPORT ARM 129A0005 GUARD (LEFT) 129A0006 GUARD (RIGHT) 12700067 PLASTIC PLATE 10606102 ANTI-KICKBACK PAWL 10103040 SPRING 10103035Q SUPPORT PLATE S0030304 PHILLIPS HEAD SCREW M5*P0.8*8L S0120600M LOCK NUT M6*P1.0 S0210404 FLAT WASHER 1/4"*23*3t S0310630 PIN Ø6-30 S0313528...
-
Page 34: Miter Gauge Parts List
MITER GAUGE PARTS LIST 10104046K MITER GAUGE BODY 10104048C GUIDE BAR 10104045K HANDLE 10104050 POINTER 10104049Q STOP PLATE 10104047 GUIDE WASHER S0210501 FLAT WASHER S0030110 PHILLIPS HEAD SCREW S0110100 HEX NUT S0050404 SET SCREW S0310306 S0040400 FLAT HEAD SCREW 10104047K... -
Page 35: Warranty
This warranty shall not apply to consumable products such as blades, bits, belts, cutters, chisels, punches etceteras. Craftex shall in no event be liable for injuries, accidental or otherwise, death to persons or damage to property or for incidental contingent, special or consequential damages arising from the use of our products.
Need help?
Do you have a question about the CX204N and is the answer not in the manual?
Questions and answers