Table of Contents
Advertisement
Advertisement
Table of Contents

Related Manuals for Quality Craft QCM995P-47ACH


Summary of Contents for Quality Craft QCM995P-47ACH
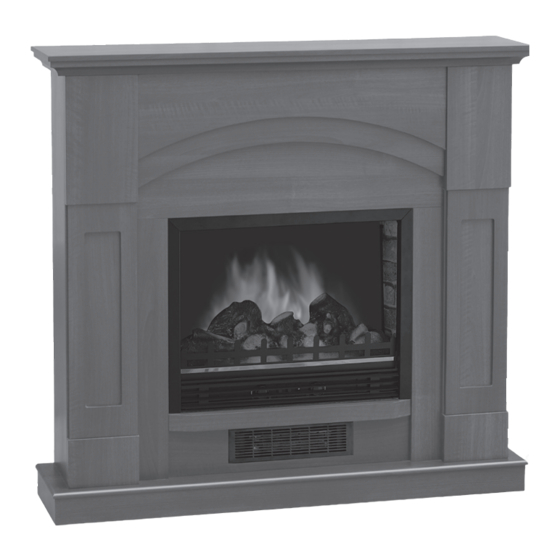
- Page 1 ELECTRIC FIREPLACE HEATER I N S T R U C T I O N M A N U A L QCM995P-47ACH NDF-70N ATTENTION: 1. Find a location for the fireplace heater that is protected from direct sunlight. 2. Do not plug the unit into the power outlet before you...
-
Page 2: Important Safety Instructions
S A F E T Y I N S T R U C T I O N S IMPORTANT SAFETY INSTRUCTIONS WHEN USING ELECTRICAL APPLIANCES, BASIC PRECAUTIONS SHOULD ALWAYS BE FOLLOWED TO REDUCE THE RISK OF FIRE, ELECTRIC SHOCK, AND INJURY TO PERSONS, INCLUDI NG THE FOLLOWING: 1) Read all instructions before using this 8) Do not run cord under carpeting. - Page 3 S A F E T Y I N S T R U C T I O N S 15) Avoid the use of an extension cord because the extension cord may overheat and cause a risk of fire. However, if you have to use an extension cord, the cord shall be No.16AWG minimum size and rated not less than 1875 watts.
- Page 4 S A F E T Y I N S T R U C T I O N S WARNING: IMPORTANT Procedures and techniques if not care- Please note when you open the carton fully followed - will result in damage to the carefully check the unit and make sure equipment.
-
Page 5: Parts List
A S S E M B L Y ASSEMBLY INSTRUCTIONS PARTS LIST: Fireplace insert ..........1 Top Panel ..........1 Base Panel ..........1 Front Upper Panel ........1 Front Middle Panel .........1 Front Lower Panel ........1 Left Front Panel ........1 Right Front Panel ........1 Left Small Panel ........1 Right Small Panel ........1 Left Side Panel ........1... - Page 6 A S S E M B L Y Step 2: Attach Left Front Panel [F] to Right MANTEL AND INSERT Side Panel [K] with 3 KD screws. Attach Right ASSEMBLY: Front Panel [G] to Right Side Panel [L] with 3 KD screws.
- Page 7 A S S E M B L Y Step 4: Attach Panels F, H and K to Base [B] with 2 KD screws. Attach Panels G, J and L to Base [B] with 2 KD screws. See Fig. D. fig. F Step 7: Attach Top Panel [A] on top with 4 KD screws.
-
Page 8: Fireplace Insert Installation
A S S E M B L Y reduce possible risk of injury if the fireplace FIREPLACE INSERT is improperly handled, but is not a substi- INSTALLATION tute for proper adult supervision. Children should not be left unattended near any heater. -
Page 9: Operation
O P E R A T I O N OPERATION BY Turn the thermostat dial to the right (clock- THE CONTROL PANEL wise) to increase the desired temperature and to the left for lower temperature. This thermostat control dial can only be used The controls are located behind the grill below the front glass and can be accessed by pulling while the ON/OFF switch and 750W/1500W... -
Page 10: M A I N T E N A N C E / R E P A I R S
M A I N T E N A N C E / R E P A I R S REPLACING THE LIGHT BULBS TOUCH UP REPAIR PAINT Step 1: Remove 4 screws on the back of 1.Paint directly on the mantel unit if fireplace and remove the rear cover necessary. - Page 11 R E P A I R S / C L E A N I N G fig. B fig. E 2. Drill the holes with diameter 3/4 inches (10 mm) and depth 3/4 inches (10mm) on the mantel. Each Plastic Connector needs 3 holes.
-
Page 12: Warranty
The company’s sole obligation is to repair or replace the unit. This warranty is void if in the opinion of Quality Craft the unit has been tampered with, altered, misused, damaged, abused or used with the wrong power source. Light bulbs are not covered by this warranty.
Need help?
Do you have a question about the QCM995P-47ACH and is the answer not in the manual?
Questions and answers