Miele DGC 6700 Operating And Installation Instructions
Hide thumbs
Also See for DGC 6700:
- Operating and installation instructions (184 pages) ,
- Technical information (121 pages) ,
- Installation instructions manual (21 pages)

Related Manuals for Miele DGC 6700


Summary of Contents for Miele DGC 6700
-
Page 1: Operating And Installation Instructions
Operating and Installation Instructions Combi Steam Oven To prevent accidents and machine damage, read these instructions be- fore installation or use. en-US M.-Nr. 09 855 050... -
Page 2: Table Of Contents
Contents IMPORTANT SAFETY INSTRUCTIONS .............. 8 Overview....................... 18 Front view ......................18 Included accessories..................... 20 Control panel ....................... 21 Sensor buttons ...................... 22 M Touch display ....................23 Symbols...................... 24 Basic operation ..................... 24 Description of functions .................. 26 Control panel ......................26 Water container ..................... - Page 3 Contents Canceling cooking....................41 Operation: Combination cooking mode ............ 42 Quck guide ......................43 After use ...................... 45 Interrupting operation.................... 45 Additional functions....................46 Turning on and off automatically .............. 46 Sequence of an automatic cooking process............ 47 Changing settings during a cooking process........... 47 Canceling cooking....................
- Page 4 Contents Alarm + Timer ...................... 64 Using the alarm ....................64 Setting the alarm .................... 64 Changing an alarm ................... 64 Deleting an alarm ..................... 64 Using the Timer ....................65 Setting the timer .................... 65 Resetting the timer ................... 65 Canceling the timer ..................
- Page 5 Contents Canning ......................... 99 Juicing ......................... 101 Menu Cooking ..................... 102 Dehydrate ......................103 Making Yogurt ..................... 104 Proofing ....................... 105 Dissolving Gelatine....................106 Melting Chocolate ....................106 Skinning Fruits and Vegetables ................107 Preserving Apples ....................108 Blanching......................108 Sweating Onions ....................
- Page 6 Contents Volume......................... 138 Buzzer tones.................... 138 Keypad tone .................... 138 Welcome melody.................... 138 Units of measurement ..................139 Weight ...................... 139 Temperature .................... 139 Keeping Warm..................... 139 Automatic rinsing ....................140 Default temperatures ................... 140 Safety ........................141 System lock .................... 141 Sensor lock ....................
- Page 7 Contents Installation dimensions .................. 168 Installation into a tall cabinet................168 Undercounter installation ..................170 Installation in combination with an oven ............. 172 Installation...................... 174 Electrical connection .................. 175 Power Supply .................... 175 Caring for the environment ................ 176 Technical service, data plate, warranty............ 177 MieleCare ......................
-
Page 8: Important Safety Instructions
IMPORTANT SAFETY INSTRUCTIONS The Combi Steam oven is referred to in the following instructions as steam oven. This appliance conforms to current safety requirements. Inappro- priate use can, however, lead to personal injury and damage to property. To avoid the risk of accidents and damage to the appliance, please read these instructions carefully before installing or using it for the first time.They contain important notes on installation, safety, use and maintenance. - Page 9 IMPORTANT SAFETY INSTRUCTIONS This appliance is intended for residential use only. The steam oven is not suitable for outdoor use. This steam oven is intended for domestic use only as described in these operating instructions. Any other usage is not supported by the manufacturer and could be dangerous.
- Page 10 IMPORTANT SAFETY INSTRUCTIONS Children Activate the system lock to ensure that children cannot switch on the steam oven inadvertently. Children must not be allowed to clean the steam oven unsuper- vised. Please supervise children in the vicinity of the steam oven and do not let them play with it.
- Page 11 Technical safety Installation, repair and maintenance work should be performed by a Miele authorized service technician in accordance with national and local safety regulations and the provided installation instruc- tions. Contact Miele’s Technical Service Department for examination, repair or adjustment. Repairs and other work by unauthorized per- sons could be dangerous and may void the warranty.
- Page 12 Do not open the outer casing of the appliance. While the appliance is under warranty, repairs should only be per- formed by a Miele-authorized service technicians. Work by unquali- fied persons could be dangerous and may void the warranty. ...
- Page 13 All other servicing should be ref- fered to a qualified technician. Do not operate any appliance with a damaged cord or plug, or if the appliance has been damaged in any manner. Contact Miele’s Technical Service Department.
-
Page 14: Proper Use
IMPORTANT SAFETY INSTRUCTIONS Proper use Danger of burning. The steam oven becomes hot when in use. You could burn yourself on the heating elements, oven interior, cooked food, oven accessories or hot steam. Use pot holders when placing food in the oven or removing it and when adjusting oven shelves etc. - Page 15 IMPORTANT SAFETY INSTRUCTIONS Oil and fat can ignite if overheated. Never leave the steam oven unattended when cooking with oil and fat. If it does ignite do not put the flames out with water. Switch the steam oven off immediately and then suffocate the flames by keep- ing the oven door closed.
- Page 16 IMPORTANT SAFETY INSTRUCTIONS When using an electrical appliance, e.g., a hand-held mixer, near the steam oven, make sure that the power cord does not get caught in the door. The insulation on the cord could become damaged, giv- ing rise to an electric shock hazard. ...
- Page 17 Use only genuine original Miele parts. If parts or accessories from other manufacturers are used, the warranty will become void. Only use the Miele roast probe supplied with this oven. If it is faulty, it must only be replaced with a Miele genuine roast probe.
-
Page 18: Overview
Overview Front view a Control panel g Side runners with 3 shelf levels b Vent h Oven interior lighting c Door gasket i Drip channel d Moisture sensor j Drain e Temperature sensor k Grease filter f Browning / Broiling element l Connection socket for the roast probe... - Page 19 Overview m Slide-in compartment for condensate container n Water container o Slide-in compartment for water container p Condensate container...
-
Page 20: Included Accessories
Overview Universal tray Included accessories The accessories supplied with your ap- pliance, as well as a range of optional ones, are available to order from Miele (see "Optional accessories"). 1 universal tray for baking, roasting and DGGL 20 broiling Wire oven rack 1 perforated cooking pan... -
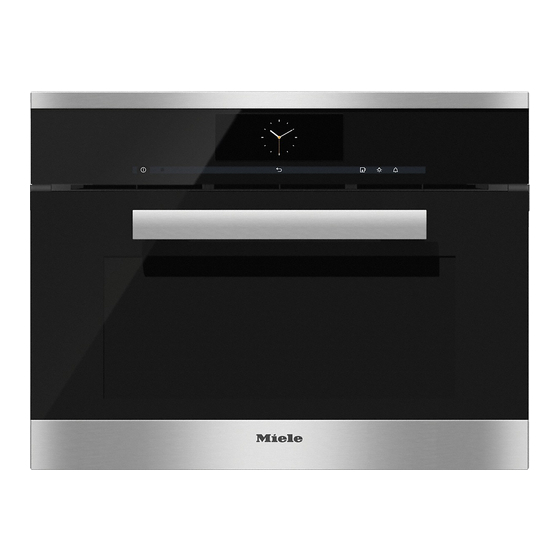
Page 21: Control Panel
Control panel a Recessed On / Off button To turn the appliance on and off b Display Shows the time of day and user information in addition to selection of applica- tions and setting various parameters c "Timer" sensor button For setting the timer and/or alarm d "Light"... -
Page 22: Sensor Buttons
Control panel Sensor buttons The sensors react to touch. Each touch is confirmed with an audible tone. This tone can be turned off (see "Settings – Volume - Keypad tone"). Sensor Function Notes button Back To go back a step Lift For opening/clos- Panel... -
Page 23: M Touch Display
Control panel M Touch display Make sure that water cannot get behind the touch display. The touch display can be scratched by pointed or sharp objects, e.g. pens and pencils. Only touch the display with your fingers. Touching the display with your finger emits a small electrical charge which in turn triggers an electrical pulse that is detected by the surface of the Touch display. -
Page 24: Symbols
Control panel Symbols The following symbols may appear in the display: Symbol Description Some settings, e.g. display brightness and buzzer volume, are selected using a bar chart. This symbol indicates that there is additional information and ad- vice about using the oven. Select OK to access the information. ... - Page 25 Control panel Helpful information will then appear in text and pictures. Entering numbers You can enter numbers by scrolling through and touching the roller, or by using the numerical keypad. To enter numbers using the roller: Swipe the roller up or down to select the desired number. To enter numbers using the numerical keypad: ...
-
Page 26: Description Of Functions
Description of functions Control panel Grease filter The water container and condensate Insert the grease filter in the back wall container are located behind the control for all roasting programs. panel. The control panel is opened and It should be removed when using steam closed using the ... -
Page 27: Moisture Content
Description of functions Moisture content Cooking duration and Combi Steam Reheat modes Depending on the function, you can set use a combination of oven heat and a cooking duration of between 1 minute moisture. You can alter the moisture and 6, 10 or 12 hours. -
Page 28: Preheating Phase
Description of functions Preheating phase Oven interior lighting During the preheating phase the display The oven light has been set at the fac- will show the temperature in the cook- tory to go out when cooking starts. ing compartment as it rises and Pre- If you want it to stay on all the time the heating... -
Page 29: Before Using For The First Time
Before using for the first time Set the date General settings You can enter numbers by scrolling The steam oven must not be op- through and touching the roller, or by erated until it has been correctly in- using the numeric keypad. stalled. -
Page 30: Cleaning For The First Time
Before using for the first time Please adhere the extra data plate for Time of day format the appliance supplied with this doc- You will then be asked when you want umentation in the space provided in the time of day to show on the display the "Technical service, data plate, when the steam oven is turned off (see warranty"... -
Page 31: Setting The Water Hardness Level
Before using for the first time Accessories / Oven interior Setting the water hardness level Remove all accessories from the steam oven. The steam oven is factory set for Hard water. It must be adjusted local water Wash them by hand using hot water hardness to ensure trouble-free opera- and a soft clean sponge and a mild tion and to ensure that descaling is car-... -
Page 32: Setting The Correct Boiling Point For Water
Before using for the first time Setting the correct boiling Heating up the steam oven point for water To remove the grease from the ring heating element, heat the appliance Before cooking food for the first time, up with nothing in it at 400°F / 200°C you must set the boiling point for water, using the Convection Bake... -
Page 33: Modes / Programs / Menus
Modes / Programs / Menus Default tem- Temperature perature/ range Setting Operating Modes Convection Bake 320°F / 160°C 85-435°F / For baking on several levels at the same 30–225°C time. The fan distributes the heat evenly throughout the cavity for a consistent bak- ing temperature. - Page 34 Modes / Programs / Menus Default tem- Temperature perature/ range Setting Operating Modes Maxi Broil Level 3 Level 1-3 The entire upper heating element is used for intense heating from above. Excellent browning and searing results can be achieved.
- Page 35 Modes / Programs / Menus Default tem- Temperature perature/ range Setting Special Modes Canning 195°F / 90°C 175-210°F / 80–100°C Sanitize Cookware – – Dehydrate 140°F / 60°C 140-160°F / 60–70 °C Proof – – Sabbath Program 350°F / 180°C 85-435°F / 30–225°C ...
-
Page 36: Operation: Steam Cooking
Operation: Steam cooking After the cooking duration has been set, A fault can occur if the drain is the following also appears in the display blocked. Check that the drain filter is correctly – Ready at in place before each program as –... -
Page 37: After Use
Operation: Steam cooking At the end of the cooking duration After use Remove and empty the water con- – Steam Reduction (with temperatures over approx. 175°F / 80°C) and tainer and condensate container. Pro- gram Finished will appear in the dis- Push upwards slightly as you take play, them out of the appliance. -
Page 38: Interrupting Operation
Operation: Steam cooking Interrupting operation Operation is interrupted as soon as the door is opened. The heating will be turned off and the cooking duration re- maining stored in memory. Burn hazard! Steam can escape when the door is opened. -
Page 39: Additional Functions
Operation: Steam cooking Turning on and off automatically Additional functions To turn a cooking program on and off Setting additional durations automatically, you have a choice of how You have placed the food in the oven, to enter the time parameters: selected a temperature and a duration. -
Page 40: Sequence Of An Automatic Cooking Process
Operation: Steam cooking Sequence of an automatic cooking Changing settings during a cooking process process Select Up until the start time the mode, the Change selected temperature, cooking duration The following will appear on the display: (time left), Start at , and the start time will appear in the display. -
Page 41: Canceling Cooking
Operation: Steam cooking Deleting a finish time Canceling cooking In the field Ready at set the time to Touch "Back" twice. "----" Cancel Cooking? appears on the display. Confirm with OK. Select The finish time is now deleted. The main menu will appear. -
Page 42: Operation: Combination Cooking Mode
Operation: Combination cooking mode Combi Steam works by combining The following operating modes are dry heat and steam. You can combine available: up to ten cooking stages in a combina- – Convection Bake tion mode program. You can set the temperature, moisture level, and dura- –... -
Page 43: Quck Guide
Operation: Combination cooking mode Cooking stage 1 A fault can occur if the drain is blocked. Convection Bake / Surround Check that the drain filter is correctly in place before each program as Select Set the Duration large food residues can clog the ... - Page 44 Operation: Combination cooking mode Cooking stage 3 At the end of the cooking duration Select the desired mode. – Steam Reduction (only with tempera- tures of approx. 175-210°F / Select the required settings (see 80-100°C and a 100% humidity set- cooking stage 1).
-
Page 45: After Use
Operation: Combination cooking mode After use Interrupting operation Remove and empty the water con- Operation is interrupted as soon as the tainer and condensate container. door is opened. The heating will be Push upwards slightly as you take turned off and the cooking duration re- them out of the appliance. -
Page 46: Additional Functions
Operation: Combination cooking mode Turning on and off automatically Additional functions To turn a cooking program on and off Setting additional durations automatically, you have a choice of how You have placed the food in the oven to enter the time parameters: and selected the settings for the cook- –... -
Page 47: Sequence Of An Automatic Cooking Process
Operation: Combination cooking mode Sequence of an automatic cooking Changing settings during a cooking process process Select Up until the start time, the mode, the Change selected temperature and moisture, The following will appear on the display: cooking duration (time left), Start at , and the start time will appear in the display. -
Page 48: Operation: Functions Without Steam
Operation: Functions without steam You do not necessarily need to enter a The following operating modes are cooking duration for operating modes available: which do not use steam. If no duration – Convection Bake is entered, operation starts automati- cally as soon as the temperature has –... -
Page 49: Quck Guide
Operation: Functions without steam Alter the recommended and/or core The grease filter on the back wall temperature or level if necessary. must be removed for baking as this can result in uneven browning. The recommended temperature will be automatically accepted within a few Quck guide seconds. -
Page 50: Interrupting Operation
Operation: Functions without steam Interrupting operation Operation is interrupted as soon as the door is opened. The heating will be switched off. Burn hazard! You could burn yourself on the oven interior walls, spilled food and acces- sories Use pot holders when inserting, re- moving or turning hot food, or when adjusting shelves, etc. -
Page 51: Additional Functions
Operation: Functions without steam Setting additional durations Additional functions By entering Duration Ready at Start at You have placed the food in the oven, you can automatically turn the cooking selected a function, and set the temper- program on or off. ature or broil level. -
Page 52: Turning Off Automatically
Operation: Functions without steam Turning off automatically Turning on and off automatically To switch off a cooking process auto- We recommend using automatic matically, you can set either Duration switch-on and switch-off when roast- Ready at ing. Example: It is now 11:45 am. The food To turn a cooking program on and off takes 30 minutes to cook and needs to automatically, you have a choice of how... -
Page 53: Sequence Of An Automatic Cooking Process
Operation: Functions without steam Sequence of an automatic cooking Rapid PreHeat process Rapid PreHeat can be used to speed up Up until the start time the mode, the the preheating phase. selected temperature, cooking duration This function switches on automatically (time left), Start at , and the start time will... -
Page 54: Changing The Oven Mode
Operation: Functions without steam Switching off Rapid PreHeat Changing settings during a cooking process Select Additional Settings Select Change Rapid PreHeat will appear. The following will appear on the display: Select – Temperature Level Rapid PreHeat will appear. –... -
Page 55: Canceling Cooking
Operation: Functions without steam Changing the cooking duration Canceling cooking Change the duration. If you have not set a duration, tap "Back" twice. Confirm with OK. The main menu will appear. The program will restart using the new duration. -
Page 56: Mymiele
MyMiele MyMiele can be used to personalize To add an entry your steam oven by inputting frequently You can add up to 20 entries. used processes. Select . MyMiele It is particularly useful with MasterChef program as you do not need to work ... -
Page 57: Editing Mymiele
MyMiele Sorting entries Editing MyMiele The order can be rearranged as long as After selecting Edit you can there are more than 4 entries. – add entries as long as MyMiele con- Select MyMiele tains fewer than 20 entries, ... -
Page 58: Masterchef
MasterChef Your steam oven has a number of Mas- List of automatic programs terChef programs that enable you to You can select MasterChef under Mas- achieve excellent cooking results with terChef . ease. Simply select the appropriate pro- gram for the type of food you are cook- –... -
Page 59: Using The Masterchef Programs
MasterChef Notes on using these programs Using the MasterChef pro- grams – The degree of doneness and brown- ing levels are represented by a bar Select MasterChef . with seven segments. The factory A list of food types will appear on the setting is a medium doneness and display. -
Page 60: Search
MasterChef – To end a MasterChef automatic pro- Search gram early, turn the steam oven off You can search MasterChef by food completely by touching "Back".. type and by the name of the Mas- Cancel Cooking? will appear on the terChef program. -
Page 61: Favorites
Favorites You can create and save up to 20 of Creating a Favorite your own programs. Select Favorites . – Each one can have up to 10 cooking Select Create Program stages. This enables you to save your favorite or most frequently used You can now specify the settings for recipes very accurately. -
Page 62: Starting A Favorite
Favorites A message will appear in the display Starting a Favorite confirming that the program has been Put the food in the oven. saved. Select Favorites . Confirm with OK. The program names will appear in the You can start the saved program imme- display. -
Page 63: Changing Favorites
Favorites Changing the name Changing Favorites Select Favorites . Changing cooking stages Select Edit Cooking stages in a MasterChef pro- Select Change Program gram that have been saved under a different name cannot be changed. Select the desired program. ... -
Page 64: Alarm + Timer
Alarm + Timer Using "Timer", you can set an alarm for At the set alarm time a specific time or set the timer duration – will flash next to the time in the to time an activity in the kitchen e.g. display. -
Page 65: Using The Timer
Alarm + Timer Using the Timer At the end of the timer – flashes in the display. The timer can be used to time any ac- tivity in the kitchen, e.g. boiling eggs. – The time starts counting upwards. The timer can also be used at the same –... -
Page 66: General Notes
General notes The "General Notes" section contains Your own pans general information. You will find more You can also use your own pans. How- detailed information about particular ever, please note the following: foods and how to cook them in the –... -
Page 67: Shelf Level
General notes Shelf level Cooking duration You can select any shelf level. You can In general, the cooking durations for also cook on several levels at the same Steam Cooking are the same as for time. This will not alter the cooking du- cooking food in a saucepan. -
Page 68: Wire Oven Rack / Universal Tray
General notes Wire oven rack / universal tray Use the rack above the universal tray when roasting or broiling. The cooking liquids will collect in the tray and can then be used to make a gravy or sauce. If you are using the universal tray with the rack on top, e.g. -
Page 69: Steam Cooking
Steam cooking Shelf level Vegetables When cooking vegetables with a dis- Fresh food tinctive color (e.g. beets) in a perforated Prepare fresh vegetables in the usual container at the same time as cooking way, i.e. wash, clean and cut them up. other foods in other containers, place the drip tray directly underneath the Frozen food... - Page 70 Steam cooking The durations given in the charts for fresh vegetables are guidelines only. We rec- ommend selecting the shorter cooking duration quoted to start with. If vegetables are not cooked sufficiently after the shorter time, they can be put back in the steam oven and cooked some more.
- Page 71 Steam cooking [min] Vegetables Pumpkin, diced 2–4 Corn on the cob 30–35 Swiss chard, chopped 2–3 Peppers, diced / cut into strips Potatoes cooked in skins, firm 30–32 Mushrooms Leeks, chopped 4–5 Leek, halved lengthwise Romanesco, whole 22–25 Romanesco, florets 5–7 Brussels sprouts 10–12...
-
Page 72: Meat
Steam cooking Settings Meat | | ... | MasterChef Meat Steam Cook- Fresh food Prepare the meat as usual. Frozen food | Operating Modes Steam Cooking Meat should be thoroughly defrosted Temperature: 210°F / 100°C before cooking in the steam oven (see Duration: see chart "Defrosting"). - Page 73 Steam cooking The cooking times given in the chart are guidelines only. We recommend selecting the shorter cooking time to start, additional time can be added if necessary. [min] Meat Shank, covered with water 110–120 Pork knuckle 135–140 Chicken breast filet 8–10 Leg (Joint) 105–115...
-
Page 74: Sausage
Steam cooking Sausage Fish Settings Fresh food | | ... | Prepare fresh fish in the usual way, i.e. MasterChef Sausage Steam clean, gut and filet. Cooking Frozen food | Operating Modes Steam Cooking Frozen fish should be slightly defrosted Temperature: 194°F / 90°C before cooking. - Page 75 Steam cooking Temperature – You can use any fish scraps, e.g. fish heads, bones, tails etc to make a fish 185° F – 195° F / 85° C – 90° C stock. Place the fish scraps together For gently cooking delicate types of with some mixed vegetables in a fish, such as sole.
- Page 76 Steam cooking The durations given in the chart are guidelines for fresh fish. We recommend se- lecting the shorter cooking duration quoted to start with. If the fish is not cooked sufficiently after the shorter time, it can be put back in the steam oven and cooked some more.
-
Page 77: Shellfish
Steam cooking Shellfish Preparation Defrost frozen shellfish before cooking with steam. Peel, clean and wash the shellfish. Cooking pan If using a perforated pan, grease it first. Cooking duration The longer shellfish are cooked, the tougher they become. Use the cooking dura- tions given in the chart. -
Page 78: Mussels
Steam cooking Mussels Fresh food Warning - danger of food poisoning. Only cook mussels which are closed. Do not eat mussels which have not opened after being cooked. Steep fresh mussels in water for a few hours before cooking to rinse out any sand. Then scrub the mussels thoroughly to clean them. -
Page 79: Rice
Steam cooking Rice Rice swells when cooked and needs to be cooked in liquid. The proportion of rice to liquid will vary depending on the type of rice. The rice absorbs all the liquid. Therefore none of the nutrients are lost. Settings ... -
Page 80: Pasta
Steam cooking Pasta Dry pasta Dry pasta swell when cooked and needs to be cooked in liquid. The liquid must cover the pasta. Using hot liquid gives better results. Increase the cooking time stated by the manufacturer by approx. ¹/₃. Fresh food Fresh noodles and pasta, for example, from the store refrigerator, do not swell. -
Page 81: Dumplings
Steam cooking Dumplings Ready-made dumplings in wrappers need to be covered completely with water. Otherwise they will not absorb enough water and will fall apart, even if steeped in water prior to cooking. Cook fresh dumplings in a greased, perforated container. Settings ... -
Page 82: Grains
Steam cooking Grains Grain swells when cooked and needs to be cooked in liquid. The proportion of grain to liquid will vary depending on the type of grain. Grain can be cooked whole or cracked. Settings | | ... | MasterChef Grains Steam Cooking... -
Page 83: Legumes
Steam cooking Legumes Soak legumes for at least 10 hours in cold water before cooking. Soaking makes the legumes more digestible and shortens the cooking duration required. Soaked legumes must be covered with liquid during cooking. Lentils do not need to be soaked before cooking. With unsoaked legumes, a certain ratio of pulses to liquid is required depending on type. - Page 84 Steam cooking Unsoaked [min] Ratio Legumes to liquid Beans Kidney beans 1 : 3 130–140 Azuki beans 1 : 3 95–105 Black beans 1 : 3 100–120 Pinto beans 1 : 3 115–135 White beans 1 : 3 80–90 Lentils Brown lentils 1 : 2 13–14 Red lentils 1 : 2 Peas Yellow peas 1 : 3 110–130 Green peas, shelled...
-
Page 85: Eggs
Steam cooking Eggs Use a perforated container to prepare boiled eggs in the steam oven. The eggs do not need to be pierced before cooking as they are gradually warmed during the preheating phase and so do not burst when they are cooked with steam. -
Page 86: Fruit
Steam cooking Fruit Cook fruit in a solid container so that none of the juice is lost. If you wish to cook fruit in a perforated container, place a solid container directly underneath it to col- lect the juice. Tip: You can use the collected juice to prepare a glaze. Settings ... -
Page 87: Menu Cooking - Manual
Steam cooking Cooking duration Menu Cooking - Manual If you are increasing the recommended Before cooking meals with the "Menu temperature, shorten the cooking dura- Cooking" function, turn off the steam tion by approx. ¹/₃. reduction system (see "Settings"). Example "Menu Cooking"... - Page 88 Steam cooking Method Switch off the steam reduction. Place the rice in the steam oven first. Set the first cooking duration: 14 min- utes. After 14 minutes, place the tilapia in the steam oven. Set the second cooking duration: 2 minutes.
-
Page 89: Sous-Vide (Vacuum) Cooking
Sous-vide (vacuum) cooking Always follow USDA guidelines on Only use food that is fresh and in food safety. good condition. Ensure hygienic conditions and that This gentle cooking method allows food food has not been out of the refriger- to be cooked slowly at a low, constant ator too long, e.g. - Page 90 Sous-vide (vacuum) cooking Important usage information Tips To obtain an optimum cooking result, – Freeze liquids such as marinades be- observe the following information: fore vacuum-sealing to prevent them from escaping from the vacuum bag. – Use less herbs and spices than for conventional cooking since the influ- –...
- Page 91 Sous-vide (vacuum) cooking Method Possible causes for poor re- sults Rinse the food with cold water and dry it. The vacuum bag opened: Put the food in a vacuum bag and – The seam was not clean or secure add spices or liquid if desired.
- Page 92 Sous-vide (vacuum) cooking Food Added in advance [°F / °C] [min] Sugar Salt Fish Cod filet, 1" (2.5 cm) thick 130 / 54 Salmon filet, 1 1/4" (3 cm) 125 / 52 thick Monkfish filet 145 / 62 Pikeperch filet, 3/4" (2 cm) 130 / 55 thick Vegetables...
- Page 93 Sous-vide (vacuum) cooking Food Added in advance [°F / °C] [min] Sugar Salt Shallot, whole 185 / 85 45–60 Temperature / Cooking duration [°F / °C] [min] Food Added in ad- vance Sugar Salt Medium* Well done* Meat...
-
Page 94: Special Modes
Special modes Tips Reheat – Food does not need to be covered Always follow USDA guidelines on before it is reheated. food safety. – Do not reheat large items whole. Di- The steam oven is very effective at re- vide it into portions and reheat these heating food gently, without drying it as plated meals. - Page 95 Special modes [°F / °C] [%] [min] Food Vegetables Carrots 250 / 120 8–10 Cauliflower Kohlrabi Beans Side dishes Pasta 250 / 120 8–10 Rice Potatoes, halved lengthways Dumplings 285 / 140 18–20 Mashed potato Meat and poultry Sliced meat, 1/2"...
-
Page 96: Defrost
Special modes Tips Defrost – Fish does not need to be fully de- Always follow USDA guidelines on frosted before cooking. Defrost so food safety. that the surface is sufficiently thawed to take herbs and seasoning. De- It is much quicker to defrost food in the pending on the thickness of the fish, steam oven than at room temperature. - Page 97 Special modes Food to be defrosted Quantity [°F / °C] [min] [min] Fruit Apple sauce 1/2 lb / 250 g 140 / 60 20–25 10–15 Apple chunks 1/2 lb / 250 g 140 / 60 20–25 10–15 Apricots 1 lb / 500 g 140 / 60...
- Page 98 Special modes Food to be defrosted Quantity [°F / °C] [min] [min] Chicken 2 lbs / 1000 g 140 / 60 15–20 Chicken thighs 5.3 oz / 150 g 140 / 60 20–25 10–15 Chicken filet 1 lb / 500 g 140 / 60 25–30 10–15...
-
Page 99: Canning
Special modes Fill volume Canning Fill the glass jars with produce up to a Always follow USDA guidelines on maximum of 1 1/4" (3 cm) below the food safety. rim. Do not pack down as this would damage the cell walls of the produce. Only use unblemished, fresh produce Bang the jar gently on a cloth to help which is in good condition. - Page 100 Special modes Method Place a perforated pan on the lowest shelf level. Place the jars (all the same size) in the perforated cooking pan. Ensure that they do not touch one another. Settings | Special Modes Canning ...
-
Page 101: Juicing
Special modes Method Juicing Put the prepared fruit (cleaned, This appliance is ideal for extracting washed, chopped etc.) into a perfo- juice from soft, firm and hard fruit. rated cooking pan. It is best to use overripe fruit, as the ... -
Page 102: Menu Cooking
Special modes After you have confirmed Start Menu Menu Cooking Cooking , the display will tell you which You can cook up to three different types food to put in the oven. At the end of of food, e.g. fish with a side dish and the preheating phase, the display will vegetables. -
Page 103: Dehydrate
Special modes Dehydrate | Only use the special application Dehydrate or the Combi Steam Convection Bake mode to dry food so that moisture can be dissipated. Method Cut the food into similar sized pieces. Place the pieces on the rack covered with baking paper. Tip: Bananas and pineapple are not suitable for drying in a combi steam oven. -
Page 104: Making Yogurt
Special modes Possible causes for poor results Making Yogurt Yogurt is not set: Always follow USDA guidelines on Incorrect storage of the yogurt starter, food safety. too much time out of the refrigerator, packaging was damaged, milk was in- To make yogurt, you will need either sufficiently heated. -
Page 105: Proofing
Special modes Method Proofing Mix ½ cup (100 g) yogurt with 4 cups Method (1 liter) of milk or make up the mixture Prepare the dough according to the with yogurt starter powder, following recipe. the instructions on the packaging. ... -
Page 106: Dissolving Gelatine
Special modes Dissolving Gelatine Melting Chocolate You can use the steam oven for melting Method any type of chocolate. Gelatine sheets: Completely cover the gelatine sheets with cold water Method and leave to soak for 5 minutes. Re- Break the chocolate into small move the gelatine sheets from the pieces. -
Page 107: Skinning Fruits And Vegetables
Special modes | Operating Modes Steam Cooking Skinning Fruits and Vegetables Temperature: 210°F / 100°C Method Duration: see chart Cut a cross in the top of tomatoes, [min] Food nectarines etc. This will allow the peel to be removed more easily. -
Page 108: Preserving Apples
Special modes Preserving Apples Blanching You can treat homegrown apples in the Blanch fruit and vegetables before steam oven to increase the length of freezing them. Blanching helps maintain time for which you can store them. the quality of the produce when it is Once treated, the apples will keep for 5 frozen. -
Page 109: Sweating Onions
Special modes Sweating Onions Rendering Fat Sweating means cooking the onions in The bacon will not become brown. their own juices, with the addition of a Method little fat if necessary. Place the bacon (diced or rashers) in Method a solid cooking pan. -
Page 110: Sanitizing Cookware
Special modes Sanitizing Cookware Heating damp towels The steam oven will sanitize baby bot- Method tles and other cookware. Check before- Moisten the towels and then roll them hand that the manufacturer guarantees all components are to be heat resistant to 212°... -
Page 111: Decrystalize Honey
Special modes Decrystalize honey Pizza Method Settings Loosen the lid and place the jar of | Special Modes Pizza honey in a perforated cooking pan. | Operating Modes Convection Bake Stir the honey once during the cook- ... -
Page 112: Making Jam
Special modes Method Making jam Fill jars maximum 2/3 full. Only use unblemished, fresh produce which is in good condition. Place the open jars in a perforated cooking pan or on the rack. Glass jars At the end of the program take the Only use sterilised jars with twist-off lids jars out of the steam oven using oven up to a maximum capacity of 1 cup /... -
Page 113: Sabbath Program
Special modes Sabbath Program The Sabbath program cannot be se- lected if an alarm has been set or a This mode is designed for religious ob- timer is counting down. servance. The program operates with Surround Method and cannot be changed. ... -
Page 114: Roast Probe
Roast probe How it works When to use the roast probe The metal tip of the roast probe is in- The roast probe can be used in the fol- serted into the food. There is a temper- lowing operating modes: ature sensor in the metal tip which mea- –... -
Page 115: Important Notes Regarding The Roast Probe
Roast probe Important notes regarding the Method roast probe Prepare the food. Risk of breakage! Insert the metal tip of the roast probe fully into the food. Do not use the roast probe to lift or carry the food. ... - Page 116 Roast probe Tips – If you are cooking several pieces of meat together, the roast probe should be inserted into the largest piece of meat. – If the food is not cooked sufficiently when the core temperature is reached, insert the roast probe into another place or increase the core temperature and repeat the program.
-
Page 117: Roast
Roast Combi Steam Always follow USDA guidelines on food safety. The lower the temperature in the oven compartment, the longer the cooking Roasting tips process and the more tender the result. Insert the grease filter into the back Lean meat wall. - Page 118 Roast Fatty meat with crispy skin – Cooking stage 1: use a high tempera- ture to render the fat and brown the skin. – Cooking stage 2: reduce the temper- ature and increase the moisture – Cooking stage 3: increase the tem- perature for crispy skin. Braised dishes –...
-
Page 119: Roasting Chart
Roast Roasting chart Always follow USDA guidelines on food safety. The times and temperatures given in the tables are recommendations only. Type of meat Stage Operating mode [°F / °C] [min] [°F / °C] Poultry Duck up to 4 lbs / 2 kg, ... - Page 120 Roast Type of meat Stage Operating mode [°F / °C] [min] [°F / °C] Veal Tenderloin (Roast) rare – 347/175 – – 115/45 medium – 329/165 – – 130/55 well done – 320/160 –...
- Page 121 Roast Type of meat Stage Operating mode [°F / °C] [min] [°F / °C] Leg (Joint) 210/100 – 375/190 – – Braised meat* Level 3 – Level 3 – 210/100 Lamb ...
- Page 122 Roast Type of meat Stage Operating mode [°F / °C] [min] [°F / °C] Tenderloin (Roast with moisture) Rare* Level 3 – Level 3 – 140/60 – 140/60 – Medium* Level 3 –...
- Page 123 Roast Type of meat Stage Operating mode [°F / °C] [min] [°F / °C] Well done* Level 3 – Level 3 – 210/100 – 150/65 – 195/90 – 395/200 – –...
-
Page 124: Bake
Bake Bake Eating food which has been cooked correctly is important for good Use this at the end of the baking time to health.Only bake cakes, pizza, french brown the bottom of the food. fries, etc. until they are golden brown. -
Page 125: Baking Tips
Bake Parchment paper Baking tips Parchment paper is only necessary Grease filter when baking: Remove the grease filter from the – Anything with a high salt content (e.g. back wall. Otherwise results can be pretzels, bread sticks), because uneven. sodium can damage the PerfectClean surface Bakeware... - Page 126 Bake Shelf level Notes regarding the baking chart When baking cakes with a moist top- ping only bake on one level. As a general rule, select the lower temperature given in the chart. Use a maximum of two shelf levels at once.
-
Page 127: Baking Chart
Bake Baking chart [F / °C] [%] min Baked good Stage Operating mode Sponge Baking tray – 300-355 / – 150–180 Springform pan – 320-340 / – 25–35 160–170 Puff pastry Filled 210/100 375-410/1 90–210 ... - Page 128 Bake [F / °C] [%] min Baked good Stage Operating mode Triple grain bread 85/30 300/150 300/150 Flat bread 105/40 125/50 410/210 310-375/1 55–190 Braided loaf 105/40 125/50 395/200 320-395/1 60–200 ...
- Page 129 Bake [F / °C] [%] min Baked good Stage Operating mode Sweet rolls 105/40 125/50 395/200 395/200 8–13 Whole grain bread 105/40 125/50 410/210 375-420/1 90–215 White bread 105/40 125/50 ...
- Page 130 Bake [F / °C] [%] min Baked good Stage Operating mode Sweet rolls 125/50 330/165 330/165 14–26 Pizza – 310-365/1 – 55–185 Baking tray – 320-355/1 – 45–55 60–180 Batter Cake pan – 340-375/1 –...
-
Page 131: Broil
Broil Broiling tips Burn hazard! The appliance door must remain shut Place the food on the rack on top of during broiling, as otherwise the con- universal tray. trols will get hot. When broiling fish, place the fish on a piece of baking paper cut to size. - Page 132 Broil Tips – Marinate or add a little oil if neces- sary to lean meat. Do not use other types of fat as they can burn and cause smoke. – Make diagonal cuts in sausage be- fore broiling. – It is best to broil food of a similar thickness at the same time so that the broiling time for each item does not vary too greatly.
- Page 133 Broil Broiling table Broiled food Operating [F / °C] [%] min mode Fish Trout Level 3 – 25–30 Salmon 355/180 – Mackerel Level 3 – Meat / sausages Hamburgers Level 3 – Sausage Level 3 –...
-
Page 134: Settings
Settings Accessing the "Settings" menu From the main menu: Select Settings They can be checked and changed, if needed. Settings cannot be altered while a cooking program is in progress. Changing and saving settings Select Settings ... -
Page 135: Settings Overview
Settings Settings overview Option Available settings ... / / ... Language deutsch english Country Time Display Night Dimming Clock Type Analog Digital Clock Format 24 h 12 h (am/pm) Date Lighting On for 15 seconds Start Screen Main Menu Operating Modes MasterChef Special Modes... - Page 136 Settings Option Available settings Water hardness Soft Medium * Hard Showroom Program Demo Mode Factory default Settings Favorites Default temperatures MyMiele Factory default...
-
Page 137: Language
– Synchronize This menu item only appears if you are The display is switched off to save connected to the Miele@Home system energy. The steam oven has to be (see separate instructions). switched on before you can use it. This also applies to using the oven interior lighting , the alarm and... -
Page 138: Date
Settings Date Volume Set the date. Buzzer tones The volume is represented by a bar with When the steam oven is turned off, the seven segments. date will only appear on the display if Time | Clock Type | Digital is se- ... -
Page 139: Units Of Measurement
Settings Units of measurement Keeping Warm Please note that delicate food, espe- Weight cially fish, can continue cooking while – being kept warm. The weight of food in MasterChef – programs is shown in grams. The keeping warm function is acti- –... -
Page 140: Automatic Rinsing
Settings Steam reduction Automatic rinsing – Following a cooking program with steam, Appliance rinsing will appear in the If you cook at a temperature from ap- display after the steam oven has been prox. 175°F / 80°C (Steam Cooking) switched off. or 175-210°F / 80–100°C and a 100% humidity setting (Combi Any remaining food deposits are... -
Page 141: Safety
Settings Sensor lock Safety The sensor button lock prevents you System lock from accidently turning the oven off or The system lock prevents the appliance changing a cooking program. being turned on by mistake. – The alarm and timer can still be set The sensor lock is active. -
Page 142: Water Hardness
Settings Water hardness Showroom program The steam oven is factory set for Hard This mode enables the oven to be water. It must be adjusted local water demonstrated in showrooms without hardness to ensure trouble-free opera- heating up. It should not be set for do- tion and to ensure that descaling is car- mestic use. -
Page 143: Factory Default
Settings Factory default – Settings Any settings that have been altered will be reset to the factory default setting. – Favorites All Favorites will be deleted. – Default temperatures Any default temperatures that have been changed will reset to the factory default settings. -
Page 144: Cleaning And Care
Cleaning and care The appliance and accessories Important information on should be cleaned and dried thor- cleaning and care oughly after each use. Risk of injury! Leave the appliance door open until The steam from a steam cleaner the oven interior is completely dry. -
Page 145: Appliance Front
Cleaning and care To better maintain your appli- Appliance front ance avoid the following: Clean the front with a solution of warm water and liquid dish soap ap- To avoid damaging surfaces when plied with a clean sponge or cloth. A cleaning, do not use: clean, damp microfiber cloth without –... -
Page 146: Perfectclean
Cleaning and care To protect the non-stick effect of PerfectClean PerfectClean surfaces, please avoid: The surfaces of the oven compartment – Abrasive cleaning agents, such as and shelf runners have been treated scouring powder, scouring cream, with PerfectClean enamel. This finish pumice pits has an iridescent appearance. -
Page 147: Oven Interior
Cleaning and care After a roasting, broiling or baking Do not use oven spray. program Oven interior Clean the oven compartment thor- oughly after roasting and baking as The surface of the oven compart- otherwise soiling can burn on and ment has been treated with Perfect- become impossible to remove. - Page 148 Door seals can be ordered from the color. This discoloration will not affect Miele Service (see the end of this book- the functioning of the filter in any way. let for contact details).
-
Page 149: Water Container And Condensate Container
Cleaning and care Universal tray and wire oven rack Water container and conden- sate container The surface of the universal tray and the wire oven rack have been treated The water container and condensate with a PerfectClean finish. container are suitable for cleaning in a Do not clean the universal tray and dishwasher. -
Page 150: Shelf Runners
Cleaning and care Push the side runners firmly back in Shelf runners after cleaning. When putting them The surface of the side runners has back in, make sure they are correctly been treated with PerfectClean. inserted (see illustration). Do not clean the side runners in the If the side runners are not correctly dishwasher. -
Page 151: Mainentance
Cleaning and care Descaling Mainentance We recommend that you use Miele functions are Ready at Start at Descaling Tablets (see "Optional ac- . not available in Maintenance cessories") for descaling the appli- ance. They have been specifically de- Soak signed for optimal descaling of Miele Heavy soiling can be soaked with this products. - Page 152 After descaling Fill the water container with cold wa- Remove, empty, and dry the water ter to the marking and add 2 Miele container and condensate container. descaling tablets. Turn the steam oven off. Push the water container into the ap- pliance until it engages.
-
Page 153: Door
Cleaning and care Door Removal Prepare a suitable underlay for the door, such as a soft cloth. Release the locking clamps on the hinges by pushing them down. Turn them as far as they will go in an an- gled position. - Page 154 Cleaning and care Risk of damage to the door! If the locking clamps are not locked, the door can easily become de- tached from the hinge guides and be damaged. You must make sure that the locking clamps are locked again. ...
-
Page 155: Frequently Asked Questions
Frequently asked questions The following faults can be corrected without contacting the Miele Service Depart- ment. If in doubt, please contact Miele. Risk of injury! Improperly performed installation, maintenance or repair work can pose a serious danger to users of the appliance. - Page 156 The door seal is damaged, e.g. cracked. ally. Replace the door seal. This can be ordered from Miele Service (see the end of this booklet for contact details). The control panel will There is an obstruction in the control panel.
- Page 157 If the fault message appears again, switch the ap- pliance off and contact Miele Service. F 44 Communication fault Turn the steam oven off and then back on again after a few minutes. If the same message appears again, contact Miele Service.
- Page 158 Insert the filter correctly: Switch the steam oven back on again. If, having corrected the problem, this fault mes- sage appears again, contact Miele Service. and other fault codes Technical fault Turn the appliance off and contact Miele.
- Page 159 Frequently asked questions Opening the control panel Closing the control panel man- manually ually Open the appliance door carefully. Hold the control panel at the top and bottom. Hold the control panel at the top and Carefully push it downwards. bottom.
-
Page 160: Optional Accessories
Optional accessories Miele offers a range of useful acces- Cooking pan sories, as well as cleaning and condi- There is a wide range of perforated and tioning products for your appliance. solid cooking pans available in different Depending on country, these can be or- sizes: dered online from Miele. - Page 161 Optional accessories DGGL 4 DGGL 8 Perforated cooking pan Perforated cooking pan 12 3/4" x 10 ½" x 2 ½" (WxDxH) 12 3/4" x 10 ½" x 1 1/2" (WxDxH) 325 x 265 x 65 mm (WxDxH) 325 x 265 x 40 mm (WxDxH) DGGL 5 DGGL 12 Perforated cooking pan...
-
Page 162: Cleaning And Care Products
Optional accessories Lid for cooking pans Cleaning and care products DGD 1/3 DGCLean (8 oz. / 250 ml) Lid for 12 3/4" x 7" (325 x 175 mm) Special cleaning agent for removing cooking pans stubborn soiling from the oven interior, particularly after roasting. -
Page 163: Additional Accessories
Optional accessories Rack for cooking pans Additional accessories Universal tray For holding 12 13/16" (325 mm) wide containers. Slides into the side runners Universal tray for baking, roasting and in the appliance. broiling Round baking form Wire oven rack Suitable for cooking pizzas, flat cakes 1 wire oven rack for baking, roasting made with yeast or whisked mixtures, and broiling... - Page 164 Slides into the side HBD 60-35 runners in the oven. Also suitable for use on an extended zone of an electric ceramic hob and in all Miele ovens. Not suitable for use on gas or induc- tion cooktops. Suitable for HUB 5000-XL HUB 5000-XL...
-
Page 165: Important Safety Instructions - Installation
IMPORTANT SAFETY INSTRUCTIONS - INSTALLATION Be certain your appliance is Incorrect installation can properly installed and grounded result in personal injury and by a qualified technician. To damage to property. guarantee the electrical safety of Before connecting the appli- this appliance, continuity must exist between the appliance and ance to the mains supply, ensure... -
Page 166: Detailed Dimensions Of Oven Front
Detailed dimensions of oven front PureLine front ContourLine front * Glass front / ** Metal front... - Page 167 Detailed dimensions of oven front Control panel swivel range The area in front of the control panel must not be blocked by anything (such as a door handle) that would hinder it from opening and closing. Glass front / Metal front...
-
Page 168: Installation Dimensions
Installation dimensions Installation into a tall cabinet The housing unit must not have a back panel installed behind the building-in niche. a Steam oven b Niche c Pass-through for the power cord d Recommended position for electrical connection e Power cord * Glass front / ** Metal front... - Page 169 Installation dimensions Ventilation cut-outs a Cut-out in the top of the unit b Cut-out in the center shelf above the building-in niche...
-
Page 170: Undercounter Installation
Installation dimensions Undercounter installation The housing unit must not have a back panel installed behind the building-in niche. When building the appliance into a base unit underneath a cooktop, please also observe the installation instructions for the cooker and its respective installation depth (see the installation instructions for the cooktop). - Page 171 Installation dimensions Ventilation cut-outs a Cut-out in the center shelf under the building-in niche b Cut-out in cabinet base...
-
Page 172: Installation In Combination With An Oven
Installation dimensions Installation in combination with an oven The housing unit must not have a back panel installed behind the building-in niche. a Steam oven b Niche c Pass-through for the power cord d Recommended position for electrical connection e Power cord f Oven * Glass front / ** Metal front... - Page 173 Installation dimensions Ventilation cut-outs a Cut-out in the top of the unit b Cut-out in the center shelf above the appliance building-in niche For the oven ventilation cut-out, please see the information in the oven installa- tion instructions.
-
Page 174: Installation
Installation Installing the steam oven A fault can occur if the appliance is not correctly aligned. For correct functioning of the steam generator, please make sure that the appliance is horizontally level.The maximum deviation should not ex- ceed 2°. Push the appliance into position in the niche and align it. -
Page 175: Electrical Connection
Danger of electrical shock! persons can cause considerable The power cord must only be re- danger to users. Miele cannot be placed by a suitably qualified and held liable for any damage arising as competent person in accordance a result of such work. -
Page 176: Caring For The Environment
Caring for the environment Disposal of the packing mate- Disposal of your old appliance rial Old electrical and electronic appliances often still contain valuable materials. The cardboard box and packing materi- However, they also contain harmful als protect the appliance during ship- substances that were essential for the ping. -
Page 177: Technical Service, Data Plate, Warranty
In the event of a fault which you cannot easily correct yourself, please contact: – your Miele dealer, or – the Miele Technical Service Department. See back cover for contact details. Please quote the model and serial number of your appliance when contacting Miele. -
Page 178: Mielecare
Miele appliance. Please note that unless expressly ap- proved in writing by Miele’s Service de- partment, Extended Service Contracts offered by other providers for Miele products will not be recognized by Miele. -
Page 179: Copyright And Licenses
You will need to enter the specific product name. Miele will provide the source code for all components of software licensed under the GNU General Public License and comparable Open Source licenses. For source code requests, please email info@miele.com. - Page 183 Technical Service. U.S.A. Canada Miele, Inc. Importer Miele Limited National Headquarters 9 Independence Way Headquarters and Miele Centre Princeton, NJ 08540 161 Four Valley Drive Phone: 800-843-7231 Vaughan, ON L4K 4V8 609-419-4298 Fax: www.miele.ca www.mieleusa.com...
- Page 184 DGC 6700 / DGC 6800 en-US M.-Nr. 09 855 050 / 05...
Need help?
Do you have a question about the DGC 6700 and is the answer not in the manual?
Questions and answers