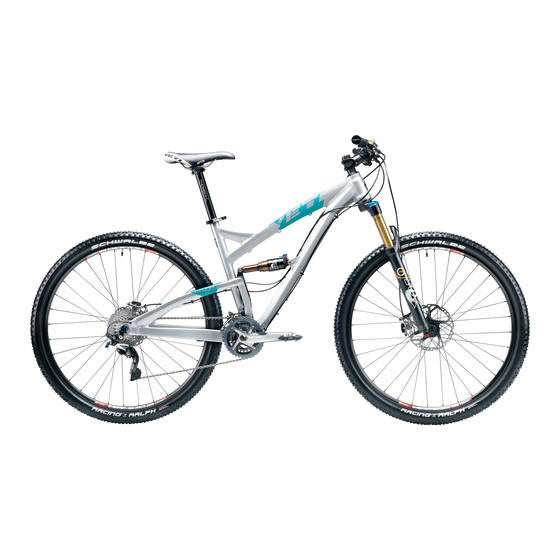
Summary of Contents for Yeti Cycles SB95 2012
- Page 1 2012 yeti sb95 YETI CYCLES 600 Corporate Circle, Unit D Golden, CO 80401 888.576.9384 www.yeticycles.com...
-
Page 2: Table Of Contents
table of Contents BranD Overview Frame FeatUres GeOmetery maintenanCe sCheDUle setup Overview shOCk setUp QUiCk start GUiDe CaBle/line setUp technical assemBly Overview Chip system explODeD views reBUilD kits legal warranty COntaCt inFOrmatiOn... - Page 3 welCome to the tribe. Congratulations on your purChase of a new yeti. we are confident your new bicycle will exceed this manual outlines basic setup and your expectations for value, performance, and maintenance recommendations of your new ride quality. each frameset and component yeti.
- Page 4 a 29’r that embodies the the sB95 delivers 5 inches of travel with our new switch technology. efficient pedaling performance while still smooth and soul of a ClassiC yeti continuous when the going gets rough. Compact, stiff, and fully sealed, the eccentric assembly is the key trailbike.
-
Page 5: Geometery
geometry fox 34 120 mm fork 16.5 18.0 19.5 21.0 22.1 23.1 24.1 24.9 68.5 68.5 68.5 68.5 72.0 72.0 72.0 72.0 17.5 17.5 17.5 17.5 43.9 44.9 46.0 46.8 13.2 13.2 13.2 13.2 28.2 28.8 29.0 29.8 21.0 21.0 21.0 21.0 fox 34 140 mm fork... -
Page 6: Overview
keep your new yeti fresh and Clean overview torque Following these guidelines will help maintain the performance of your bicycle and prevent yeti strongly recommends using a torque wrench when assembling your frame. torque more serious problems from arising. it is important to remember that service intervals can vary specifications for individual parts on the sB-95 are listed below, as well as in the step by step depending on climate, trail conditions and riding frequency. -
Page 7: Shock Setup
shoCk setup yeti tips tools needed inspect your shock for any visible damage. • shock pump if oil is leaking or you notice any damage to • tape measue the surfaces or seals, please contact the Fox racing shox service center for repair at 800. FOx.shOx. -
Page 8: Quick Start Guide
shoCk setup 04. rebound the rebound adjustment has 12 clicks of adjustment. the rebound knob is the red adjustment dial located above your blue pro-pedal adjustment lever. as a general rule, adjustments that are too fast (counter- clockwise adjustment) will produce a springy ride with excessive kick-up of the rear end causing a bucking sensation. -
Page 9: Front Derailleur
Cable setup yeti tips the sB95 has full cable housing. By using full cable housing, we have eliminated break points in the line of your shifter housing. this allows riders to experience better overall shifting performance by reducing the entrance of unwanted elements such as sweat and sediment. Use of full cable housing helps prevent corrosion from the elements and keeps the shifting smoother for a longer period of time. - Page 10 Warning: service on Yeti bicycles requires special knowledge and tools. Yeti cycles recommends that all service and repairs be performed by an authorized Yeti Dealer lightly grease the 40mm integrated axle and prepare a ti male bolt with blue loctite and install insert it through the drive side main pivot bearing.
- Page 11 assembly assembly Fit the bearing retainer clips in the groove lightly grease the threads on the stop bolt and apply blue loctite to the threads on the lower link Create two collet bolt assemblies. place a collet between the drive side integrated axle and the tighten into the eccentric housing with a 6mm axle cap.
- Page 12 assembly assembly tighten a collet bolt assembly into the non drive press two 22mm Fox reducers into the the lower Grease the shaft and threads of the upper link tighten a collet bolt assembly into the non drive side of the main pivot collet axle with a 5mm shock eyelet.
-
Page 13: Chip System
Chip system Use a 2.5mm allen key to loosen the two Fit the 12mm insert hanger into the groove on m4x9mm flat head bolts holding the Qr insert the inside of the drive side chainstay. the hanger derailleur hanger in place. remove the bolts and should be flush with the chainstay. -
Page 14: Exploded Views
exploded views part # DesCriptiOn FrOnt trianGle sB-95 rear trianGle sB-95 hnas95a00000000000005 lOwer link axle sB-95 hnas95a00000000000006 axle Cap lOwer link FOx rp23 7.5x2.0 300020020 GarlOCk Dp BUshinG .5”x.5” 300020034 reDUCer FOx 8x22mm 300030069 washer (8.5x12.5x0.5mm) 300030062 washer (6.5x12.5x0.5mm) 300030111 BOlt ti Female 8x34mm 300030110 BOlt ti male m6x1x12mm... -
Page 15: Rebuild Kits
# DesCriptiOn h12s95a0000000BrG0000 sB95 2012 BearinG reBUilD kit hnas95a00000000000007 BUshinG 52x50x9.5 300020039 BearinG 40x52x7 6808 2rs max hnas95a00000000000010 BearinG retainer Clip sB-95 300020041 BearinG 15x24x7 3802 2rs max 300040430 O rinG QUaD 56.8x60.4x1.6 h12s95a0000000eCC0000 sB95 2012 eCCentriC kit hnas95a00000000000007 BUshinG 52x50x9.5... -
Page 16: Warranty
Cycles will make replacement parts available at a minimum charge to the original owner in the event of a crash or any other non-warranty situation. yeti Cycles does this at its sole discretion and reserves the right to refuse this offer.


Need help?
Do you have a question about the SB95 2012 and is the answer not in the manual?
Questions and answers