Table of Contents
Advertisement
Power Machines for Soil Cultivation,
Grass and Property Maintenance
Operating Instructions
for AGRIA
with
Planetary Mowing Drive
Rocker Arm Mowing Drive
3689-A, 3727
Before commissioning the engine, read operating instructions
and observe warnings and safety instructions.
Operating Instructions No. 998 726
®
Power Mower 5400
and Engine Versions:
4-Stroke, Robin EH 25
2-Stroke, Rotax 232
02.97
Advertisement
Table of Contents
Troubleshooting

Subscribe to Our Youtube Channel
Related Manuals for Agria 5400


Summary of Contents for Agria 5400
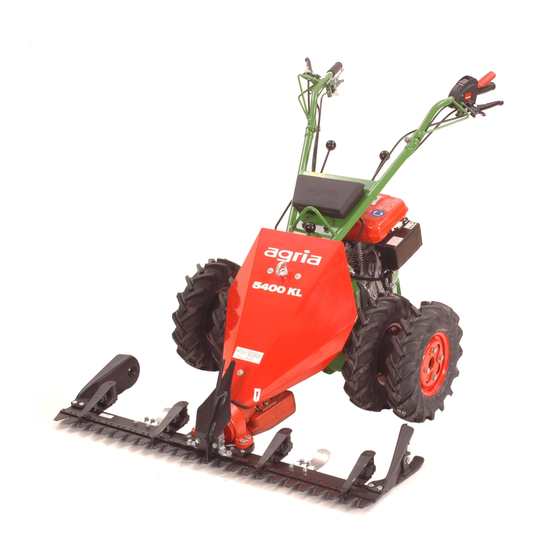
- Page 1 Power Machines for Soil Cultivation, Grass and Property Maintenance Operating Instructions ® for AGRIA Power Mower 5400 with and Engine Versions: Planetary Mowing Drive 4-Stroke, Robin EH 25 Rocker Arm Mowing Drive 2-Stroke, Rotax 232 3689-A, 3727 Before commissioning the engine, read operating instructions and observe warnings and safety instructions.
-
Page 2: Table Of Contents
Fig. B and C ........9 Before Starting the Engine ..... 34 Starting 4-Stroke-Engine ....35 Fig. D and E (Robin EH 25) ..60 Starting 2-Stroke-Engine ....36 Fig. F and G (Rotax 232) ....64 Power Mower 5400 Edition 02.97... -
Page 3: Symbols, Name Plate
Mowing drive p62/fig. F/9. Please state these data when ordering spare parts to avoid wrong deliveries. Wheel drive Only use original AGRIA spare parts! Forward Specifications, figures and dimensions stated in these instructions are not bind- Reverse ing. No claims can be derived from them. -
Page 4: Recommendations
Repair When storing the mower at the end of the season, also drain leaded fuel com- The trained mechanics of your AGRIA pletely or add a fuel stabilizing liquid. workshop carry out expert maintenance For further instructions refer to “Engine and repair. -
Page 5: Designation Of Parts
Designation of Parts Figure A (with planetary mowing drive) Figure B (Handlebars) Edition 02.97 Power Mower 5400... - Page 6 5 Clamping screw for handlebars height-adjustment 6 Gearshifter 1st and 2nd gear 7 Central brake 8 Shifter for mowing drive ON–OFF/EIN–AUS 9 Speed control lever 10 Pawl for F-R change 11 Hand lever for F-R change Power Mower 5400 Edition 02.97...
- Page 7 Edition 02.97 Power Mower 5400...
- Page 8 Power Mower 5400 Edition 02.97...
-
Page 9: Machine With Rocker Arm Mowing Attachment, Steering Handle
Designation of Parts Figure C (with rocker arm mowing drive) Figure B (Handlebars) Edition 02.97 Power Mower 5400... - Page 10 5 Clamping screw for handlebars height-adjustment 6 Gearshifter 1st and 2nd gear 7 Central brake 8 Shifter for mowing drive ON–OFF/EIN–AUS 9 Speed control lever 10 Pawl for F-R change 11 Hand lever for F-R change Power Mower 5400 Edition 02.97...
-
Page 11: Safety Instructions
When transporting the mower on vehi- cles or trailers outside the area to be mowed, ensure that the engine is turned off. Careful with rotating tools – keep at a safe distance! Edition 02.97 Power Mower 5400... - Page 12 Never adjust the operating handles dur- ing work – danger! During operation the operator must keep at a distance as defined by the steering handle, especially when turning the machine. Power Mower 5400 Edition 02.97...
- Page 13 Only mount implements with the engine cutting edges. and PTO switched off. For grinding the mowing knives, always Always use appropriate tools and wear wear safety goggles and gloves. gloves when changing implements and parts thereof. Edition 02.97 Power Mower 5400...
- Page 14 1. Safety Instructions Weights Only use original AGRIA spare parts. All other commercial spare parts must Always fit weights onto appropriate correspond to quality and technical re- weight mounting devices. quirements specified by AGRIA. Snow Clearing Storage Ensure snow dozer is mounted cor- It is not allowed to store the mower in rectly! Wear slip-proof shoes.
- Page 15 Re-tighten attachment bolts of drive- wheels or check tightness when doing maintenance work. Electrical System and Battery Persons having a pacemaker must not touch live parts of ignition system when the engine is running. Edition 02.97 Power Mower 5400...
-
Page 16: Gearbox
2. Specifications Type: ........... 5400 Dimensions [mm] Tyres: ....... 4.00-8 (field tyre) optional ....5.0-10 (field tyre) Tyre air pressure: ....1.5 bar Weight: .... 4-stroke-engine 94 kg 2-stroke-engine 92 kg (without cutter bar) Clutch: ...... Dry bevel clutch Gearbox: ..Mechanical gearbox, F-R... -
Page 17: Specifications
2. Specifications Track Width Plan [mm] Tyres A (twin-wheel) A (strake wheel) 4.00-8 5.0-10 1020 16x6,50-8 Edition 02.97 Power Mower 5400... -
Page 18: Engine, Robin Eh 25
....45° inclination (100%) Noise level: In accordance with German 3rd Ordi- nance on machine-safety law: Noise level at operator’s ear ....84.5 dBA (in accordance with regulations of Ger- man Agricultural Association) Power Mower 5400 Edition 02.97... -
Page 19: Engine, Rotax 232
....45° inclination (100%) Noise level: In accordance with German 3rd Ordi- nance on machine-safety law: Noise level at operator’s ear ...... 87 dBA Sound level ......99 dBA (in accordance with regulations of Ger- man Agricultural Association) Edition 02.97 Power Mower 5400... -
Page 20: Devices And Operating Elements
3. Devices and Operating Elements Cooling System The power mower AGRIA 5400 is suited for common horticultural, agricultural, Cooling system is fan-cooled. Therefore and forestal operations, for grass and keep grille at recoil starter and cooling park maintenance and for winter serv- ribs of cylinder clean and free from ice operation. -
Page 21: Engine-Off-Switch
Otherwise, clutch problems may result due to Stop position: When releasing the corrosion. lever, the ignition system is switched off (engine is off). Beware – engine keeps running due to centrifugal mass. Edition 02.97 Power Mower 5400... -
Page 22: Gearbox
Move shifter forward to engage mowing knife drive. Pull shifter backward to dis- Only actuate F/R change with trans- engage mowing knife drive. mission decoupled and machine at a halt! The machine can be pushed in F/R neutral. Power Mower 5400 Edition 02.97... -
Page 23: Central Brake
Clockwise swivel eccentric lever (B/7) backwards beyond the dead centre. Eccentric lever automatically comes to a stop – both drive-wheels are blocked. To release hand brake, swivel eccentric lever back to original position – brake is released. Edition 02.97 Power Mower 5400... -
Page 24: Planetary Mowing Attachment
6 Mowing knife Wedge washer position for tyres 4.00-8 7 Hex head bolt for attaching Wedge washer position for tyres 5.0-10 knife driver )* only for finger cutter bar 8 Knife driver 9 Swath board)* Power Mower 5400 Edition 02.97... - Page 25 Attach the grass distributor (H/2) to the knife driver. Attach swath boards (if available) onto cutter bar. Attach counternuts until they are even with threaded bolts out- side. Dismounting the cutter bar is in reverse order. Edition 02.97 Power Mower 5400...
-
Page 26: Rocker Arm Mowing Attachment
Finger rotary cut 165 cm ......5547 181 Figure J 1 Knife guard 2 Cutter bar 3 Running base 4 Knife driver 5 Protective hood 6 Mower hood 7 Cutter bar carrier 8 Rocker arm Power Mower 5400 Edition 02.97... - Page 27 (6). The peg at the front end of 8 Square bolt the running base snugs in the recess between the shoe and the back of the cutter bar. For adjustment of the running bases, see instructions on page 30. Edition 02.97 Power Mower 5400...
- Page 28 For cutter bar removal reverse this or- der. As a first step, loosen the clamping screw which holds the link pin so this can move up and down. For cutter bar accessories see page 63. Power Mower 5400 Edition 02.97...
-
Page 29: Attachment
(for instructions see page 52). Tighten the clamping screw (K/5) which holds the link pin (100 Nm). Edition 02.97 Power Mower 5400... -
Page 30: Running Bases, Extra Weights
(item no. 5547 931). In addition, a second pair of extra weights can be attached in place of the running bases. This takes a long hex head bolt M 8 x 45. Power Mower 5400 Edition 02.97... -
Page 31: Strake Wheels, Snow Chains
16 x 6.50 - 8 Terra Grip 6 Tommy screw Usage: Mowing on soft (boggy) ground. Snow Chains When working with snow chains fitted on wheels, observe manufacturer’s in- structions, make sure there is sufficient clearance between chains and machine parts. Edition 02.97 Power Mower 5400... -
Page 32: Twin-Wheels
Rigid position 1 Double-end stud 2 Ball spring ring 3 Hex nut 4 Differential hub 5 Wheel flange 6 Thrust washer 7 Snap ring (Seeger circlip ring) 8 Lubrication nipple Differential position Anti-winding tube Power Mower 5400 Edition 02.97... -
Page 33: Commissioning And Operation
For the first commissioning or after longer periods of no operation, fill fuel tank to maximum to avoid starting prob- lems. Do not cause fuel tank to overflow, but leave a 5 mm margin for the fuel to ex- pand. Edition 02.97 Power Mower 5400... -
Page 34: Before Starting The Engine
Do not touch the ignition cable and stick (A/10). (Check with machine parked do not touch or remove spark plug in horizontal position). Lower notch connector while the engine is running. shows minimum oil quantity, upper notch maximum quantity. Power Mower 5400 Edition 02.97... -
Page 35: Starting 4-Stroke-Engine
After the start, carefully let cord glide back. Do not let snap. Once the engine has started, let it warm up for some time. Slowly push choke back into operating position, if necessary. Edition 02.97 Power Mower 5400... -
Page 36: Starting 2-Stroke-Engine
Once the engine has started, slowly move speed control lever to centre po- sition and let engine warm up for some time. Move Choke slowly back to operat- ing position (if it was actuated). Power Mower 5400 Edition 02.97... -
Page 37: Switching Off The Engine
This ensures that carburetor is empty and no resin residue can deposit. Secure mower against unau- thorized use – disconnect spark-plug connector. Edition 02.97 Power Mower 5400... -
Page 38: Mowing
Pull hand lever for F/R (B/11) up (re- verse is engaged) and hold with right hand. Slowly release clutch hand lever while pressing the throttle. For direction change from reverse to forward proceed likewise, but release hand lever F/R. Power Mower 5400 Edition 02.97... - Page 39 Engage hand brake (if available). pling). Pull clutch hand lever and lock pawl. Move safety switch to operating po- sition. Re-start engine. Mowing on flat areas Mowing on slopes Edition 02.97 Power Mower 5400...
-
Page 40: 5. Maintenance: 4-Stroke-Engine
(do not screw in), take out dip-stick and read oil level. In case oil level is below lower mark, refill engine oil (refer to “Specifications”) until oil level reaches rim of oil filler neck. Power Mower 5400 Edition 02.97... -
Page 41: Air Filter (4-Stroke-Engine Robin)
Do not treat with oil. air circulation. For this purpose, con- Wash foamed preliminary filter in de- tact your professional AGRIA work- tergent and water (do not use petrol), shop. squeeze like a sponge (wrap in a cloth) Exhaust System and dry thoroughly. - Page 42 For this purpose, close fuel tap, remove fuel strainer and remove impurities.Then rinse strainer container in fuel, check fuel strainer and exchange, if damaged. Then screw back on correctly, to avoid fuel leakage. Power Mower 5400 Edition 02.97...
-
Page 43: Stroke-Engine
(For idling speeds refer to “Specifications”). We recommend to have the necessary adjustments done by your AGRIA work- Keep governor spring, speed control le- shop. ver and linkages free from dirt and plant trash at all times. -
Page 44: 2-Stroke-Engine
Otherwise danger of fire. Check exhaust after every 200 oper- ating hours for oil carbon and, if neces- sary, clean or burn out. For this purpose, contact your pro- Oil level fessional AGRIA workshop. Power Mower 5400 Edition 02.97... -
Page 45: Stroke-Engine
(For idling speed rates refer to “Specifications”). 0.5 mm We recommend to have the necessary Fuel System adjustments done by your AGRIA work- shop. Each time you maintain the machine, check fuel hose, fuel tank, and Governor carburetor for leakages. -
Page 46: Machine
50 operating hours and then at intervals of 200 operating hours. En- sure the engine has operating tempera- ture. Inspect all seals and replace them, if necessary. For oil filling quantity and oil quality, see ”Specifications”. Power Mower 5400 Edition 02.97... - Page 47 Loosen hexagonal nuts (2). Adjust stop buffer (1) by turning it to the above stated play. Re-tighten hexagonal nut (lock). 1 Lock nut for stop buffer 2 Stop buffer 3 Adjustment nut for steering handle central mounting Edition 02.97 Power Mower 5400...
-
Page 48: Safety Circuit
Fit retaining spring (2). must automatically come to a stop. Clutch hand lever: Check electric lines and connections x = 3–5 mm (clutch play) for proper condition and exchange, if necessary. For this purpose, contact your AGRIA workshop. Power Mower 5400 Edition 02.97... -
Page 49: Planetary Mowing Drive
0.3 mm. When the play is 0.5 mm, re- AGRIA workshop and to take the cutter place one distance plate. If the problem bar along for maintenance. This ensures... -
Page 50: Rocker Arm Mowing Drive
Bio lubrication pins (underneath the pivot arms). grease Ensure the grease is clean! Remove excess grease but leave a collar on the bearings to protect them from penetration of water and plant sap. Power Mower 5400 Edition 02.97... - Page 51 Check wether it is necessary to ad- well (70 Nm) while you simultaneously just knife guide and adjust it if neces- press the knife holders (h) in the direc- sary. tion indicated by the arrow (f) using a long ring spanner. Edition 02.97 Power Mower 5400...
- Page 52 1/3 of the knife hold- the cutter bar was assembled. er’s front end. Finger Cutter Bar 1 Mowing knife 2 Guide bar 3 Knife holder 4 Friction plate 5 Distance plate 6 Set screw 7 Set screw Power Mower 5400 Edition 02.97...
-
Page 53: Municipal Cutter Bar
1 Cutter bar blade Pressure 2 Pin rest 3 Pin sleeve Spring balance 4 Driver pin 5 Cutter bar back 7 Attachment bolt 8 Set screw 9 Bearing part 10 Clamping sleeve 11 Lubrication nipple Edition 02.97 Power Mower 5400... -
Page 54: Re-Grinding Mowing Knives
15,000 to 20,000 rpm with a pot-shaped grinding pin of 25 mm in diameter and approx. 35 mm in length or a special grinding tool. Bottom knife Top knife ESM universal- municipal-cutter bar Correct Grinding Wrong Grinding Power Mower 5400 Edition 02.97... -
Page 55: General Maintenance, Cleaning
Apply grease generously to leave a grease neck around bearing to prevent water, plant sap and dirt from penetrating. Edition 02.97 Power Mower 5400... -
Page 56: Storage
Engine preservation Drain fuel completely or add stabi- lizer (AGRIA No. 673 50). Method: Fill fuel tank, add anti-corro- sive and stabilizing liquid (amount “ON” stabilizes 4l of fuel). Let engine run for approx. 1 minute. (Observe enclosed instructions). -
Page 57: Cutter Bars
009 16 Sealing washer, 16 x 22 x 1.5 (Transmission housing drain screw/oil dip-stick) 604 79 Spring balance Lists of Spare Parts 997 022 Power Mower 5400 997 077 Robin engines 997 142 Rotax engines 997 062 Cutter bars Edition 02.97... -
Page 58: Electric Circuit Diagram
2 Magnet ignition system 3 Engine-off-switch 4 Switch in clutch lever 5 Switch in safety lever bl = blue br = brown rt = red Lubrication Plan with planetary mowing drive with rocker arm mowing drive Power Mower 5400 Edition 02.97... -
Page 59: Accessories For Cutter Bar
5547 951 height-adjustable, rigid, ecological, ecological cutting height cutting height 3–12 cm approx. 9 cm Pair of extra weights Pair of running bases 5547 931 713 22 adjustable, cutting height up to approx. 5 cm Edition 02.97 Power Mower 5400... -
Page 60: Robin Engine Eh 25
4 Engine oil filler plug with dip-stick 5 Engine type and number 6 Engine drain plug 7 Engine protection base 8 Cooling-air grille 9 Recoil starter 10 Starter handle 11 Spark plug and spark plug connector Power Mower 5400 Edition 02.97... - Page 61 Edition 02.97 Power Mower 5400...
-
Page 62: Troubleshooting
6. Troubleshooting Observe safety instructions! Have all serious malfunctions on the machine or engine repaired by your AGRIA workshop. They have the proper tools. Improper repairs can only add to the damage. Problem Possible cause Remedy Page Engine - Spark plug connector not connected... -
Page 63: Troubleshooting
- Bent blades or knives, Check whether knives are straight, not on top twisted knife back re-align, if necessary, of each other until blades align as well. = For this purpose contact your AGRIA workshop. Edition 02.97 Power Mower 5400... -
Page 64: Rotax Engine 232
9 Engine type plate 10 Oil bath air filter Figure G 12 Fuel tank cap 13 Fuel tank 14 Fuel taps (2) 15 Starter handle 16 Exhaust with exhaust guard 17 Recoil starter 18 Cooling-air grille Power Mower 5400 Edition 02.97... - Page 65 Edition 02.97 Power Mower 5400...
-
Page 66: Inspection And Maintenance Chart
= only for 2-stroke-engine W = Maintenance to be executed by professional workshop S = location in lubrication plan F = Maintenance should be carried out by your AGRIA A = Each time before you take up operation workshop B = After each cleaning... -
Page 67: Conformity Declaration
EC directive AGRIA-Werke, GmbH D-74215 Möckmühl/Württ. herewith declare in sole responsibility that the product Power Mower, Type 5400 to which this declaration refers, corresponds to the standard fundamental safety and health requirements as stipulated in EC directive 89/392/EEC and EMC directive 89/336/EEC. - Page 68 Two-wheel tractors power hoes Lawn mowers Verticutters All-purpose machines ® AGRIA -- a tradition of quality Contact your authorised AGRIA dealer for service and prompt delivery of spare parts AGRIA-Werke GmbH, D-74215 Möckmühl, Phone 0049 62 98/39-0, Fax 0049 62 98/39-111...
Need help?
Do you have a question about the 5400 and is the answer not in the manual?
Questions and answers