GREAT PLANES J-3 Cub Instruction Manual
Electrifly series
Hide thumbs
Also See for J-3 Cub:
- Instruction manual (48 pages) ,
- Instruction manual (6 pages) ,
- Instruction manual (24 pages)
Table of Contents
Advertisement
Quick Links
Download this manual
See also:
Instruction Manual
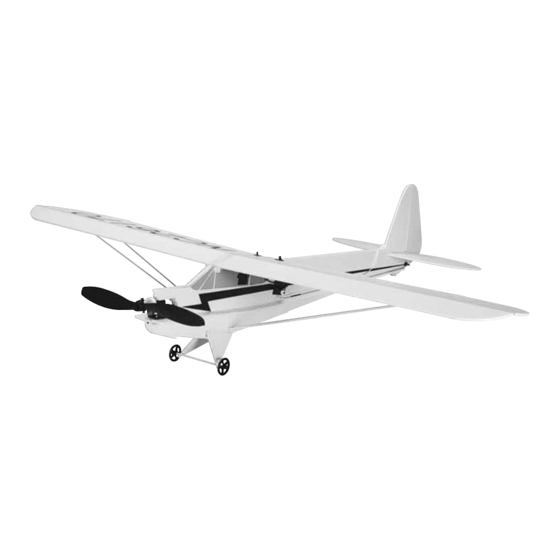
Wingspan: 35.75 in [908mm]
Wing Area: 245 sq in [15.8dm
Weight: 10 oz [280g]
Wing Loading: 5.9 oz/sq ft [18g/dm
Length: 33 in [840mm]
Radio: 4-channel minimum, 3 micro servos, 7A ESC and micro receiver
Great Planes
®
Model Manufacturing Co. guarantees this kit to be free from defects in both material and workmanship at the date of
purchase. This warranty does not cover any component parts damaged by use or modification. In no case shall Great Planes' liability
exceed the original cost of the purchased kit. Further, Great Planes reserves the right to change or modify this warranty without notice.
In that Great Planes has no control over the final assembly or material used for final assembly, no liability shall be assumed nor
accepted for any damage resulting from the use by the user of the final user-assembled product. By the act of using the user-assembled
product, the user accepts all resulting liability.
If the buyer is not prepared to accept the liability associated with the use of this product, the buyer is advised to return this
kit immediately in new and unused condition to the place of purchase.
To make a warranty claim send the defective part or item to Hobby Services at the address below:
Include a letter stating your name, return shipping address, as much contact information as possible (daytime telephone number, fax
number, e-mail address), a detailed description of the problem and a photocopy of the purchase receipt. Upon receipt of the package
the problem will be evaluated as quickly as possible.
READ THROUGH THIS MANUAL BEFORE STARTING
CONSTRUCTION. IT CONTAINS IMPORTANT INSTRUCTIONS
AND WARNINGS CONCERNING THE ASSEMBLY AND
USE OF THIS MODEL.
Entire Contents © Copyright 2006
INSTRUCTION MANUAL
]
2
2
]
WARRANTY
Hobby Services
3002 N. Apollo Dr., Suite 1
Champaign, IL 61822 USA
Champaign, Illinois
(217) 398-8970, Ext 5
airsupport@greatplanes.com
GPMZ1102 for GPMA1120 V1.0
Advertisement
Table of Contents

Related Manuals for GREAT PLANES J-3 Cub


Summary of Contents for GREAT PLANES J-3 Cub
-
Page 1: Instruction Manual
Further, Great Planes reserves the right to change or modify this warranty without notice. In that Great Planes has no control over the final assembly or material used for final assembly, no liability shall be assumed nor accepted for any damage resulting from the use by the user of the final user-assembled product. -
Page 2: Table Of Contents
The FlatOuts J-3 Cub can comfortably fly in a large gymnasium at slow speeds, or fly 2. -
Page 3: Lithium Battery Handling & Usage
If you already have a transmitter you are going to use membership includes experienced pilots. to fly the FlatOuts J-3 Cub, you can get the receiver and servos separately: We, as the kit manufacturer, provide you with a top quality, •... -
Page 4: Electronic Speed Control (Esc)
An Electronic Speed Control (ESC) with Battery Eliminator Circuitry (BEC) is required. The BEC allows both the motor Replacement parts for the Great Planes FlatOuts J-3 Cub are and the radio system to be powered by the same battery available using the order numbers in the Replacement Parts (thus eliminating the on-board receiver battery). -
Page 5: Kit Inspection
If any parts are missing or are not of acceptable quality, or if you need assistance with assembly, contact Product Support. When reporting defective or missing parts, use the part names exactly as they are written in the Kit Contents list. Great Planes Product Support: 3002 N Apollo Drive, Suite 1 Champaign, IL 61822 Telephone: (217) 398-8970, ext. -
Page 6: Assemble The Airplane
ASSEMBLE THE AIRPLANE IMPORTANT NOTE: As stated in the Additional Items Required section you must use a Foam Safe CA glue in the assembly process. Do not attempt to assemble this plane with standard CA. It will melt the foam! ❏... -
Page 7: Assemble The Aileron Pushrods
along the edge of the wing. Press the two halves of the wing together until the glue has hardened. Fill any gaps in the wing joint with thick foam safe CA and harden it with CA accelerator. ❏ 3. Measure outward 1/2" [13mm] on either side of the wing joint. -
Page 8: Install The Wing Struts
holes in the control horns. Slide a piece of 1" [25mm] heat- front of the rib. Measure back 2-1/8" [54mm] from that mark shrink tubing onto one of the pushrods for each wing panel. and make another mark. Hand drill a 1/8" [3mm] hole on each of the marks using the same technique used for the other holes. -
Page 9: Install The Horizontal Stabilizer & Rudder
Install the Horizontal Stabilizer & Rudder ❏ 3. Glue the vertical stabilizer/rudder into the slot in the fuselage and the top of the horizontal stabilizer. Hold it in place until the glue hardens. ❏ 1. Draw a line on the center of the top and bottom of the Install the Tail Servos &... -
Page 10: Install The Electronics & Propeller
❏ 2. Tape the receiver antenna to the bottom of the fuselage ❏ 4. Hook the remaining two 2-1/4" [57mm] pushrods into longeron as shown. Be sure that none of the antenna is the outer hole of the elevator and rudder control horns. exposed on the underside of the airplane, as it could Connect the 16-1/4"... -
Page 11: Assemble The Landing Gear
GET THE MODEL READY TO FLY Check the Control Directions ❏ 1. Turn on the transmitter and receiver and center the trims. ❏ ❏ 7. Loop the prop saver O-ring around one of the screws 2. With the transmitter and receiver still on, check all the and over the prop hub. -
Page 12: Balance The Model (C.g.)
If, after you have add any weight to achieve the suggested balance point. become accustomed to the way the FlatOuts J-3 Cub flies, Instead, shift the battery pack forward or aft to alter the C.G. -
Page 13: Ama Safety Code (Excerpts)
2) I will not fly my model aircraft in the presence of spectators until I become a qualified flier, unless assisted by The FlatOuts J-3 Cub is a good flying indoor model. an experienced helper. However, it is not a trainer. Flying the airplane requires the use of the ailerons, elevator and rudder. -
Page 14: Flight
You can achieve high alpha flight more easily flying at an aft C.G. When flying the FlatOuts J-3 Cub you will find that you will use the rudder for most all of the turning of the airplane. The ailerons will be used primarily to level the wings. - Page 15 Futaba ® 4YF SkySport FM Radio With its two 0.27 oz [7.7g] S3110 micro servos, the 4YF FM is an ideal system for the FlatOuts J-3 Cub. In addition to servo reversing and trims, the 4YF also includes an R114F...
- Page 16 BUILDING NOTES Kit Purchased Date: _______________________ Date Construction Finished: _________________ Where Purchased:_________________________ Finished Weight: __________________________ Date Construction Started: __________________ Date of First Flight: ________________________ FLIGHT LOG...
Need help?
Do you have a question about the J-3 Cub and is the answer not in the manual?
Questions and answers