Table of Contents
Advertisement
Quick Links
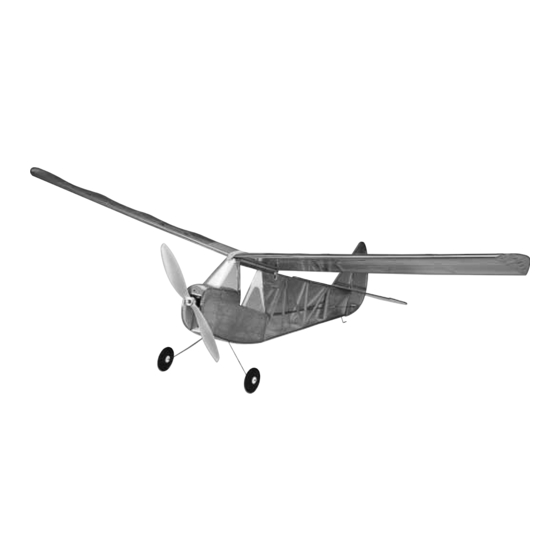
Wingspan: 47 in [1195mm]
Wing Area: 264 sq in [17 dm²]
Weight: .75 lbs [340 g]
Wing Loading: 7 oz/sq ft [22 g/dm²]
Length: 26 in [660mm]
Great Planes
®
Model Manufacturing Co. guarantees this kit to be free from defects in both material and workmanship at the date of
purchase. This warranty does not cover any component parts damaged by use or modification. In no case shall Great Planes' liability
exceed the original cost of the purchased kit. Further, Great Planes reserves the right to change or modify this warranty without notice.
In that Great Planes has no control over the final assembly or material used for final assembly, no liability shall be assumed nor
accepted for any damage resulting from the use by the user of the final user-assembled product. By the act of using the user-assembled
product, the user accepts all resulting liability.
If the buyer is not prepared to accept the liability associated with the use of this product, the buyer is advised to return this
kit immediately in new and unused condition to the place of purchase.
READ THROUGH THIS MANUAL BEFORE
STARTING CONSTRUCTION. IT CONTAINS
IMPORTANT WARNINGS AND INSTRUCTIONS
CONCERNING THE ASSEMBLY AND USE OF
THIS MODEL.
© Copyright 2003, Printed in Thailand
INSTRUCTION MANUAL
Radio: 3-channel with 8-cell 2/3AA NiCD airborne pack, 2 micro servos
Motor: 280 with Gear Drive and Electronic Speed Control (ESC)
CG: 1-3/4" [45mm] back from leading edge with a range of
Throws: Elevator
WARRANTY
1-1/2" [38mm] to 2" [51mm]
1/2" up
1/2" down
Rudder
1" up
1" down
Champaign, Illinois
(217) 398-8970, Ext 5
airsupport@greatplanes.com
GPMZ0218 for GPMA1101 V1.0
Advertisement
Table of Contents

Subscribe to Our Youtube Channel
Related Manuals for GREAT PLANES HeadWind "B"


Summary of Contents for GREAT PLANES HeadWind "B"
-
Page 1: Instruction Manual
Further, Great Planes reserves the right to change or modify this warranty without notice. In that Great Planes has no control over the final assembly or material used for final assembly, no liability shall be assumed nor accepted for any damage resulting from the use by the user of the final user-assembled product. -
Page 2: Table Of Contents
Headwind B, visit the web site listed below and select whose membership includes experienced pilots. the Great Planes Headwind B. If there is new technical information or changes to this kit, a “tech notice” box will In addition to joining an R/C club, we strongly recommend you appear in the upper left corner of the page. -
Page 3: Additional Items Required
NiCds and transmitter battery packs. The Headwind B is designed to use the Great Planes ElectriFly T-280GD ESC motor system and gear drive for If you have another type of charger that is not a peak charger, electric flight (GPMG0430). -
Page 4: Adhesives And Building Supplies
“short list” of the most important items required to build the Headwind B. Great Planes Pro™ CA and Epoxy glue are • Whenever the term glue is written you should rely upon recommended. -
Page 5: Kit Inspection
ORDERING REPLACEMENT PARTS To order replacement parts for the Great Planes Headwind B, use the order numbers in the Replacement Parts List that follows. Replacement parts are available only as listed. Not all parts are available separately (an aileron cannot be purchased separately, but is only available with the wing kit). -
Page 6: Building Instructions
BUILDING INSTRUCTIONS Assemble the Wing Note: Accurate assembly of the wing is critical. In addition to your first cursory reading, please read all steps in this section carefully prior to beginning wing assembly. 5. Glue the plastic TE support centered on the wing. Assemble the Tail 1. - Page 7 4. Remove the covering from the control horn slot on the 7. Glue the elevator control horn in place with medium left side of the rudder. CA. Note: The removed piece can be shaped and glued to the other side of the control horn for appearance if you desire, but it is not necessary.
- Page 8 10. Using a felt-tip pen, mark the covering on the bottom 13. Center the fin on the stab and align it with the center of the stab where it contacts the fuse. Also mark the top of of the fuse. Mark the stab on both sides of the base of the the fuse along the LE of the stab.
-
Page 9: Install The Canopy And Main Gear
Install the Canopy and Main Gear 4. Remove the covering from the landing gear slot in the bottom of the fuse. 1. Remove the tape holding the canopy to the fuse. 5. Fit the landing gear in the fuse. Lock the gear in place Cutting small amounts at a time with sharp scissors, fit the by gluing the 1/16"... -
Page 10: Install The Motor
Note: The Headwind B is easily fitted with a variety of powerplants. We tested the model most extensively with the Great Planes T280GD ESC system with the 4.1:1 gear ratio, and these instructions are written to install that power system. We found that the GWS IPS IPS-DX2BB motor system was also a good choice, and a motor mount for the GWS system is included. -
Page 11: Complete Final Radio Installation
Adjust if necessary. Set the Control Throws The battery and receiver mounting are used to adjust the center of gravity (CG). We recommend using the Great Planes Use a Great Planes AccuThrow ™ (or a ruler) to accurately Sanyo ®... -
Page 12: Balance The Model (C.g)
(ready to fly), place the model right-side- radio control system to charge the batteries.You should always up on a Great Planes CG Machine, or lift it right-side-up at charge your transmitter batteries the night before you go flying, and at other times as recommended by the radio manufacturer. -
Page 13: Balance Propellers
We use a Top Flite Precision Magnetic Prop Balancer ™ around your electric motor. (TOPQ5700) in the workshop and keep a Great Planes Fingertip Prop Balancer (GPMQ5000) in our flight box. • Make all motor adjustments from behind the rotating propeller. -
Page 14: Checklist
2. I will not fly my model aircraft higher than approximately CHECKLIST 400 feet within 3 miles of an airport without notifying the airport operator. I will give right of way to, and avoid flying in the proximity of full scale aircraft. Where necessary an During the last few moments of preparation your mind observer shall be used to supervise flying to avoid having may be elsewhere anticipating the excitement of the first... -
Page 15: Takeoff
to see how she climbs as well. Continue to fly around, CAUTION (THIS APPLIES TO ALL R/C AIRPLANES): If, executing various maneuvers and making mental notes (or while flying, you notice any unusual sounds, such as a having your assistant write them down) of what trim or C.G. low-pitched “buzz,”... - Page 16 ACCESSORIES AVAILABLE FROM GREAT PLANES Great Planes ® ElectriFly ™ Mini FM Receivers Futaba ® Receiver: R114F 3FR FM Radio Servos: S3106 (2) Tx NiCd: 600mAh Single-stick simplicity, Rx NiCd: 250mAh GPML0044 Low Band Band: 72MHz FM clarity and NiCd...
Need help?
Do you have a question about the HeadWind "B" and is the answer not in the manual?
Questions and answers