
Related Manuals for Trojan ENDURO 330


Summary of Contents for Trojan ENDURO 330
- Page 1 ENDURO 330 STATIONARY CYCLE STATIONARY CYCLE CARE, INSTRUCTION AND ASSEMBLY MANUAL 10268 - 1...
-
Page 2: Table Of Contents
SAFETY INSTRUCTIONS PRE-ASSEMBLY CHECKLIST HARDWARE LIST ASSEMBLY STEPS COMPUTER FUNCTIONS FITNESS TIPS AND TECHNIQUES CONDITIONING GUIDELINES WARM -UP AND COOL-DOWN FREQUENTLY ASKED QUESTIONS PARTS LIST EXPLODED DRAWING TROJAN 1 YEAR LIMITED WARRANTY TROJAN REPAIRS PROCEDURE 10268 - 2... -
Page 3: Safety Instructions
1. SAFETY INSTRUCTIONS It is the sole responsibility of the purchaser of TROJAN products to read the owner’s manual, warning labels and instruct all individuals, on proper usage of the equipment. Understanding each and every warning to the fullest is important. If any of these instructions or warnings are unclear please contact Trojan Customer Services on 0861 876 526 (0861 Trojan), within the Republic of South Africa. - Page 4 Please contact our service department on 0861 876526 (0861 Trojan) to arrange a repair. OPERATING WARNINGS • It is the purchaser’s responsibility to instruct all users as to the proper operating procedures of all TROJAN equipment. • K eep children away from all moving parts. Parents must provide close supervision of children if the equipment is used in the presence of children.
-
Page 5: Pre-Assembly Checklist
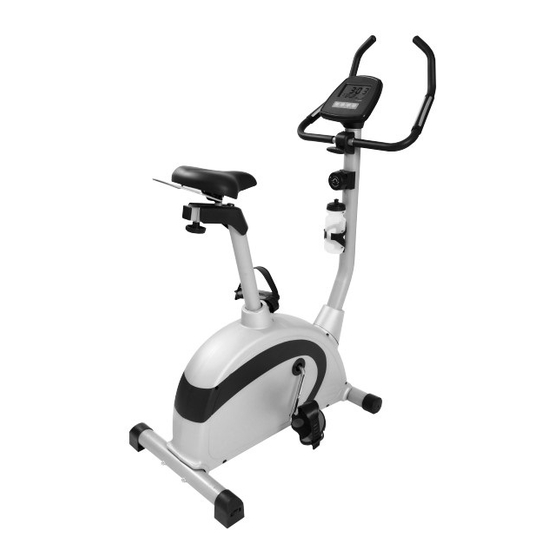
Before reading further, please familiarise yourself with the parts that are labelled. Read this manual carefully before using the TROJAN ENDURO 330. Consol Hand Pulse... -
Page 6: Hardware List
3. HARDWARE LIST 10268 - 6... - Page 7 3. HARDWARE LIST 10268 - 7...
-
Page 8: Assembly Steps
4. ASSEMBLY STEPS Instructions for assembly • Unpack the carton and place all parts on the floor carefully. • Remove the packing material and check all parts are accounted for. • Tools are provided for use in assembly. STEP 1: FRONT STABILISER ASSEMBLY • Attach the Front Stabiliser (06) to the front of the Main Frame (01) and secure with two Allen Screws (19), two Spring Washers (35) and two Curved Washers (34). • Attach the Rear Stabiliser (07) to the rear of the Main Frame (01) and secure with two Allen Screws (19), two Spring Washers (35) and two Curved Washers (34). STEP 2: PEDAL ASSEMBLY •... - Page 9 4. ASSEMBLY STEPS (CONT.) STEP 3: FRON T POST ASSEMBLY CAUTION: Ensure that cables are not damaged during assembly or when tightening bolts. • Remove the four Allen Bolts (20) and four Curved Washers (34) from the Main Frame. • Slide the Front Post (02) through the Front Cover (52) and connect the Middle Computer Wire (67) from the Front Post (02) to the Lower Computer Wire (68).
-
Page 10: Seat Post Assembly
4. ASSEMBLY STEPS (CONT.) STEP 5: COMPUTER ASSEMBLY CAUTION: Ensure that cables are not damaged during assembly or when tightening bolts. • Connect the Middle Computer Wire (67) to the Upper Computer Wire on the Computer (62). • Connect the Hand Pulse Wire (69) to the Upper Pulse Wire on the Computer (62). •... -
Page 11: Computer Functions
5. COMPUTER FUNCTIONS COMPUTER INSTRUCTIONS FUNCTION BUTTONS 1. Insert 2 AA 1.5V batteries into the rear of the consol. A buzzer will sound and the LCD displays all functions for about 2 seconds. After powering up, the upper (big) window displays TEMPERATURE and the lower (small) window displays the calendar. • The first data flashed is HOUR, press SET to increase from 00 to 23; then press MODE to set minutes. • Press SET to increase from 00 to 59; then press MODE to set year. •... - Page 12 5. COMPUTER FUNCTIONS (CONT.) 9. PULSE: Sensors measure your pulse every minute through the hand-held pulse sensor. When a pulse signal is received, the consol displays your current pulse rate after 1 – 2 seconds. The PULSE symbol flashes when receiving a pulse signal. If no signal is detected, it displays 0. Setting scope: 0-72-240 beats / minute. The first time you press SET key: it shows 72, each time you press the SET key thereafter, the PULSE increases by 1.
-
Page 13: Fitness Tips And Techniques
Tricep Biceps Latissimus Dorsi Abdominal Gluteals Sartorius Quadriceps Hamstrings Tibialis Gastrocnemius Trojan and the Heart and Stroke Foundation have joined forces to KEEP SOUTH AFRICA MOVING. The Heart and Stroke Foundation South Africa encourages all South Africans to make heart-healthy choices that include daily physical activity, exercise and a balanced diet. Use Trojan, SA’s No. 1 selling Home Fitness brand to gives you the ability to boost your fitness level and lower your risk of cardiovascular disease. Visit www.trojanhealth.co.za for equipment choices and exercise programs, and www.heartfoundation.co.za for information on how to adopt a healthy lifestyle. 10268 - 13... -
Page 14: Conditioning Guidelines
7. CONDITIONING GUIDELINES How you begin your exercise program depends on your physical condition. If you have been inactive or are severely overweight, you must start slowly and increase your time on the equipment; a few minutes per workout. Initially, you may be able to exercise only for a few minutes in your target zone, however, your aerobic fitness will improve over the next six to eight weeks. Don’t be discouraged if it takes longer. It’s important to work at your own pace. Ultimately, you’ll be able to exercise continuously for 30 minutes. The better your aerobic fitness, the harder you will have to work to stay in your target zone. Please remember these essentials : • Have your doctor review your training and diet programs to advise you of a workout routine you should adopt. • Begin your training program slowly with realistic goals that have been set by you and your doctor. • Monitor your pulse frequently. Establish your target heart rate based on your age and condition. EXERCISE INTENSITY To maximize the benefits of exercising, it is important to exercise with the proper intensity. -
Page 15: Warm-Up And Cool-Down
8. WARM-UP AND COOL-DOWN WORKOUT GUIDELINES Each workout should include the following three parts: • A warm-up, consisting of 5 to 10 minutes of stretching and light exercise. A proper warm-up increases your body temperature, heart rate, and circulation in preparation for exercise. • Training zone exercise, consisting of 20 to 30 minutes of exercising with your heart rate in your training zone. (Note: During the first few weeks of your exercise program, do not keep your heart rate in your training zone for longer than 20 minutes). • A cool-down, with 5 to 10 minutes of stretching. This will increase the flexibility of your muscles and will help to prevent post-exercise problems. EXERCISE FREQUENCY To maintain or improve your condition, plan three workouts each week, with at least one day of rest between workouts. After a few months of regular exercise, you may complete up to five workouts each week, if desired. -
Page 16: Frequently Asked Questions
9. FREQUENTLY ASKED QUESTIONS – ENDURO 330 1. The consol is showing the incorrect readings. • Check that the connector on the back of the consol is plugged in correctly. • Check your batteries and replace if necessary. 2. The functions are not working properly or display incorrectly. • Check that the connector on the back of the consol is plugged in correctly. • Press the reset button to test if the error has corrected itself. • Check your batteries and replace if necessary. 3. There is no pulse reading or the data displayed is unstable. -
Page 17: Parts List
10. PARTS LIST Part No. Description Part No. Description Main Frame Nut M10 Front Post Nails M5 8 x 13.5 Handlebar Hex Head Nut M5 Seat Post End Cap for Handlebar Sliding Tube Square End Cap Front Stabiliser Seat Bushing Rear Stabiliser Left Pedal U Type Bracket Right Pedal Crank With Pulley T - Type Knob... -
Page 18: Exploded Drawing
11. EXPLODED DRAWING MANY OF THE PARTS SHOWN HERE HAVE BEEN PRE-ASSEMBLED AT THE FACTORY. 10268 - 18... -
Page 19: Trojan 1 Year Limited Warranty
Any claim in terms of the warranty must be supported by a proof of purchase or a warranty number. Warranty numbers can be issued through contacting our call centre on 0861 876526 (0861 Trojan), or online at www.trojanhealth.co.za. If such proof is not available, then notwithstanding anything to the contrary herein, the service agent’s prevailing charges for services/repairs including call-out and/or spares will be payable by the consumer upon collection or delivery of the repaired product. -
Page 20: Trojan Repairs Procedure
Should you experience any faults or breakdowns on your Trojan equipment, please adhere to the following procedure to have the fault rectified speedily and professionally. • Do not return the product to the store*. • Call 0861 Trojan (0861 876526) to log the faulty product (under warranty or out of warranty). • The operator or technical advisor will try identify the fault, and will book a service team call out. • The service team will endeavour to fix the problem in your home on an agreed date and time. • O nly if the fault cannot be repaired in the convenience of your home, will the service team take the faulty product back to the service centre.
Need help?
Do you have a question about the ENDURO 330 and is the answer not in the manual?
Questions and answers