Table of Contents
Advertisement
Quick Links
Advertisement
Chapters
Table of Contents

Related Manuals for RCA RMW1636SS


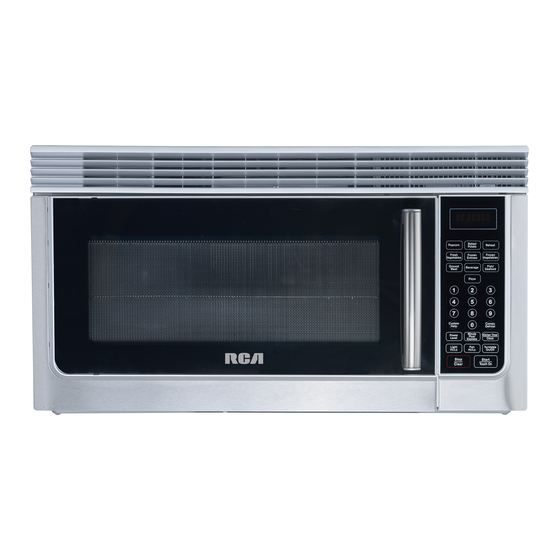
Summary of Contents for RCA RMW1636SS
- Page 1 OWNER’S MANUAL Microwave Oven RMW1636SS 1. Read these instructions carefully before installing and operating the oven. Keep them for further reference. 2. Record in the space below the “SERIAL NO.” found on the nameplate on your oven and retain this information for future reference.
-
Page 2: Table Of Contents
PRECAUTIONS TO AVOID POSSIBLE EXPOSURE TO EXCESSIVE MICROWAVE ENERGY (a) Do not attempt to operate this oven with the door open since open-door operation can result in harmful exposure to microwave energy. It is important not to defeat or tamper with the safety interlocks. -
Page 3: Important Safety Instructions
IMPORTANT SAFETY INSTRUCTIONS When using electrical appliances, basic safety Do not leave paper products, cooking precautions should be followed, including the utensils or food in the cavity when not in following: use. WARNING - To reduce the risk of burns, Liquids, such as water, coffee, or tea are electric shock, fire, injury to persons or able to be overheated beyond the boiling... - Page 4 Do not operate this appliance if it has a appliance beneath this appliance. damaged cord or a plug, if it is not working Be certain the glass tray and roller rings properly or if it has been damaged or are in place when you operate the oven. dropped.
-
Page 5: Unpacking Instructions
ELECTRICAL REQUIREMENTS qualified electrician or service person. The electrical requirements are a 120 volt Neither RCA nor the dealer can accept any only, amp. liability for damage to the oven or personal recommended that a separate circuit injury resulting from failure to observe the serving only the oven be provided. -
Page 6: Information You Need To Know
INFORMATION YOU NEED TO KNOW ABOUT YOUR OVEN microwave floor. This could damage the microwave. NEVER use the oven without the turntable ·Use pot holders when handling the shelf-it and support nor turn the turntable over so may be hot. that a large dish could be placed in the ·Do not use the shelf when cooking popcorn. -
Page 7: About Food
ABOUT FOOD FOOD DON’T · Puncture egg yolks before cooking to ·Cook egg in shells. Eggs, ·Reheat whole eggs. sausages, prevent “explosion”. · Pierce skins of potatoes, apples, squash, hot fruits & vegetable dogs and sausages so that steam escapes. ·... -
Page 8: About Sensor Cooking
ABOUT SENSOR COOKING · The proper containers and covers are essential for best sensor cooking. · Always use microwave-safe containers and cover them with lids or vented plastic wrap. Never use tight sealing plastic containers — they can prevent steam from escaping and cause food to overcook. -
Page 9: About Children And The Microwave
The following coverings are ideal: safe temperatures. RCA is not responsible for ·Paper towels are good for covering foods for reheating and absorbing fat while cooking any damage to the oven when accessories are used. -
Page 10: Specifications
SPECIFICATIONS Power Supply 120V AC 60Hz Single phase Power Consumption 1550W Microwave Output Power 1000W Frequency 2450MHz Outside Dimensions ”(H)×29 ”(W)×17 ”(D) Cavity Dimensions ”(H)×21 ”(W)×14 ”(D) Oven Capacity 1.6 Cu.Ft. Cooking Uniformity Turntable /Stirrer Fan System Weight Approx. (net) 60.0lb / (gross) 68.8lb FEATURES DIAGRAM 1. -
Page 11: Control Panel Features
CONTROL PANEL FEATURES DISPLAY SCREEN Cooking time, Lock indicator, timer, defrost sign and help information are displayed. CUSTOM HELP Information is available to help the user with cooking. COMPU DEFROST Easy settings to defrost according to weight entered. POWRE LEVEL Use to set cooking power level. -
Page 12: Basic Controls
BASIC CONTROLS Before operating your new microwave oven, 60%(P-60) Medium please read and understand this operation 40%(P-40) Medium Low manual completely. Low/Defrost 20%(P-20) 0% (P -00) Zero SIGNALS DURING OVEN SETTINGS ONE SIGNAL: Oven accepts the entry. Suppose you want to cook for 5 minutes at TWO SIGNALS: Oven does not accept the 80% power. -
Page 13: Turntable On/Off
STOP/CLEAR Touch the STOP/CLEAR pad to: TURNTABLE ON/OFF Clear previous setting. Cancel Timer. For most cooking, the turntable should be Stop the oven temporarily during on; however the turntable can be turned off cooking. so that it does not rotate for extra large Set CHILD LOCK dishes, such as the 13×9×2 glass utility Cancel a program during cooking,... -
Page 14: Compu Defrost
COMPU DEFROST Compu Defrost automatically defrosts foods Touch START/TOUCH ON pad. from the following chart. Press COMPU Enter weight by touching the number pad 5. DEFROST, display shows COMPU Touch START/TOUCH ON pad. DEFROST SELECT FOOD NUMBER SEE LABLE CODE 1-6, then enter number 1~6 to Suppose you want to defrost Soup. -
Page 15: Manual Defrost
MANUAL DEFROST If the food that you want to defrost is not listed separate the portions that are defrosted. If food on the COMPU DEFROST CHART or the food is not defrosted at the end of the estimated weight exceed maximum weight defrosting time, program the oven in 1-minute... -
Page 16: Custom Help
CUSTOM HELP CUSTOM HELP provides hints for 3 features which make it easy to use the oven because specific instructions are provided in the Interactive Display. 1. WEIGHT HINT Press CUSTOM HELP once, the screen will show you the weight range of compu defrost. 2. - Page 17 catch fire. REMOVE cloves in a 2-cup glass measuring cup. Boil for WAVEGUIDE COVER. several minutes using 100% power. Allow to Odor Removal set in oven until cool. Wipe interior with a soft cloth. Occasionally, a cooking odor may remain in the Turntable/Turntable Support oven.
- Page 18 Oven Light Remove the louver per instructions 1~3 above and charcoal filter, if used. 1. Open light cover located behind filter mounting by carefully pulling up on the front edge. 2. DO NOT USE A BULB LARGER THAN 30 WATTS. 3.
- Page 19 Microwave Oven RMW1636SS Installation Intructions 1. Read these instructions carefully before installing and operating the oven. Keep them for further reference. 2. Record in the space below the “SERIAL NO.” found on the nameplate on your oven and retain this information for future reference.
- Page 20 Installation Instructions CONTENTS General information Recirculating ........... 20–22 Attach Mounting Plate to Wall ....20 Important Safety Instructions .....3 Preparation of Top Cabinet ..... 20 Electrical Requirements ......3 Mount the Microwave Oven....21, 22 Hood Exhaust ...........4, 5 Installing the Charcoal Filter ....22 Damage –...
-
Page 21: Important Safety Instructions
Installation Instructions IMPORTANT SAFETY INSTRUCTIONS This product requires a three-prong grounded outlet. You should have the wall receptacle and circuit The installer must perform a ground continuity check checked by a qualified electrician to make sure on the power outlet box before beginning the the receptacle is properly grounded. -
Page 22: Hood Exhaust
Installation Instructions HOOD EXHAUST NOTE: Read these next two pages only if you plan to vent your exhaust to the outside. If you plan to recirculate the air back into the room, proceed to page 6. OUTSIDE TOP EXHAUST (EXAMPLE ONLY) The following chart describes an example of one possible ductwork installation. - Page 23 Installation Instructions Maximum duct length: NOTE: If you need to install ducts, note that the total duct length of 3¼" x 10" rectangular or 6" diameter For satisfactory air movement, the total duct length of round duct should not exceed 140 equivalent feet. 3¼"...
- Page 24 Installation Instructions DAMAGE – SHIPMENT/ PARTS INCLUDED INSTALLATION HARDWARE PACKET • If the unit is damaged in shipment, return the unit to the store in which it was bought for repair or replacement. Wood Screws • If the unit is damaged by the customer, repair (¼"...
-
Page 25: Tools You Will Need
Installation Instructions TOOLS YOU WILL NEED Ruler or tape measure and straight edge Carpenter square (optional) Pencil # 1 and #2 Phillips screwdriver Tin snips (for cutting Scissors Electric drill with ", ½" damper, if required) Filler blocks or scrap wood (to cut template, if necessary) "... -
Page 26: Placement Of The Mounting Plate
Installation Instructions 1. PLACEMENT OF THE MOUNTING PLATE REMOVING THE MICROWAVE FINDING THE WALL STUDS OVEN FROM THE CARTON/ ASSEMBLE THE MOUNTING PLATE Remove the installation instructions, filters, glass tray and the small hardware bag. Do not remove Wall Studs the Styrofoam protecting the front of the oven. - Page 27 Installation Instructions DETERMINING WALL PLATE LOCATION UNDER YOUR CABINET Plate position – beneath framed recessed Plate position – beneath flat bottom cabinet cabinet bottom Mounting Plate Tabs Touching the Cabinet Bottom Mounting Plate Tabs Touching the Back Frame 30" to Cooktop Your cabinets may have decorative trim that Plate position –...
-
Page 28: Aligning The Wall Plate
Installation Instructions ALIGNING THE WALL PLATE Draw a Vertical Line on Wall from Center of Hole A Centerline Top Cabinet notches Area E Hole C Hole B CAUTION: Wear gloves to avoid cutting fingers on sharp edges. NOTE: Holes A,B and C are inside area E. If none of Draw a vertical line on the wall at the center of the A,B and C is in a stud , find a stud somewhere in area 30"... -
Page 29: Installation Types
Installation Instructions 2. INSTALLATION TYPES (Choose A, B or C) This microwave oven is designed for adaptation to NOTE: This microwave is shipped assembled for the following three types of ventilation: Recirculating. A. Outside Top Exhaust (Vertical Duct) B. Outside Back Exhaust (Horizontal Duct) C. -
Page 30: Attach Mounting Plate To Wall
Installation Instructions OUTSIDE TOP EXHAUST (Vertical Duct) INSTALLATION OVERVIEW A1. Attach Mounting Plate to Wall A2. Prepare Top Cabinet A3. Check Microwave Assembly A4. Check Damper Operation A5. Mount Microwave Oven A6. Adjust Exhaust Adaptor Connect Ductwork To use toggle bolts: ATTACH THE MOUNTING PLATE TO THE WALL Spacing for Toggles More... -
Page 31: For Recirculation
Installation Instructions USE TOP CABINET TEMPLATE Roll the blower unit 90° so that fan blade openings FOR PREPARATION OF TOP are facing out the up of the microwave. CABINET After Rolling Before Rolling You need to drill holes for the top support screws, a hole large enough for the power cord to fit through, and a cutout large enough for the exhaust adaptor. -
Page 32: Checking For Proper Damper Operation
Installation Instructions MOUNT THE MICROWAVE OVEN CHECK FOR PROPER DAMPER OPERATION Exhaust Adaptor (absent on models shipped for recirculation exhaust) Blower Plate Damper FOR EASIER INSTALLATION AND PERSONAL SAFETY, WE RECOMMEND THAT TWO PEOPLE INSTALL THIS MICROWAVE OVEN. Back of IMPORTANT: Do not grip or use handle during Microwave installation. -
Page 33: Mount The Microwave Oven
Installation Instructions MOUNT THE MICROWAVE OVEN ADJUST THE EXHAUST ADAPTOR (cont.) Open the top cabinet and adjust the exhaust adaptor to connect to the house duct. Cabinet Front Cabinet Bottom Shelf Back of Damper Filler Block Microwave Blower Plate Equivalent to Depth of Cabinet Recess For Front-to-Back or... -
Page 34: Outside Back Exhaust
Installation Instructions OUTSIDE BACK EXHAUST (Horizontal Duct) INSTALLATION OVERVIEW B1. Prepare Rear Wall B2. Attach Mounting Plate to Wall B3. Prepare Top Cabinet B4. Adjust Blower B5. Mount the Microwave Oven PREPARING THE REAR WALL FOR OUTSIDE BACK EXHAUST You need to cut an opening in the rear wall for outside exhaust. -
Page 35: Adapting Microwave Blower For Outside Back Exhaust
Installation Instructions ATTACH THE MOUNTING PLATE USE TOP CABINET TEMPLATE FOR PREPARATION OF TOP CABINET You need to drill holes for the top support screws and a hole large enough for the power cord to fit through. Attach the plate to the wall using toggle bolts. At least one wood screw must be used to attach the plate to a wall stud. - Page 36 Installation Instructions Place the blower unit back into the opening. ADAPTING MICROWAVE BLO FOR OUTSIDE BACK EXHAUST (cont.) AFTER: Fan Blade Openings Facing Back End A Openings Facing Back Remove “Parts A”with Nipper or Scissors. End B CAUTION: Do not pull or stretch the blower unit wiring.
-
Page 37: Mount The Microwave Oven
Installation Instructions MOUNT THE MICROWAVE OVEN Cabinet Front Cabinet Bottom Shelf Filler Block Equivalent to Depth of Cabinet Recess FOR EASIER INSTALLATION AND PERSONAL SAFETY, WE RECOMMEND THAT TWO PEOPLE Self-Aligning Screw INSTALL THIS MICROWAVE OVEN. Microwave Oven Top IMPORTANT: Do not grip or use handle during installation. - Page 38 Installation Instructions RECIRCULATING (Non-Vented Ductless) INSTALLATION OVERVIEW C1. Attach Mounting Plate to Wall C2. Prepare Top Cabinet C3. Mount the Microwave Oven C4. Install Charcoal Filter ATTACH THE MOUNTING PLATE Place the mounting plate against the wall and TO THE WALL insert the toggle wings into the holes in the wall to mount the plate.
- Page 39 Installation Instructions MOUNT THE MICROWAVE OVEN WARNING NOTE: When mounting the microwave oven, thread power cord through hole in bottom of top cabinet. Keep it tight throughout Steps 1–3. Do not pinch cord or lift oven by pulling cord. Lift microwave, tilt it forward, and hook slots FOR EASIER INSTALLATION AND PERSONAL at back bottom edge...
- Page 40 Installation Instructions MOUNT THE MICROWAVE OVEN INSTALLING THE CHARCOAL (cont.) FILTER (Continued) Insert 2 self-aligning screws through outer Remove screws on top of grille using a #1 Phillips cabinet holes. Turn two full turns on each screw. screwdriver. Open the door. Remove the grille.
-
Page 41: Before You Use Your Microwave
Installation Instructions BEFORE YOU USE YOUR MICROWAVE Make sure the microwave oven has been installed Read the Owner’s Manual. according to instructions. Remove all packing material from the microwave KEEP INSTALLATION INSTRUCTIONS FOR oven. THE LOCAL INSPECTOR’S USE. Install turntable and ring in cavity. Replace house fuse or turn breaker back on.
Need help?
Do you have a question about the RMW1636SS and is the answer not in the manual?
Questions and answers