Webasto Thermo Top C Installation Instructions Manual
For mercedes benz 2002 w203 c class
Hide thumbs
Also See for Thermo Top C:
- Installation instructions manual (56 pages) ,
- Operating instructions manual (40 pages) ,
- Operating and installation instructions (39 pages)
Table of Contents
Advertisement
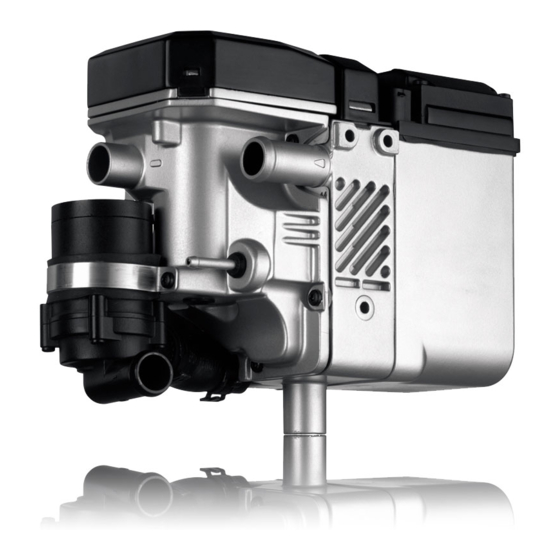
Water Heater Unit
Thermo Top C Auxiliary Heating
1
Legend for figure 1:
1 Thermo Top C Heater Unit
2 Metering pump
3 Antenna Option
4 Receiver Option
Warning!
Hazard warning:
Incorrect installation or repair of Webasto heating systems may cause a fire or result
in the emission of carbon monoxide, which can be fatal. Serious or fatal injuries can
be caused as a result.
Specialist company training, technical documentation, specialized tools and
equipment are required to install and repair Webasto heating and cooling systems.
NEVER attempt to install or repair Webasto heating or cooling systems if you have not
successfully completed the company training and thereby acquired the required
technical skills or if you do not have access to the required technical documentation,
tools and equipment needed to carry out correct installation and repairs.
ALWAYS follow all Webasto installation and repair instructions and observe all
warning instructions.
Webasto does not accept any liability for defects and damage that are attributable to
an installation by untrained staff.
Ident. No.: 9015593A
00 0002
3 4
2
1
€10 fee
e1
Installation Instructions
Mercedes Benz W203
(C Class)
Gasoline and diesel
From model year 02
For left-hand drive vehicles only
Not for AMG look
© Webasto AG
Advertisement
Table of Contents

Related Manuals for Webasto Thermo Top C


Summary of Contents for Webasto Thermo Top C
-
Page 1: Installation Instructions
Specialist company training, technical documentation, specialized tools and equipment are required to install and repair Webasto heating and cooling systems. NEVER attempt to install or repair Webasto heating or cooling systems if you have not successfully completed the company training and thereby acquired the required technical skills or if you do not have access to the required technical documentation, tools and equipment needed to carry out correct installation and repairs. - Page 2 Mercedes Benz W 203 Table of Contents Validity Operating Instructions for the End Customer 16 Heater Unit / Foreword / Special Tools Explanatory Notes on the Document Preliminary Work / Installation Location Electrical Diagram Remote Start and Thermo Call Heater Unit Assembly Pre-assembling and Assembling the Metering Pump Fuel Take-off / Fuel Lines...
- Page 3 Mercedes Benz W 203 Heater Unit / Scope of Delivery Quantity Name Order No. Scope of Delivery Water heater unit Thermo Top C-B 9011466A W 203 sedan/station wagon up to model year 03 Scope of Delivery Water Heater Unit Thermo Top C-D...
-
Page 4: Electrical Connection
Specific risk of damage to components. Specific risk of fire or explosion. Reference to general installation instructions of Webasto components or to the manufacturer's vehicle-specific documents. Reference to a special technical feature. The arrow in the vehicle icon indicates the... - Page 5 Mercedes Benz W 203 Warning! Pre- - Remove the passenger compartment filter in the engine compartment liminary - Disconnect the battery and remove it! - Remove the battery base plate. - Let off pressure in the cooling system. - Copy the factory number from the original type label to the duplicate type label. - Remove years that do not apply from the duplicate label.
- Page 6 Mercedes Benz W 203 Installation should be carried out according to the general, standard rules of technology. Unless Con- specified otherwise, you should fasten to original vehicle lines and cable harnesses using cable clips. nection Sharp edges should be fitted with edge protectors! Electrics Grounding point in front Cable harness duct in front...
- Page 7 Mercedes Benz W 203 Remote start option Slide the remote control receiver on the bracket tracks on the fuse and relay box. (1) Remote start receiver (2) Fuse and relay box (3) Remote start cable harness Remote (4) Antenna cable start T90 (1) Adhesive antenna remote start (2) Trunk ledge...
- Page 8 Mercedes Benz W 203 Fasten the heater unit bracket with edged bolts to the front frame. (1) M6x16 edge bolts [2x] (2) Front screen Assem- bling the Heater Unit Fasten the heater unit bracket with two edged bolts. (1) M6x16 edge bolts with body washer (2) M6x16 edge bolts (3) Heater unit bracket Assem-...
- Page 9 Mercedes Benz W 203 CAUTION! Fuel Open the vehicle's tank-cap lock, ventilate the tank and then re-close the tank lock. connec- tion Catch any fuel running off with an appropriate container. Install the fuel line so that it is protected from impact by rocks! Fit the fuel line with edge protectors around sharp edges.
- Page 10 Mercedes Benz W 203 Note the installation position of the metering pump, see the "installation instructions" Fasten the pre-assembled metering pump to the angled bracket with bolt M6x25 and flanged nut. (1) Metering pump bracket Assem- (2) Metering pump bling the (3) Angle bracket metering (4) M6x20 bolt...
- Page 11 Mercedes Benz W 203 Remove both oval protective rubber sleeves in the frame side rail, run the Mecanyl fuel line through the rear opening and pull through. Then lead this back into the rear opening, push out to the front and lead through the front grommet opening.
- Page 12 Mercedes Benz W 203 WARNING! Tighten all hose clamps with 2.0 + 0.5 Nm. Any cold water running off should be collected using an appropriate container! Install hoses so that they are kink-free and to prevent wear. Position hose clamps so that no other hose can be damaged! The connection should be "inline"...
- Page 13 Mercedes Benz W 203 a = 210 mm b = 70 mm c = 90° bend (remaining) Cutting water Dispose of section hoses into sections (230K without residual heat pump) Separate the original vehicle engine hose on the marking. (1) Original vehicle hose Splitting point.
- Page 14 Mercedes Benz W 203 a = 360 mm b = 170 mm c = 20 mm Cutting water Dispose of section hoses into sections (220 CDI without residual heat pump) Only 220 CDI/320 CDI Cut the braided protective hoses to 220 mm and slide onto hose A.
- Page 15 Mercedes Benz W 203 WARNING! Final Reassemble disassembled components in reverse order. work Check that all hose lines, hose and universal clips, and all electrical connections are securely fastened. Secure all loose lines using cable clip. Spray heating unit components with anti-corrosion wax (Tectyl 100K, Order No. 111 329). - Connect battery.
- Page 16 Mercedes Benz W 203 (Please remove page and insert with vehicle operating instructions.) Operating instruc- tions for the end customer Before parking the vehicle, make the following settings: Set the heater times with the steering wheel buttons when the key is in position 1 or 2 (ignition) or when the engine is running.
- Page 17 Webasto Thermosysteme International GmbH Postfach 80 - 82132 Stockdorf - Hotline 0 18 05 / 93 22 78 Hotfax (0395) 55 92-353 - http://www.webasto.de Printed in Germany 04/06 Printed by: Steffen...
Need help?
Do you have a question about the Thermo Top C and is the answer not in the manual?
Questions and answers