
Related Manuals for Extraflame Elisir


Summary of Contents for Extraflame Elisir
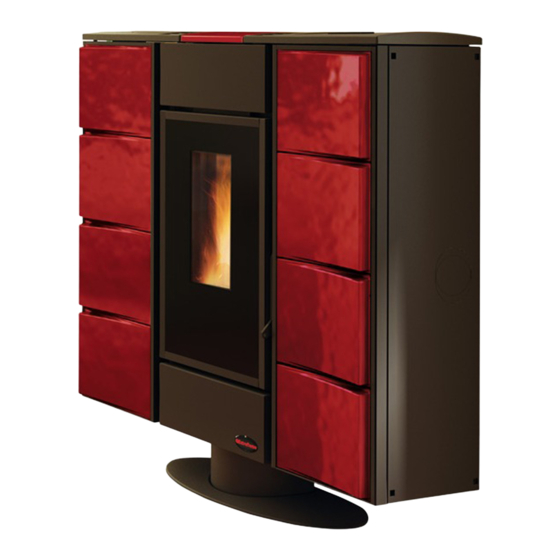
- Page 1 User manual Elisir Read the instructions carefully before installation, use and maintenance. The instruction book is an integral part of the product.
- Page 3 Congratulations! You are now the owner of an Extrafl ame stove! The Extrafl ame pellet stove is an ideal heating solution. It utilises the most advanced technology and is manufactured to the highest standards with a contemporary design, allowing you to enjoy the ambience and warmth of a natural fl ame in complete safety.
-
Page 5: Table Of Contents
Chapter 8 THE REMOTE CONTROL ..........................................24 Chapter 9 ELISIR PRODUCT DISPLAY TABLES ......................................25 Chapter 1 ELISIR UTENTE PARAMETERS (BOARD 002272575) ................................28 SET CLOCK ........................................................28 CLOCK ADJUSTMENT RAPID MODE ............................................29 SET CHRONO .........................................................30 RAPID ACCESS MODE TO CHRONO ............................................31 CHRONO MENU DISPLAY ..................................................32 LANGUAGE SETTING ....................................................33... - Page 6 ACTIVATION OR DEACTIVATION OF STAND-BY MODE ....................................39 KEYS FROZEN ......................................................40 KEYS FROZEN RAPID MODE ...............................................40 AIR DUCTING RAPID MODE (V2-ARIA) ...........................................41 Chapter 2 ELISIR CLEANING ............................................42 Chapter 3 RAPID MENUS .............................................45 STOVE IGNITION ......................................................46 STOVE SWITCH-OFF ....................................................46 FUNCTIONING POWER CHANGE ................................................46 ROOM TEMPERATURE....................................................46...
-
Page 7: Warnings And Safety Devices
WARNINGS AND SAFETY DEVICES The stoves produced by our establishment are built with manufacturer. attention to the individual components in a way to protect Do not pull, disconnect, twist electric cables leaving the both the user and the installer from any accidents. It is stove, even if disconnected from the electric power supply therefore recommended that after any intervention on the mains. -
Page 8: Chapter 2 What Is The Pellet
Chapter 2 Chapter 2 WHAT IS THE PELLET? Pellets are realised by subjecting wood shavings i.e. the rejects of pure wood (without paint) sawmill, carpenter products and products from other activities connected to working and transforming wood, to very high pressures. This type of fuel is absolutely ecological as no glues are used to hold it together. -
Page 9: Chapter 3 Safety Devices
Chapter 3 SAFETY DEVICES HOT AIR DISTRIBUTION FAN BREAKAGE In case the fan stops for any reason, the stove automatically stops. FLUE EXHAUST BREAKAGE If the suction device stops, the electronic board immediately blocks the pellet supply. PELLET FEED MOTOR BREAKAGE If the motor reducer stops, the stove continues to function until the minimum cooling level is reached. -
Page 10: Assembly And Installation Instructions
Chapter 4 ASSEMBLY AND INSTALLATION INSTRUCTIONS The installation must be in compliance with: UNI 10683 (2005) heat generators fed with wood and other solid fuels: installation. The chimneys have to be in compliance with: UNI 9731 (1990) chimneys: classifi cation based on thermal resistance. EN 13384-1 (2006) chimneys thermal and fl uid-dynamics calculation method. -
Page 11: Installation
Chapter 4 FORCED DRAUGHT Air circulation by means of the fan activated by electric motor. NATURAL DRAUGHT Draught which determinates in a chimney/fl ue for eff ect of the volume mass diff erence existing between smoke (hot) and surrounding atmosphere air, without any mechanical intake aid installed inside it or at its peak. -
Page 12: Connection To The Smoke Evacuation System
Chapter 4 CONNECTION TO THE SMOKE EVACUATION SYSTEM SMOKE CHANNEL OR CONNECTIONS To mount the smoke channels, non-fl ammable elements will have to be used, ideal for resisting fuel products and their eventual condensing. The use of fl exible metal and asbestos cement pipes to connect the appliances to the fl ue is forbidden, even for pre-existing smoke channels. -
Page 13: Chimney Or Individual Flue
Chapter 4 It is forbidden to have other air supply channels and pipes for plant engineering, especially if over-sized, transit inside the smoke channels. The mounting of manual draught adjustment devices on forced draught appliances is forbidden. CHIMNEY OR INDIVIDUAL FLUE The chimney or individual fl ue must respond to the following requisites: seal the fuel products, waterproof and adequately insulated similarly to the use conditions;... - Page 14 Chapter 4 Windproof chimney cap < 3 m 3 - 5 % Flue Inspection Inspection fi gure 4.5 fi gure 4.6 < 3 m Insulated external 45° pipe Inspection 45° Inspection fi gure 4.7 fi gure 4.8 ASSEMBLY AND INSTALLATION INSTRUCTIONS...
-
Page 15: Appliance Connection To The Flue And Fuel Products Evacuation
Chapter 4 APPLIANCE CONNECTION TO THE FLUE AND FUEL PRODUCTS EVACUATION The fl ue must receive the discharge from only one heat generator. The direct discharge towards closed spaces is forbidden, even with clear sky. The direct discharge of the fuel products must be at roof and the smoke pipe must have the features provided in the “Chimney or individual fl ue”... -
Page 16: Connection To External Air Inlets
Chapter 4 CHIMNEY CAPS, DISTANCES AND POSITIONING Roof Distance between the Minimum chimney height inclination ridge and the chimney (measured from outlet) β A (m) H (m) < 1,85 0.50 m over the ridge 15° > 1,85 1,00 m from roof <... -
Page 17: Hot Air Ducting
The diff erent ducting modalities must be discussed with the technician who will see to the installation. It is recommended not to exceed the 2 metres in length and to use insulating material to avoid heat losses. ELISIR AIR INLET INSTALLATION To install the air inlet we recommend reading the attached folder. fi gure 5.4... -
Page 18: Mechanical Thermostat Functioning For Ducting Motor Control
2nd motor to 1st speed, making the relative luminous indicator on the control board fl ash. Front view right side casing clamps for additional thermostats connection fi gure 5.5 Casing clamps for additional thermostat ducting Casing clamps for additional thermostat room fi gure 5.6 ELISIR AIR INLET INSTALLATION... -
Page 19: Product Functionality
Chapter 6 PRODUCT FUNCTIONALITY CONTROL BOARD REMOTE CONTROL SENSOR fi gure 6.1 ON/OFF BUTTON By pressing button 1 it is possible to switch the stove on and off automatically. ROOM TEMPERATURE SETTING Buttons 2 and 3 are used to adjust the wanted room temperature inside the house. FUNCTIONING POWER The heat power can be adjusted using buttons 4 and 5 Display D1 to view the various messages. -
Page 20: Recommendations Before Ignition
Chapter 6 RECOMMENDATIONS BEFORE IGNITION Before ignition the following points must be verifi ed: the feed-box must be full of pellets the combustion chamber must be clean The brazier must be completely free and clean check the hermetic closure of the fi re door and the ash drawer make sure the power supply cable is connected correctly the bipolar switch in the rear right part must be positioned on 1 ATTENTION!!! -
Page 21: Functioning
Chapter 6 FUNCTIONING In the “functioning” phase the user can set the functioning power using key 4 to decrease it and key 5 to increase it, using key 2 or 3 increase or decrease the setting of the wanted room temperature. When the product will have reached the set temperature, it automatically goes to minimum functioning mode. -
Page 22: Chapter 7 Room Thermostat
Chapter 7 ROOM THERMOSTAT DIGITAL THERMOSTAT (AS PER STANDARD) The appliance can control the room temperature using a digital thermostat, which can lower the heating power to minimum when a pre-set temperature is reached. When the stove is started and has entered normal functioning mode, display D1 will show a number (e.g. - Page 23 Chapter 7 when the temperature is reached it will take the 2nd motor to 1st speed, making the relative luminous indicator on the control board fl ash. Front view right side casing clamps for additional thermostats connection fi gure 7.1 Casing clamps for additional thermostat ducting Casing clamps for additional thermostat...
-
Page 24: Chapter 8 The Remote Control
Chapter 8 THE REMOTE CONTROL The heating power, the wanted room temperature (or set water in case of thermoproduct) and the auto- matic appliance ignition/switch off , can be adjusted using the remote control. S = Indicator light indicating the pressing of every key. -
Page 25: Elisir Product Display Tables
Chapter 9 ELISIR PRODUCT DISPLAY TABLES SIGNALS Signals Reason Solution Display AVVIO The ignition phase is in progress START The start phase is in progress When the stove switches off (normal or caused by an alarm) it is necessary to wait until complete... - Page 26 ATTE alternately on the display. stove still in cooling mode. The alarm can be reset by pressing key 1 for 3 seconds only if the fumes motor has stopped and if 15 minutes have passed from displaying the same alarm. ELISIR PRODUCT DISPLAY TABLES...
- Page 27 If the indicator is always on it indicates that the communication between remote control and stove. between remote control and stove is blocked. To restore the functioning of the component, contact an authorised technician. ELISIR PRODUCT DISPLAY TABLES...
-
Page 28: Elisir Utente Parameters (Board 002272575)
Chapter 1 ELISIR UTENTE PARAMETERS (BOARD 002272575) There are diff erent menus allowing to customise the functioning of the product depending on ones’ own requirements. The menu is structured as follows: TIME CLOCK MINUTES CLOCK SET CLOCK DAY CLOCK MONTH CLOCK... -
Page 29: Clock Adjustment Rapid Mode
4 key 5 key 3 key 3 key 3 key 1 MONTH CLOCK key 2 key 2 key 4 key 5 key 1 key 3 key 3 key 3 YEAR CLOCK key 2 key 2 ELISIR UTENTE PARAMETERS (BOARD 002272575) -
Page 30: Set Chrono
Adjust the selected value using buttons 2 and 3. Using button 5 confi rm and proceed to the following parameter. Using button 4 return to the previous parameter. Using button 1 twice confi rm and return to the higher menu. ELISIR UTENTE PARAMETERS (BOARD 002272575) -
Page 31: Rapid Access Mode To Chrono
TUESDAY PROG1 key 2/3 ON/OFF button 5 key 1 ...SUNDAY PROG1 button 5 key 3 key 3 key 1 key 3 etc...41 SET PROG1 key 2 key 2 key 2 button 5 key 1 ETC. ELISIR UTENTE PARAMETERS (BOARD 002272575) -
Page 32: Chrono Menu Display
SATURDAY PRG4 ON / OFF Enables/disables 4th time period for saturday Power SUNDAY PRG4 ON / OFF Enables/disables 4th time period for sunday Power SET PRG4 07 - 35 Maximum temperature for 4th time period Power ELISIR UTENTE PARAMETERS (BOARD 002272575) -
Page 33: Language Setting
STAND-BY KEYS FROZEN key 2 key 3 V2-ARIA SET TECHNIC RESERVED TECHNICIAN key 1 LANGUAGE key 4 key 5 key 3 key 3 key 3 key 1 ITAL LANGUAGE engl deut key 2 key 2 ELISIR UTENTE PARAMETERS (BOARD 002272575) -
Page 34: Utente
KEYS FROZEN key 2 key 3 V2-ARIA SET TECHNIC RESERVED TECHNICIAN key 1 LANGUAGE key 2 key 3 key 1 UTENTE key 1 key 5 key 3 key 3 key 3 DISPLAY key 2 key 2 ELISIR UTENTE PARAMETERS (BOARD 002272575) -
Page 35: Pellets (-20% +20%)
If the problem is attenuated, but not solved, EXCESS FUEL decrease by another 5 points. Repeat the operation until the problem is solved. If the problem cannot be resolved, contact the after-sales service. ELISIR UTENTE PARAMETERS (BOARD 002272575) -
Page 36: Pellet Adjustment Rapid Mode
5 key 1 DISPLAY key 1 key 5 key 1 key 3 key 3 key 3 PELLET key 2 key 2 THE ADJUSTMENTS FOR THE CALIBRATION OF THE PELLET ARE NOT COVERED BY WARRANTY INTERVENTIONS. ELISIR UTENTE PARAMETERS (BOARD 002272575) -
Page 37: V1-Aria
3 key 1 UTENTE key 1 key 5 key 1 DISPLAY key 4 key 5 key 1 PELLET key 4 key 5 key 3 key 1 key 3 key 3 V1-ARIA key 2 key 2 ELISIR UTENTE PARAMETERS (BOARD 002272575) -
Page 38: Stand-By: Explanation
If the STAND-BY mode has been activated the following situation will occur: External thermostat under request contact closed Stove ignition ON FIRE Satisfi ed external thermostat contact open Stove switch-off STBTY EST ELISIR UTENTE PARAMETERS (BOARD 002272575) -
Page 39: Stand-By Rapid Mode
Using buttons 2 and 3 select “ ON / key 1 V1-ARIA OFF” to enable/disable the function. Using button 1 confi rm and return key 4 key 5 to the higher menu. key 2/3 key 1 STAND-BY ON/OFF ELISIR UTENTE PARAMETERS (BOARD 002272575) -
Page 40: Keys Frozen
5 DAY CLOCK key 2/3 key 1 MONTH CLOCK KEYS FROZEN ON/OFF YEAR CLOCK SET CHRONO (SEE FOLLOWING TABLE) SET LANGUAGE LANGUAGE REG. UTENTE DISPLAY PELLET V1-ARIA STAND-BY KEYS FROZEN V2-ARIA SET TECHNIC RESERVED TECHNICIAN ELISIR UTENTE PARAMETERS (BOARD 002272575) -
Page 41: Air Ducting Rapid Mode (V2-Aria)
4 key 5 increase/decrease varies by 5 points per time. key 1 KEYS FROZEN key 4 key 5 key 1 V2-ARIA key 3 key 3 key 3 key 2 key 2 ELISIR UTENTE PARAMETERS (BOARD 002272575) -
Page 42: Chapter 2 Elisir Cleaning
Chapter 2 ELISIR CLEANING Maintenance operations guarantee correct functioning of the product through time. Failure to comply with these operations can jeopardise the safety of the product. BRAZIER CLEANING The brazier must be cleaned every day. remove the brazier from the relevant compartment and free the holes using the appropriate supplied fi re irons (fi gure 11.2) - Page 43 Only afterwards use a specifi c vacuum cleaner for the complete removal of the ashes. When cleaning has been completed, re-position the extractable cast iron with the opposite movement used to remove it. fi gure 2.6 fi gure 2.5 fi gure 2.7 fi gure 2.8 ELISIR CLEANING...
- Page 44 For correct functioning, the stove must undergo routine maintenance by an authorised technician, at least once a year. If the power supply cable is damaged, it must be replaced by the after-sales service or by a qualifi ed person. fi gure 2.9 fi gure 2.10 ELISIR CLEANING...
-
Page 45: Chapter 3 Rapid Menus
Chapter 3 RAPID MENUS Ignition/Switch-off Key 1 pressed for 3 seconds Exit from user menu Room temperature Key 2 or key 3 User menu parameters amendment Power change Key 5 increases power Key 4 decreases power Go to user menu subsequent parameter Key 5 proceed Key 4 return RAPID MENUS... -
Page 46: Stove Ignition
Chapter 3 STOVE IGNITION ROOM TEMPERATURE INITIAL SCREEN INITIAL SCREEN key 1 for 3 seconds key 3 START SET THERMOSTAT key 3 STOVE SWITCH-OFF LOU (MINIMUM) key 3 INITIAL SCREEN key 2 key 1 for 3 seconds key 3 CLEANING FINAL key 2 FUNCTIONING POWER CHANGE key 3... -
Page 47: Clock Adjustment
Chapter 3 CLOCK ADJUSTMENT INITIAL SCREEN key 5 for 3 seconds key 1 SET CLOCK key 5 key 3 key 3 key 3 key 1 Monday Tuesday key 2 key 2 key 4 key 5 key 3 key 3 key 3 key 1 TIME CLOCK key 2... -
Page 48: Chrono
Chapter 3 CHRONO INITIAL SCREEN key 5 for 3 seconds key 1 SET CLOCK key 3 key 2 key 1 SET CHRONO button 5 key 1 key 1 key 2/3 ON/OFF CHRONO ENABLE button 5 key 4 key 3 key 3 key 3 key 1 00:00... -
Page 49: Language Setting
Chapter 3 LANGUAGE SETTING INITIAL SCREEN key 5 for 3 seconds key 1 SET CLOCK key 2 key 3 key 1 SET CHRONO key 2 key 3 key 1 LANGUAGE key 4 key 5 key 3 key 3 key 3 key 1 ITAL LANGUAGE engl... -
Page 50: Pellet Setting
Chapter 3 PELLET SETTING FRONT AIR (V1-AIR) INITIAL SCREEN INITIAL SCREEN key 5 for 3 seconds key 5 for 3 seconds key 1 key 1 SET CLOCK SET CLOCK key 2 key 3 key 2 key 3 key 1 key 1 SET CHRONO SET CHRONO key 2... -
Page 51: Stand - By
Chapter 3 STAND - BY KEYS FROZEN INITIAL SCREEN INITIAL SCREEN key 5 for 3 seconds key 5 for 3 seconds key 1 key 1 SET CLOCK SET CLOCK key 2 key 3 key 2 key 3 key 1 key 1 SET CHRONO SET CHRONO key 2... -
Page 52: Air Ducting (V2 - Aria)
Chapter 3 AIR DUCTING (V2 - ARIA) INITIAL SCREEN key 5 for 3 seconds key 1 SET CLOCK key 2 key 3 key 1 SET CHRONO key 2 key 3 key 1 LANGUAGE key 2 key 3 key 1 UTENTE key 1 key 5 key 1... -
Page 53: Warranty Conditions
EXTRAFLAME S.p.A. is not liable for any damages that can, directly or indirectly, aff ect persons, objects and pets as a consequence of failure to comply with the prescriptions indicated in this manual/book. - Page 54 The warranty intervention envisions the repair of the appliance without any charge, as provided by the law in force. LIABILITY EXTRAFLAME S.p.A. does not grant any compensation for direct or indirect damages caused or dependant by the product. LAW COURT The Vicenza Law Court is elected as the competent court for any disputes.
- Page 55 etichetta codice a barre...
- Page 56 The company reserves the right to vary the features and data given in this document at any time without forewarning, in order to improve its products. This manual, therefore, cannot be considered as a contract for third parties. 004275725 - ENGLISH Manuale utente Elisir REV003 02.11.2009...
Need help?
Do you have a question about the Elisir and is the answer not in the manual?
Questions and answers