WMF 1000 s User Manual
Hide thumbs
Also See for 1000 s:
- User manual (100 pages) ,
- Service manual (64 pages) ,
- Manual (156 pages)

Related Manuals for WMF 1000 s


Summary of Contents for WMF 1000 s
-
Page 1: User Manual
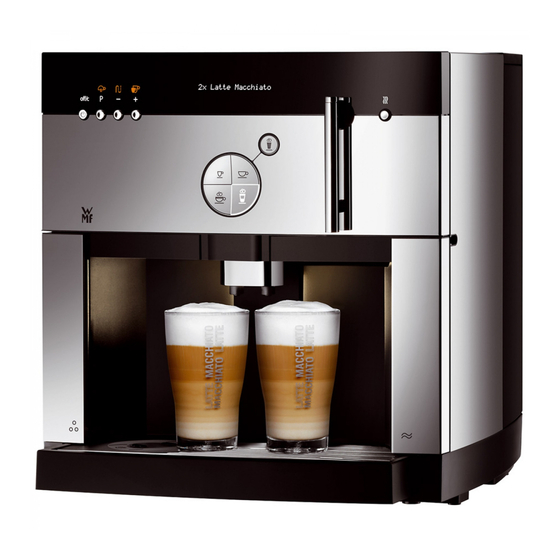
User Manual Coffee machine English 1000 S V0.18 1000 pro S V01.00.01 Valid for all models of the WMF 1000 S and 1000 pro S Series 1000 Order number 33 2646 0010 Edition 05.2014... - Page 2 Congratulations on the purchase of your WMF coffee machine. The WMF 1000 S / WMF 1000 pro S coffee machine is a fully automatic single cup machine for espresso, ristretto, café crème, cappuccino, milk coffee, latte macchiato, milk foam and hot water. Each beverage is freshly brewed which guarantees a high quality beverage.
-
Page 3: Chapter 1 Introduction
Double SteamJet (WMF 1000 pro S) ........ -
Page 4: Table Of Contents
WMF Perfect Extraction System ........ - Page 5 Chapter 12 Guarantee and directives for private use 12.1 Intended use 12.2 Directives 12.3 Guarantee for private use Chapter 13 Service and addresses Chapter 14 technical data Chapter 15 Shipping and disposal Index User Manual WMF 1000 S/1000 pro S...
-
Page 6: Parts Of The Coffee Machine
Introduction Chapter 1 Introduction 1.1 parts of the coffee machine DI_00_00_00 your selection pls 08:15 23.04.2014 User Manual WMF 1000 S/1000 pro S... - Page 7 Cup storage (heated) Brewing unit Display and function buttons off/c button P button / SteamJet button Minus button / Care button Plus button / Cup size button * Style may vary by version. Follow the description in the corresponding chapter. User Manual WMF 1000 S/1000 pro S...
-
Page 8: User Manual Signs And Symbols
• for the installation location guarantee section always follow the User Manual. w from page 88 Technical data w starting on page 91 note notE • Instructions for safe use and tips for easier operation. User Manual WMF 1000 S/1000 pro S... -
Page 9: Ready To Operate
O-rings Seals Prior to brewing cycle, coffee is briefly infused in order to Pre-infusion ensure a more intense release of its aromatic substances. Pressing Automatic pressing of ground coffee prior to brewing Rinsing Intermediate cleaning User Manual WMF 1000 S/1000 pro S... -
Page 10: Chapter 2 Start-Up
• Never open the housing. • Never loosen the screws, and do not remove any housing parts. Conditions for usage and installation IMportant Follow the User Manual. Technical data w starting on page 91 User Manual WMF 1000 S/1000 pro S... -
Page 11: Installation Location
™ Unpack the coffee machine Technical data ™ Place the coffee machine on a stable, horizontal w starting on page 91 surface 2.4 Drip tray ™ Insert the drip tray with the drip tray grid User Manual WMF 1000 S/1000 pro S... -
Page 12: Grounds Container
™ Place the water filter adapter onto the water tank water filter is needed. coupling from above (with lock open) and lock into w Start-up program page 19 place [2] ™ Unpack the water filter and insert into the water filter adapter [3] User Manual WMF 1000 S/1000 pro S... -
Page 13: Connect Up The Milk
Determine the water hardness ™ Request the water hardness reading from your water The unit used is the “Deutsche Karbonathärte” supplier, or determine it by using the WMF carbonate (°dKH) hardness test in the accessories (complete with instructions) 2.7 Connect up the milk When shipped, the milk hose has been inserted over the assembled All-in-One spout. -
Page 14: Milk Lance
Start-up 2.7.1 Milk lance Included in the scope of delivery of the WMF 1000 pro S. Available as an option for the WMF 1000 S. Stick the WMF milk lance into the milk container and connect it to the milk hose. The exterior of the milk hose no longer comes into contact with the milk, for optimal hygiene. -
Page 15: Fill The Bean Hopper
™ Remove the cover from the cable compartment ™ Connect the power cord to the connection on the back side of the coffee machine ™ Plug the mains plug into a grounded plug ™ Cover the cable compartment with the cover User Manual WMF 1000 S/1000 pro S... -
Page 16: Function Buttons
+ hold plus button / Cup size button • Step forward press briefly • Increase value press briefly • Increase coffee strength press briefly • Select cup size press + hold • Pot function press + hold User Manual WMF 1000 S/1000 pro S... -
Page 17: Switch On The Coffee Machine / Start-Up Program
DI_04_04_05 time The current time. time hh:mm:ss OK: P change: -/+ = hour (two places) mm = minutes (two places) = seconds (two places) ™ Adjust values with ™ Confirm the desired setting with User Manual WMF 1000 S/1000 pro S... - Page 18 ™ Confirm the desired setting with DI_04_04_10 Eco-mode Standard setting Eco‑mode 2. ECO-mode: 2 ™ Adjust values with OK: P change: -/+ ™ Confirm the desired setting with Eco-mode w page 42 User Manual WMF 1000 S/1000 pro S...
- Page 19 After each brewing cycle, in the heating up phase and during the care programs, release water runs into the drip tray. ™ Place a collection container with 120 ml capacity under the All-in-One spout The warm‑up rinsing lasts approx. 40 seconds. User Manual WMF 1000 S/1000 pro S...
-
Page 20: Setting Options
Start-up is complete. All settings can be changed 08:15 23.04.2014 now, or at a later time. Setting options • Cup size (Cup volumes) page 34 • Beverage setting page 35 • Set grinding degree page 49 • Basic settings page 40 User Manual WMF 1000 S/1000 pro S... -
Page 21: Chapter 3 Operation
Energy saving mode If an Eco-mode has been activated, this is shown on the DI_00_00_00_e display with an E in front of the date. Eco-mode w page 42 your selection pls 08:15 E 23.04.2014 User Manual WMF 1000 S/1000 pro S... -
Page 22: Beverage Dispensing
™ Briefly press the beverage button If more than 10 minutes have passed since the last beverage was dispensed, the display shows the question of whether to perform a warm rinsing. The warm rinsing may be skipped. User Manual WMF 1000 S/1000 pro S... -
Page 23: Beverage Buttons
1 serving of milk press and hold milk foam Hot water button press briefly 1 serving of hot water press and hold hot water dispensing continues for as long as the pad is held. User Manual WMF 1000 S/1000 pro S... -
Page 24: Dispense Milk Or Milk Foam
> Allow the cup to rest for a moment after dispensing a beverage, or place a collection container under the All-in-One spout. > Slide the All-in-One spout upward slightly after beverage dispensing, so that less milk drips out. User Manual WMF 1000 S/1000 pro S... -
Page 25: Hot Water Dispensing
Dispensing continues for as long as the button is held. 3.6 Height adjustment of the all-in-one spout The All-in-One spout is height adjustable. ™ Take the combi spout from the front and push to the desired height User Manual WMF 1000 S/1000 pro S... -
Page 26: Steamjet Cup Warmer
The steam flow stops automatically when the P button is released, or after 8 seconds. 3.7.2 Double SteamJet (WMF 1000 pro S) WMF 1000 S The double SteamJet is also suitable for two cups at once. Operation Single SteamJet WMF 1000 pro S User Manual WMF 1000 S/1000 pro S... -
Page 27: Coffee Strength For The Next Beverage
The cup volume is increased by approx. 30 %. small ™ Press and hold for longer than 2 seconds The display shows normal ™ Press The display shows small The cup volume is reduced by approx. 30 %. User Manual WMF 1000 S/1000 pro S... -
Page 28: Pot Function For Café Crème
“Ready to operate” OK: P display appears again. DI_03_10_01 ™ Fill the water tank with drinking water ™ Confirm with place pot OK: P ™ Confirm with ™ Select the desired number of cups by pressing User Manual WMF 1000 S/1000 pro S... -
Page 29: Manual Insert
The display shows: insert ground coffee select beverage ™ Insert ground coffee (max. 15 g) ™ Close the manual insert lid ™ Press the desired beverage button Manual insert Cancel beverage dispensing ™ Press the off/c button User Manual WMF 1000 S/1000 pro S... -
Page 30: Grounds Container
• The drip tray may contain hot liquids. Observe the Safety chapter > Move the drip tray carefully. w starting on page 81 > Replace carefully so that no water accidentally drips down. Clean drip tray daily w Care page 63 User Manual WMF 1000 S/1000 pro S... -
Page 31: Switch Off The Coffee Machine
If a milk beverage has been dispensed, you will be requested to perform a milk system rinsing 20 minutes after dispensing, or when switching off. The milk system rinsing does not need to be initiated separately using the customer care program. User Manual WMF 1000 S/1000 pro S... -
Page 32: Chapter 4 Settings
P end: C foam volume: 14 sec DI_04_02_08 OK: P change: -/+ rest time: 20 sec DI_04_02_09 OK: P change: -/+ sequ.: milk+coffee DI_04_02_10 OK: P change: -/+ preinfusion: on OK: P change: -/+ User Manual WMF 1000 S/1000 pro S... - Page 33 -/+ DI_04_04_18 OK: P change: -/+ water filter: display contrast DI_04_04_17 OK: P change: -/+ OK: P change: -/+ factory sett.: no DI_04_04_16 OK: P change: -/+ change PIN OK: P change: -/+ User Manual WMF 1000 S/1000 pro S...
-
Page 34: Cup Size (Cup Volumes)
™ As soon as the cup volume is set as desired, confirm the values with 4.1.1 Dispensing test ™ Press the desired beverage button The beverage is dispensed using the newly changed values. Each beverage setting can be tested during setup. User Manual WMF 1000 S/1000 pro S... -
Page 35: Beverage Setting
-/+ ™ Select the beverage for which the taste and composition should be set The PIN is requested prior to this action, if the PIN function is active. Activate PIN function w page 44 User Manual WMF 1000 S/1000 pro S... -
Page 36: Water Volume
Adjustments can be made only to Determine the desired volume with a dispensing the additions that are available for this beverage. test. ™ As soon as the beverage is set as desired, confirm with User Manual WMF 1000 S/1000 pro S... -
Page 37: Rest Time (Wmf 1000 S)
™ Set as desired beverages except café crème. ™ Start a dispensing test with the current values ™ As soon as the beverage is set as desired, confirm the values with User Manual WMF 1000 S/1000 pro S... -
Page 38: Set Grinding Degree
The finer the coffee is ground, the more strongly its contents are released into the coffee. Adjust the grinding degree using the WMF Perfect Extraction System so that it is optimal for the type of coffee used. - Page 39 ™ Turn the multitool clockwise to set the grinding degree coarser Adjust the grinding degree only while the grinder is running. ™ Test the new grinding degree setting (see above) ™ Touch to end grinding degree setting User Manual WMF 1000 S/1000 pro S...
-
Page 40: Basic Settings
PIN function is active. Activate PIN function w page 44 DI_02_11_01 4.4.2 Language ™ Touch to set the desired language language: english ™ Confirm the desired setting with OK: P change: -/+ User Manual WMF 1000 S/1000 pro S... -
Page 41: Switch-Off Time
When the coffee machine is switched off in timer mode, it is not considered to be in a ready-to-use state, as defined and regulated in regulation (EC) No. 1275/2008. The timer mode is thus not a standby mode in the sense of the EuP directive. User Manual WMF 1000 S/1000 pro S... -
Page 42: Eco-Mode
Always switched off. after the last beverage. For dispensing pure coffee, without milk beverages. After the temperature has been reduced, it must be heated up before the next beverage is dispensed. Heating duration approx. 15 seconds. User Manual WMF 1000 S/1000 pro S... -
Page 43: Brewing Temperature
It can be set to standard , for household use cleaning: standard and monthly machine cleaning, or office OK: P change: -/+ recommended for commercial use and daily machine cleaning. ™ Confirm the desired setting with User Manual WMF 1000 S/1000 pro S... -
Page 44: Activate Pin Function
™ Confirm the desired setting with DI_04_04_07 4.4.12 Date / time (display) If set to , the time and date are shown on the date / time: on display during operation. OK: P change: -/+ ™ Confirm the desired setting with User Manual WMF 1000 S/1000 pro S... -
Page 45: Water Hardness
, all beverage settings are reset to the factory sett.: no factory settings. OK: P change: -/+ ™ Confirm the desired setting with All individual settings are lost if you reset to the factory settings. User Manual WMF 1000 S/1000 pro S... -
Page 46: Change Pin
35 • Set grinding degree page 38 • Basic settings page 40 • Delete counters page 47 Use beverage buttons to enter the digits Hot water Espresso Café crème Cappuccino Latte macchiato Milk User Manual WMF 1000 S/1000 pro S... -
Page 47: Counters
Yes: P presented. The PIN is requested prior to Keep counter settings this action, if the PIN function is ™ Press the off/c button active. Delete counters Activate PIN function ™ Press w page 44 User Manual WMF 1000 S/1000 pro S... -
Page 48: System Information
WMF 1000 S browse: -/+ DI_04_06_05 4.6.3 Machine number The 5-digit machine number is shown. serial no. ##### browse: -/+ DI_04_06_06 4.6.4 Date of production The date of production is shown. prod. date: mm.aaaa browse: -/+ User Manual WMF 1000 S/1000 pro S... -
Page 49: Chapter 5 Other Settings
Test the new grinding degree setting dispensing two w page 38 cups of espresso. The effect of the grinding degree setting can only be determined after the second beverage is dispensed, following a change in the setting. User Manual WMF 1000 S/1000 pro S... -
Page 50: Chapter 6 Care
Health hazard. Hygiene. CaUtIon • All cleaning agents are perfectly tuned to the Observe the Safety chapter cleaning programs. w starting on page 81 > Use only WMF cleaning and descaling media. User Manual WMF 1000 S/1000 pro S... - Page 51 > Ensure that no one ever drinks the cleaning solution or descaling solution. never clean the coffee machine parts in IMportant the dishwasher. Consult the warranty / guarantee section w from page 88 User Manual WMF 1000 S/1000 pro S...
-
Page 52: Cleaning Intervals Overview
Daily = Daily, at least once per day and as required Weekly = Weekly cleaning Regularly = Regularly as required Message = After the display shows a message Optional = Optional (depending on the model) User Manual WMF 1000 S/1000 pro S... -
Page 53: Start Care Programs
6.4.1 Clean the milk system The milk system consists of: • All-in-one spout (WMF 1000 S with air intake pipe and cap) • Milk nozzle • Milk hose Health hazard. Hygiene. CaUtIon • Milk is very sensitive. Germs that can pose Observe the safety a health hazard can build up in the milk... -
Page 54: Milk System Cleaning
™ Wipe off the outside of the milk hose with a clean, damp cloth ™ Connect the milk hose with the milk nozzle to the hot water spout [1] ™ Turn the milk hose counterclockwise until it reaches the hard stop [2] User Manual WMF 1000 S/1000 pro S... - Page 55 ™ Slide the all-in-one spout downward Not all the way to the stop. ™ Hold the milk hose with the milk nozzle over the drip tray after rinsing, so that the remaining hot water can run out User Manual WMF 1000 S/1000 pro S...
-
Page 56: Machine Cleaning
> Never reach under the spouts while cleaning or descaling. > Ensure that no one ever drinks the cleaning solution or descaling solution. The cleaning program provides a step-by-step guide through the machine cleaning on the display. Follow the messages. User Manual WMF 1000 S/1000 pro S... - Page 57 A minute countdown timer shows the time remaining in Milk system cleaning the cleaning cycle. w page 54 After cleaning, the display requests a manual milk system cleaning. This message disappears as soon as is pressed. User Manual WMF 1000 S/1000 pro S...
-
Page 58: Water Filter
DI_06_07_03 Filter change starts. remove water tank DI_06_07_04 ™ Remove water tank remove old filter place new filter Insert water filter ™ Replace the old water filter with a new one w Start-up page 12 User Manual WMF 1000 S/1000 pro S... -
Page 59: Rinse Water Filter
Calculated by the coffee machine and shown on the display. • Postpone descaling ™ Press the off/c button • Number of brewing cycles 50 brewing cycles allowed after the first message before beverages are blocked • Remove beverage block ™ Perform a descaling User Manual WMF 1000 S/1000 pro S... - Page 60 • 1 bottle of WMF liquid descaling agent (0.75 litre) • 3-litre collection container Display messages lead you step by step through the program.
- Page 61 The crystals must not enter ™ Pour one whole bottle of WMF liquid descaling agent the coffee machine. into the water tank The water temperature in ™ Fill the water tank with water and stir the tank must not exceed ™...
- Page 62 Finish descaling ™ Remove and empty water tank ™ Thoroughly rinse the water tank under warm drinking water in order to remove all descaler residues A request for machine cleaning appears immediately after descaling. User Manual WMF 1000 S/1000 pro S...
-
Page 63: Clean The Grounds Container
> Do not clean with scouring powders or the Consult the warranty / guarantee section like. w from page 88 > Do not use any sharp cleaners or implements. > Use soft cloths for cleaning. User Manual WMF 1000 S/1000 pro S... -
Page 64: Clean The Housing And Control Panel
6.11 Clean the water tank ™ Thoroughly rinse out the water tank weekly with warm drinking water Severe scale deposits can be removed with WMF liquid descaling agent. After descaling, thoroughly rinse the water tank under warm drinking water in order to remove all descaler residues. -
Page 65: Release Blocked Grinder
™ Place the multitool on the finger protector and rotate the grinder ™ Vacuum out again with the vacuum cleaner ™ Repeat this procedure until the foreign object has been removed ™ Return the grinding degree to its previous position User Manual WMF 1000 S/1000 pro S... -
Page 66: Clean The Milk System
™ Press the ejection lever on the back side of the All-in-One spout to loosen the milk foamer [1] ™ Pull the milk foamer down and off [2] ™ Release the milk hose from the milk foamer [2] User Manual WMF 1000 S/1000 pro S... - Page 67 All-in-One spout, with hose coupling Health hazard in case of eye contact CaUtIon • In case of eye contact, the WMF milk system Observe the Safety chapter cleaner can cause severe eye injury. w starting on page 81 > Ensure that the WMF milk system cleaner never makes contact with the eyes of a person or animal.
- Page 68 Clean the steam nozzle w page 71 ™ Dry all parts with a clean dishcloth and allow to dry completely before assembly ™ Clean any WMF milk system cleaner residue from your hands ™ Slide the top and bottom parts of the milk foamer together WMF 1000 S...
-
Page 69: Clean The Brewing Unit And Brewing Chamber
™ Open the brewer lid [1] ™ Unlock brewing unit [2] ™ Lift the brewing unit up out of the brewer compartment [3] ™ Use the multitool to turn the thread on the head of the brewing unit counterclockwise [4] User Manual WMF 1000 S/1000 pro S... - Page 70 ™ Use the multitool to turn the thread at the top of the brewing unit clockwise, until the black scraper folds back in [5] ™ Insert the dried brewing unit in until the lock engages ™ Close the brewer lid User Manual WMF 1000 S/1000 pro S...
-
Page 71: Clean The Steam Nozzle
™ Disconnect mains plug ™ Disassemble the milk foamer [1] ™ Press the red steam nozzle to the left with the index finger to remove it [2] ™ Carefully clean the steam nozzle with a small cleaning brush User Manual WMF 1000 S/1000 pro S... -
Page 72: Chapter 7 Haccp Cleaning Schedule
UHT milk with pack at commencement of operation. a 1.5 % fat content. • Ensure absolute cleanliness when opening the milk pack. Germs can be introduced from dirty hands or tools when opening. User Manual WMF 1000 S/1000 pro S... - Page 73 4 hours of operation time (absolutely required for a low number of 2. Manual All‑in‑One spout cleaning (Milk foamer) dispense cycles, or if milk is not cooled) w Cleaning instructions 4. General machine cleaning Cleaning steps Cleaning steps Time Signature Time Signature User Manual WMF 1000 S/1000 pro S...
-
Page 74: Chapter 8 Messages And Instructions
™ Pour coffee beans into the bean hopper w page 76 ™ Press the desired beverage button again The grinding process continues and the additional coffee required for the brewing cycle is ground. The desired beverage is brewed. User Manual WMF 1000 S/1000 pro S... -
Page 75: Insert Ground Coffee
™ Change the filter change water filter Change water filter page 58 DI_08_01_12 8.1.8 Descale machine the machine must be descaled your selection pls ™ Perform a descaling descale machine Care Descaling, page 59 User Manual WMF 1000 S/1000 pro S... -
Page 76: Error Messages And Malfunctions
(with empty water tank) ™ Switch the coffee machine off and then back on after a few seconds Care Water tank, page 64 ™ Deaerate the coffee machine: dispense hot water until a smooth water stream comes out User Manual WMF 1000 S/1000 pro S... - Page 77 ™ Check the O-ring on the water tank coupling and replace if needed ™ If the error recurs, call the WMF Service Brewing unit is clogged ™ Remove the brewing unit, clean it manually, insert it, and perform a machine cleaning ™...
- Page 78 Action instructions Motor driver error ™ Switch off the coffee machine and then on again after a few seconds ™ If the error recurs, call the WMF Service Grinder blocked the grinder is blocked by a foreign object Release blocked grinder, page 65 Grinding degree too fine ™...
-
Page 79: Errors Without Error Messages
™ Make sure that the milk nozzle is attached to the milk cold hose ™ Check whether the correct milk nozzle is mounted (1000 S brown for refrigerated milk 1000 pro S white for refrigerated milk) Milk is too warm Milk is too warm and too little in quantity ™... - Page 80 The brewing unit is not in the normal position be removed or ™ Close the cover and switch-on the coffee machine replaced ™ Adjust the brewing unit with the multitool while inserting it, until the brewing unit can be inserted User Manual WMF 1000 S/1000 pro S...
-
Page 81: Chapter 9 Safety
• Follow all the safety instructions. 9.1 Hazards to the operator At WMF, safety is one of the most essential product features. The effectiveness of the safety devices can only be ensured if the following points are observed: • Read the User Manual carefully prior to use. - Page 82 Burn hazard. Hot surfaces. CaUtIon • The brewing unit can get hot. > Clean the brewing unit only when the machine has cooled off. User Manual WMF 1000 S/1000 pro S...
- Page 83 • The hot liquids can irritate the skin, and the heat poses a burn hazard. > Never reach under the spouts while cleaning or descaling. > Ensure that no one ever drinks the cleaning solution or descaling solution. User Manual WMF 1000 S/1000 pro S...
-
Page 84: Hazards To The Coffee Machine
Coffee grinder • Foreign objects can damage the grinders. This damage is not covered under the warranty. > Ensure that no foreign objects land in the coffee bean hopper. User Manual WMF 1000 S/1000 pro S... - Page 85 • For water with carbonate hardness in excess of 5 °dKH, a WMF water filter must be fitted; otherwise, the coffee machine can be damaged due to build-up of scale. • For insurance reasons always ensure that, at the end of operation, the mains switch is switched off or the mains plug is unplugged.
-
Page 86: Chapter 10 Intended Use And Directives
Intended use and Directives Chapter 10 Intended use and Directives 10.1 Intended use The WMF 1000 S/1000 pro S is designed The use of the device is also subject to dispense coffee beverages and milk to the “General Terms and Conditions” beverages in many variations into of WMF AG and this User Manual. -
Page 87: Directives
MD (MR) 2006/42/EC (EG), Directive Requirements traceability pursuant 2004/108/EC (EMC), Directive 2011/65/EC to EC regulation No. 1935/2004 and (ROHS), Directive 2002/96/EC (WEEE). Good Manufacturing Practice within the meaning of EC regulation No. 2023/2006 are ensured and guaranteed. User Manual WMF 1000 S/1000 pro S... -
Page 88: Chapter 11 Warranty For Commercial Use
• With respect to the consequences of on the part of WMF. improper modifications undertaken • With respect to faults which occur without the consent of WMF, or by as a result of failure to follow repair or reconditioning work on handling instructions and regulations,... -
Page 89: Chapter 12 Guarantee And Directives For Private Use
Guarantee and directives for private use Chapter 12 Guarantee and directives for private use 12.1 Intended use The WMF 1000 S/1000 pro S is designed aforementioned is considered incorrect to dispense coffee beverages and milk use. The manufacturer shall not be liable beverages in many variations into cups for any damage resulting from this. -
Page 90: Chapter 13 Service And Addresses
WMF Service Center is your the local WMF Service is not known. first point of contact. Service certificate: w www.wmf.de w Kaffee & Tee w Kaffeevollautomaten w WMF 1000 S w Downloads name and address of the guarantor In Germany: WMF Württembergische Metallwarenfabrik Aktiengesellschaft Eberhardstraße... -
Page 91: Chapter 14 Technical Data
* For special models see model label, values given above are for the basic model. ** A-evaluated sound pressure level Lpa (slow) and Lpa (impulses) at operating personnel workplace is under 70 dB(A) in any working mode. User Manual WMF 1000 S/1000 pro S... -
Page 92: Conditions For Usage And Installation
850 mm. If the coffee machine connections are to be run downwards through the counter, please make space for the lines, which can reduce the usable space below the machine. * Value applies for commercial use. User Manual WMF 1000 S/1000 pro S... -
Page 93: Chapter 15 Shipping And Disposal
This device conforms to the European Directive 2002/96/EC on waste electrical and electronic equipment (WEEE) and must not be disposed of in household trash. Further information is available at your nearest collection station or at your service center. User Manual WMF 1000 S/1000 pro S... -
Page 94: Index
Device name 48 Machine number 48 Directives 87, 89 Mains power connection 91 Malfunctions 76 Dispensing hot water 7, 25 Dispensing test 34, 35 Manual insert 7, 29 Display 7 Messages and instructions 74 User Manual WMF 1000 S/1000 pro S... - Page 95 Weight empty 91 Release blocked grinder 65 Without water drain 30 Rest time 37 WMF Service Hotline 90 Rinse water filter 19 Work on site 92 Safety 81 Safety devices 81 Sanitize milk system 72 User Manual WMF 1000 S/1000 pro S...
- Page 96 Your nearest WMF Service: © 2012–2014 WMF AG All rights reserved, in particular duplication, distribution and translation rights. No part of this manual may be reproduced in any form or processed, duplicated or distributed using electronic systems without written consent. Design and production / typesetting and print presentation: TecDoc GmbH;...
Need help?
Do you have a question about the 1000 s and is the answer not in the manual?
Questions and answers