Table of Contents
Advertisement
Quick Links
Advertisement
Table of Contents

Related Manuals for WMF 1000


Summary of Contents for WMF 1000
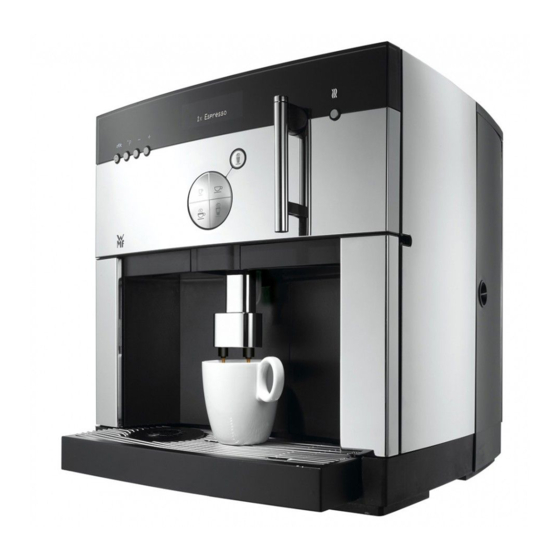
- Page 1 WMF 1000 User Manual EN...
- Page 2 The first premium machine that brings home 125 years of coffee expertise. WMF has been involved in the preparation of coffee since 1880. The first WMF large coffee machine dates back to 1927. Just 30 years later, in 1955, the great victory campaign of WMF coffee machines began, when WMF brought Italian espresso to German restaurants with the first fully automatic espresso machine.
-
Page 3: Introduction And General Information
Introduction Introduction and General Information Parts of the machine Bean hopper Manual insert Heated cup storage Display Plus button / Aroma button Minus button / Care button / Aroma button Hot water button P button / Confirm off/c button / Timer Hot water spout Milk button / Milk hose... -
Page 4: The First Premium Machine That Brings Home 125 Years Of Coffee Expertise
All beverages can be individually programmed for taste, fill level, and composition. The display makes it easy to operate your WMF 1000, and guides you safely through each program step. The care of your WMF 1000 is very important. We have developed a completely new customer care program for rinsing the milk system. - Page 5 Congratulations on the purchase of your WMF 1000 .
-
Page 6: Table Of Contents
Manual switch on for timer operation Manual switch off for timer operation Settings Cup size (Cup volumes) Beverage settings Grinding degree setting Check the grinding degree using the WMF Perfect Extraction System Set the grinding degree Basic settings Read counters Care Care overview... - Page 7 Errors with no malfunction display Safety Safety instructions Hazard instructions Correct use Warranty/Guarantee 24 Month Premium Service Maintenance WMF Service Center Service ticket WMF 1000 Transport and disposal Accessories and spare parts Scope of supply Optional accessories and spare parts Technical Data Index...
-
Page 8: Before You Begin
Introduction Before you begin Read this user manual before you begin dispensing coffee. Only then can you use all of the functions, operate the machine safely and indulge yourself with a wonderful cup of coffee. Additional components of the user manual: •... - Page 9 Introduction Ready to operate display The descriptions in the user manual always assume that the coffee machine is ready to operate. your selection pls 08:15 09.06.2008 Glossary Term Declaration • • Listings, selection options > > Individual actions, individual steps Text in italics Description of coffee machine state and/or explanations of steps carried out automatically...
-
Page 10: Start-Up
Start-up program Start-up Unpacking and setting up > Unpack coffee machine and set it up on a stable, horizontal surface Always heed the safety instructions in the “Safety” chapter, starting on page 56. > Inspect the coffee machine for possible shipping damage >... -
Page 11: Insert The Wmf Water Filter
Start-up Insert the WMF water fi lter The optional WMF water fi lter ensures the best coffee quality and protects the coffee machine from calcium deposits. For water hardness 0-4, do not use a water fi lter. > Remove the built-in fi lter from the front of the water tank >... -
Page 12: Install The Milk Hose
Start-up program Install the milk hose The milk hose is already mounted on the All-in-One spout. • For refrigerated milk, use the brown milk nozzle (installed on delivery) • For non-refrigerated milk, use the transparent milk nozzle from the accessories box The nozzle fits very tightly in the hose. -
Page 13: Fill The Coffee Bean Hopper
Press the button to set the desired language “Basic Settings” program after start-up. > Confirm with the P button Initial settings WMF 1000 w Settings The machine is switched on, the start-up program leads you through the basic settings. Page 26... -
Page 14: Basic Settings
Start-up program Basic settings > Press the buttons to set the desired values – > Press the P button to confirm the values and inputs After confirmation, the program jumps to the next point of the settings. The new values are saved when you exit the program. Time of day Select Confirm... - Page 15 > Fill the water tank with cold tap water Follow the display messages > Insert the WMF water filter Slowly slide the water tank back into the machine w Start-up The machine now heats up. w Prepare the water tank Page 8 heating up ...
- Page 16 Start-up program Start-up complete Setup is now complete. All settings can be changed now, or at a later time. The following setting options are available: • Set cup size • Beverage setting • Basic settings • Grinding degree setting w Set grinding degree Page 30 For perfection in your preparation of coffee we have compiled a chapter of “Tips and Tricks”.
-
Page 18: Operation
Preparation of coffee beverages In the centre of the WMF 1000 is a multi-function knob with four beverage buttons. Herein lie all the international coffee specialities that you can imagine. Each of the four buttons is assigned several beverages. -
Page 19: Example: Prepare A Cup Of Latte Machhiato
This description serves as an example for the preparation of all beverages. All steps are carried out for the preparation of the other beverages according to the example. Adjusting the height w Operation w WMF All-in-One spout > If necessary, adjust the height of the All-in-One spout to the height of the drinking vessel Page 21 The All-in-One spout must not be in the top position. -
Page 20: Coffee Preparation Using The Manual Insert
Operation Coffee preparation using the manual insert In addition to the coffee bean hopper, you can use the manual insert to make second type of coffee, such as decaffeinated coffee. > Place an appropriate container under the All-in-One spout > Remove the lid of the manual insert The display instructs: insert coff. -
Page 21: Preparing Milk And Milk Foam
Operation Preparing milk and milk foam At the touch of a button, the WMF 1000 also dispenses hot milk and milk foam. press briefly press and hold 1 cup milk Milk foam on request All-in-One spout in the top position... -
Page 22: Dispensing Hot Water
Operation Dispensing hot water With the hot water function, you can dispense hot water, for instance for tea. press briefly press and hold Hot water button 1 glass hot water Hot water on request Glass of hot water > Place a suitable glass under the hot water spout >... -
Page 23: Wmf All-In-One Spout
Operation WMF All-in-One spout The WMF 1000 is fitted with a unique system that has been standard in our professional machines for many years: The All-in-One spout. It dispenses coffee and milk foam simultaneously, with variable height adjustment so that you can place anything from an espresso cup to a latte macchiato glass beneath it. -
Page 24: Control Buttons
Operation Control buttons So that you will be delighted not only by the especially good taste of the coffee, but also by the elegant design of the machine, we decided to rely on a small number of multi-function buttons for operation. off/c button •... -
Page 25: Switching The Coffee Machine On And Off
If beverages with milk, such as latte macchiato, were prepared, then you will be asked to perform a milk Milk system rinse WMF Connect & Clean system rinse before the coffee machine switches off. w Care w General care programs A coffee system rinse begins after that. -
Page 26: Switching The Coffee Machine On And Off With The Timer
Operation Switching the coffee machine on and off with the timer Setting the automatic switch on time Set automatic switch on time to active To use the timer, the basic setting “Automatic switch on time” must first be set to active. w ... -
Page 28: Settings
The Counters give you information about the number of beverages that have been prepared. Cup size (Cup volumes) The WMF 1000 allows you to make easy individual adjustments to the cup volume to suit the cup sizes. The essential point is that: the recipe remains unchanged. -
Page 29: Beverage Settings
Settings > If necessary the new setting can be tested with a dispensing test cup volume: 100 % OK: P Test:bev.btn. The taste and the composition of the beverage remains the same; only the volume is changed to your wishes and to match the cup size. >... - Page 30 Settings > Select the beverage for which the taste and composition should be changed 1x briefl y 1 x espresso 1x café crème 1x briefl y 2x briefl y no setting no setting 2x briefl y 1x long 1x ristretto 1x mug café...
- Page 31 Settings Coffee strength Select cof. strng: 100 % 5,1s Confirm OK: P change: -/+ Care button The grinding quantity varies depending on the grinding degree setting, the type of coffee used, the Page backward – humidity and various other factors. The factory setting for Espresso is about 8 grams. Reduce value Determine the desired coffee strength with a dispensing test.
-
Page 32: Grinding Degree Setting
Adjust the grinding degree using the flavour after setting. WMF Perfect Extraction system so that it is optimal for the type of coffee used. Check the grinding degree using the WMF Perfect Extraction System >... -
Page 33: Set The Grinding Degree
Settings grinding too coarse Signs: The coffee fl ows too fast, the crème is too light and has too little body, the aroma is fl at. w Set grinding degree grinding too coarse Page 31 Test: P end: C > Turn the multitool one rotation clockwise to set the grinding degree fi ner Test the new grinding degree setting >... -
Page 34: Basic Settings
Settings Basic settings • Language* • Time* • Date* Description of the other basic settings w Start-up • Date/Time Page 12 • Switch on time • Switch off time • Water hardness* • Water filter* • Brewing temperature • Factory settings For a description of the basic settings marked with *, see the “Start-up”... -
Page 35: Read Counters
Settings Switch off time (in minutes after the last beverage preparation) Caution! switch off time: 60 min If timer operation is activated, the machine OK: P change: -/+ switches on again at the set switch on time. Here you can set how many minutes after the last beverage preparation the coffee machine should switch off automatically. -
Page 37: Care
Care Care The care of your WMF 1000 is very important, not least so that your coffee is always prepared perfectly. The display notifies you as soon as the WMF 1000 must be rinsed, cleaned or descaled. The unique Milk system rinse WMF Connect & Clean provides you with a very easy to maintain cleaning system for beverages with milk components. -
Page 38: General Care Programs
Run the care program regularly, and without delay when the request to do so appears in the display. WMF assumes no liability for damage due to lack of cleaning or descaling or due to the use of other cleaning or descaling agents than those provided by WMF. All guarantee and warranty claims are then void.. -
Page 39: Warm-Up Rinse/Coffee System Rinse
WMF Connect & Clean milk system rinse Milk system rinse time approx. 30 seconds The WMF Connect & Clean milk system rinse is unique world-wide; it allows you to easily maintain perfectly clean systems for beverages with milk components and thus maintain consistently enjoyable coffee. -
Page 40: Cleaning The Machine - Cleaning Program
Care The coffee machine’s milk system is rinsed with hot water. Hot rinse water is emptied through the All-in-One spout. The display prompts: lower spout into beverage position > Slide the All-in-One spout downward, out of the top position The display indicates: your selection pls 08:15 09.06.2008... - Page 41 Care drip tray cleaning refi ll water tank place 3L container under spout > Place an appropriate container (min. 3 litres) under the All-in-One spout insert tablet into coffee grounds slot > Add a cleaning tablet together with the yellow sponge and close the lid start: care button >...
-
Page 42: Replace Water Filter
> Refi ll water tank > After the change confi rm with the P button Replace water fi lter Insert the WMF water fi lter fi lter rinsing w Start-up w Prepare the water tank Page 9 place 3L container under h.w. -
Page 43: Descale Coffee Machine
> Remove the fi lter cartridge if a water fi lter is used > Pour a whole bottle of WMF liquid descaling agent (750 ml) into the water tank > Fill the water tank with water and close the lid >... - Page 44 Care A countdown timer shows how much longer the descaling will take. descaling ... time remain: 37 min. After approx. 30 minutes, the following displays appear: empty water tank OK: care button > Empty the water tank and rinse thoroughly with clear water The remaining descaling solution must be emptied from the tank so that the coffee machine can then be rinsed with clear water and no descaling solution remains in the coffee machine.
- Page 45 The water hardness, the water flow and whether a tank filter is used determine the schedule Page 36 for descaling. This time is calculated by the WMF 1000, and a request for descaling appears. Immediately following descaling, you will Descaling can be delayed by pressing the off/c button; however, it must be carried out within be prompted to clean the machine.
-
Page 46: Manual Cleaning
Care Manual cleaning The milk system consists of: All parts of the milk system must be cleaned thoroughly at least once a week. - All-in-One spout - milk hose - milk nozzle Cleaning the milk system All parts of the milk system must be cleaned thoroughly at least once a week. >... - Page 47 Care > Stir one measuring cap of WMF milk system cleaner into 200 ml lukewarm water in a container > Place all parts of the milk system in the cleaning solution for 5 hours or overnight [10] With the brushes included with the >...
-
Page 48: Cleaning The Brewing Unit
Care Cleaning the brewing unit Caution! Burn hazard! The brewing unit must cool off before cleaning Clean the brewing unit at least once a week > Switch off the coffee machine with the off/c button and unplug the power cord >... - Page 49 Care > Clean the brewing fi lter under running water or with a cloth > Rinse the brewing unit under running water Never clean the brewing unit in a dishwasher and never use any cleaner additives. > Dry the brewing unit with a cloth. Allow to dry completely before replacing in the coffee machine. >...
-
Page 50: General Cleaning
Switch off the machine, unplug the power cord > Clean the housing with a damp cloth It is best to clean the stainless steel front and the side parts using the WMF stainless steel cleaning cloth from the specialty shop. -
Page 52: Tips And Tricks For Perfect Coffee Beverages
Run a warm-up rinse on the machine after switching on and after The pre-brew function is set at the factory for all coffee specialties pauses in use. This brings the WMF 1000! up to its ideal operating except café crème. -
Page 53: Cleaning The Bean Hopper
Care Coffee is assessed by its qualities such as acidity, aroma, body and The care of the WMF 1000 is particularly important for perfectly fragrance. 100 % Arabica guarantees top quality. In the end, the prepared coffee. Therefore, run the appropriate care programs as choice of top-quality coffee that comes to your breakfast table is a requested on the display, and also regularly perform manual care. -
Page 54: Twelve International Specialties At The Touch Of A Button
Tips and tricks Twelve International specialties at the touch of a button Espresso Two espressos Ristretto The little black coffee with the strong “Due espressi” The Italian way of enjoying Small, black and powerful aroma. Cognoscenti prize the characteristic coffee - best with a friend. –... -
Page 55: Messages And Instructions
Messages and instructions Messages and instructions Operating messages Empty grounds container The coffee grounds container is full empty grounds cont. > Remove the coffee grounds container, empty it and rinse it with water beverage sel. locked > Wipe the coffee grounds container dry grounds cont.missing >... -
Page 56: Bean Hopper Is Empty
Messages and instructions Bean hopper is empty There are not enough coffee beans in the coffee refi ll beans bean hopper confi rm beverage Grinding is interrupted. > Pour coffee beans into the bean hopper > Press the beverage button again The grinding process continues and the additional coffee required for the brewing cycle is ground. -
Page 57: Side Door Open
Messages and instructions Side door open The right-hand side door of the coffee machine is beverage sel. locked open side door open > Close the right-hand side door > Close lock completely Spout downwards The All-in-One spout is in the milk system rinse lower spout into position beverage position... -
Page 58: Error Messages And Malfunctions
Search in the error list for the error message and follow the instructions. If this is not successful, or the error displayed is not listed, please call the WMF service hotline. Some messages lead to blocking of individual functions. You will notice this by the fact that the beverage button light goes out. - Page 59 > Set the grinding degree coarser by 3 rotations > EEPROM Error Switch machine on/off If the error repeats, the malfunction must be corrected by the WMF Service Center. w 24-Month Premium Service and Maintenance w WMF Service Center >...
-
Page 60: Errors With No Malfunction Display
Lightly smear O-rings on water spout supports with remove WMF gasket grease > Brewing unit is difficult to Lightly the smear O-rings on the brewer with WMF sealing ring grease Grease O-rings w Messages and instructions remove and replace w Error messages and malfunctions >... - Page 61 Messages and instructions Pump makes loud noises Water tank is not inserted correctly (air in the system). > Push in water tank completely > Bleed machine: Dispense hot water until a constant stream of water comes out Instruction: It is normal if the water pump runs independently from time to time during operation;...
- Page 62 Messages and instructions Grease O-rings > Use only WMF gasket grease. The grease is specially matched to the material and safe for food preparation equipment. If the water tank is diffi cult to remove and replace. O-ring for water tank >...
-
Page 63: Safety
Safety Safety Safety instructions At WMF, we pay utmost attention to the product features, to ensure the machine is as safe as possible. The effectiveness of the built-in safety devices is, however, only guaranteed if the following points are observed: •... -
Page 64: Correct Use
WMF assumes no liability for damage due to lack of cleaning or descaling or due to the use of other cleaning or descaling agents than those provided by WMF. All guarantee and warranty claims are then void. -
Page 65: Warranty/Guarantee
§§ 437 ff BGB remain unaffected. The warranty period is only valid if the repairs to the product are carried out by WMF. The warranty period expires if repairs are performed other than by WMF. -
Page 66: 24 Month Premium Service Maintenance
WMF Service Center This procedure applies only within Have a question on the operation or function of your WMF 1000 ? Call us on our WMF Service Hotline. Germany and Austria. Or send us an e-mail. The WMF Service Center is the first point of contact, along with your specialist dealer. - Page 67 Operation...
-
Page 68: Service Ticket Wmf 1000
Don’t forget to include the completed service ticket and a copy of the proof of purchase in your package. Attention: Handling of shipping of your WMF 1000 occurs via the WMF Service Center. The package is collected from your premises. -
Page 69: Transport And Disposal
This device is subject to the directive on waste electrical and electronic equipment (WEEE/EU directive) and may not be disposed of as domestic waste. Further information can be obtained from your local recycling depot or from our WMF Service Center. -
Page 70: Accessories And Spare Parts
Therefore we have developed the right matching accessories for your WMF 1000. In addition to the Coffee Lounge milk cooler, with active milk refrigeration you will receive everything that makes for perfect enjoyment of coffee. -
Page 71: Technical Data
200 mm space on the right side of the machine to remove the brewer. Weight empty approx. 19.0 kg Weight of brewer 1.2 kg Cable length approx. 1.0 m Continuous sound pressure level (Lpa) < 70 dB (A) Item number 03 0500 0002 Manufacturer WMF Group... -
Page 72: Index
Accessories and Spare parts 68 Date 12, 32 Insert coffee grounds 54 Adjusting the All-in-One spout 21 Date/time 32 Insert the WMF water filter 9 All-in-One spout 19 Delete all counters 33 Install the milk hose 10 Automatic coffee system rinse. 14... - Page 73 Symbols 6 Safety instructions 61 Water hardness 12, 13 Scope of supply 68 Water quality 50 WMF 1000 Service Center 64 Second type of coffee 18 Sequence: coffee-milkOK: 29 WMF 1000 service ticket 66 Technical Data 69 Set the grinding degree 31...
- Page 74 Operation 1000 WMF AG D-73309 Geislingen www.wmf.de Typ 0500 BAL 06/08 EN...
Need help?
Do you have a question about the 1000 and is the answer not in the manual?
Questions and answers