Table of Contents
Advertisement
915_CIB_2ATT
6/9/03
2:01 PM
Page II
USER'S MANUAL
Part 2
Revsied FINAL
06/9/03
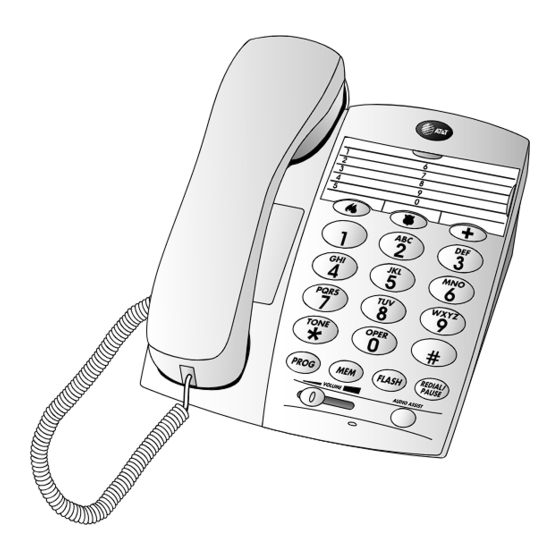
Big Button Telephone 915
Please also read
Part 1 — Important
Product Information
© 2003 Advanced American Telephones. All Rights Reserved.
AT&T and the Globe Design are trademarks of AT&T Corp., licensed to Advanced American Telephones.
Advertisement
Table of Contents

Subscribe to Our Youtube Channel
Related Manuals for AT&T 915


Summary of Contents for AT&T 915
- Page 1 Page II USER’S MANUAL Part 2 Revsied FINAL 06/9/03 Big Button Telephone 915 Please also read Part 1 — Important Product Information © 2003 Advanced American Telephones. All Rights Reserved. AT&T and the Globe Design are trademarks of AT&T Corp., licensed to Advanced American Telephones.
- Page 2 915_CIB_2ATT 6/9/03 2:01 PM Page III Visit us at www.telephones.att.com © 2003 Advanced American Telephones. All Rights Reserved. AT&T and the Globe Design are trademarks of AT&T Corp., licensed to Advanced American Telephones. Printed in China. Issue 2AT&T 06/03...
-
Page 3: Table Of Contents
915_CIB_2ATT 6/9/03 2:01 PM Page V CONTENTS BEFORE YOU BEGIN ..1 TELEPHONE Parts List ........1 MEMORY ......11 Directory Card ..... 11 INSTALLATION ....2 Store a Number Table/Desk Installation ..2 in Memory ......11 Wall Installation....... 5 Store a Pause in a Memory Number .... -
Page 4: Before You Begin
Your box should include: This User’s Manual USER’S MANUAL Part 2 Short telephone line cord Big Button Telephone 915 Long telephone line cord Please also read Part 1 — Important Product Information © 2003 Advanced American Telephones. All Rights Reserved. -
Page 5: Installation
915_CIB_2ATT 6/9/03 2:01 PM Page 2 INSTALLATION Table/Desk Installation 1 Install batteries to provide power for the dial pad lights.Press the battery cover tab and remove the cover. Install four AA batteries (not included), being careful to follow the polarity guide in the battery compartment. Replace the cover. - Page 6 915_CIB_2ATT 6/9/03 2:01 PM Page 3 2 Set the Tone/Pulse switch. If you have touch tone service, set the switch to TT (tone). If you have dial pulse (rotary) service, set the switch to DP (pulse). Tone/Pulse switch 3 Connect the handset to the telephone. Plug the coiled cord into the handset jack on the left side of the base unit.
- Page 7 915_CIB_2ATT 6/9/03 2:01 PM Page 4 5 Connect the line cord to a modular jack. Modular Telephone telephone line cord wall jack 6 Check for dial tone. Lift the handset and listen for a dial tone. If you cannot hear a dial tone, slide the VOLUME switch to the right. If you still do not hear a dial tone, see the IN CASE OF DIFFICULTY SECTION beginning on page 15 of this User’s Manual.
-
Page 8: Wall Installation
915_CIB_2ATT 6/9/03 2:01 PM Page 5 Wall Installation 1 Install batteries to provide power for the dial pad lights. Press the battery cover tab and remove the cover. Install four AA batteries (not included), being careful to follow the polarity guide in the battery compartment. Replace cover. - Page 9 915_CIB_2ATT 6/9/03 2:01 PM Page 6 2 Set the Tone/Pulse switch. If you have touch tone service, set the switch to TT (tone). If you have dial pulse (rotary) service, set the switch to DP (pulse). 3 Connect the short line cord to the telephone. Plug the line cord into the jack labeled TELEPHONE LINE and thread the cord through the tabs under the phone as shown.
- Page 10 915_CIB_2ATT 6/9/03 2:01 PM Page 7 5 Connect the handset to the telephone. Plug the coiled cord into the handset jack on the left side of the base unit. Plug the other end of the coiled cord into the handset, then hang up. 6 Connect the line cord to a modular wall jack and mount the phone on the wall jack as shown.
-
Page 11: Telephone Operation
915_CIB_2ATT 6/9/03 2:01 PM Page 8 TELEPHONE OPERATION Make a Call Lift the handset. When you hear a dial tone, dial the call using the dial pad or memory buttons. ◗ Answer a Call When you hear the phone ring and the ringer light turns on, you have an incoming call. -
Page 12: Redial
915_CIB_2ATT 6/9/03 2:01 PM Page 9 Redial The last number dialed at this phone is stored in redial memory. To place a redial call, lift the handset and listen for the dial tone, then press r. The number is dialed automatically. NOTE: Redial memory can store up to 32 digits. -
Page 13: Temporary Tone Dialing
915_CIB_2ATT 6/9/03 2:01 PM Page 10 Temporary Tone Dialing If you have dial pulse (rotary) service, you can change from dial pulse to touch tone dialing during a call by pressing t. All keys pressed after this will send touch tone signals. -
Page 14: Telephone Memory
915_CIB_2ATT 6/9/03 2:01 PM Page 11 TELEPHONE MEMORY This telephone can store 13 telephone numbers, each up to 16 digits long. You can dial numbers stored in memory by pressing one or two buttons. ◗ Directory Card Lift the mylar cover off the directory card to write the numbers (or names) stored in telephone memory on the card. -
Page 15: Store A Pause In A Memory Number
915_CIB_2ATT 6/9/03 2:01 PM Page 12 Store a Pause in a Memory Number Press and release r once to store a 3.6 second pause in the dialing sequence, twice for a 7.2 second pause and so on. NOTE: Each 3.6 second pause counts as one digit when storing numbers in telephone memory. -
Page 16: General Product Care
915_CIB_2ATT 6/9/03 2:01 PM Page 13 GENERAL PRODUCT CARE To keep your phone working and looking good, follow these guidelines: • Avoid putting it near heating appliances and devices that generate electrical noise (for example, motors or fluorescent lamps). • DO NOT expose it to direct sunlight or moisture. -
Page 17: Technical Specifications
915_CIB_2ATT 6/9/03 2:01 PM Page 14 TECHNICAL SPECIFICATIONS TECHNICAL SPECIFICATIONS 1.3B Power Four AA batteries are required for backlighting. Phone must also be connected to telephone line for all features to work. 48V + ⁄- 2V Line Feed Voltage Line Loop Current 18mA to 100mA Ringer Levels Off = 0dB... -
Page 18: In Case Of Difficulty
915_CIB_2ATT 6/9/03 2:01 PM Page 15 IN CASE OF DIFFICULTY If you have difficulty operating this phone, try the suggestions below. For Customer Service, visit our website at www.telephones.att.com 1 800 222–3111 or call Please retain your receipt as your proof of purchase. To purchase accessories or replacement parts contact Customer www.telephones.att.com Service. - Page 19 915_CIB_2ATT 6/9/03 2:01 PM Page 16 TELEPHONE OPERATION PROBLEM SOLUTION Dial Pad Lights • Make sure you have installed four fully Are Dim Or charged AA batteries (not included) Do Not Work following the polarity guide in the battery compartment. (See INSTALLATION beginning on page 2 of this User’s Manual for details.)
-
Page 20: Index
915_CIB_2ATT 6/9/03 2:01 PM Page 17 INDEX AUDIO Assist™ 10 redial memory 9 RINGER switch 10, 15 batteries 2, 5, 16 Telephone Does Not Ring dial pad lights 2, 5 Temporary Tone Dialing 10 Dial Pad Lights Are Dim Tone/Pulse switch 3, 6 Or Do Not Work 16 touch tone signals 10 Difficulty Storing Numbers...
Need help?
Do you have a question about the 915 and is the answer not in the manual?
Questions and answers