Dürkopp Adler 559 Operating Instructions Manual
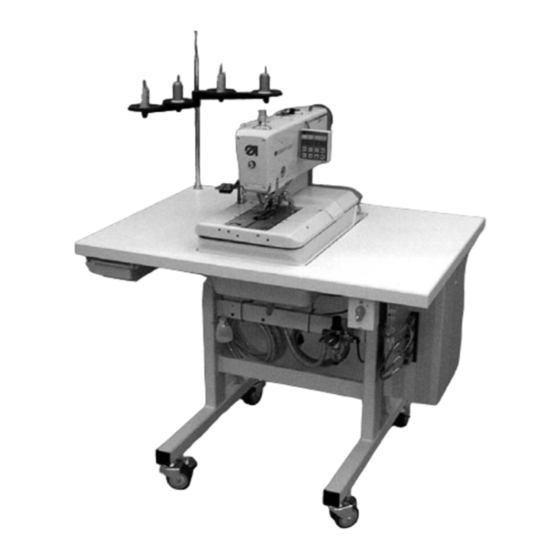
Automatic single-chainstitch eyelet machine
Hide thumbs
Also See for 559:
- Parts list (107 pages) ,
- Operating, installation and servicing instructions (70 pages) ,
- Instruction manual (258 pages)
Table of Contents
Advertisement
Doppelkettenstich Knopflochautomat
Einfachkettenstich Schnürlochautomat
Automatic double-chainstitch buttonholer
Automatic single-chainstitch eyelet machine
Aufstellanleitung / Installation Instructions
Postfach 17 03 51, D-33703 Bielefeld Ÿ Potsdamer Straße 190, D-33719 Bielefeld
Telefon +49 (0) 5 21/ 9 25-00 Ÿ Telefax +49 (0) 5 21/ 9 25 24 35 Ÿ www.duerkopp-adler.com
Ausgabe / Edition:
02/2006
Bedienanleitung /
Serviceanleitung / Service Instructions
Printed in Federal Republic of Germany
Operating Instructions
Teile-Nr.:/Part-No.: 0791 559001
559
1
2
3
Advertisement
Table of Contents

Related Manuals for Dürkopp Adler 559


Summary of Contents for Dürkopp Adler 559
- Page 1 Doppelkettenstich Knopflochautomat Einfachkettenstich Schnürlochautomat Automatic double-chainstitch buttonholer Automatic single-chainstitch eyelet machine Bedienanleitung / Operating Instructions Aufstellanleitung / Installation Instructions Serviceanleitung / Service Instructions Postfach 17 03 51, D-33703 Bielefeld Ÿ Potsdamer Straße 190, D-33719 Bielefeld Telefon +49 (0) 5 21/ 9 25-00 Ÿ Telefax +49 (0) 5 21/ 9 25 24 35 Ÿ www.duerkopp-adler.com Ausgabe / Edition: 02/2006 Printed in Federal Republic of Germany...
- Page 2 Manual, complete ummary perating Instructions Installation Instructions Service Instructions Interconnection-diagram 9890 580001 B Pneumatic circuit plan 9770 559001 lle Rechte vorbehalten. Eigentum der Dürkopp Adler AG und urheberrechtlich geschützt. Jede, auch auszugsweise Wiederverwendung dieser Inhalte ist ohne vorheriges schriftliches Einverständnis der Dürkopp Adler AG verboten.
- Page 3 Foreword This instruction manual is intended to help the user to become familiar with the machine and take advantage of its application possibilities in accordance with the recommendations. The instruction manual contains important information on how to operate the machine securely, properly and economically. Observation of the instructions eliminates danger, reduces costs for repair and down-times, and increases the reliability and life of the machine.
-
Page 4: General Safety Instructions
General safety instructions The non-observance of the following safety instructions can cause bodily injuries or damages to the machine. 1. The machine must only be commissioned in full knowledge of the instruction book and operated by persons with appropriate training. 2. -
Page 5: Table Of Contents
Page: Preface and general safety hints Part 1: Operating Instructions cl. 559 Description of product Use in accordance with the requirements ........5 Brief description . - Page 6 Index Page: 10.3 Main level of the menu system ......... 21 10.3.1 Direct editing of the values in the main level .
-
Page 7: Description Of Product
Description of product Use in accordance with the requirements The DÜRKOPP ADLER 559 is a sewing automat determined for sewing buttonholes in light to medium-weight material, i.e. fabrics made of textile or synthetic fibres. Such sewing materials are used in the clothing industry. Furthermore, this sewing automat can possibly also sew so-called technical seams. -
Page 8: Subclasses
- number of stitches in the eyelet - stitch distance - taper tack length Subclasses 559-151000 With trimmer for the needle thread cut short. For cutting lengths up to 42 mm. Universal machine for buttonholes in fabrics of different quality and size;... -
Page 9: Structure Of Product
Structure of product Subclasses Equipment Material number Sewing automat 0559 990001 Accessories 0791 580501 Optional equipment: Pneumatic connection package 0797 0030031 Integral sewing lamp (LED) 0580 100344 Foot switch 9880 580002 Upper gimp guide 0580 590804 Fabric deflector for back trousers 0580 590574 Support table for operating while standing 0580 590504... -
Page 10: Technical Data
Technical data Machine head: Class 559 Type of sewing stitch: Double-chainstitch Number of needles: Needle system: 558 / 579 Attention! When changing over from one needle system to the other the distance between looper and needle and the adjustment of the needle protection have to be checked in any case (see service instructions). -
Page 11: Operation
Depending on the sewing equipment (E-No.) and the material also other threads and thread sizes may be required. Subclass Type and size of needle Type and size of bottom Type and size of lower thread thread gimp 559-151000 Poly-Poly 80/2 Poly-Poly 80/2 Poly-Schappe 15/3... -
Page 12: Removing And Inserting The Clamping Plates
Removing and inserting the clamping plates Caution: Danger of injury ! The removing and inserting of the clamping plates 1 has to be done with the sewing automat switched off or in the position “Threading mode” (see chapter “Threading mode”). Remove the clamping plates –... -
Page 13: Needle Change
Needle change Caution: Danger of injury ! The needle has to be changed with the sewing automat switched off or in the position “Threading mode” (see chapter “Threading mode”). – Loosen screw 1 (Allen key in the accessories). – Pull needle 2 out of the needle bar. –... -
Page 14: Threading The Needle Thread
Threading the needle thread Caution: Danger of injury ! The needle thread must only be threaded in when the machine is switched off or in the “Threading mode” (see chapter “Threading mode”). – Thread in the needle thread as shown in the illustrations. –... -
Page 15: Threading The Looper Thread
Threading the looper thread Looper thread Gimp thread Caution: Danger of injury ! The looper thread must only be threaded in when the machine is switched off or in the “Threading mode” (see chapter “Threading mode”). The automat must be in its final position, i.e. the looper turret with the loopers has to point to the front. -
Page 16: Threading The Gimp Thread
Threading the gimp thread Bottom thread Gimp thread The looper turret has been turned 90° counter clockwise in order to show clearly the thread guide of the gimp thread. Caution: Danger of injury ! The gimp thread must only be threaded in when the sewing machine is switched off or in the “Threading mode”... -
Page 17: Thread Tension
Thread tension Needle thread and looper thread tension The thread tensions are dependent on the type and quality of the threads and fabrics. The buttonhole looks best if it is sewn with the lowest possible thread tension. Too tight thread tensions can lead to undesired ruffling and thread breakage, particularly when processing thin materials. - Page 18 Looper thread tension – Swivel the machine head up. – Adjust the looper thread tension by means of tension 1. Turn the tension in clockwise direction in order to increase the looper thread tension. Turn the tension counter-clockwise in order to reduce the looper thread tension.
-
Page 19: Changing Of Cutting Blocks And Knives
Changing of cutting blocks and knives The cutting length can be altered by changing the cutting blocks. Caution: Danger of injury ! Change the cutting block or the knife only when the automatic buttonholer is switched off! Change the cutting block –... -
Page 20: Push Button
Push button By means of the push button it is possible to control the clamps and to start the sewing operation. According to the adjustment in the service menu (see service instructions) the function is different. 1. Adjustment – Key 1: The clamps are opened or closed respectively. –... -
Page 21: Switching On - Switching Off - Threading Mode
Switching on - Switching off - Threading mode Switching on – Switch the main switch 1 on. The machine moves to the loading position and is ready for sewing. Switching off – Switch the main switch 1 off. All drives and the control are immediately separated from the electric supply lines. -
Page 22: Control
LED display Keyboard 10.1 General notes The automatic buttonholer class 559 is equipped with a programmable control. Up to 5 different buttonholes can be defined. It is possible to change between the programmed buttonholes when sewing. There are two buttonhole types to choose from: –... -
Page 23: Main Level Of The Menu System
10.3 Main level of the menu system After the automat has been switched on and while sewing the display of the automat indicates the main level of the menu system. In the main level three values are indicated: - The buttonhole program 1 (in the example P02) - The needle thread tension 2 (in the example 43) - The cutting length 3 (in the example 20) -
Page 24: Adjusting The Thread Tension In The Main Level
10.3.3 Adjusting the thread tension in the main level In the right field of the display the first two digits indicate the needle thread tension when sewing. This can be adjusted directly from the main level. “F”-key Press the “F”-key. A value is blinking in the display. Keys ïð... -
Page 25: Operating The Menu
10.4 Operating the menu The menu system of the 559-151000 is subdivided in 3 levels. The main level indicates the used buttonhole program, the needle thread tension and the cutting length while sewing. You can change over from the main level to the menu for programming buttonholes. A menu item can include further submenu items. -
Page 26: List Of Menu And Submenu Items
10.4.3 List of menu and submenu items Menu item Description Buttonhole number: up to 5 different buttonholes can be programmed. Taper tack selection: buttonholes with taper tack (1), cross tack (2), round tack (3), and without taper tack (0) can be programmed. Length adjustments Sewing length: the sewing length can be set from 6 to 42 mm, depending on the equipment. - Page 27 Menu item Description Eyelet inclination: the buttonhole eye can be slightly inclined to the left or to the right. Throw width: the mechanically regulated throw width (stitch width) can be enlarged/reduced of 0.5mm. Cutting adjustments Cutting mode: depending on the sewing equipment, the buttonhole cut can be set either after sewing (1), before (2), or not at all.
- Page 28 Menu item Description Round tack adjustments Number of stitches in the round tack: from 6 to 12 stitches can be set in the round tack. Throw width in the round tack: the mechanically regulated throw width (stitch width) can be enlarged/reduced. Attention! The enlargement depends on the setting of the throw width in menu item 150.
-
Page 29: Programming A Buttonhole
Hint! In order to give you a better overview of all the submenus and to facilitate the programming, a quick-reference is accompanying the manual. You can store it above the drawer. 10.4.4 Programming a buttonhole – Press the “P”-key to get from the main level to the buttonhole programming mode. -
Page 30: Sewing Operation
10.5 Sewing operation 10.5.1 Switching on Field 1 Field 2 – Switch on main switch. The machine moves to the loading position. The main level is indicated in the display. – Field 1: used buttonhole program – Field 2: The first two digits indicate the thread tension. The last two digits indicate the cutting length of the buttonhole or the internal diameter of the eyelet in mm. -
Page 31: Sewing
10.6 Sewing The sewing operation can be controlled either by push button or with the keys “OK” and “ESC” at the control panel. Sewing with the push button With the push button the clamps can be controlled and the sewing operation started. -
Page 32: Information Messages
Replacing the knife – Loosen screw 1 and remove the fabric holder 4. – Take out the old knife 2. – Stick the new knife 3 in the groove and snap it off in the arrow direction. – Tighten the screw 1. –... -
Page 33: Threading Mode
11.4 Threading mode As long as the sewing automate is in the “Threading mode”, the information code in the margin appears. The sewing automat is in the “Threading mode”, the needle is not in its upper position. Correction – Switch off the “Threading mode” by pressing the button at the head cover. -
Page 34: Maintenance
Maintenance Caution: Danger of injury ! Carry out maintenance work only when the machine is switched off. In case maintenance work has to be done when the machine is running, practise utmost caution. 13.1 Cleaning A clean sewing automat avoids disturbances ! Daily cleaning: –... -
Page 35: Oiling
13.2 Oiling Check the oil level in the oil reservoirs 4 and 5 weekly ! Caution: Danger of injury ! Oil can cause skin eruption! Avoid a longer contact with the skin! Wash yourself thoroughly after a contact! ATTENTION ! The handling and disposal of mineral oils is subject to legal regulations. -
Page 36: Control
13.3 Control Caution: Danger of Injury ! Turn the main switch off. The maintenance of the automatic buttonholer must only be carried out with the machine switched off! ATTENTION ! If the automatic buttonholer has not been used for a long time or after assembling the machine, oil the wicks, felts, looper and needle bar components (see Installation Instructions chapter 10).
Need help?
Do you have a question about the 559 and is the answer not in the manual?
Questions and answers