Table of Contents
Advertisement
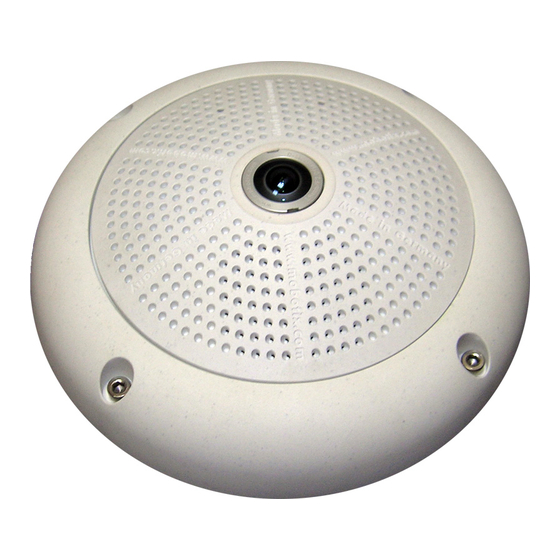
Q22M Camera Manual Part 1
Allround Easy. Allround Secure.
MOBOTIX' ultra-compact, weatherproof IP Dome camera is so inconspicuous that many
do not recognize it to be a camera. Thanks to its 360° allround view, the camera can
monitor and record, event-driven, an entire room.
Full Image
Powerful performance in complete video solutions ...
• Hemispherical allround view for complete room coverage
• Digital, continuous zooming and panning (virtual PTZ)
• Robust and maintenance-free, without mechanically moving parts
• Event-controlled, complete room recording directly in the camera
• Alarm function, speaker and microphone integrated
• Discreet and inconspicuous design
HiRes Video Innovations
The German company MOBOTIX AG is known as the leading pioneer in network camera technology and its
decentralized concept has made high-resolution video systems cost-efficient.
MOBOTIX AG • D-67657 Kaiserslautern • Tel: +49-631-3033-103 • Fax: +49-631-3033-190 • sales@mobotix.com
Image Correction
www.mobotix.com > Support > Manuals
The HiRes Video Company
Virtual PTZ Features
Current PDF File:
X
MOBOTIX
Advertisement
Table of Contents

Related Manuals for Mobotix Q22M


Summary of Contents for Mobotix Q22M
- Page 1 > Support > Manuals HiRes Video Innovations The German company MOBOTIX AG is known as the leading pioneer in network camera technology and its decentralized concept has made high-resolution video systems cost-efficient. MOBOTIX AG • D-67657 Kaiserslautern • Tel: +49-631-3033-103 • Fax: +49-631-3033-190 • sales@mobotix.com...
- Page 2 DHCP: activated deactivated Admin User Name: Admin Password: Note: MOBOTIX offers inexpensive seminars that include a workshop and practical excercises: Basic Seminar 3 days, Advanced Seminar 2 days. For more information, see www.mobotix.com © MOBOTIX AG • Security-Vision-Systems • Made in Germany...
-
Page 3: Table Of Contents
Mounting to a Ceiling Using the In-Ceiling Set Mounting the Vandalism Set Mounting to a Wall Using the Wall Mount Finishing the Mounting Process 2.10 Operating the MOBOTIX Q22M-Secure With SD Card 2.10.1 Removing an SD Card 2.10.2 Inserting an SD Card 2.11 Notes 2.11.1 Cleaning Instructions... - Page 4 3.5.3 Activating the Recording on an SD Card 3.5.4 Accessing the Data on an SD Card 3.5.5 Using an SD Card in a Different MOBOTIX Camera 3.5.6 Deactivating SD Card Recording and Removing the Card 3.5.7 Limitations on Warranty When Using Flash Storage Media 3.5.8 Problems Accessing an SD Card...
- Page 5 4.10 Fast Video Streaming 4.11 Operating Multiple Cameras GENERAL CAMERA CONFIGURATION Overview Quick Installation Connection Test Basic Settings Image Controls Logos Exposure Settings Day & Night Modes Managing Settings SOFTWARE UPDATES © MOBOTIX AG • Security-Vision-Systems • Made in Germany www.mobotix.com • sales@mobotix.com...
- Page 6 Phone Call-In: Inbound Phone Calls Remotely Controlling the Camera Using a Phone Sample Configurations for IP Telephony via Internet Sample Configurations for IP Telephony on a LAN Video Telephony © MOBOTIX AG • Security-Vision-Systems • Made in Germany www.mobotix.com • sales@mobotix.com...
- Page 7 Copyright © 1999-2008 MOBOTIX AG, Kaiserslautern, Germany. All rights reserved. MOBOTIX, MxPEG and MxControlCenter are worldwide trademarks of MOBOTIX AG. Microsoft, Windows and Windows Server are reg- istered trademarks of Microsoft Corporation. Apple, the Apple logo, Mac and Mac OS X are trademarks of Apple Inc. Linux is a trademark of Linus Torvalds.
- Page 8 Additional functions and other extras included Audio support, lens, wall mount and weatherproof housing (-30° to +60°C, -22° to +140°F) included; microphone & speaker available in certain models © MOBOTIX AG • Security-Vision-Systems • Made in Germany www.mobotix.com • sales@mobotix.com...
- Page 9 SIP standard with automatic alarm call and remote control MxControlCenter included Dual screen technology with building plans, free camera positioning, event search, image processing, lens distortion correction and PTZ support © MOBOTIX AG • Security-Vision-Systems • Made in Germany www.mobotix.com • sales@mobotix.com...
-
Page 10: Introduction
QXGA format (2048x1536 pixels) taken by hemispherical (fish- eye) lenses cannot be easily examined by the user. The MOBOTIX Q22M elegantly solves this problem thanks to its integrated image distortion correction that displays perfectly corrected live images with straight lines in resolutions up to D1-PAL (768x576 pixels). - Page 11 MxPEG ActiveX plug-in, MxControlCenter and pan/tilt features in a similar manner. Thanks to its 180° lens, a Q22M installed (V1.8 or higher) or MxEa- in a ceiling provides 360° allround view and all the other features of a standard...
- Page 12 The person highlighted by the red circle in the left image would not have been recorded by a regular PTZ camera; the full image recording of the Q22M in this example allows determining the exact time at which the person had entered the image area recorded by the camera.
- Page 13 Storing and Loading of Predefined Views MxControlCenter: Download free of charge In order to facilitate the work of the users, the Q22M can store a total of views from www.mobotix.com (virtual camera direction and zoom setting) including the North, East,...
- Page 14 Some applications scenarios benefit from a surveillance camera that is present, but without attracting attention. The low-key, elegant appearance of the camera, espe- cially when installed with the In-Ceiling set, makes the Q22M an optimum solution where decent design and an inconspicuous look are important. Take hotels and restaurants, for example, but also installations in public buildings, waiting rooms and showrooms.
- Page 15 Q22M Camera Manual Part 1 /112 Since the Q22M is just as robust, weatherproof and maintenance-free as all other MOBOTIX cameras (Q22M-Secure attains IP65), it can be used without limitations in all mobile and fixed installations, including outdoor applications. Mobile Q22M application...
- Page 16 PoE products. More Features for Less Money Similar to the other MOBOTIX cameras, the Q22M models outperform by far what Everything integrated! is considered industry standard today. The integrated software brings a whole ran-...
- Page 17 On-Wall Set (MX-D22-OPT-AP) corresponding set! The On-Wall set can reliably protect external cables to the Q22M if the cables cannot be guided from below the housing but have to On-Wall set (IP65, be led above the wall. The weatherproof hou-...
- Page 18 Wall Mount (MX-D22-OPT-WH) This mount is the ideal solution for mounting Wall Mount made from the Q22M to walls in indoor and outdoor sturdy PBT-30GF (IP65, applications. The camera is absolutely dust- suitable for outdoor appli- proof and resistant against water jets (IP65).
- Page 19 Q22M Camera Manual Part 1 /112 Notes: © MOBOTIX AG • Security-Vision-Systems • Made in Germany www.mobotix.com • sales@mobotix.com...
-
Page 20: Lens Options, Hardware And Software Features
MxControlCenter/MxEasy properly correct the lens distortion that is specific to each of the lenses. Both lenses deliver good image quality even when using maximum digital zoom. Since MOBOTIX cameras are backlight-proof, they do not require a mechanical auto iris, making them extremely robust and maintenance-free. - Page 21 • Image height 26.0 Note The focal lengths of MOBOTIX lenses do not reflect the actual focal Focal lengths of MOBO- length of the lenses, but the focal length ( Lxx mm) converted to 35 mm TIX lenses are always gi- ven as compared to a camera format.
- Page 22 Q22M Software Features Digital zoom (continuous) vPTZ mode / Surround view X / X X / X X / X X / X Additional storable views Full image recording © MOBOTIX AG • Security-Vision-Systems • Made in Germany www.mobotix.com • sales@mobotix.com...
- Page 23 Image size Mega** Mega** L22 lens Image Sensor Color Color Color/BW Color/BW Standard lens for software version L22* L22* L22* L22* Audio support (Microphone/Speaker) -/S* -/S* M/S* M/S* © MOBOTIX AG • Security-Vision-Systems • Made in Germany www.mobotix.com • sales@mobotix.com...
-
Page 24: The Mobotix Concept
Q22M Camera Manual Part 1 /112 1.2 The MOBOTIX Concept In addition to the features specific to the MOBOTIX Q22M, this section contains an overview of the MOBOTIX concept, which brings many more advantages over other systems. High-Resolution Live Video With up to 30 Frames/s The MOBOTIX cameras deliver smooth live video with lip-synchronous live audio, yet they keep the network load to a minimum. - Page 25 MOBOTIX cameras feature an integrated long-term storage system on Linux, Windows and Mac OS X computers. Every camera manages its own ring buffer storage on the shared folder. This decentralized MOBOTIX concept is crucial in cre- ating cost-efficient, high-resolution video systems since this approach drastically reduces the required network bandwidth as well as the number of IT standard components needed for managing a large number of HiRes cameras.
- Page 26 The MOBOTIX Q22M-Secure has been certified according to IP65 and is designed for outdoor as well as indoor usage*. Since the camera does not have any moving *In conjunction with Wall parts, the Q22M is extremely robust, durable and resistant against heat or cold Mount; Q22M-Basic re- aches IP54 (-30 to +60°C;...
- Page 27 MOBOTIX cameras. The clear design allows managing up to 16 cameras and the application can show up to four cameras at the same time.
- Page 28 (retrieve camera information, establish an Internet connection, announce the retrieved IP address, intercom feature, etc.). • MxPEG video compression using MOBOTIX MxControlCenter. The ActiveX plug-in for Internet Explorer users brings all advantages of MxPEG to the browser-based user interface (including the audio stream to and from the camera).
- Page 29 Free-of-charge software updates from vals that improve and expand the camera's functionalities. Chapter 6, www.mobotix.com Software Update , in the Software Manual provides more information on the process. © MOBOTIX AG • Security-Vision-Systems • Made in Germany www.mobotix.com • sales@mobotix.com...
-
Page 30: Mounting
Wall outlets, see section 2.1.5 . 5) Which sections of the Mounting Instructions should I read? In order to mount the Q22M with its optional accessories as quickly and effi- ciently as possible, you should consult the Directions for Mounting, see sec- tion 2.1.6 . -
Page 31: Mounting Options
Wall Mount (D22M-OPT-WH) The Q22M/D22M Wall Mount is the ideal solution for mounting the Q22M to walls for indoor and outdoor ap- plications. The camera is absolutely dustproof and resis- tant against water jets (IP65). The wall mount also covers... -
Page 32: Hints For Choosing A Good Mounting Position
60 and 180 mm (2.4 to 7.1 in). 2.1.3 Hints for Choosing a Good Mounting Position In order to get the most out of the MOBOTIX Q22M, you should follow these mount- ing hints. 360° Allround Surveillance... - Page 33 As an additional measure to pro- the camera)! tect the camera against condensation, you should use either the On-Wall set (MX-D22-OPT-AP) or the Wall Mount (MX-D22-OPT-WH). © MOBOTIX AG • Security-Vision-Systems • Made in Germany www.mobotix.com • sales@mobotix.com...
-
Page 34: Network Connection And Power Supply, Ups
/112 2.1.4 Network Connection and Power Supply, UPS Power-over-Ethernet (MxPoE) Power is supplied to all Q22M models via the network cabling (MxPoE, Power- over-Ethernet). For smaller installations, the universal power supply ( MX-SNT-E/U/ GB/J/AUS01-30-RJ ) with the MOBOTIX Network Power Adapter MX-NPA-3-RJ is sufficient. - Page 35 (e.g. switches, routers, PoE switches, etc.). Since MOBOTIX cameras do not require any heating even in the wintertime, the po- wer consumption of 3 W is very low. This in turn means that you can centralize the USP-protected power supply by injecting power into the network cables (max.
-
Page 36: Providing The Camera Connections, Wall Outlets
Once the camera position, the position of the cable outlets and the method of power supply have been decided upon, the cabling can be installed. Before mounting the MOBOTIX Q22M, you should make sure that the network connections have been properly tested, so that the proper functioning of the camera is guaran- teed. -
Page 37: Directions For Mounting
Q22M: Delivered Parts, Components and Dim. 2.3.4 Wall Mount Poles 2.3.5 Pole Mount Mounting With the Wall Mount Final Tasks Sections All camera variants Finishing the Mounting Process (except Vandalism Set) © MOBOTIX AG • Security-Vision-Systems • Made in Germany www.mobotix.com • sales@mobotix.com... -
Page 38: Q22M: Delivered Parts, Components And Dimensions
Stainless steel washers Ø 5.3 mm 1.13 Stainless steel wood screws with Torx head 4.5x60 mm 1.14 Stainless steel Allen screws M4x16 mm 1.15 Stainless steel washers Ø 4.3 mm © MOBOTIX AG • Security-Vision-Systems • Made in Germany www.mobotix.com • sales@mobotix.com... -
Page 39: Camera Housing And Connectors
Q22M Camera Manual Part 1 /112 /112 2.2.2 Camera Housing and Connectors The MOBOTIX Q22M consists of the camera housing (motherboard and lens), the outer shell and the mounting ring. SD cards will be suppor- Connection ted from software versi- •... -
Page 40: Q22M: Dimensions Without Mounting Options
Q22M Camera Manual Part 1 /112 2.2.3 Q22M: Dimensions Without Mounting Options Ø 160 mm/6.3 in Mobile Q22M application in a bus: Full image (QXGA, uncorrected) of the rear exit © MOBOTIX AG • Security-Vision-Systems • Made in Germany www.mobotix.com • sales@mobotix.com... - Page 41 Find the folded drilling template at the end of the manual. Make sure that the drilling template is not scaled or adjusted to the paper size when printing the PDF file. © MOBOTIX AG • Security-Vision-Systems • Made in Germany www.mobotix.com • sales@mobotix.com...
-
Page 42: Camera Accessories: Delivered Parts, Components And Dimensions
The On-Wall set can be used for all Q22M and Stainless steel washers Ø 4.3 mm D22M models Dimensions On-Wall set On-Wall set 10° ∅ 165 mm Ø 166 mm/6.5 in Ø 160 mm/6.3 in © MOBOTIX AG • Security-Vision-Systems • Made in Germany www.mobotix.com • sales@mobotix.com... - Page 43 Find the folded drilling template at the end of the manual. Make sure that the drilling template is not scaled or adjusted to the paper size when printing the PDF file. © MOBOTIX AG • Security-Vision-Systems • Made in Germany www.mobotix.com • sales@mobotix.com...
-
Page 44: In-Ceiling Set
The In-Ceiling set can be In-Ceiling set used for all Q22M and Decoration ring D22M models Winged cam Clamps Wrench for In-Ceiling mount Dimensions Min: 6 mm/0.2 in Max: 22 mm/0.9 ∅ 165 mm Ø 180 mm/7 in © MOBOTIX AG • Security-Vision-Systems • Made in Germany www.mobotix.com • sales@mobotix.com... - Page 45 Find the folded drilling template at the end of the manual. Make sure that the drilling template is not scaled or adjusted to the paper size when printing the PDF file. © MOBOTIX AG • Security-Vision-Systems • Made in Germany www.mobotix.com • sales@mobotix.com...
-
Page 46: Vandalism Set
Stainless steel cover 2 mm stainless steel Spacers for Vandalism set Security screws M4x16 mm Two-hole driver bit for security screws Polycarbonate dome Dome wrench Dimensions ∅ 165 mm Ø 160 mm/6.3 in © MOBOTIX AG • Security-Vision-Systems • Made in Germany www.mobotix.com • sales@mobotix.com... - Page 47 /112 Variants The Q22M Vandalism set provides added protection for Q22M cameras. The set consists of a robust stainless steel cover, a dome made of polycarbonate and se- curity screws. A camera equipped with the Vandalism set is perfectly suited for ap- plications in demanding environments (such as prisons, social hot spots, train sta- tions, etc.).
-
Page 48: Wall Mount
Stainless steel Allen screws M4x16 mm Stainless steel washers Ø 4.3 mm Bottom plate The Wall Mount can be used for all Q22M and D22M models Depth: 201 mm/7.9 in Width: 216 mm/8.5 in © MOBOTIX AG • Security-Vision-Systems • Made in Germany www.mobotix.com • sales@mobotix.com... - Page 49 Find the folded drilling template at the end of the manual. Make sure that the drilling template is not scaled or adjusted to the paper size when printing the PDF file. © MOBOTIX AG • Security-Vision-Systems • Made in Germany www.mobotix.com • sales@mobotix.com...
-
Page 50: Pole Mount
Stainless steel washers Ø 9 mm Stainless steel lock nuts M8 Stainless steel straps The Pole Mount can be used for all Q22M and Q22M models Width: 201 mm/7.9 in Depth: 175 mm/6.9 in © MOBOTIX AG • Security-Vision-Systems • Made in Germany www.mobotix.com • sales@mobotix.com... - Page 51 Q22M Camera Manual Part 1 /112 Notes: © MOBOTIX AG • Security-Vision-Systems • Made in Germany www.mobotix.com • sales@mobotix.com...
-
Page 52: Mounting The Camera Without Additional Mounting Options
Maximum torque for all position. Make sure that the OBEN / TOP ar- screws is 1 to 1.2 Nm (0.74 lbf ft) row points into the desired direction. © MOBOTIX AG • Security-Vision-Systems • Made in Germany www.mobotix.com • sales@mobotix.com... - Page 53 Q22M Camera Manual Part 1 /112 Caution Only use the factory pre-installed network cable of the MOBOTIX camera. It is very important that the rubber plug of the network cable reliably protects the back of the housing from moisture en- tering the camera.
-
Page 54: Mounting With The On-Wall Set
Note When mounting the MOBOTIX Q22M to a wall, you should always use the Wall Mount instead of the On-Wall set. 3) Apply silicone: Before mounting the set, apply some silicone around each hole to prevent wa- ter from entering the housing. - Page 55 On-Wall mount. Make sure that the OBEN / TOP arrow points into the desired direction. Continue with section 2.9, Finishing the Mounting Process . © MOBOTIX AG • Security-Vision-Systems • Made in Germany www.mobotix.com • sales@mobotix.com...
-
Page 56: Mounting To A Ceiling Using The In-Ceiling Set
In-Ceiling set. 6) Connect the cable: Connect the network ca- ble to the network cable of the camera using a patch cable connector. © MOBOTIX AG • Security-Vision-Systems • Made in Germany www.mobotix.com • sales@mobotix.com... - Page 57 2) Loosen the screws of the In-Ceiling set (this will automatically retract the winged cams). You can now remove the In-Ceiling set with the attached camera from the ceiling. © MOBOTIX AG • Security-Vision-Systems • Made in Germany www.mobotix.com • sales@mobotix.com...
-
Page 58: Mounting The Vandalism Set
If required, clean the dome gently using a lint-free cotton cloth before finishing the in- stallation. Check the focus of the live image again and re-adjust the focus, if required. © MOBOTIX AG • Security-Vision-Systems • Made in Germany www.mobotix.com • sales@mobotix.com... - Page 59 1 to 1.2 Nm (0.74 lbf ft) Security screw and two- hole driver bit Mounting the Vandalism set has been completed successfully. © MOBOTIX AG • Security-Vision-Systems • Made in Germany www.mobotix.com • sales@mobotix.com...
-
Page 60: Mounting To A Wall Using The Wall Mount
Caution Only use the factory pre-installed network cable of the MOBOTIX camera. It is very important that the rubber plug of the network cable reliably protects the back of the housing from moisture en- tering the camera. - Page 61 Wall Mount. Make sure that the OBEN / TOP arrow points into the desired direction. Continue with section 2.9, Finishing the Mounting Process . © MOBOTIX AG • Security-Vision-Systems • Made in Germany www.mobotix.com • sales@mobotix.com...
-
Page 62: Finishing The Mounting Process
3) Clean the lens: If required, clean the lens gently using a lint-free cotton cloth. Do not apply excessive pressure onto the glass surface when cleaning the lens. © MOBOTIX AG • Security-Vision-Systems • Made in Germany www.mobotix.com • sales@mobotix.com... -
Page 63: Operating The Mobotix Q22M-Secure With Sd Card
If you would like to remove, insert or exchange the SD card, you need to dismantle the camera. In order to avoid loss of data, you need to make sure that you deacti- vate SD card recording and reboot the MOBOTIX camera before removing the card. Caution An SD card may only be removed from the camera after you have deactivated Recording to SD Card and rebooted the camera. -
Page 64: Inserting An Sd Card
3) Tighten the back plate: Place the four Allen screws back into the back plate and tighten the screws using the supplied 2 mm Allen wrench. © MOBOTIX AG • Security-Vision-Systems • Made in Germany www.mobotix.com • sales@mobotix.com... - Page 65 If you have inserted a new SD card, you need to format it first as described in section 3.5, SD Card Recording . Mobile Q22M application in a bus: Full image stor- age (QXGA) on 16 GB SD card © MOBOTIX AG • Security-Vision-Systems • Made in Germany www.mobotix.com • sales@mobotix.com...
-
Page 66: Notes
When installing the wiring inside or outside of buildings, make sure you always ad- here to the relevant regulations on wiring, fire prevention and protection against lightning. MOBOTIX recommends having MOBOTIX cameras installed only by certified spe- cialists accustomed to installing network devices and having proper respect for the applicable regulations regarding... - Page 67 This includes surge protectors for 19" racks, ad- ding an uninterruptible power supply (UPS) to the MOBOTIX camera, and in- stalling surge arresters or similar for routers, switches, servers, etc.
-
Page 68: Camera Accessories
Q22M Camera Manual Part 1 /112 2.12 Camera Accessories Power Supply (MX-SNT-E/U/GB/J/AUS01-30-RJ) The MOBOTIX power supply is required if you do not Not required if network use a Network Power Rack or Network Power Box components are used that or a PoE-compatible switch or router. - Page 69 Vandal- ism set is perfectly suited for applications in demanding environments (such as prisons, social hot spots, train stations, etc.). © MOBOTIX AG • Security-Vision-Systems • Made in Germany www.mobotix.com • sales@mobotix.com...
- Page 70 Pole mount made of 3 mm stainless steel The Pole Mount is made from 3 mm white powder- coated stainless steel and is just as robust and maintenance-free as the outdoor Wall Mount. © MOBOTIX AG • Security-Vision-Systems • Made in Germany www.mobotix.com • sales@mobotix.com...
- Page 71 Q22M Camera Manual Part 1 /112 Notes: © MOBOTIX AG • Security-Vision-Systems • Made in Germany www.mobotix.com • sales@mobotix.com...
-
Page 72: Operating The Camera
3.1 Overview browser. You can also use MxControlCenter MOBOTIX cameras do not require any extra software. Thus, you can set up and MxEasy for this purpose. operate the MOBOTIX camera using a JavaScript-enabled browser on all com- mon operating systems (such as Windows, Linux, Macintosh, etc.). -
Page 73: Setting Up The Network Interface Of The Camera And The First Image
IP addresses in the 172 or 192 ranges. In order to access a MOBOTIX camera via the network, the camera needs to get an IP address in the same address range. You can set up the network interface of the MOBOTIX camera using one of the following methods: a) Manually using a computer in the 10.x.x.x IP address range: You can set... - Page 74 • The camera needs to be physically accessible since you need to press a key on the camera housing to boot it using DHCP. • Requires a running DHCP server on the network. © MOBOTIX AG • Security-Vision-Systems • Made in Germany www.mobotix.com • sales@mobotix.com...
-
Page 75: Configuring The Mobotix Q22M
West South As these settings are specific to the Q22M, they need to be set up in the browser interface for the moment. For more information of these important configuration steps, please see section 3.3.2, The First Image and the Most Important Settings in the Browser . -
Page 76: Connecting The Camera To The Network And To The Power Supply
MOBOTIX cameras, make sure that these compo- Netpower rack-mount nents do not have a fan. Since the power consumption of MOBOTIX cameras units to supply power to is very low compared to other products, the reliability of the entire system is 8/20 cameras (MX-NPR- increased, thus extending the life of these components. -
Page 77: Camera Startup Sequence
During the startup sequence of the camera, the LEDs will always light up, even if they have been deactivated in Admin Menu > LED Setup. "L" key "R" key LEDs (1 x green, 1 x red) © MOBOTIX AG • Security-Vision-Systems • Made in Germany www.mobotix.com • sales@mobotix.com... -
Page 78: Power Supply (Mxpoe) Using A Switch
(3) Plug the RJ45 connector of the external power unit into the LAN/Power con- nector of the Network Power Adapter. The Network Power Adapter replaces the crossover cable when di- rectly connecting to a computer © MOBOTIX AG • Security-Vision-Systems • Made in Germany www.mobotix.com • sales@mobotix.com... -
Page 79: Power Supply (Mxpoe) Using A Network Power Rack Or Network Power Box
Connect the factory pre-installed cable of the camera to the Ethernet connector of the PoE switch/router. The switch/router needs to support the PoE standard IEEE 802.3af. PoE IEEE 802.3af! © MOBOTIX AG • Security-Vision-Systems • Made in Germany www.mobotix.com • sales@mobotix.com... -
Page 80: The First Camera Image And The Most Important Settings
IP address of the camera on the loudspeaker. 3.3.1 Manually Setting Up the Network Interface of the Camera In order to manually set up the network parameters of the MOBOTIX camera, you need a computer that is using a 10.x.x.x IP address. It is recommended to connect the camera to the computer or to a switch. - Page 81 Quick Installation wizard. (1) Open a web browser on a computer. (2) Enter the factory IP address of the MOBOTIX camera (e.g. 10.1.0.99) in the browser address bar and hit the Return key on the keyboard. This will open the user interface of the MOBOTIX camera.
-
Page 82: The First Image And The Most Important Settings In The Browser
Make sure that you use the IP address of your 10.1.0.99), you will see the Live screen of the MOBOTIX camera with its user camera instead of interface controls, such as softbuttons, buttons for the different camera screens, 10.1.0.99! - Page 83 Q22M Camera Manual Part 1 /112 a) Set the mounting position: A Q22M camera can be installed at the ceiling or at a wall (Installation Quick Control, Wall or Ceiling option). Note that the camera has different features that depend on the chosen setting.
- Page 84 Further PTZ settings and actions 1) Set the display mode: By default, Q22M models run in virtual PTZ mode (Normal 640x480 pixels, max. D1-PAL 768x576 pixels). The camera shows a fully corrected image and you can move and zoom to any posi-...
- Page 85 Browser Screens Camera Screens in the Browser Live: Live screen of the camera Per factory default, the MOBOTIX camera automatically shows the Live screen. You can set a different start page (e.g. the Guest screen) in Admin Menu > Language and Start Page as this screen only shows the current live image without any fur- Player: Playback of ther controls.
-
Page 86: The First Image In Mxcontrolcenter
If this is not the case or if you would like to update to a newer version, you Download MxControlCen- can download the latest MSI or ZIP file from the MOBOTIX website. The latest ter free of charge from version is available at www.mobotix.com > Support > Software Downloads in www.mobotix.com... - Page 87 Automated Search for MOBOTIX Cameras If you start MxControlCenter for the first time or if you have not yet stored a start layout with the desired video sources (i.e. MOBOTIX cameras), the Open Video Sources dialog will open and automatically starts scanning the network.
- Page 88 Anytime you connect a new camera to the local network, you can initiate the search in the Open Video Sources dialog again by pushing the button. If the desired MOBOTIX cameras are highlighted as OK in the video source list (status OK ), proceed to the Selecting Video Sources section further below.
- Page 89 MOBOTIX camera as a video source. • Add file server path: Adds the alarm images previously stored by a MOBOTIX camera on an external file server as a video source. Selecting Video Sources Highlight the desired video sources you would like to manage and display in MxControlCenter.
- Page 90 MxControlCenter. If you interrupt the discovery process (section Configuring MOBOTIX Cameras for a Different Subnet ) or require a password that is different from the factory-preset password, you can always relaunch the configuration process from the context menu at a later time and enter the appropriate user name and password.
-
Page 91: The First Image In Mxeasy
MxEasy version for your operating system from the MOBOTIX website. MxEasy will be available from Q4/2008 at www.mobotix.com > MxEasy is currently under Support >... - Page 92 All reconfigured cameras are now running in the same subnet as the computer and are displayed with an OK status in the camera list. © MOBOTIX AG • Security-Vision-Systems • Made in Germany www.mobotix.com • sales@mobotix.com...
- Page 93 MOBOTIX cameras to MxEasy, simply click the Add cameras button (max. 16 cameras in total). © MOBOTIX AG • Security-Vision-Systems • Made in Germany www.mobotix.com • sales@mobotix.com...
-
Page 94: Starting The Camera With An Automatic Ip Address (Dhcp)
IP address. You should also make sure that the cameras always get the same IP addresses by mapping the MAC addresses of the cameras to the desired IP addresses © MOBOTIX AG • Security-Vision-Systems • Made in Germany www.mobotix.com • sales@mobotix.com... -
Page 95: Starting The Camera Using The Factory Ip Address
As opposed to resetting the camera using Admin Menu > Reset be changed! configuration to factory defaults , the user information will not be reset if the camera is booted using the factory IP address. © MOBOTIX AG • Security-Vision-Systems • Made in Germany www.mobotix.com • sales@mobotix.com... -
Page 96: Configuring The Camera In The Browser
MOBOTIX camera as well as information on further configuration options. For infor- mation on configuration steps specific to the Q22M, see section 3.1.3, Configuring Software Manual Part 2: the MOBOTIX Q22M . Please see the Software Manual Part 2 for more detailed www.mobotix.com information on the software features. - Page 97 => (Software Manual, section 5.5.2) • Set the resolution of the live image: By factory default, all MOBOTIX cam- eras are delivered with an image resolution of 640x480 pixels. You can select the desired resolution using the Resolution Quick Control.
-
Page 98: Additional Configuration Options
This allows you to keep the camera in synch manually with a computer or fully automatic using a time server or another MOBOTIX camera. The camera can use either NTP time servers or Time Protocol servers. For additional infor- mation on this topic, see section 5.4.2, Date and Time / Time Zones and Time... - Page 99 Q22M Camera Manual Part 1 /112 Notes: © MOBOTIX AG • Security-Vision-Systems • Made in Germany www.mobotix.com • sales@mobotix.com...
-
Page 100: Sd Card Recording
Note that no data is lost in this process. In addition, MOBOTIX cameras constantly monitor the wear of activated Flash stor- age devices. MOBOTIX has developed a technology to test the wear of the Flash device by logging the number of write/delete cycles (patent pending). Open Admin Menu >... - Page 101 SD card against a new one after one year of operation. When storing to an SD card, you should limit event recording to the minimum required frame rate instead of the default Max fps setting (Setup Menu > Recording). © MOBOTIX AG • Security-Vision-Systems • Made in Germany www.mobotix.com • sales@mobotix.com...
- Page 102 The maximum data rate (write speed) of the memory used in MOBOTIX R models is by far higher than the maximum data output of the MOBOTIX camera even in extreme situations.
-
Page 103: Formatting An Sd Card With The Mxffs Format
Q22M Camera Manual Part 1 /112 3.5.2 Formatting an SD Card With the MxFFS Format Before a MOBOTIX camera can store image and video sequences on an SD card, it Follow these steps to for- mat an SD card in Admin... -
Page 104: Activating The Recording On An Sd Card
MxFFS-formatted (Admin Menu > Storage on External File Server / Flash Device): 1) Make sure that an SD card is in the SD card slot of the MOBOTIX camera (see section 2.10.2, Inserting an SD Card ). 2) Make sure that the SD card has been MxFFS-formatted (see section 3.5.2, Formatting an SD Card With the MxFFS Format ). -
Page 105: Using An Sd Card In A Different Mobotix Camera
3.5.5 Using an SD Card in a Different MOBOTIX Camera An SD card containing recorded video data from a MOBOTIX camera can be inserted into any SD card-enabled MOBOTIX camera. Once SD card recording has been activated (requires a reboot), the "new"... -
Page 106: Deactivating Sd Card Recording And Removing The Card
MOBOTIX will not assume any responsibility for Flash storage devices (e.g. SD cards or connected USB storage devices) deliv- ered with or integrated in MOBOTIX cameras. The same applies to damages to Flash storage media not acquired through MOBOTIX or by the use of such media. -
Page 107: Problems Accessing An Sd Card
3.5.8 Problems Accessing an SD Card Caution Some SD cards cannot be set back reliably by the MOBOTIX cam- era when rebooting. In rare occasions, the camera cannot access such an SD card after the camera has executed a soft reboot. If... -
Page 108: Important Notes
The Basic model of the MOBOTIX Q22M reaches protection class IP54. 3.6.2 Password for the Administration Menu Accessing the administration area of the camera (Admin Menu button) is only pos- sible after entering a user name and password. -
Page 109: Starting The Camera Using The Factory Ip Address
As the camera arming is deactivated in its default configuration (see preceding section), the MOBOTIX camera only displays the Text WWW.MOBOTIX.COM, the time stamp and the MOBOTIX logo at the top of the image. Once the camera arm- Text and logos can be also... -
Page 110: Deactivating The Automatic Daily Reboot Of The Camera
Admin Menu > Time Tasks dialog. 3.6.9 ISDN Compatibility Notes MOBOTIX Q22M, M22M and D22M models do not possess ISDN functionality. MOBOTIX M12, D12 and V12 cameras are compatible with Euro ISDN standard TBR3/TBR3 A1. MOBOTIX offers special models for the Japanese market that sup- port the Japanese ISDN standard. -
Page 111: Additional Information
Camera Status dialog. Click on the yellow [Objekt] icon in the top right corner to open the corresponding camera dialog. Another source of information on all dialogs and parameters of the MOBOTIX cam- era is the Reference Manual (PDF), which consists of the camera's online help. You can download the PDF file from the MOBOTIX website in the Support >... - Page 112 Q22M Camera Manual Part 1 /112 Declaration of Conformity © MOBOTIX AG • Security-Vision-Systems • Made in Germany www.mobotix.com • sales@mobotix.com...
- Page 113 Q22M Camera Manual Part 1 /112 Notes: © MOBOTIX AG • Security-Vision-Systems • Made in Germany www.mobotix.com • sales@mobotix.com...
-
Page 114: Q22M Camera Manual Part 1
Q22M Camera Manual Part 1 /112 Notes: © MOBOTIX AG • Security-Vision-Systems • Made in Germany www.mobotix.com • sales@mobotix.com... - Page 115 Q22M-IT/SECURE: Drilling Template Scale 1:1 1 00 mm/3.94 in ø5.5 mm/ 0.22 in © MOBOTIX AG • Security-Vision-Systems • Made in Germany www.mobotix.com • sales@mobotix.com...
- Page 116 Q22M On-Wall Set: Drilling Template Scale 1:1 60 mm/2.36 in ø5.8 mm/0.23 in © MOBOTIX AG • Security-Vision-Systems • Made in Germany www.mobotix.com • sales@mobotix.com...
- Page 117 Q22M In-Ceiling Set: Cutting Template Scale 1:1 © MOBOTIX AG • Security-Vision-Systems • Made in Germany www.mobotix.com • sales@mobotix.com...
- Page 118 71 .5 mm/2.82 in Q22M Outdoor Wall Mount: Drilling Template Scale 1:1 50 mm/1 .97 in 86 mm/3.39 in ø7.5 mm/0.3 in © MOBOTIX AG • Security-Vision-Systems • Made in Germany www.mobotix.com • sales@mobotix.com...
- Page 119 Q22M Camera Manual Part 1 MOBOTIX ... the new face of IP video All images in this manual are genuine MOBOTIX camera images. Enjoy the image quality! Manufacturer: CEO: MOBOTIX AG Dr. Ralf Hinkel Luxemburger Str. 6 67657 Kaiserslautern Court of Registration:...
- Page 120 > Support > Manuals HiRes Video Innovations The German company MOBOTIX AG is known as the leading pioneer in network camera technology and its decentralized concept has made high-resolution video systems cost-efficient. MOBOTIX AG • D-67657 Kaiserslautern • Tel: +49-631-3033-103 • Fax: +49-631-3033-190 • sales@mobotix.com...
Need help?
Do you have a question about the Q22M and is the answer not in the manual?
Questions and answers