Table of Contents
Advertisement
Q24M: Camera Manual
Allround Easy. Allround Secure.
HiRes Video Innovations
The German company MOBOTIX AG is known as the leading pioneer in network camera technology and its
decentralized concept has made high-resolution video systems cost efficient.
MOBOTIX AG • D-67722 Langmeil • Tel: +49-6302-9816-103 • Fax: +49-6302-9816-190 • sales@mobotix.com
High-resolution 180° Panorama
H i g h - r e s o l u t i o n 1 8 0 ° P a n o r a m a
The HiRes Video Company
Version 09/06/Latest PDF file:
www.mobotix.com > Support > Manuals
Advertisement
Table of Contents

Related Manuals for Mobotix Q24M


Summary of Contents for Mobotix Q24M
- Page 1 > Support > Manuals HiRes Video Innovations The German company MOBOTIX AG is known as the leading pioneer in network camera technology and its decentralized concept has made high-resolution video systems cost efficient. MOBOTIX AG • D-67722 Langmeil • Tel: +49-6302-9816-103 • Fax: +49-6302-9816-190 • sales@mobotix.com...
- Page 2 Admin password: Original Q24M image; Wall mounted at a height of 2.3 m in a bank High-resolution 180° Panorama Note MOBOTIX offers inexpensive seminars which include workshops and practical exercises: Basic Seminar three days, Advanced Seminar two days. For more information, please visit www.mobotix.com ©...
-
Page 3: Table Of Contents
Mounting The Camera Without Accessories 2.4.1 Mounting Instructions 2.4.2 Required Tools 2.4.3 Procedure 2.� Mounting The Camera With The On-Wall Set 2.5.1 Mounting Instructions 2.5.2 On-Wall Set 2.5.3 Procedure © MOBOTIX AG • Security-Vision-Systems • Made in Germany www.mobotix.com • sales@mobotix.com... - Page 4 3.2.4 First Images And Network Parameter Configuration In MxEasy 3.2.5 Starting The Camera With An Automatic IP Address (DHCP) 3.2.6 Starting The Camera With The Factory IP Address © MOBOTIX AG • Security-Vision-Systems • Made in Germany www.mobotix.com • sales@mobotix.com...
- Page 5 Download the latest version of this manual and the MxEasy and MxControlCenter manuals as PDF files from www.mobotix.com (Support > Manuals). All rights reserved. MOBOTIX, MxControlCenter, MxEasy, ExtIO and CamIO are inter- nationally protected trademarks of MOBOTIX AG. Microsoft, Windows and Windows Server are registered trademarks of Microsoft Corporation.
-
Page 6: Foreword
If you have any questions, our support and international sales staffs are available under intl-support@mobotix.com from Monday to Friday, 8 a.m. to 6 p.m (German time). We would like to thank you for your trust and wish you all the best with your new MOBOTIX camera! ©... - Page 7 /1�6 1�6 Q24M with 10° On-Wall Set Q24M in the In-Ceiling Set © MOBOTIX AG • Security-Vision-Systems • Made in Germany www.mobotix.com • sales@mobotix.com...
-
Page 8: The Mobotix Concept
Technology Leader Of Network Cameras In a short time, MOBOTIX has gained the second place in Europe and the fourth place worldwide in terms of market share. MOBOTIX has been solely producing megapixel cameras for years and, in this area, ranks as global market leader in high-resolution video systems with a market share of over 60%. - Page 9 The PC now serves purely for viewing, not for analysis or recording. As a result, MOBOTIX cameras can record in response to an event even without the PC being switched on and digitally store the videos with sound.
-
Page 10: Innovative Hemispheric Technology
Hemispheric cameras are extremely discreet because they manage their task with only one lens, which is generally focused on the entire room and not a specific object. MOBOTIX hemispheric cameras are without Q24M in the mechanical moving parts and require low maintenance. In addition, they In-Ceiling Set are silent when panning and focusing on a specific image area. - Page 11 PTZ also allows you to pan to other areas at a later MicroSD/SD card (up to of 32 GB) stage in the recording as the entire room can be recorded as a hemispheric image. © MOBOTIX AG • Security-Vision-Systems • Made in Germany www.mobotix.com • sales@mobotix.com...
-
Page 12: Mobotix Hemispheric Technology
This makes it hard to comprehend the overall setting. The new panorama function of the Q24M delivers a widescreen image of a high-resolution 180° allround view. High image quality is achieved through the use of a 3.1 megapixel sensor and the new hemispheric lens. - Page 13 Virtual PTZ is available for each of the four views. Together with the 180° panorama the Q24M can deliver two more views simultaneously, making it possible to see the overview and to focus on two scenes at the same time (Display Mode “Panorama Focus“).
-
Page 14: Superior Storage Solution
Central PC is a bottleneck and a risk for the total system MOBOTIX Stores HiRes Cost Efficiently MOBOTIX solves the PC storage bottleneck problem using a unique and yet amazingly effective method - through the camera itself. High-resolution video with lip synchronized sound is saved either remotely over the network or locally on flash memory devices (com- mercial SD or CF cards, USB memory). - Page 15 Ring buffer: Old images can be overwritten automatically or deleted after a speci- fied time MOBOTIX Stores Data Reliably MOBOTIX’ own flash file system (MxFFS) prevents unauthorized persons from reading or transferring the internally stored data, even if the card is stolen. Mobotix Only Saves What Is Necessary...
-
Page 16: Added Security Value
SSL when they are transferred over the network. Notification Of Failure MOBOTIX cameras will automatically report any impairment or failure. This ensures maximum reliability and readiness for use. Subsequent Searches Events rarely confine themselves to just one spot. - Page 17 1�6 Sound Increases The Chance Of Detection In the event of an alarm, MOBOTIX cameras can turn on their built-in microphones and record lip-synchronous sound. They are therefore an even greater help in analyzing a situation and easing clarification. In addition, the video system can be used for bidirectional communication via a loudspeaker/microphone.
-
Page 18: Cost Benefits And Technical Advantages
/1�6 1�6 Q24M Camera Manual: Cost Benefits And Technical Advantages THE MOST IMPORTANT COST BENEFITS Increased resolution reduces amount of cameras needed 1536-line, high-resolution sensors give a better overview and allow monitoring an entire room with just one camera from the corner... - Page 19 SIP standard with automatic alarm call and remote control MxControlCenter included Dual screen technology with building plans, free camera positioning, event search, image processing, lens distortion correction and PTZ support © MOBOTIX AG • Security-Vision-Systems • Made in Germany www.mobotix.com • sales@mobotix.com...
-
Page 20: Introduction
This makes it hard to comprehend the overall setting. The new panorama function of the Q24M delivers a widescreen image of a high-resolution 180° allround view. High image quality is achieved through the use of a 3.1 megapixel sensor and the new hemispheric lens. - Page 21 Q24M Overview Panorama Focus – One Camera, Three Views (Wall-Mounted) Maximum room overview while simultaneously viewing detail in a single image: the Q24M is capable of providing two more views at the same time with the 180° panorama, allow- ing you to focus on two scenes in parallel ("Panorama Focus" display mode).
- Page 22 The overview image provided by a single Q24M, which may be tailored in a number of ways according to specific user require- ments, not only reduces the number of required cameras, but also minimizes the system costs by reducing the wiring complexity, emergency power requirements and number of recording devices required.
- Page 23 Each of the four views features a software-controlled pan/tilt/zoom function (virtual PTZ), allowing it to be customized as necessary. In order to reduce user workload, the Q24M can store in addition to the North, East, South and West standard views, a total of 2�6 user-defined camera views vPTZ &...
- Page 24 Q24M Camera Manual: INTRODUCTION Virtual PTZ (vPTZ) – No Motor Required The Q24M can zoom in on detail as well. These vPTZ functions are a standard feature in the integrated Q24M camera software. The image from the hemispheric camera can be enlarged using e.g.
- Page 25 Example: The people marked by the red circle in the middle area of the image would Integrated vPTZ func- not have been recorded by a regular PTZ camera; the full image recording of the Q24M tions allow "analysis" of the complete saved full...
- Page 26 MOBOTIX camera will only transmit the desired image sections. This means that a Q24M panorama image will only require a small part of the usual data and bandwidth. Data from up to six times as many MOBOTIX cameras may be transported over the same network compared to “standard”...
- Page 27 Q24M models feature the highest operating temperature range from -30°C to +60°C (-22°F to +140°F). Both Q24M models (BASIC & SECURE) are absolutely dust proof to IP54, with the SECURE model being resistant against water jets (IP65) also.
- Page 28 Set with stainless steel ring (elevator) Model Versions The Q24M is available in Secure and Basic models, which come with different features. Both models can also be ordered with an L22 Super Wide-Angle lens with a horizontal image angle of 90°.
-
Page 29: Q24M: Next Generation Hemispheric Technology
4 GB MicroSD Card Every Q24M Secure is delivered with a high-quality, factory-installed 4 GB MicroSD card (internal DVR) as a standard feature – sufficient for around 50,000 panorama images or 10 hours of HiRes continuous recording including audio (4 fps). -
Page 30: General Mobotix Camera Functions
Q24M Camera Manual: INTRODUCTION General MOBOTIX Camera Functions Like all other MOBOTIX cameras, the Q24M models include a range of (software) func- tions, such as video motion detection, long-term recording, alarm messaging and video IP telephony, to name but a few. Unlike in camera systems from other manufacturers, buying and installing additional software on the computer is unnecessary. - Page 31 Long-Term Storage On File Servers Included MOBOTIX cameras have an integrated long-term storage system for Linux, Windows and Mac OS X computers. Every camera manages its own ring buffer storage on the shared folder. Thanks to this decentralized approach, 30 live cameras can store images of up to 30 frames per second each, including audio, on a single computer.
- Page 32 Remote Alerting In case of an alarm, MOBOTIX cameras automatically pop up windows or activate other functions at a remote security control center. The cameras can use network/wireless, GSM/GPRS/UMTS (3G) or Internet connections for this purpose.
- Page 33 30 Cameras Live Using MxControlCenter Instead of using a web browser, you can also download the free-of-charge MxControlCenter from www.mobotix.com, which allows fast display of up to 30 MOBOTIX cameras on one monitor. In addition, MxControlCenter can process incoming alarms with sound from the cameras and allows comfortable search and evaluation of alarm video clips (including audio).
- Page 34 A Linux version will be available soon. Diverse Installation Options Not only can MOBOTIX cameras be installed under almost all weather and temperature conditions, they also offer suitable installation materials from a wide range of accessories for any conceivable application scenario.
- Page 35 SSL-protected transmission of the video sequences and the data (using SSL encryption and X.509 certificates). Free Software Updates (www.mobotix.com) MOBOTIX provides software updates free-of-charge at regular intervals that improve and expand the camera’s functionalities. Chapter 6, Software Update , in the Software Free-of-charge soft- Manual provides more information on the process.
-
Page 36: Lens Options, Hardware And Software Features
Q24M Camera Manual: INTRODUCTION Lens Options, Hardware And Software Features MOBOTIX Q24M cameras come with a standard L11 fisheye lens with a 180° horizontal image angle. The camera is also available with an L22 Super Wide-Angle lens with a horizontal image angle of 90°. The integrated virtual PTZ features of the camera software or MxControlCenter/MxEasy properly correct the lens distortion that is specific to each of the lenses. - Page 37 Another benefit is that you can easily set any average 35 mm camera (analog or digital) to the same focal length as the MOBOTIX lens (L xx ) to obtain the same image angle. This approach greatly facilitates lens selection.
- Page 38 External audio (Line-In/Out) Signal input pins Signal outputs Concealed cabling Q24M Software Features Digital zoom (continuous) with panning Panorama and surround views Additional storable views Full image recording © MOBOTIX AG • Security-Vision-Systems • Made in Germany www.mobotix.com • sales@mobotix.com...
- Page 39 Image Sensor Color Color Color & B/W Color & B/W Standard lens for software version M12 lens included if Audio support (Microphone/Speaker) -/L** -/L** M/L** M/L** requested by customer © MOBOTIX AG • Security-Vision-Systems • Made in Germany www.mobotix.com • sales@mobotix.com...
-
Page 40: Installation
Q24M Camera Manual: INSTALLATION INSTALLATION The Q24M is primarily designed for installation on walls or ceilings. The supplied L11 180° lens captures the entire room, practically from wall to wall and from floor to the ceiling. See sections 2.4 and above. for the different installation options; drilling templates can be found at the end of the manual. -
Page 41: Wall-Mounted
2.1.1 Wall-Mounted To make optimal use of the high-resolution 180° panorama functionality of the Q24M, the camera must be mounted on an internal or external wall. The entire hemisphere of the room directly in front of the camera is then effectively monitored, from the wall on the left of the camera to the wall on the right. - Page 42 Mounting in the middle of the wall The OBEN / TOP label Hint: The Q24M should always be installed on a wall such that the arrow on the camera is only visible when the housing marked OBEN / TOP points towards the ceiling of the room.
- Page 43 However, due to elevation of the rear casing of the camera caused by connections and holders, a wall outlet should be installed prior to camera installation (see drilling template Q24M). This provides perfect protection to the cabling, ensuring that it cannot be seen or damaged from outside.
-
Page 44: Ceiling-Mounted
In-Ceiling Set Thanks to its hemispherical lens, a single Q24M can monitor an entire room right into each of the four corners (360° Panorama View). The camera's should ideally be positioned on the ceiling in the center of the room. Due to its inherent physical and optical properties, the precision of the lens decreases as the distance from the lens grows. - Page 45 Bearing this in mind, it is advisable to install the Q24M in rectangular room ceilings so that the arrow marked OBEN / TOP points towards one of the longer walls of the room as shown in the figure.
- Page 46 On-Wall set (MX-OPT-AP) or the Wall Mount (MX-OPT-WH). Installation On Building Corners With The Corner And Pole Mount This is a special method of Q24M installation, offering substantial advantages for the outdoor surveillance Installation requires a Corner and Pole Mount, of buildings.
-
Page 47: Mounting Options
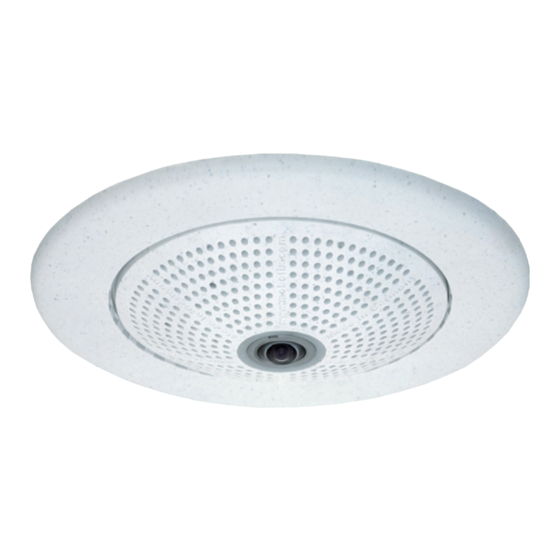
On-Wall Set 10° (IP65, for outdoor applications) ing situations. In-Ceiling Installation (MX-OPT-IC) The In-Ceiling Set allows the Q24M camera to be installed in suspended ceilings, for example. This type of installation provides optimum pro- Discreet in-ceiling installation; decorative tection for the camera and reduces the visible profile to a minimum, outer ring also avail- since the camera only protrudes 24 mm from the ceiling. -
Page 48: Network Connection And Power Supply, Ups
2.1.4 Network Connection And Power Supply, UPS Power over Ethernet (PoE Conforming To IEEE 802.3af) All Q24M models are supplied with power using the PoE standard. The Network Power The Q24M sup- ports the Power over Adapter (MX-NPA-PoE-Set) may be used for smaller installations. For larger installations, Ethernet standard it is worth investing in a PoE capable supply device available on the market. -
Page 49: Preparing The Camera Connections, Wall Outlets
3 watts is very low. This in turn means that you can centralize the UPS-protected power supply by injecting power into the network cables (max. 100 m). This kind of protected power supply can be used either with MOBOTIX PoE products (MX-NPA-PoE + Universal Power Supply) or with PoE-compliant switches according to IEEE 802.3af. -
Page 50: Wiring, Fire Prevention, Lightning And Surge Protection
When installing the wiring inside or outside of buildings, make sure you always adhere to the relevant regulations on wiring, fire prevention and protection against lightning.: MOBOTIX cameras are protected against the effects of small electrical surges by a range of measures. These measures, however, cannot prevent the camera from being damaged when stronger electrical surges occur. - Page 51 More information is available at an institution such as the International Electrotechnical Commission (IEC, www.iec.ch) or at a manufacturer of protection devices against lightning and electrical surges, such as Dehn (www.dehn.de). © MOBOTIX AG • Security-Vision-Systems • Made in Germany www.mobotix.com • sales@mobotix.com...
-
Page 52: Q24M Basic/Secure: Delivered Parts, Components, Dimensions �2
Stainless steel wood screws with hex head 4.5x60 mm 1.14 Stainless steel Allen screws M4x16 mm 1.15 Stainless steel washers Ø 4.3 mm 1.16 Cable retainer with bayonet catch (patch cable, MiniUSB) © MOBOTIX AG • Security-Vision-Systems • Made in Germany www.mobotix.com • sales@mobotix.com... -
Page 53: Camera Housing And Connectors
/1�6 1�6 Q24M Basic/Secure: Delivered Parts, Components, Dimensions 2.2.2 Camera Housing And Connectors The MOBOTIX Q24M consists of the camera housing (motherboard and lens), the outer shell and the mounting ring. Connections • Network (Ethernet network incl. PoE power supply) •... -
Page 54: Q24M: Dimensions Without Mounting Options
Find the folded drilling template at the end of the manual. Make sure that the drilling template is not scaled or adjusted to the paper size when printing the PDF file (enlarged or reduced). © MOBOTIX AG • Security-Vision-Systems • Made in Germany www.mobotix.com • sales@mobotix.com... - Page 55 �� /1�6 1�6 Q24M Basic/Secure: Delivered Parts, Components, Dimensions © MOBOTIX AG • Security-Vision-Systems • Made in Germany www.mobotix.com • sales@mobotix.com...
- Page 56 Vandalism Set (MX-Q24-Sec-Vandal-ESMA) Alternative design featuring matt stainless The matt stainless steel housing has a steel housing. As above incl. lens protector thickness of 1.5 mm and security screws. © MOBOTIX AG • Security-Vision-Systems • Made in Germany www.mobotix.com • sales@mobotix.com...
-
Page 57: Available Q24M Accessories - Overview �6
Network Power Adapter Set (MX-NPA-PoE-Set*) The Network Power Adapter Set allows inject- * Country-specific ver- sions of the set are ing the power supply for the MOBOTIX Q24M available from MOBOTIX into the network cable. This makes it possible (DE, US, GB, AUS, JP) - Page 58 2 input and 2 output contacts and 2 illuminated buttons. It is ideal for door communication, elevators, access control, etc. The ExtIO may be operated directly with the Q24M over a separately available MOBOTIX USB cable. The ExtIO can operate in two different modes: •...
- Page 59 PoE signal is transmitted parallel to the network signal. The Mx2wire is delivered in a standard wall outlet frame available in different designs, but may also be used with the included on-wall outlet. © MOBOTIX AG • Security-Vision-Systems • Made in Germany www.mobotix.com • sales@mobotix.com...
-
Page 60: Mounting The Camera Without Accessories
To guarantee maximum coverage of the room by the camera, the Q24M should be positioned on the wall or ceiling as close to the middle of the room as possible. -
Page 61: Required Tools
• to mark the drill holes • Materials and any tools needed to connect the pre-installed MOBOTIX network cable in the camera with the on-site network cable. • Wall outlet and tools to install the outlet in the wall/ceiling (keyhole saw) •... -
Page 62: Procedure
Connect the cable: Connect the on-site network cable to the camera patch cable using a standard connector. © MOBOTIX AG • Security-Vision-Systems • Made in Germany www.mobotix.com • sales@mobotix.com... - Page 63 1 to 1.2 Only use the factory pre-installed network cable supplied with the MOBOTIX camera. Always ensure that the cable retainer with bayonet catch is closed properly around the network cable. All openings at the back of the camera housing except the pres- sure equalization element need to be sealed properly with the rubber plugs.
- Page 64 The cable can now be pulled out of the camera. Open the cable retainer by rotating the bayonet catch to the marked position Bayonet catch open Bayonet catch closed © MOBOTIX AG • Security-Vision-Systems • Made in Germany www.mobotix.com • sales@mobotix.com...
- Page 65 (see image). The cable is now properly retained. Close the cable retainer by rotating the bayonet catch to the marked position Bayonet catch open Bayonet catch closed © MOBOTIX AG • Security-Vision-Systems • Made in Germany www.mobotix.com • sales@mobotix.com...
-
Page 66: Mounting The Camera With The On-Wall Set
It is not possible to install the on-wall set directly above an on-wall or flush-mounted outlet. Installation using the 10° On-Wall Set is often the right choice if a Q24M is to be used as a panorama camera installed at a greater than usual height (3 m or higher). Tilting the lens in the direction of the center of activity in the room maximizes image quality. -
Page 67: On-Wall Set
Stainless steel Allen screws M4x35 mm Stainless steel washers Ø 4.3 mm Foam rubber washers Lock screws with counter nuts Cable fitting with counter nut and O-ring cord © MOBOTIX AG • Security-Vision-Systems • Made in Germany www.mobotix.com • sales@mobotix.com... - Page 68 Make sure that the drilling template is not scaled or adjusted to the paper size when printing the PDF file (enlarged or reduced). The maximum torque for all screws is 1 to 1.2 Nm. © MOBOTIX AG • Security-Vision-Systems • Made in Germany www.mobotix.com • sales@mobotix.com...
- Page 69 • to mark the drill holes • Materials and tools needed to connect the pre-installed MOBOTIX network cable in the camera with the on-site network cable. • Soft cotton cloth to clean the front of the lens ©...
-
Page 70: Procedure
Mount the On-Wall Set : Mount the On-Wall Set (with- out the camera) at the intended position using e.g. the wood screws (included with Q24M camera, Pos. 1.13). Make sure the OBEN / TOP arrow points in the correct direction. - Page 71 3.1 and above. The live image from the camera should be visible on the computer monitor. Check image sections on the computer monitor as well. © MOBOTIX AG • Security-Vision-Systems • Made in Germany www.mobotix.com • sales@mobotix.com...
-
Page 72: Mounting The Camera With The In-Ceiling Set
For these reasons, the Q24M installed with the In-Ceiling Set is the preferred option for most indoor spaces frequented by customers or the general public (e.g. hotels, restaurants, banks, retail stores, public buildings, etc.). -
Page 73: In-Ceiling Set
The In-Ceiling set must be ordered separately from the camera Item Quantity Part Name Ceiling mounting ring incl. 4 flat headed screws Decoration ring Wrench for In-Ceiling mount Clamps © MOBOTIX AG • Security-Vision-Systems • Made in Germany www.mobotix.com • sales@mobotix.com... - Page 74 Find the folded drilling template at the end of the manual. Make sure that the drilling template is not scaled or adjusted to the paper size when printing the PDF file (enlarged or reduced). © MOBOTIX AG • Security-Vision-Systems • Made in Germany www.mobotix.com • sales@mobotix.com...
- Page 75 • Two blue In-Ceiling wrenches from the In-Ceiling Set • Materials and tools needed to connect the pre-installed MOBOTIX network cable in the camera with the on-site network cable. • Soft cotton cloth to clean the front of the lens ©...
-
Page 76: Procedure
In-Ceiling mounting ring. Connect the cable : Connect the on-site network cable to the camera network cable using a standard con- nector. © MOBOTIX AG • Security-Vision-Systems • Made in Germany www.mobotix.com • sales@mobotix.com... - Page 77 3.1 and above. The live image from the camera should be visible on the computer monitor. Check image sections on the computer monitor as well. © MOBOTIX AG • Security-Vision-Systems • Made in Germany www.mobotix.com • sales@mobotix.com...
-
Page 78: Installing The Vandalism Set
2.7.1 Mounting Instructions The Vandalism Set serves to provide additional security and protection for Q24M cameras. It may be installed with little effort and at low cost. This set is recommended for use under particularly demanding conditions (such as prisons, trouble areas, train stations, etc.). The set consists of a robust stainless steel cover for the camera housing (matt or polished) and an impact-resistant dome cover made of reinforced plastic. -
Page 79: Vandalism Set
Stainless steel cover 2 mm stainless steel Spacers for Vandalism set Security screws M4x16 mm Two-hole driver bit for security screws Polycarbonate dome incl. washer Lens wrench ø 160 mm © MOBOTIX AG • Security-Vision-Systems • Made in Germany www.mobotix.com • sales@mobotix.com... - Page 80 /1�6 1�6 Q24M Camera Manual: INSTALLATION Available Variants Of The MOBOTIX Q24m Vandalism Set: Stainless steel, polished Stainless steel, matt © MOBOTIX AG • Security-Vision-Systems • Made in Germany www.mobotix.com • sales@mobotix.com...
- Page 81 Please check that all components supplied with the Vandalism Set are present in the original packaging first. The Following Additional Tools Are Required For Installation: • Allen wrench for removing the standard outer shell (included in Q24M packaging) • Screwdriver with bit receptacle for the two-hole driver bit •...
-
Page 82: Procedure
Q24M Camera Manual: INSTALLATION 2.7.3 Procedure In order to install the Vandalism Set, replace the white plastic outer shell of the Q24M, including the Allen screws, with the stainless steel cover, the security screws and the four spacers of the Vandalism set. -
Page 83: Installing The Vandalism Set
Stainless steel cover must be positioned correctly to line up with the LED openings © MOBOTIX AG • Security-Vision-Systems • Made in Germany www.mobotix.com • sales@mobotix.com... -
Page 84: Installing The Wall Mount
2.8.1 Mounting Instructions The Wall Mount allows you to easily mount Q24M cameras to walls or extensions, both indoors and outdoors. The camera remains IP65 weatherproof (dust-proof and resistant to water jets). The Wall Mount also covers RJ45 wall outlets and has ample space for additional modules (WLAN, batteries, etc.). -
Page 85: Wall Mount
Stainless steel washers Ø 6.4 mm Stainless steel wood screws with hex head 6x50 mm Wall sealing Stainless steel Allen screws M4x16 mm Stainless steel washers Ø 4.3 mm Bottom plate © MOBOTIX AG • Security-Vision-Systems • Made in Germany www.mobotix.com • sales@mobotix.com... - Page 86 Find the folded drilling template at the end of the manual. Make sure that the drilling template is not scaled or adjusted to the paper size when printing the PDF file (enlarged or reduced). © MOBOTIX AG • Security-Vision-Systems • Made in Germany www.mobotix.com • sales@mobotix.com...
- Page 87 • Materials and tools needed to connect the pre-installed MOBOTIX network cable in the camera with the on-site network cable. • Clean and soft cotton cloth © MOBOTIX AG • Security-Vision-Systems • Made in Germany www.mobotix.com • sales@mobotix.com...
-
Page 88: Procedure
Wall Mount. Pay attention to the direction of the camera (OBEN / TOP arrow pointing in the direction of the longer wall for ceiling installation in rectangular rooms). © MOBOTIX AG • Security-Vision-Systems • Made in Germany www.mobotix.com • sales@mobotix.com... - Page 89 3.1 and above. The live image from the camera should be visible on the computer monitor. Check image sections on the computer monitor as well. © MOBOTIX AG • Security-Vision-Systems • Made in Germany www.mobotix.com • sales@mobotix.com...
-
Page 90: Installing The Corner And Pole Mount
It is used in combination with the Wall Mount described in section 2.8, in the case that a Q24M is to be installed on a pole or building corner. The Wall Mount required for complete installation must be ordered separately. -
Page 91: Corner And Pole Mount
Stainless steel lock nuts M6 Stainless steel straps Cable fitting with counter nut and O-ring cord Wood screws 6x80mm incl. screw anchors and washers Width: 218 mm Depth: 92 mm © MOBOTIX AG • Security-Vision-Systems • Made in Germany www.mobotix.com • sales@mobotix.com... - Page 92 The Following Additional Tools Are Required For Installation As A Pole Mount: • Screwdriver • Materials and tools needed to connect the pre-installed MOBOTIX network cable in the camera with the on-site network cable. The Following Additional Tools Are Required For Installation Of The Corner Mount: •...
-
Page 93: Mounting To A Pole
80 cm! stainless steel straps on the Pole Mount • Tighten the with a screwdriver. If necessary, the ends of the straps can be cut off. © MOBOTIX AG • Security-Vision-Systems • Made in Germany www.mobotix.com • sales@mobotix.com... -
Page 94: Mounting To A Wall Or Building Corner
• Then: Install the Wall Mount on the Corner and Pole Mount (section 2.9.5). © MOBOTIX AG • Security-Vision-Systems • Made in Germany www.mobotix.com • sales@mobotix.com... -
Page 95: Mounting The Wall Mount To The Corner And Pole Mount
M6 nuts included with the Corner and Pole Mount and attach the Wall Mount to the Corner and Pole Mount. • Then continue with the remaining work steps described in section 2.8.3! © MOBOTIX AG • Security-Vision-Systems • Made in Germany www.mobotix.com • sales@mobotix.com... -
Page 96: Replacing The Microsd Card
The card will be released remove the MicroSD card after first gen- from the slot and can then be removed from the cam- tly pushing it in era. © MOBOTIX AG • Security-Vision-Systems • Made in Germany www.mobotix.com • sales@mobotix.com... -
Page 97: Inserting A Microsd Card
File Server / Flash Device. Once the camera has been rebooted, it automatically activates recording. If you have inserted a new MicroSD card , it must first be formatted as described in section 3.4, MicroSD Card Recording. © MOBOTIX AG • Security-Vision-Systems • Made in Germany www.mobotix.com • sales@mobotix.com... -
Page 98: Network And Power Connection
Notes On Cable Lengths And Power Supply • Power may only be supplied to the camera via its Ethernet connector. A MOBOTIX Power Adapter or similar high-quality PoE product is recommended to provide the power supply via the network cable (see section 2.3, Available Q24M Accessories ): •... -
Page 99: Power Supply Using A Switch
1�6 Network And Power Connection The MOBOTIX factory default is Class 2. This default is usually fine and nothing needs to be changed. However, if the lower power level class 1 is sufficient for your application, it may - due to possible internal power distribution schemes amongst the ports of the PoE switch in use - be advantageous to change the PoE power level class in the browser: Admin Menu >... -
Page 100: Power Supply When Connected Directly To A Computer
Connect the factory pre-installed cable of the camera to the Ethernet connector of the PoE switch/router. The switch/router must support the PoE standard IEEE 802.3af. IP addresses in the diagram are shown only as an example © MOBOTIX AG • Security-Vision-Systems • Made in Germany www.mobotix.com • sales@mobotix.com... -
Page 101: Camera Startup Sequence
As soon as the camera's power supply has been established, the two LEDs will show the progress of the startup sequence (see section 5.4.3, LED Signals and LED Configuration , in the MOBOTIX Camera Software Manual Part 2 ). •... -
Page 102: Operating The Camera
OPERATING THE CAMERA Manual And Automatic Operation - Overview MOBOTIX cameras do not require any extra software. Thus, you can set up and operate the MOBOTIX camera using a JavaScript-enabled browser on all common operating systems (such as Windows, Linux, Macintosh, etc.). As an alternative, you can also use the MOBOTIX applications MxControlCenter and MxEasy. -
Page 103: Manually Using A Computer In The 10.X.x.x Ip Address Range
The computer or the network need to operate in the 10.x.x.x IP address range or need to be able to access such a network. • The setup does not work automatically. • You need to know the relevant network parameters. © MOBOTIX AG • Security-Vision-Systems • Made in Germany www.mobotix.com • sales@mobotix.com... -
Page 104: Automatically Using Mxcontrolcenter Or Mxeasy
MxControlCenter or MxEasy (see sections 3.2.3 and 3.2.4). You can also use one of these applications to automatically configure the network parameters of MOBOTIX cameras that are not operating on the same IP address range as the computer. -
Page 105: Automatically Using Dhcp
The camera needs to be physically accessible, as you need to press a key on the camera to boot it using DHCP. • Requires a functioning DHCP server on the network. © MOBOTIX AG • Security-Vision-Systems • Made in Germany www.mobotix.com • sales@mobotix.com... -
Page 106: First Images And The Most Important Settings
3.2.1 Manually Setting Up The Network Parameters In A Browser In order to manually set up the network parameters of the MOBOTIX camera, you need a computer that is using a 10.x.x.x IP address. For this purpose, the computer's network parameters usually have to be changed. - Page 107 Enter displays the user interface of the MOBOTIX camera (see also section 3.2.2, First Images and the Most Important Settings in the Browser ). 2. Click the Admin Menu softbutton in the user interface of the MOBOTIX camera. The Quick Installation starts automatically once the admins user has logged on.
-
Page 108: First Images And Configuration In The Browser
3.2.2 First Images And Configuration In The Browser Once the MOBOTIX camera has been connected to the power supply and to the network, you can access the user interface with the live camera image in the web browser. Internet Explorer, Firefox, Safari, Konqueror, Opera, Camino or any other graphical browser with activated JavaScript is suitable. - Page 109 For more information on camera screens, see section 4.1.1, Camera Screens in the Browser , the Camera Software Manual Part 2 or the online help of the camera's browser interface. © MOBOTIX AG • Security-Vision-Systems • Made in Germany www.mobotix.com • sales@mobotix.com...
-
Page 110: First Images And Network Parameter Configuration In Mxcontrolcenter
MxControlCenter will automatically attempt to find all MOBOTIX cameras in the MOBOTIX cameras in the cameras in the physically connected network (i.e. even a MOBOTIX camera with a factory IP address MOBOTIX camera with a factory IP address camera with a factory IP address of 10.x.x.x). - Page 111 Legend Camera preview Note Video sources in this context not only refer to MOBOTIX cameras, but also to third- party IP cameras, file server paths, MxPEG clips and analog cameras connected via MxPEG clips and analog cameras connected via clips and analog cameras connected via MxServer (e.g.
- Page 112 Note The MxControlCenter finds all MOBOTIX cameras, even when the computer and the cameras are not located in the same subnet. Select the cameras that you would like to display in a Layout (a view with cameras) and click Add selected video sources.
- Page 113 (OK). Confirm the Open Video Sources dialog again by clicking Defining Additional Video Sources In addition to the MOBOTIX cameras that are found automatically, you can also manually add video sources to the list of video sources for MxControlCenter .
- Page 114 Otherwise, the selected video sources will only be added to the MxCC system and can then be used to create layouts at a later date. © MOBOTIX AG • Security-Vision-Systems • Made in Germany www.mobotix.com • sales@mobotix.com...
- Page 115 11� /1�6 First Images And The Most Important Settings © MOBOTIX AG • Security-Vision-Systems • Made in Germany www.mobotix.com • sales@mobotix.com...
-
Page 116: First Images And Network Parameter Configuration In Mxeasy
If this is not the case or if you would like to update to a newer version, you can download the latest MxEasy version for your operating system from the MOBOTIX website ( www.mobotix.com > Support > Software Downloads in the MxEasy section). - Page 117 Using Bonjour, MxEasy finds not only cameras on the same network as your computer, but also MOBOTIX cameras located in other subnets (Status Invalid Network). In such a case, you would not be able to establish any connection to cameras in a different network or subnet...
- Page 118 In addition, you can display further information of a camera and change the user name/password of a camera. For more information on this topic, see the MxEasy User Manual. © MOBOTIX AG • Security-Vision-Systems • Made in Germany www.mobotix.com • sales@mobotix.com...
- Page 119 Click the Add cameras button at any time to add MOBOTIX cameras to MxEasy (max. Last event image (marked red) 16 cameras in total). © MOBOTIX AG • Security-Vision-Systems • Made in Germany www.mobotix.com • sales@mobotix.com...
-
Page 120: Starting The Camera With An Automatic Ip Address (Dhcp)
3.2.� Starting The Camera With An Automatic IP Address (DHCP) If your network has a DHCP server, you can start the MOBOTIX camera with DHCP sup- port. In this case, the DHCP server automatically assigns and announces an IP address (also for Q24M Basic). -
Page 121: Starting The Camera With The Factory Ip Address
As opposed to resetting the camera using Admin Menu > Reset configuration to Users and passwords factory defaults the user information will not be reset if the camera is booted using will be changed! the factory IP address. © MOBOTIX AG • Security-Vision-Systems • Made in Germany www.mobotix.com • sales@mobotix.com... -
Page 122: Virtual Ptz And Special Q24M Configuration
Operation Using The Mouse And Scroll Wheel The vPTZ function of the Q24M can be controlled in the browser using the mouse. By click- ing any position on the image displayed on the monitor, this position becomes the new image center. - Page 123 PTZ Features), the MxControlCenter manual, section 2.4.6 (Using the vPTZ Features) and section 3.1.4 ("PTZ Controls" in the sidebar panel). The latest versions of all manuals are available, as always, at www.mobotix.com, Support > Manuals. © MOBOTIX AG • Security-Vision-Systems • Made in Germany...
-
Page 124: Special Q24M Configuration In The Browser
Q24M is first installed. A corresponding adjustment of the image setting is strongly recommended if the on-wall set is mounted with an inclination of 10 degrees (available as a Q24M accessory). - Page 125 These tilted lines are primarily caused if the camera itself is tilted (camera installed with 10° On-Wall Set) or if the image tilt has been modified. © MOBOTIX AG • Security-Vision-Systems • Made in Germany www.mobotix.com • sales@mobotix.com...
- Page 126 Caution To permanently save the standard image setting defined for the Q24M, select the "Store Complete Configuration" option under the "Manage Settings" in Quick Control. The settings will then remain in effect, even after rebooting.
- Page 127 Bring columns together at the (neces- sary to correct the example on the left) Bring columns together at the bottom © MOBOTIX AG • Security-Vision-Systems • Made in Germany www.mobotix.com • sales@mobotix.com...
- Page 128 Ceiling Mounted: Set North (User-Defined North Direction) If the camera has been mounted to a ceiling, the Q24M should be set to "North". This is not the "real" direction of North but rather the main line of sight or the focus of camera.
- Page 129 "Double Panorama" mode the lock icon (open lock - correct display - close lock again). © MOBOTIX AG • Security-Vision-Systems • Made in Germany www.mobotix.com • sales@mobotix.com...
-
Page 130: Overview Of The Available Camera Views
Q24M. The live image calcu- lation and distortion correction is done directly in the camera and does not burden the PC or the network. © MOBOTIX AG • Security-Vision-Systems • Made in Germany www.mobotix.com • sales@mobotix.com... - Page 131 Panorama (Mounted To Wall) The corrected image of an entire room (corrected 180° panorama) from the left to the right wall is shown. This view is available for a wall-mounted MOBOTIX Q24M. The aspect ratio of the view is 8:3 (width to height).
- Page 132 Southern half in the image with an aspect ratio of 4:3 (width to height) is shown. This view is available for a ceiling-mounted Q24M. Both partial views can be changed independently of each other using vPTZ commands. North is defined in the "Normal"...
- Page 133 /1�6 Virtual PTZ And Special Q24M Configuration © MOBOTIX AG • Security-Vision-Systems • Made in Germany www.mobotix.com • sales@mobotix.com...
-
Page 134: Microsd Card Recording
Menu > Camera Status dialog. Conservative Memory Usage Thanks To MOBOTIX MxFFS File System MxFFS formatting of the MicroSD card means that the MOBOTIX camera software will use the Flash device as evenly as possible, thus allowing for the maximum possible number of write/delete cycles. - Page 135 Monitoring The Cell Wear Of Flash Storage Devices (Patent Pending) MOBOTIX uses its own technology for this purpose and has a pending patent. You can view the Flash wear in the status bar of the live image or by opening Admin Menu >...
-
Page 136: Formatting The Card
MxFFS-formatted). The following steps are necessary to format a storage device File Server / Flash Device (Admin Menu > Storage on External File Server / Flash Device): Make sure that there is a MicroSD card in the card slot of the MOBOTIX camera. Click the Format button under SD Flash Card. -
Page 137: Activate Recording
MicroSD card in Admin Menu > Storage on External Make sure that there is a MicroSD card in the card slot of the MOBOTIX camera. File Server / Flash Device Make sure that the MicroSD card has been MxFFS-formatted (see section 3.4.2, Formatting the Card ). -
Page 138: Accessing Camera Data
Play back the recorded video sequences with audio by accessing the MicroSD card in the MOBOTIX camera via the camera or with a direct access to the MicroSD card via a card reader connected to the computer. Access the card by setting the MicroSD card's drive/volume as a "directory"... -
Page 139: Using A Microsd Card In A Different Mobotix Camera
3.4.6 Using A MicroSD Card In A Different MOBOTIX Camera A MicroSD card containing recorded video data from a MOBOTIX camera can be inserted into any MicroSD card-enabled MOBOTIX camera. Once MicroSD card recording has been activated (requires a reboot), the "new" MOBOTIX camera automatically synchronizes with the card and resumes recording. -
Page 140: Q24M Storage Options - Full Image Storage
The main advantage of full image storage lies in the special functionality of the Q24M, in that it can always maintain availability of a maximum size (full) image for later investi- gation, despite vPTZ actions carried out on the live image. - Page 141 "Full Image Recording" option. Notes Post-event search in the full image: If you are using Full Image Recording on Q24M cameras, you should use at least MEGA resolution when storing. This will facilitate later searches in MxControlCenter or MxEasy. The advanced distortion correction features require this resolution to deliver satisfactory image quality.
-
Page 142: Further Configuration In The Browser
HTTP commands using programs and scripts of the embedded software. The settings are stored in the camera's flash memory. This section contains an overview of the general browser settings of the MOBOTIX camera, as well as further configuration options. Q24M-specific configuration steps can be found in section 3.3. - Page 143 => ( Software Camera Manual Part 2 , Section 4.3.3) • Adjust the exposure: The automatic exposure control of the MOBOTIX camera uses individually configurable windows to determine the best image exposure. Open the Exposure Control Quick Control and select a predefined set of exposure windows. If required, you can also define custom exposure windows (Setup Menu >...
- Page 144 Click the Arm & Record button to activate event control. This will activate video motion detection and recording. Cameras with integrated Flash memory (MOBOTIX R models and models with SD card) will use the Flash memory by default to store the image and video data (recording target). If desired you can set additional events and adjust the settings of the recording and storage parameters (Setup Menu >...
-
Page 145: Additional Configuration Options
MOBOTIX camera. The camera can use either NTP time servers or Time Protocol servers. For additional information, see section 5.4.2, Date and Time/ Time Zones and Time Servers in the Camera Software Manual Part 2 . -
Page 146: Additional Notes
3.7.1 Weatherproof Qualities The MOBOTIX Q24M Secure has been certified weatherproof according to IP65 (absolutely dustproof and resistant to water jets) and can also be wall-mounted outdoors. The MOBOTIX Q24M-BASIC has attained a protection class of IP54 (absolutely dustproof). 3.7.2... -
Page 147: Starting The Camera With The Factory Ip Address
MOBOTIX camera only displays the Text WWW.MOBOTIX.COM, the time stamp and Text and logos can be also the MOBOTIX logo at the top of the image. Once the camera arming has been activated, deactivated or customized the text at the bottom of the live image (event, action, messaging and recording symbols) will also appear. -
Page 148: Deactivating The Daily Automatic Camera Reboot
3.7.8 Deactivating The Daily Automatic Camera Reboot Per factory default, the MOBOTIX camera automatically reboots every morning at 3:36 am. The reason for this is that in some rare cases external influences (e.g. radiation in high locations) can lead to camera malfunctions. The automatic reboot will refresh the camera's memory and will ensure proper operation without requiring any interaction on the part of the user. -
Page 149: Safety Warnings
Electrical surges can be induced by other electrical appliances, improper wiring, but also from the outside (e.g. lightning strikes to phone or power lines). MOBOTIX cameras are protected against the effects of small electrical surges by a range of measures. These measures, however, cannot prevent the camera from being damaged when stronger electrical surges occur. - Page 150 Control element on Windows computers which may also be used in other programs (including Windows Internet Explorer) to run special tasks. The MxPEG ActiveX control element allows video and audio data from MOBOTIX cameras to be displayed in other applications (including Internet Explorer).
- Page 151 16 Mbps for a typical household. DualDome Dome camera with two lenses and image sensors such as the MOBOTIX D12D. These lenses can deliver wide-angle and telephoto images independently of one another. Abbreviation for Digital Video Recorder .
- Page 152 1�6 Q24M Camera Manual: MOBOTIX Glossary ExtIO MOBOTIX signal module that the camera uses to directly operate lamps, sirens and door openers as well as external audio components (speakers and microphones). Fixdome Camera without moving parts in a dome-shaped housing.
- Page 153 MOBOTIX cameras and add-on modules, which emits light when current flows through the component in the correct direction. Linux Free and open source operating system; serves as the operating system for all MOBOTIX cameras. Megapixel Images that are 1 million pixels. Larger formats of images can be displayed as a multiple of this, for example, 3 Megapixel is equal to 3 million pixels.
- Page 154 SD Memory Card ( Secure Digital Memory Card ). A digital storage medium based on flash storage modules such as USB sticks. Search Monitoring of recordings, searching for a particular event. © MOBOTIX AG • Security-Vision-Systems • Made in Germany www.mobotix.com • sales@mobotix.com...
- Page 155 WLAN Wireless Local Area Network. Used to provide Internet connections without the need for cables. © MOBOTIX AG • Security-Vision-Systems • Made in Germany www.mobotix.com • sales@mobotix.com...
- Page 156 1�6 1�6 /1�6 /1�6 1�6 Q24M Camera Manual: Declaration Of Conformity DECLARATION OF CONFORMITY © MOBOTIX AG • Security-Vision-Systems • Made in Germany www.mobotix.com • sales@mobotix.com...
- Page 157 Tax Offi ce: Kaiserslautern, Germany http://www.mobotix.com VAT ID: sales@mobotix.com DE202203501 You can fi nd the latest version of this document at www.mobotix.com under Support. Technical specifi cations subject to change without notice! © MOBOTIX AG • Security-Vision-Systems • Made in Germany www.mobotix.com • sales@mobotix.com...
- Page 158 H i g h - r e s o l u t i o n 1 8 0 ° P a n o r a m a Version 09/06/Latest PDF file: www.mobotix.com > Support > Manuals HiRes Video Innovations The German company MOBOTIX AG is known as the leading pioneer in network camera technology and its decentralized concept has made high-resolution video systems cost efficient.
Need help?
Do you have a question about the Q24M and is the answer not in the manual?
Questions and answers