Table of Contents
Advertisement
Quick Links
ASSEMBLE ONLY WITH ADULT SUPERVISION
Please read through this instruction booklet to THOROUGHLY familiarize yourself with the assembly and flight characteristics of this airplane
prior to assembly. Please inspect all parts carefully before starting assembly! If any parts are missing, broken or defective, or if you have any
questions about the assembly or flying of this airplane, please call us at (217) 398-8970 and we'll be glad to help.
This product is suitable only for people of 14 years and older.
Hobbico
®
Inc. guarantees this kit to be free from defects in both material and workmanship at the date of purchase. This warranty does not
cover any component parts damaged by use or modification. In no case shall Hobbico's liability exceed the original cost of the
purchased kit. Further, Hobbico, Inc. reserves the right to change or modify this warranty without notice. In that Hobbico, Inc. has no
control over the final assembly or material used for final assembly, no liability shall be assumed nor accepted for any damage resulting from
the use by the user of the final user-assembled product. By the act of using the user-assembled product, the user accepts all resulting
liability. If the buyer is not prepared to accept the liability associated with the use of this product, the buyer is advised to return this kit
immediately in new and unused condition to the place of purchase. To make a warranty claim send the defective part or item to Hobby
Services at the address below:
Hobby Services
3002 N. Apollo Dr. Suite 1
Champaign IL 61822 USA
© 2011 Hobbico
®
, Inc. All rights reserved.
™
Include a letter stating your name, return shipping address, as much contact information as possible
(daytime telephone number, fax number, e-mail address), a detailed description of the problem and a
photocopy of the purchase receipt. Upon receipt of the package, the problem will be evaluated as quickly
as possible.
Printed in China
™
™
WARRANTY
HCAA2560 Mnl
Advertisement
Table of Contents

Related Manuals for Hobbico ItCanFly Uberlite 2


Summary of Contents for Hobbico ItCanFly Uberlite 2
- Page 1 In no case shall Hobbico’s liability exceed the original cost of the purchased kit. Further, Hobbico, Inc. reserves the right to change or modify this warranty without notice. In that Hobbico, Inc. has no control over the final assembly or material used for final assembly, no liability shall be assumed nor accepted for any damage resulting from the use by the user of the final user-assembled product.
-
Page 2: Included Items
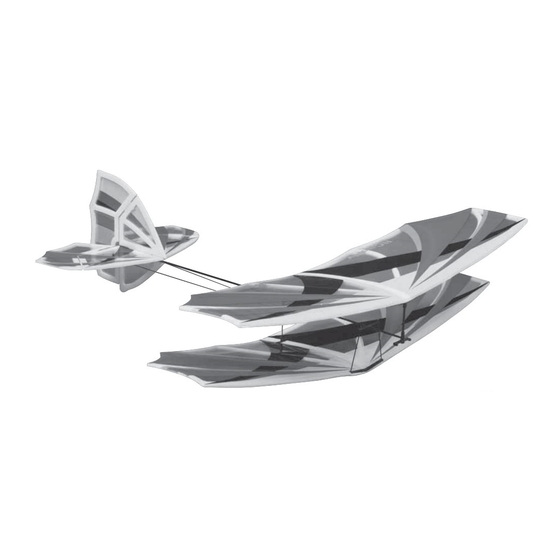
INCLUDED ITEMS Check the parts against those shown. If any parts are damaged or missing, please call Hobby Services at: (217) 398-8970 FCC AND ETSI This device complies with part 15 of the FCC rules. Operation is subject to the following FCC REQUIREMENT two conditions. - Page 3 PRECAUTIONS Your Uberlite 2-1 should not be considered a toy, but rather a sophisticated, working model that functions very much like a full-size airplane. Because of its performance capabilities, the Uberlite, if not assembled and operated correctly, could possibly cause injury to yourself or spectators and damage to property. 1.
-
Page 4: Prepare The Transmitter
GLOSSARY ● Lithium Polymer (LiPo) Battery: Rechargeable battery which is used to power the airplane. LiPo batteries are lighter and smaller than most other types of rechargeable batteries. ● Transmitter (TX): This is the hand-held unit that sends the signal to the control unit, or receiver (RX). ●... -
Page 5: Power The Transmitter
CHARGE THE INCLUDED LIPO BATTERY Do not use the charge feature while flying the Uberlite! Remove end caps. USB port on USB port on transmitter alternative source Plug charger into USB socket. A very small, blinking red light should appear. Place battery on charge terminals. -
Page 6: Binding The Transmitter
PREPARE THE UBERLITE FOR FLIGHT Keep hands clear of propeller during power battery installation and removal. Place the Power Module in the under carriage of Make sure elevator & rudder linkages are connected. the fuselage. Magnets hold the module in place. module in place. - Page 7 CHECK THE CONTROL SURFACE DIRECTION Right stick moves up, elevator moves down causing Right stick moves right, rudder moves right, the aircraft’s nose to pitch down, losing altitude. causing the aircraft to turn to the right. Conversely, right stick moves down, elevator Conversely, right stick moves left, rudder moves up causing the aircraft’s nose to pitch up, moves left, causing the aircraft to turn to the left.
-
Page 8: Choose A Flying Site
TEST THE PROPELLER With hands and onlookers clear, position yourself Test the operation of the propeller by raising the behind the aircraft. Hold the aircraft or have an assistant left stick. hold the aircraft to prevent it from moving forward. Warning: The aircraft will be compelled to move forward if enough throttle is applied. -
Page 9: After The Flight
FLYING THE UBERLITE BIPLANE AND MONOPLANE Take off (or hand launch) and land heading into the wind. The Uberlite will take off with ease at just 1/2 throttle and 3/4 up elevator throw. If any time during operation the controls or propeller become jammed or unresponsive, lower the power to the propeller, land and cycle the power on the Uberlite by removing... -
Page 10: Replacement Parts
Replacement parts are not available from Product Support, but can be purchased from hobby shops or mail order/Internet order firms. If you need assistance locating a dealer to purchase parts from, contact: Product Support Phone: 217-398-0007 Fax: 217-398-7721 E-mail: productsupport@hobbico.com Stock No. Description HCAA6396 Monoplane Airframe HCAA6397 Biplane Airframe HCAA6398 Complete Base Module HCAA6399 Transmitter 2.4GHz... - Page 11 notes...
- Page 12 ™ ™...
Need help?
Do you have a question about the ItCanFly Uberlite 2 and is the answer not in the manual?
Questions and answers