Table of Contents
Advertisement
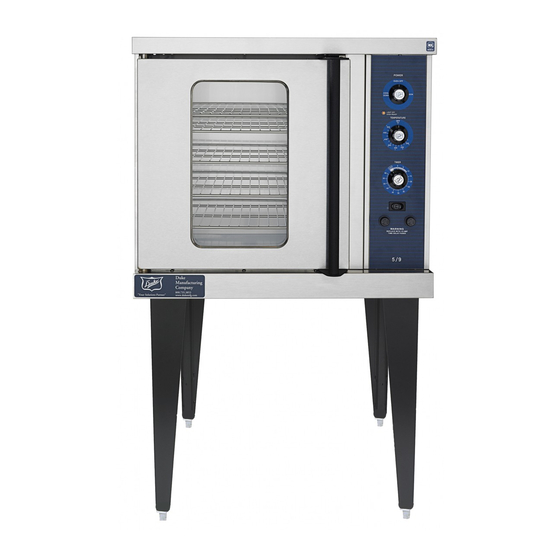
ELECTRIC
CONVECTION OVEN
MODELS
5/9 THE OVEN
5/9 SERIES OVENS
6/13 THE OVEN
E SERIES
59-E3C
59-E3P
Please read this manual completely before attempting to
This manual is Copyright © 2011 Duke Manufacturing Co. All rights reserved.
Reproduction without written permission is prohibited. Duke is a registered
install, operate or service this equipment
trademark of the Duke Manufacturing Co.
Duke Manufacturing Co.
2305 N. Broadway
St. Louis, MO 63102
Phone: 314-231-1130
Toll Free: 1-800-735-3853
Fax: 314-231-5074
www.dukemfg.com
SERVICE MANUAL
P/N 153611B
Advertisement
Table of Contents

Related Manuals for Duke 5/9 THE OVEN


Summary of Contents for Duke 5/9 THE OVEN
-
Page 1: Convection Oven
Please read this manual completely before attempting to install, operate or service this equipment This manual is Copyright © 2011 Duke Manufacturing Co. All rights reserved. Reproduction without written permission is prohibited. Duke is a registered trademark of the Duke Manufacturing Co. -
Page 2: Important Warning And Safety Information
Service Manual for Electric Convection Oven IMPORTANT WARNING AND SAFETY INFORMATION WARNING READ THIS MANUAL THOROUGHLY BEFORE OPERATING, INSTALLING OR PERFORMING MAINTENANCE ON THE EQUIPMENT. WARNING FAILURE TO FOLLOW INSTRUCTIONS IN THIS MANUAL CAN CAUSE PROPERTY DAMAGE, INJURY OR DEATH. WARNING DO NOT USE OR STORE GASOLINE OR OTHER FLAMMABLE VAPORS OR LIQUIDS IN THE VICINITY OF THIS OR ANY OTHER APPLIANCE. -
Page 3: Table Of Contents
Service Manual for Electric Convection Oven TABLE OF CONTENTS INTRODUCTION ..................................6 GENERAL ..................................6 INSTALLATION ................................6 OPERATION .................................6 CLEANING ..................................6 TOOLS ..................................6 Standard.................................6 ELECTRICAL SPECIFICATIONS ..........................6 COMPONENT REMOVAL AND REPLACEMENT ........................7 Electrical LOCKOUT/TAGOUT Procedure ........................7 RIGHT SIDE PANEL (OVENS WITH DUAL DOORS) ....................7 X CONTROL PANEL ASSEMBLY ..........................8 Component Access Procedure..........................8 POWER Switch ..............................8... - Page 4 Service Manual for Electric Convection Oven Fan Switch ................................13 LIGHT Switch ..............................13 Fuse and Fuse Holder Light ..........................13 Buzzer ................................. 13 59-E3P OVEN CONTROLS ............................14 Component Access Procedure..........................14 POWER Switch ..............................14 Controller................................14 OVEN READY Light ............................14 Fuse and Fuse Holder Light ..........................
- Page 5 Service Manual for Electric Convection Oven ZZ CONTROLLER PROGRAMMING ........................28 System Programming ............................28 Factory Programming ............................29 TROUBLESHOOTING CHARTS ............................30 6/13 V CONTROLLER AND E SERIES ELECTRO-MECHANICAL CONTROLLER ..........30 5/9 OVEN WITH ZZ CONTROLLER .......................... 31 ALL SOLID STATE CONTROLLERS EXCEPT ZZ CONTROLLER ................
-
Page 6: Introduction
1 PHASE 3 PHASE 53 Amps 31 amps 46 Amps 27 amps 220/380 20 amps 240/415 18 amps 14 amps 5/9 THE OVEN 5/9, 59-E3C, 59-53P OVENS TOTAL TOTAL VOLTS 1 PHASE 3 PHASE VOLTS 1 PHASE 3 PHASE 53 Amps... -
Page 7: Component Removal And Replacement
Service Manual for Electric Convection Oven COMPONENT REMOVAL AND REPLACEMENT Electrical LOCKOUT/TAGOUT RIGHT SIDE PANEL (OVENS WITH DUAL DOORS) Procedure WARNING: BEFORE PERFORMING ANY SERVICE THAT INVOLVES ELECTRICAL CONNECTION OR DISCONNECTION AND/OR Screw EXPOSURE TO ELECTRICAL COMPONENTS, ALWAYS FOLLOW THE ELECTRICAL LOCKOUT/TAGOUT PROCEDURE. -
Page 8: X Control Panel Assembly
Service Manual for Electric Convection Oven X CONTROL PANEL ASSEMBLY X Controller 1. Perform Component Access Procedure. WARNING: DISCONNECT OVEN FROM POWER 2. Tag and disconnect wires from Controller. SOURCE BEFORE PERFORMING ANY SERVICE. 3. Remove knobs from front of Control Panel. Component Access Procedure 4. -
Page 9: Xx Control Panel Assembly
Service Manual for Electric Convection Oven XX CONTROL PANEL ASSEMBLY XX Controller 1. Perform Component Access Procedure WARNING: DISCONNECT OVEN FROM POWER 2. Tag and disconnect wires from Controller. SOURCE BEFORE PERFORMING ANY SERVICE. 3. Remove knobs from front of Control Panel. Component Access Procedure 4. -
Page 10: Z Control Panel Assembly
Service Manual for Electric Convection Oven Z CONTROL PANEL ASSEMBLY Z Controller 1. Perform Component Access Procedure. WARNING: DISCONNECT OVEN FROM POWER 2. Tag and disconnect wires from Controller. SOURCE BEFORE PERFORMING ANY SERVICE. 3. Remove two knobs from front of Control Panel. Component Access Procedure 4. -
Page 11: Zx Control Panel Assembly
Service Manual for Electric Convection Oven ZX CONTROL PANEL ASSEMBLY ZX Controller 1. Perform Component Access Procedure. WARNING: DISCONNECT OVEN FROM POWER 2. Tag and disconnect wires from ZX Controller, & SOURCE BEFORE PERFORMING tag wires. ANY SERVICE. 3. Remove two knobs from front of Digital Control Component Access Procedure Panel. -
Page 12: Zz Control Panel Assembly
Service Manual for Electric Convection Oven ZZ CONTROL PANEL ASSEMBLY ZZ Oven Control 1. Perform Component Access Procedure. WARNING: DISCONNECT OVEN FROM POWER SOURCE BEFORE PERFORMING 2. Tag and disconnect wires from ZZ Oven Control. ANY SERVICE. 3. Remove two screws securing ZZ Oven Control to Control Panel and remove Oven Control. -
Page 13: Fan Switch
Service Manual for Electric Convection Oven 6/13 & 5/9 V CONTROLLER ASSEMBLY 1 - Hour TIMER & “E”SERIES-ELECTRO MECHANICAL 1. Perform Component Access Procedure. CONTROLLER ASSEMBLY 2. Loosen set screw and remove 1 - Hour TIMER. WARNING: DISCONNECT OVEN FROM POWER 3. -
Page 14: 59-E3P Oven Controls
Service Manual for Electric Convection Oven 59-E3P OVEN CONTROLS Controller 1. Perform Component Access Procedure. WARNING: DISCONNECT OVEN FROM POWER 2. Tag and disconnect wires from Controller. SOURCE BEFORE PERFORMING ANY SERVICE. 3. Remove nuts securing Controller to Control Panel. Component Access Procedure 4. -
Page 15: Control Circuit Board Replacement
Service Manual for Electric Convection Oven CONTROL CIRCUIT BOARD REPLACEMENT 9. Attach the new wires #1, #2 and # 3 to the relay, refer to the figure above for details. WARNING: DISCONNECT OVEN FROM POWER 10. Remove the wire nut that secures the 3 black SOURCE BEFORE PERFORMING and 1 purple wire, separate the purple wire from ANY SERVICE. -
Page 16: Seven Menu Jumper Settings (Popeye's Chicken Only)
The motor is attached to the right side of the oven in the following models: JUMPER • 5/9 Series Oven • 5/9 The Oven • 59-E3C Oven • 59-E3P Oven The motor is attached to the back of the oven in the... -
Page 17: Rear Mounted Motor
Service Manual for Electric Convection Oven Rear Mounted Motor Inside back panel WARNING: DISCONNECT OVEN FROM POWER SOURCE BEFORE PERFORMING Screws ANY SERVICE. 1. Open Oven Doors. 2. Remove shelves. 3. Remove two side racks. 4. Remove four screws attaching back plate and remove back plate to access Motor. -
Page 18: Step-Down Transformer
Service Manual for Electric Convection Oven 1. Remove screw at top center of Control Panel assembly and slide Control Panel out to allow Mounting access to the Step-Down Transformer. Plate 2. Label and disconnect wires from Step-Down Motor Transformer. Junction 3. -
Page 19: Rtd Probe
Thermostat Probe is located in the upper right of oven. The Thermostat Probe provides temperature 5/9 The Oven information back to the Thermostat. The capillary tube X Controller from the Thermostat to the Thermostat Probe is covered with a fiberglass sleeve. -
Page 20: Kx Thermostat
Service Manual for Electric Convection Oven KX THERMOSTAT Mounting Backup Toggle Switch Bracket WARNING: DISCONNECT OVEN FROM POWER SOURCE BEFORE PERFORMING ANY SERVICE. Temperature Plate The KX (Back up)Thermostat is used on the 59-E3C Side and 59-E3P Ovens as an Oven Backup Thermostat. Access Panel This Thermostat is located behind the right access... -
Page 21: Elements
4. Remove screws securing cover over heater wire 5/9 Series Oven 59-E3C Oven terminals on right side of oven. 5/9 The Oven 59-E3P Oven 5. Tag and disconnect Element wires at the terminals. The Elements are attached inside the oven on the back in the following models. -
Page 22: Back Mounted Elements
Service Manual for Electric Convection Oven Back Mounted Elements Outside back panel WARNING: DISCONNECT OVEN FROM POWER Terminals SOURCE BEFORE PERFORMING ANY SERVICE. 1. Inside oven, remove shelves and racks. 2. Remove four screws securing Back Panel inside oven and remove panel. This allows access to the Blower and the Elements. -
Page 23: Oven Lights
Service Manual for Electric Convection Oven Right Side OVEN LIGHTS Rack Oven lights are located on the right side of the oven. The light bulbs are replaced from inside the oven. The light Light Access sockets are replaced by removing the right side panel. Panel WARNING: DISCONNECT OVEN FROM POWER Light... -
Page 24: Roller Latch
Service Manual for Electric Convection Oven Door Switch Top Finish Piece Door WARNING: DISCONNECT OVEN FROM POWER Top Gasket SOURCE BEFORE PERFORMING Door Catch ANY SERVICE. Door Bearing 1. Remove Lower Finish Piece to access Door Switch. Door 2. Label and disconnect wires from the Door Switch. Side Gasket 3. -
Page 25: Service Procedures
If you should require assistance in the selection of 5. Once the Oven Doors are operating properly, a qualified service agency, please contact the Duke retighten the jam nuts so the Oven Doors will stay Manufacturing Company Service Department at in adjustment. -
Page 26: Oven Door Switch Check
Service Manual for Electric Convection Oven 5. Tighten the setscrew in the cam. Test the door to 3. Turn the thermostat dial to 350°F (177°C). Allow make certain the switch will make contact with the the oven to preheat 1/2 hour. When the indicator doors closed. -
Page 27: Element
Service Manual for Electric Convection Oven ELEMENT MOTOR CIRCUIT CHECK Check the Element by measuring the resistance The Motor should be operating the Fan any time between the two wires of the Element. To access the Heaters are turned on and the FAN Switch is the Element follow the procedure described in the in the ON position. -
Page 28: Zz Controller Programming
Service Manual for Electric Convection Oven ZZ CONTROLLER PROGRAMMING System Programming 1. Press and hold the “P” (Programming Key) for three seconds. 2. PRODUCI CNf will be displayed, press the Down arrow key. 3. PRCGPI/.MMlNG will be displayed, press the “P” Key. -
Page 29: Factory Programming
Service Manual for Electric Convection Oven 19. To change between automatic and manual use Factory Programming the Right or Left arrow keys. 1. Press and hold the “P” key and hold it for three seconds. PRODUCT CNT will be displayed. 20. -
Page 30: Troubleshooting Charts
Service Manual for Electric Convection Oven TROUBLESHOOTING CHARTS 6/13 V CONTROLLER AND E SERIES ELECTRO-MECHANICAL CONTROLLER SYMPTON CAUSE REMEDY Oven not heating, Fan not Oven not plugged into an Plug oven into a power source operating, and Lights not operating power source with the proper rating. -
Page 31: 5/9 Oven With Zz Controller
Service Manual for Electric Convection Oven 5/9 OVEN WITH ZZ CONTROLLER Note: Troubleshooting is based on a properly programmed Controller. SYMPTON CAUSE REMEDY Oven not heating, Fan not Oven not plugged into an Plug oven into a power source operating operating power source with the proper rating. -
Page 32: All Solid State Controllers Except Zz Controller
Service Manual for Electric Convection Oven ALL SOLID STATE CONTROLLERS EXCEPT ZZ CONTROLLER Note: Troubleshooting is based on a properly programmed Controller. SYMPTON CAUSE REMEDY Oven not heating, Fan not Oven not plugged into an Plug oven into a power source operating operating power source with the proper rating. -
Page 33: 5/9 Ccsi Control With Backup Thermostat
Service Manual for Electric Convection Oven 5/9 CCSI CONTROL WITH BACKUP THERMOSTAT Note: Troubleshooting is based on a properly programmed Controller. SYMPTON CAUSE REMEDY Oven not heating, Blower not Oven not plugged into an Plug oven into a power source operating, Oven Heating lamp operating power source with the proper rating. -
Page 34: 5/9 "V" Option 208/240 Vac. 50/60 Hz 1Ph Or 3Ph
Service Manual for Electric Convection Oven 5/9 ELECTRIC CONVECTION OVEN “V” OPTION, 208/240 VAC. 50/60 HZ, 1PH OR 3PH... -
Page 35: 6/13 "V" Option 208/240 Vac. 50/60 Hz 1Ph Or 3Ph
Service Manual for Electric Convection Oven 6/13 ELECTRIC CONVECTION OVEN “V” OPTION, 208/240 VAC. 50/60 HZ, 1PH OR 3PH... -
Page 36: 6/13 "V" Option Pulse Plus 208/240 Vac. 50/60 Hz 1Ph Or 3Ph
Service Manual for Electric Convection Oven 6/13 ELECTRIC CONVECTION OVEN “V” OPTION, PULSE PLUS 208/240 VAC. 50/60 HZ, 1PH OR 3PH... -
Page 37: 6/13 "V" Option 480 Vac. 50/60 Hz 1Ph Or 3Ph
Service Manual for Electric Convection Oven 6/13 ELECTRIC CONVECTION OVEN “V” OPTION, 480 VAC. 50/60 HZ, 1PH OR 3PH... -
Page 38: 6/13 "V" Option Pulse Plus 440/480 Vac. 50/60 Hz 1Ph Or 3Ph
Service Manual for Electric Convection Oven 6/13 ELECTRIC CONVECTION OVEN “V” OPTION, PULSE PLUS 440/480 VAC. 50/60 HZ, 1PH OR 3 PH... -
Page 39: 5/9 "X" Option 208/240 Vac. 50/60 Hz 1Ph Or 3Ph
Service Manual for Electric Convection Oven 5/9 ELECTRIC CONVECTION OVEN “X” OPTION, 208/240 VAC. 50/60 HZ, 1PH OR 3PH... -
Page 40: 6/13 "X" Pulse Option 208/240 Vac. 50/60 Hz 1Ph Or 3Ph
Service Manual for Electric Convection Oven 6/13 ELECTRIC CONVECTION OVEN “X” PULSE OPTION, 208/240 VAC. 50/60 HZ, 1PH OR 3PH... -
Page 41: 6/13 "X" Pulse Option 208/240 Vac. 50/60 Hz 1Ph Or 3Ph
Service Manual for Electric Convection Oven 6/13 ELECTRIC CONVECTION OVEN “X” PULSE OPTION, 208/240 VAC. 50/60 HZ, 1PH OR 3 PH... -
Page 42: 6/13 "X" Pulse Plus Option 208/240 Vac. 50/60 Hz 1Ph Or 3Ph
Service Manual for Electric Convection Oven 6/13 ELECTRIC CONVECTION OVEN “X” PULSE PLUS OPTION, 208/240 VAC. 50/60 HZ, 1PH OR 3 PH... -
Page 43: S 6/13 "X" Option 440/480 Vac. 50/60 Hz 1Ph Or 3Ph
Service Manual for Electric Convection Oven S 6/13 ELECTRIC CONVECTION OVEN “X” OPTION, 440/480 VAC. 50/60 HZ, 1PH OR 3PH... -
Page 44: 6/13 "X" Pulse Option 440/480 Vac. 50/60 Hz 1Ph Or 3Ph
Service Manual for Electric Convection Oven 6/13 ELECTRIC CONVECTION OVEN “X” PULSE OPTION, 440/480 VAC. 50/60 HZ, 1PH OR 3 PH... -
Page 45: 6/13 "X" Pulse Plus Option 440/480 Vac. 50/60 Hz 1Ph Or 3Ph
Service Manual for Electric Convection Oven 6/13 ELECTRIC CONVECTION OVEN “X” PULSE PLUS OPTION, 440/480 VAC. 50/60 HZ, 1PH OR 3 PH... -
Page 46: 5/9 "Z & Zx" Option 208/240 Vac. 50/60 Hz 1Ph Or 3Ph
Service Manual for Electric Convection Oven 5/9 ELECTRIC CONVECTION OVEN “Z & ZX” OPTION, 208/240 VAC. 50/60 HZ, 1PH OR 3PH. -
Page 47: 6/13 "Z, Zx" Option 208/240 Vac. 50/60 Hz 1Ph Or 3Ph
Service Manual for Electric Convection Oven 6/13 ELECTRIC CONVECTION OVEN “Z, ZX” OPTION, 208/240 VAC. 50/60 HZ, 1PH OR 3 PH... -
Page 48: 6/13 "Z, Zx" Option 480 Vac. 50/60 Hz 1Ph Or 3Ph
Service Manual for Electric Convection Oven 6/13 ELECTRIC CONVECTION OVEN “Z, ZX” OPTION, 480 VAC. 50/60 HZ, 1PH OR 3PH... -
Page 49: 6/13 "Zz" Option 208/240 Vac. 50/60 Hz 1Ph Or 3Ph
Service Manual for Electric Convection Oven 6/13 ELECTRIC CONVECTION OVEN “ZZ” OPTION, 208/240 VAC. 50/60 HZ, 1PH OR 3PH... -
Page 50: 5/9 & 6/13 "Zz" Option 208/240 Vac. 50/60 Hz 1Ph Or 3Ph
Service Manual for Electric Convection Oven 5/9 & 6/13 ELECTRIC CONVECTION OVENS “ZZ” OPTION, 208/240 VAC. 50/60 HZ, 1PH OR 3PH. -
Page 51: 5/9 "Zz" Option 208/240 Vac. 50/60 Hz 1Ph Or 3Ph
Service Manual for Electric Convection Oven 5/9 ELECTRIC CONVECTION OVEN “ZZ” OPTION, 208/240 VAC. 50/60 HZ, 1PH OR 3PH... -
Page 52: 5/9 Thermostat 208/240 Vac. 50/60 Hz 1Ph Or 3Ph
Service Manual for Electric Convection Oven 5/9 “CCSI” CONTROL W/BACKUP THERMOSTAT, 208/240 VAC. 50/60 HZ, 1PH OR 3PH... -
Page 53: Wiring Diagrams
Service Manual for Electric Convection Oven 5/9 CONVECTION OVEN “V” 208/240 V... -
Page 54: 6/13 "V" 208/240 V
Service Manual for Electric Convection Oven 6/13 CONVECTION OVEN “V” 208/240 V... -
Page 55: 6/13 "V" Option 208/220 Or 230/240 Vac. 1Ph Or 3Ph
Service Manual for Electric Convection Oven 6/13 CONVECTION OVEN “V” OPTION 208/220 OR 230/240 VAC. 1PH OR 3PH... -
Page 56: 6/13 "V" Pulse Plus 208/240 V
Service Manual for Electric Convection Oven 6/13 CONVECTION OVEN “V” PULSE PLUS 208/240 V... -
Page 57: 6/13 "V" 440/480 V
Service Manual for Electric Convection Oven 6/13 CONVECTION OVEN “V” 440/480 V... -
Page 58: 6/13 "V" Pulse 440/480 V
Service Manual for Electric Convection Oven 6/13 CONVECTION OVEN “V” PULSE 440/480 V... -
Page 59: 6/13 "X" 208/240 V
Service Manual for Electric Convection Oven 6/13 CONVECTION OVEN “X” 208/240 V... -
Page 60: 6/13 "X" Pulse Plus 208/240 V
Service Manual for Electric Convection Oven 6/13 CONVECTION OVEN “X” PULSE PLUS 208/240 V... -
Page 61: 5/9 "X" Com6000 208/240 V
Service Manual for Electric Convection Oven 5/9 CONVECTION OVEN “X” COM6000, 208/240 V... -
Page 62: 6/13 "X" 440/480 V
Service Manual for Electric Convection Oven 6/13 CONVECTION OVEN “X” 440/480 V... -
Page 63: 6/13 "X" Pulse 440/480 V
Service Manual for Electric Convection Oven 6/13 CONVECTION OVEN “X” PULSE 440/480 V... -
Page 64: 6/13 "X" Pulse Plus 440/480 V
Service Manual for Electric Convection Oven 6/13 CONVECTION OVEN “X” PULSE PLUS 440/480 V... -
Page 65: 6/13 "X" Pulse Plus 440/480 V
Service Manual for Electric Convection Oven 6/13 CONVECTION OVEN “X” PULSE PLUS 440/480 V... -
Page 66: 6/13 "W" Option Com6000 208/240 Vac. 1Ph Or 3Ph
Service Manual for Electric Convection Oven 6/13 CONVECTION OVEN “W” OPTION, COM6000, 208/240 VAC. 1PH OR 3PH... -
Page 67: 6/13 "Z" "Zx" 208/240 V
Service Manual for Electric Convection Oven 6/13 CONVECTION OVEN “Z” “ZX” 208/240 V... -
Page 68: 5/9 "Z" "Zx" 208/240 V
Service Manual for Electric Convection Oven 5/9 CONVECTION OVEN “Z” “ZX” 208/240 V... -
Page 69: 6/13 "Z" "Zx" 440/480 V
Service Manual for Electric Convection Oven 6/13 CONVECTION OVEN “Z” “ZX” 440/480 V... -
Page 70: 6/13 "Zz" W/Backup 208/240 V
Service Manual for Electric Convection Oven 6/13 CONVECTION OVEN “ZZ” W/BACKUP 208/240 V... -
Page 71: 5/9 "Zz" W/Backup 208/240 V
Service Manual for Electric Convection Oven 5/9 CONVECTION OVEN “ZZ” W/BACKUP 208/240 V... -
Page 72: 5/9 Ccsi Backup Tstat 208/240 V
Service Manual for Electric Convection Oven 5/9 CONVECTION OVEN CCSI BACKUP TSTAT 208/240 V... - Page 73 Service Manual for Electric Convection Oven NOTES...
- Page 74 Service Manual for Electric Convection Oven NOTES...
-
Page 75: Customer Assistance
SERVICER __________________________________ TELEPHONE _______________________________ NORTH AMERICA & LATIN AMERICA CONTINENTAL EUROPE Duke Manufacturing Company EU Headquarter Office 2305 N. Broadway Duke Manufacturing C.R. s.r.o. St. Louis, MO 63102 Prologis Park D1 West Phone: 314-231-1130 Building 4 Toll Free: 1-800-735-3853 Zdebradska 92... - Page 76 2305 N. Broadway St. Louis, MO 63102 Phone: 314-231-1130 Toll Free: 1-800-735-3853 Fax: 314-231-5074 www.dukemfg.com EU Headquarter Office Duke Manufacturing C.R. s.r.o. Prologis Park D1 West Building 4 Zdebradska 92 Ricany-Jazlovice, 251 01 Czech Republic Phone: 42 (0) 257-741-033 Fax: 42 (0) 257-741-039...
Need help?
Do you have a question about the 5/9 THE OVEN and is the answer not in the manual?
Questions and answers