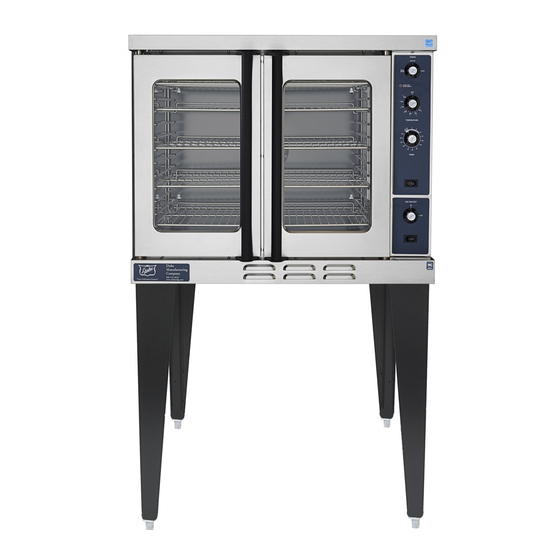
Duke E Series Installation, Operation, Parts & Maintenance Manual
Electric convection oven e - series
Hide thumbs
Also See for E Series:
- Installation and operation manual (32 pages) ,
- Service manual (76 pages) ,
- Installation, operation, parts & maintenance manual (23 pages)
Advertisement
Advertisement
Table of Contents

Subscribe to Our Youtube Channel
Summary of Contents for Duke E Series
- Page 1 "E"Series ELECTRIC CONVECTION OVEN Installation, Operation, Parts & Maintenance Manual DUKE MANUFACTURING CO. 153431K 2305 N. Broadway • St. Louis, MO 63102 800.735.3853 • 314.231.1130 • 314.231.5074 Fax www.dukemfg.com...
-
Page 2: Table Of Contents
C. Thermostat Calibration Repair Parts List Double Stacked Ovens Wiring Diagram 14-15 Please supply the ID Number and the Serial Number when ordering replacement parts or requesting service. We recommend service by Duke Authorized Service Agencies during and after the warranty period. -
Page 3: For Your Safety
POST IN A PROMINENT LOCATION instructions to be followed in the event the user smells gas. This information shall be obtained by consulting the local gas supplier. FOR YOUR SAFETY: Do not store gasoline or other flammable vapors or liquids in the vicinity of this or any other appliance. -
Page 4: A. Qualified Personnel
B. Delivery and Inspection combustible or non-combustible surface Duke Manufacturing Co. does everything within its It is also improtant not to obstruct the natural flow of power to insure you received your oven in good ventilation air if the oven is to operate properly. -
Page 5: D. Electrical Connections
Cooking Equipment, NFPA-96-1980". Electrical Connections Your oven is supplied for connection to a 208, 240 or F. Oven Assembly 480 volt grounded circuit. The electric motor, oven lights, indicator lights and control circuits are connected Before assembling and installing the oven, please check internally and require no seconday power supply to make sure that all necessary parts are present. -
Page 6: Operating Instructions
Double Sections OPERATION INSTRUCTIONS • Secure the short legs to the bottom of the lower The information in this section is intended for the use of section as described in previous section. qualified operating personnel. Qualified Operating Personnel are those individuals who have carefully read •... -
Page 7: A. Oven Controls
A. Oven Controls — Electro-Mechanical • 1. The Power Switch - Controls power to ON or Cool Down Function. • 2. The Indicator Light - When lit indicates elements are operating. When the light goes out, the oven has reached its cooking temperature. -
Page 8: B. General Guidelines For Operation
General Guidelines for Operation These guidelines are to assist you in obtaining the • Maintain equal loads when cooking more best performance from your oven: than one pan of product at a time. You may wish to weigh the product to assure that the pan loads are equal. - Page 9 C. Suggested Times & Temperatures PRODUCT ° F ° C COOK TIME RACKS TEMP TIME BEEF HAMBURGER FWTIES (3.3 OZ.) 8-10 MIN. MEAT LOAF 40-45 MIN. STEAMSHIP ROUND (80 LBS. QUART.) 2-3/4 HRS. ROLLED BEEF ROAST (12-15 LBS.) 2-1/2 HRS. STANDING RIB ROAST (20 LBS.
-
Page 10: B. Door Switch Adjustment
MILD detergent. Moisten a qualified service agency, please contact Duke cloth and wipe down the oven while it is COLD. Manufacturing Co.'s Service Department at 800-735-3853. Wiping down an oven while it is hot will cause streaking and otherwise unsatisfactory results. -
Page 11: C. Thermostat Calibration
C. Thermostat Calibration To Calibrate the Ovens In many convection ovens thermostats have been the cause of more operating problems than any other • Remove the thermostat knob by loosening the set component part. Thermostats, being mechanical screw and pull the knob forward. Take care not to devices, do sometimes fail, in which case only rotate the thermostat stem, which will change the replacing the part will correct the problem. -
Page 12: Repair Parts List
“E” Series Electric Convection Oven Repair Parts List Part # Description 153164 Baffle, 613, porcelain 153056 Bearing, door 153093 Blower wheel, 9-3/8” x 2” 153233 Bracket, stacking (for double sections) 156029 Bulb, Light 40 watt, 130v 154075 Buzzer, 208-240v 153416 Catch, door 153156 Contactor, 3-pole, 50 amp, 208/240v... -
Page 13: Double Stacked Ovens
MOUNTING FLUE EXTENSION TO TOP OVEN. 1.) Remove existing flue trim from the top of oven. 2.) Insert flue extension thru top opening 1 then align holes on flue extension with holes on rear panel of oven. 3.) Use 6 of the 8 screws 10-24x1/2” hex washer head that are provided to attach the flue extension to the rear panel of the oven as shown in figure.


Need help?
Do you have a question about the E Series and is the answer not in the manual?
Questions and answers