Table of Contents
Advertisement
Advertisement
Table of Contents

Related Manuals for Philips DreamStation CPAP


Summary of Contents for Philips DreamStation CPAP
- Page 1 User manual DreamStation CPAP DreamStation CPAP Pro DreamStation Auto CPAP...
-
Page 2: Table Of Contents
Traveling with the System ..........................23 Cleaning the Device ............................24 Cleaning or Replacing the Filters ........................24 Cleaning the Tubing ..............................24 Service ..................................24 Additional Notices ...............................25 Specifications ................................26 Disposal ..................................27 EMC Information ..............................27 Limited Warranty ........................... Back Page © 2015 Koninklijke Philips N.V. All rights reserved. -
Page 3: Intended Use
• Use only power cords supplied by Philips Respironics for this device. Use of power cords not supplied by Philips Respironics may cause overheating or damage to the device and may result in increased emissions or decreased immunity of the equipment or system. -
Page 4: Cautions
• When DC power is obtained from a vehicle battery, the device should not be used while the vehicle’s engine is running. Damage to the device may occur. • Only use a Philips Respironics DC Power Cord and Battery Adapter Cable. Use of any other system may cause damage to the device. Contraindications... -
Page 5: Symbol Key
Should you experience trouble with this equipment or require assistance setting up, using, or maintaining the device or accessories, please contact your home care provider. If you need to contact Philips Respironics directly, call the Philips Respironics Customer Service department at 1-724-387-4000 or +49 8152 93060. You can also use the following addresses: Respironics, Inc. -
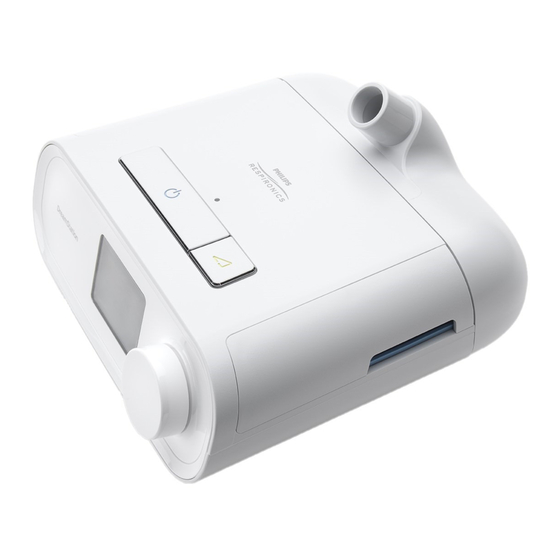
Page 6: System Overview
The DreamStation CPAP is a Continuous Positive Airway Pressure therapy device designed for the treatment of Obstructive Sleep Apnea (OSA). The DreamStation CPAP Pro can also deliver CPAP-check therapy, and the DreamStation Auto CPAP can also deliver CPAP-Check and Auto-CPAP therapy. Your home care provider will choose the appropriate pressure settings for you. -
Page 7: Installing/Replacing The Air Filters
Installing/Replacing the Air Filters Caution: A properly installed, undamaged Philips Respironics blue pollen filter is required for proper operation. The device uses a blue pollen filter that is washable and reusable, and a light-blue ultra-fine filter that is disposable. The reusable blue filter screens out normal household dust and pollens, while the light-blue ultra-fine filter provides more complete filtration of very fine particles. -
Page 8: Where To Place The Device
Where to Place the Device Place the device on a firm, flat surface somewhere within easy reach of where you will use it at a level lower than your sleeping position. Make sure the device is away from any heating or cooling equipment (e.g., forced air vents, radiators, air conditioners). -
Page 9: Connecting The Breathing Circuit
To use the system, you will need the following accessories in order to assemble the recommended breathing circuit: • Philips Respironics interface (nasal mask or full face mask) with integrated exhalation port, or Philips Respironics interface with a separate exhalation device (such as the Whisper Swivel II) •... -
Page 10: Navigating The Device Screens
Starting the Device 1. Ensure power is supplied to the device. The first screen to display will be the Philips Respironics logo, followed by the device model screen, and then the Home screen. Home Screen The first time the device is powered on, a pop-up will prompt you to set the time on the device. -
Page 11: Menu Navigation (Therapy On) And Optional Humidification Settings
Menu Navigation (Therapy ON) and Optional Humidification Settings While the device is delivering therapy, you can adjust Tube Temperature or Humidifier Settings. Rotate the control dial to choose either setting. Press and rotate the dial to change the setting. Note: If you are using the Humidifier without the Heated Tube, simply just rotate the control dial to change the Humidifier setting. -
Page 12: Menu Navigation (Therapy Off)
Menu Navigation (Therapy OFF) From the Home screen, you can scroll between the following four options: My Info Preheat My Provider My Setup My Info: This menu provides summary statistics of your therapy use. Preheat: This function lets you warm up your humidifier for 30 minutes before starting a therapy session. My Provider: This menu contains information that your provider may direct you to read to them so they can better assist you over the phone. - Page 13 Preheat: Preheat On Screen Preheat Off Screen When using a humidifier, the device can preheat the water tank for up to 30 minutes prior to starting therapy. In order to activate the preheat mode, the blower must be “off” and a humidifier must be attached. When “Preheat” is selected, you will be able to turn the control dial to choose between “on”...
- Page 14 Icon Text Description Upload Allows user to initiate a modem call when an optional Cellular Modem or Wi-Fi Accessory is installed. After the modem upload has finished, the screen will either display a green checkmark with the text “Completed” to indicate a successful upload, or a red X with the text “Failed”...
- Page 15 This setting allows you to select the correct size diameter tubing that you are using with the device. You can choose either (22) for the Philips Respironics 22 mm tubing, or (15) for the Philips Respironics 15 mm tubing. When using Heated Tubing, the device will automatically change this setting to the appropriate tubing type (15H) and you will not be able to change it.
-
Page 16: Bluetooth Wireless Technology
Bluetooth Wireless Technology Your device has Bluetooth wireless technology. You can pair the therapy device to a mobile device that has the DreamMapper app installed. DreamMapper is a mobile and web-based system designed to help Obstructive Sleep Apnea (OSA) patients enhance their sleep therapy experience. Pairing to your Bluetooth enabled Mobile Device Note: You can only pair your therapy device to one mobile device at any given time. -
Page 17: Check Mask Fit
Check Mask Fit The optional Check Mask Fit feature can be enabled or disabled by your home care provider. This feature allows you to check the fit of your mask prior to starting therapy. This is done by measuring the amount of leak. Put on your mask assembly. -
Page 18: Device Alerts
Device Alerts Device alerts are pop-ups that show up on the UI screen. There are 5 types of alerts described here: • Status: These alerts are just the pop-up screen. • Notification: These alerts consist of the pop-up screen in addition to a blinking Power LED on top of the device. •... - Page 19 Alert Icon Type Description Possible Cause Action SD Card Notification Indicates SD card SD card was not Reinsert SD card, or Removed. or Alert 2 has been removed reinserted into device. click to clear alert. from therapy device and not reinserted before the start of the current therapy session.
- Page 20 If alert continues, contact your provider. The attached Alert 2 Indicates that the Incorrect power Switch to a Philips power supply attached power supply. Respironics does not support supply is not capable DreamStation humidification.
- Page 21 Alert Icon Type Description Possible Cause Action Automatic Off Status Displayed when The mask has been Put your mask back therapy ends due to removed. on, confirm good fit, automatic off function. and turn airflow on to resume therapy. Inlet blocked. Notification Blocked airway Blockage at device...
-
Page 22: Troubleshooting
Make sure the Tubing type setting (22 or 15) matches the tubing that you are using feels too high or too setting may be (Philips Respironics 22 or 15 mm tubing). low. incorrect. If you are using the Heated Tubing, this setting will be 15H and you cannot change... - Page 23 Problem Why It Happened What To Do Tube Temperature is Incorrect power Make sure the 80W power supply is being used or a compatible battery or DC turned on in “Setup” supply is being cable is being used. screen but Heated used.
-
Page 24: Accessories
• Repairs and adjustments must be performed by Philips Respironics-authorized service personnel only. Unauthorized service could cause injury, invalidate the warranty, or result in costly damage. • Do not use any accessories, detachable parts, and materials not recommended by Philips Respironics. Incompatible parts or accessories can result in degraded performance. -
Page 25: Traveling With The System
• Oxygen supports combustion. Oxygen should not be used while smoking or in the presence of an open flame. • When using oxygen with this system, a Philips Respironics Pressure Valve must be placed in-line with the patient circuit between the device and the oxygen source. The pressure valve helps prevent the backflow of oxygen from the patient circuit into the device when the unit is off. -
Page 26: Cleaning The Device
Allow the filter to air dry completely before reinstalling it. If the reusable blue pollen filter is torn, replace it. (Only Philips Respironics-supplied filters should be used as replacement filters.) 5. If the light-blue ultra-fine filter is dirty or torn, replace it. -
Page 27: Additional Notices
The Bluetooth word mark and logos are registered trademarks owned by Bluetooth SIG, Inc. and ® any use of such marks by Philips Respironics is under license. Other trademarks and trade names are those of their respective owners. Notice: The DreamStation Therapy Device transmits data between the therapy device and a mobile device, but it does not store any of your personal data. -
Page 28: Specifications
Specifications Environmental Operating Temperature: 5° to 35° C (41° to 95° F) Storage Temperature: -20° to 60° C (-4° to 140° F) Relative Humidity (operating & storage): 15 to 95% (non-condensing) Atmospheric Pressure: 101 to 77 kPa (0 - 2286 m / 0 - 7500 ft) Physical Dimensions: 15.7 x 19.3 x 8.4 cm (6.2”... -
Page 29: Disposal
Pressure Accuracy Pressure Increments: 4.0 to 20.0 cm H O (in 0.5 cm H O increments) Maximum static pressure accuracy, according to ISO 80601-2-70:2015: Pressure Static Accuracy 10 cm H ± 0.5 cm H Static pressure accuracy has a measurement uncertainty of 3.7% Maximum dynamic pressure variation, according to ISO 80601-2-70:2015: Pressure 10 BPM... - Page 30 Guidance and Manufacturer’s Declaration - Electromagnetic Emissions – This device is intended for use in the electromagnetic environment specified below. The user of this device should make sure it is used in such an environment. Emissions Test Compliance Electromagnetic Environment - Guidance RF emissions Group 1 The device uses RF energy only for its internal function.
-
Page 31: Limited Warranty
Philips Respironics dealer, and collecting the product from the authorised Philips Respironics dealer after repair or replacement, at its own cost. Philips Respironics is responsible only for the freight cost of transporting the product between the authorised Philips Respironics dealer and Respironics. Respironics reserves the right to charge an evaluation and postage fee for any returned Product as to which no problem is found following investigation. - Page 32 1 1 2 1 9 8 1 R 0 0 1121981 1121981 R00 JR 7/01/2015 EN-INTL...
Need help?
Do you have a question about the DreamStation CPAP and is the answer not in the manual?
Questions and answers
How do you change email addresses on DreamStation II? My husband can’t log in. He is not able to see his nightly sleep stats.