Table of Contents
Advertisement
Quick Links
Advertisement
Table of Contents

Related Manuals for KeepGuard KG760EB


Summary of Contents for KeepGuard KG760EB
- Page 1 Scouting CAM INSTRUCTION MANUAL Model#s: KG760EB/KG760EV KG761NB/KG761NV 12-11...
-
Page 2: Table Of Contents
Using the SETUP Menu to Change Settings Changing Parameter Settings in SETUP Mode EXAMPLES-Changing the Settings of Some Common Parameters The SETUP Menu-Parameters and Settings List w/Descriptions Mounting and Positioning the KEEPGUARD CAM Mounting Sensing Angle and Distance Test Switching ON the Camera... -
Page 3: Introduction
INTRODUCTION About the KEEPGUARD CAM The KeepGuard Cam is a digital scouting camera. It can be triggered by any movement of game in a location, detected by a highly sensitive Passive Infra-Red (PIR) motion sensor, and then take high quality pictures (up to 12MP still photos), or video clips. -
Page 4: Parts And Controls
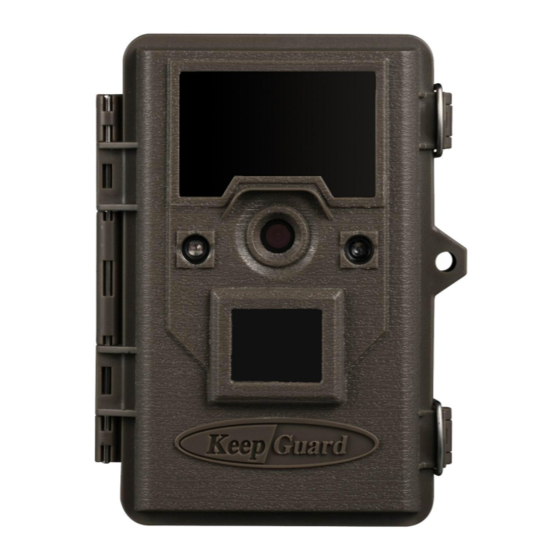
PARTS AND CONTROLS The KeepGuard Cam provides the following connections for external devices: USB port, SD card slot, TV Out and external DC power in (Fig. 1). A three way power switch is used to select the main operating modes: OFF, SETUP, and ON (Fig. - Page 5 Fig.1: Connections SD Card Slot DC In USB Port TV Out JACK LED IR Flash FRONT VIEW Lens Motion/Low Battery Indicator Light Sensor Lock Hole PIR Sensor Latch Fig .2: Button and Switch Guide Cable to Battery Compartment LCD Screen Up/Camera Left Down/Video...
-
Page 6: Installing The Batteries And Sd Card
INSTALLING THE BATTERIES and SD CARD Before you begin learning how to use your KeepGuard Cam, you will first need to install a set of batteries and insert an SD card. Although that may only take you a minute, there are some important notes about both batteries and SD... -
Page 7: Using An External Power Source
Optionally, you can connect an external 6V DC power source to the "DC In" jack at the bottom of the KeepGuard Cam. It is recommended to use a power source with a current output greater than 1000mA. However, during bright daytime operation when no flash is required, the KeepGuard Cam can function with much less current (>400mA). - Page 8 Don′t insert or remove the SD card when the power switch is in the ON position. The KeepGuard Cam uses a standard SD (Secure Digital) memory card to save photos (in .jpg format) and/or videos (in .asf format).
-
Page 9: Using The Keepguard Cam
SD cards or batteries. USING THE KEEPGUARD CAM Once you've prepared your KeepGuard Cam by properly installing batteries and an SD card, you could simply take it outside, strap it to a tree, switch it on and leave and you might get some great photos that are exactly what you wanted. -
Page 10: The Off,On And Setup Modes
OFF. Please note that even in the OFF mode the KeepGuard Cam still consumes power at a very low level. Therefore, it's a good idea to take the batteries out of the battery compartment if the camera will not be used for a long time. -
Page 11: Setup Mode
SETUP Mode In the SETUP mode you can check and change the settings of the KeepGuard Cam with the help of its built-in LCD (or a monitor connected to the TV out jack). These settings, found in the SETUP Menu, let you change the photo or video resolution, interval between photos, switch the time imprint on, etc. -
Page 12: Setup Mode Shortcut Keys/Functions
Fig. 3: SETUP Information Screen (standard display model shown) SETUP Mode Shortcut Keys/Functions As mentioned earlier in “Parts & Controls”, four of the keys below the LCD have secondary, "shortcut" functions when the camera is switched to SETUP mode (but the MENU key has not been pressed): Press the UP key to quickly set the camera to shoot video clips. -
Page 13: Using The Setup Menu To Change Settings
A wide range of options or “parameters” are provided to allow you to set the KeepGuard Cam to your operational preferences. To change the setting of any parameter you must first switch to the SETUP mode. Once in SETUP mode, pressing the MENU button will allow you to select any parameter and change its setting. -
Page 14: Examples-Changing The Settings Of Some Common Parameters
menu. MENU can also be pressed anytime you want to cancel changing a parameter's setting after a new setting has been selected (but OK has not been pressed yet). After setting the parameters to your preferences, be sure to move the switch to ON to begin actually taking photos or videos. No images will be captured if the switch is left in the SETUP position (unless you press the RIGHT/Shot key after exiting the menu) - in fact, the camera will power off automatically after a few seconds with no key pressed. - Page 15 you've selected for this parameter. Now press the RIGHT key to move to another parameter in the Menu. Pressing it four times will take you to ″Video Length″. Try using the UP and DOWN keys to scroll through the range of settings, then press OK to lock in your setting for the length of each video clip the camera shoots.
-
Page 16: The Setup Menu-Parameters And Settings List W/Descriptions
The SETUP Menu-Parameters and Settings List w/Descriptions Parameter Settings Description (Bold= default) Mode Camera or Selects whether still photos or video clips Video are captured when the camera is triggered. Image Size 12M Pixel Selects resolution for still photos from 3 to (only affects 8M Pixel 12 megapixels. - Page 17 Video 10S (second) Sets length per captured video clip. Length default, with Settings begin with 10 second default (only affects 5S to 60S when parameter is first selected. After video clips) possible range stepping down to 5S, video length settings start over at 60S.
- Page 18 motion. The High setting can be useful when the ambient temperature is warm (making it more difficult for the sensor to detect animals), and the Low setting may help in cold weather if the camera is being triggered too often by anything warmer than the surroundings.
- Page 19 Time Stamp Off, On Select ″On″ if you want the date & time (only affects (that the photo was captured) imprinted on still photos) every photo, select ″Off″ for no imprint. Set Clock Press OK and use the UP/DOWN keys (to change the setting) and LEFT/RIGHT keys (to move to the next field) to set the hour (24-hr format only, ″00″...
-
Page 20: Mounting And Positioning The Keepguard Cam
There are two ways to mount the KeepGuard Cam: using the provided adjustable web belt, or the tripod socket. Using the adjustable web belt: Fig. 5 illustrates using the web belt on the KeepGuard Cam. Push one end of the belt through the two brackets on the... -
Page 21: Sensing Angle And Distance Test
KeepGuard Cam. Thread one plastic buckle part onto each end of the belt. Fasten the belt securely around the tree trunk by clicking the buckle ends together after tightening the belt so there is no slack left. -
Page 22: Switching On The Camera
KeepGuard Cam. The height away from the ground for placing the device should vary with the animal size appropriately. In general, 3 to 6 feet is preferred. -
Page 23: Playing Back/Deleting The Photos/Videos
· Is the Power switch in the ON position? (do not leave it in SETUP). PLAYING BACK/DELETING the PHOTOS/VIDEOS After you have setup, mounted and activated your KeepGuard Cam, you will of course be eager to return later and review the images it has captured for you. - Page 24 Connect a TV monitor or a viewing device (such as a digital picture frame) that has a standard composite video input (RCA jack) to the KeepGuard Cam′s ″TV Out″ mini jack using the supplied cable. Then: · Put the power switch in SETUP mode (switch to OFF first).
-
Page 25: Deleting Photos Or Videos
Deleting Photos or Videos If you see a photo or video during playback on the LCD or video monitor that you want to delete, it can be done easily without leaving SETUP mode: · Press the MENU key. You will see the first ″Delete″ screen, which lets you select the option to delete only the currently displayed photo/video, or all photos/videos (see below). -
Page 26: Reviewing Images By Connecting The Camera To A Computer
easier to just take the card out. By removing the SD card (swapping it for a new empty card if you like) and taking it to your home or campsite to view the images by using an SD card″reader″ (user supplied) connected to your computer (some computers and TVs have a built in SD card slot), you can leave the camera in place ready to capture more images. -
Page 27: Downloading The Photos/Videos
·The default file system format of the KeepGuard Cam is FAT16, which most computers can read. If you format an SD card for the KeepGuard Cam in your computer, you should choose the file system format FAT16. Normally FAT16 is recommended unless you have another image viewer that uses FAT12 or FAT32 format. - Page 28 After the photos are copied to your hard drive, you can disconnect the KeepGuard Cam. (On Mac computers, drag the ″disk″ that appeared on your desktop when the camera was connected into your Trash to ″eject″ it before disconnecting.) The .jpg standard files from the KeepGuard Cam may be...
-
Page 29: Troubleshooting/Faqs
Battery life is shorter than expected 1. Battery life will vary with operating temperature and the number of images taken over time. Typically, the KeepGuard Cam will be able to capture several thousand images before the batteries die. 2. Check to make sure you have used new alkaline or lithium batteries. - Page 30 6. If you have used an SD card in another device before inserting it in your KeepGuard Cam, you might want to try formatting the card using the ″Format″ parameter in Setup mode (make sure you have backed up any important files first, as formatting will erase all previous files).
- Page 31 1-4 with no ″gaps″. KeepGuard recommends using 8 Energizer® Lithium AA batteries in all KeepGuard Cams. Make sure that the batteries are installed correctly, observing proper polarity. Always place the negative (lat) end of each battery in contact with the spring side of its slot inside the camera.
- Page 32 If this is seen on a consistent basis, then the sensor may need servicing. Please contact KeepGuard customer service. 7. Short video clips are not recording to the length set a. Check to make sure that the SD card is not full.
- Page 33 b. Make sure that the camera has good batteries in it. Near the end of the battery life, the camera may choose to record shorter video clips to conserve power. Date/Time Stamp not appearing on images Make sure that the ″Time Stamp″ parameter is set to ″On″. Photos Do Not Capture Subject of Interest 1.
- Page 34 and will help the user aim the camera. 2. During use, the LED will not flash when the camera takes an image. This is to help keep the camera hidden from game. LCD Screen Issues 1. LCD screen powers on but no text is present. a.
- Page 35 the setting. If you don’t save your new setting after changing it, the camera will continue to use the original default setting for that parameter.
-
Page 36: Technical Specifications
KG760/KG761 TECHNICAL SPECIFICATIONS Image Sensor 5Megapixel Color CMOS Lens F=7.36; FOV=55°Auto IR-Cut-Remove (at night) IR-Flash Range 36'-45'(12m-15m) Display Screen 1.5 inch Std B&W Display;2.4 inch Color Display Memory Card SD or SDHC Card, Maximum capacity 32GB Internal RAM Image Size 12MP (4000×3000)...
Need help?
Do you have a question about the KG760EB and is the answer not in the manual?
Questions and answers