
Subscribe to Our Youtube Channel
Related Manuals for KeepGuard CAM


Summary of Contents for KeepGuard CAM
-
Page 1: Table Of Contents
Parts and Controls Installing the Batteries and SD Card Loading Batteries Using an External Power Source Inserting the SD Card Using the KeepGuard CAM The OFF,ON and SETUP Modes OFF Mode ON Mode SETUP Mode Using the SETUP Menu to Change Settings... -
Page 2: Introduction
Coordinate Input About the KeepGuard CAM The SETUP Menu-Parameters and Settings List The KeepGuard Cam is a digital scouting camera. It can be w/Descriptions triggered by any movement of game in a location, detected by a highly sensitive Passive Infra-Red (PIR) motion sensor,... -
Page 3: Applications
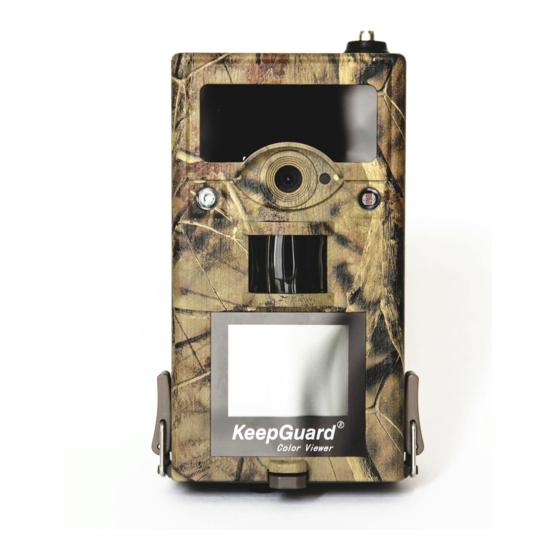
Video Mic alerted just when something has happened. Motion/Low Battery Indictator Applications Low Battery The KeepGuard Cam can be used as a trail camera for Indicator PIR Sensor hunting or scouting game. It is also suitable for surveillance usage. Color LCD... -
Page 4: Installing The Batteries And Sd Card
Optionally, you can connect an external 6V DC power source to Before you begin learning how to use your KeepGuard Cam, you the "DC In" jack at the bottom of the KeepGuard Cam. It is will first need to install a set of batteries and insert an SD card and recommended to use a power source with a current output SIM card. -
Page 5: Inserting The Sd Card
Don′t insert or remove the SDcard when the power switch is in the ON position. The KeepGuard Cam uses a • To take out the SD card, just gently push in (do not try to pull it standard SD (Secure Digital) memory card to save photos (in out without pushing in first). -
Page 6: The Off,On And Setup Modes
In the SETUP mode you can check and change the settings of the e.g.,replacing the SD card or batteries, or transporting the device. KeepGuard Cam with the help of its built-in LCD (or a monitor You will also use OFF mode if you connect the camera to a connected to the TV out jack). -
Page 7: Using The Setup Menu To Change Settings
A wide range of options or “parameters” are provided to allow you switched from ON to SETUP mode. If this occurs, simply move to set the KeepGuard Cam to your operational preferences. To the switch to OFF and then push it up to SETUP again.. -
Page 8: Examples-Changing The Settings Of Some Comon Parameters
should be able to dive right in, find the parameter(s) you want, and Press MENU (4a) Press DOWN (4b) setup the camera to your preferences. But maybe you'd rather walk through an example or two first: To change any parameter's setting, always start with the power switch in the SETUP position. -
Page 9: Set Timed Scan
Cam, which allows you to monitor your food plots or field edges is based on a 24-hour clock, with "00" hours=midnight, "12" with time lapse image or video. When set to "on",the cam will take hours=noon, "23" hours=11PM,etc. To move to the next setting,... -
Page 10: Gprs Setting
Interval :15M After the LCD comes on, These settings would cause the cam to capture a photo (or video, if 1. Press MENU to display the setting menu. the camera is set to that mode) once every 15 minutes, beginning at 2. -
Page 11: Net Setting
Send to setting NOTE: If you choose daily report, you need to set the daily report Enter into “Send to” setting, you can set 5 phone numbers and 5 email time:**H, **M. addresses. The following shows how to set the Sent to setting: 1. -
Page 12: Quick Start Mms Setting
Quick Start MMS Setting 9.Press RIGHT or LEFT until return to the GPRS Setting menu. 10.Press UP or DOWN to select Send to. The camera can send MMS message through GSM network, so 11.Press OK to enter into submenu. before using this function, you need to open GSM/GPRS service 12.Press UP or DOWN to select Phone No. - Page 13 11.Press UP or DOWN to select GPRS Email Setting. 1.Press RIGHT key or LEFT key until reach the GPRS Setting 12.Press OK to enter into submenu.There are four inputs, menu item. press or * to switch between digits, letters and punctuations.Press number buttons to 2.Press UP or Down to select Work Mode, key in the digits.Press “←”...
-
Page 14: Mms/Gprs Sending Testing
5. If you select ON, you will enter the submenu---Password. Press MMS/GPRS Sending Testing the UP, DOWN, Left, or Right to switch the digits or numbers from After completing the MMS/GPRS Setting,Please test it first before the virtual keyboard. Press OK to key in one digit or number. Press using this function. -
Page 15: The Setup Menu-Parameters And Settings List
The SETUP Menu-Parameters and Settings List w/Descriptions The SETUP Menu-Parameters and Settings List w/Descriptions Selects the length of time that the Settings 10S (second) Parameter Description camera will"wait"until it responds to default, with a (Bold=Default) any additional triggers from the PIR 60M (minute) after an animal is first detected and to1S (second) - Page 16 The SETUP Menu-Parameters and Settings List w/Descriptions The SETUP Menu-Parameters and Settings List w/Descriptions Deletes (erases) all files stored on a card to Allows the user to input latitude and prepare it for reuse. Always format a card that longfitude coordinates for the camera’s has been previously used in other devices.
-
Page 17: Mounting And Positioning The Keepguard Cam
In general, 3 to 6 feet KeepGuard Cam. Push one end of the belt through the two brackets on the is preferred.You can avoid potential false triggers due to temperature and back of the KeepGuard Cam. -
Page 18: Playing Back/Deleting The Photos/Videos
DOWN key for the next one. When viewing images, After you have setup, mounted and activated your KeepGuard Cam, you will the total number of all images in the SD card and the index of the displaying... -
Page 19: Reviewing Images Directly From The Sd Card
SD card. If this happens, please format the SD card leave the camera in place ready to capture more images. Once with the KeepGuard Cam or in your computer first and then insert connected, the card reader works the same way as described the card into your KeepGuard Cam and try again. -
Page 20: Downloading The Photos/Videos
•The default file system format of the KeepGuard Cam is FAT16, ″PICT0001.JPG″ etc,and are located in the ″DCIM\100EK113″ which most computers can read. If you format an SD card for the folder on this″Removable Disk″.Video file names will end KeepGuard Cam in your computer, you should choose the file with″.ASF″.You may copy the photos/videos to your hard drive as... - Page 21 6. If you have used an SD card in another device before inserting The flash will stop operating near the end of the battery life. it in your KeepGuard Cam, you might want to try formatting the b. You will get the best results when the subject is within the ideal card using the"Format"...
- Page 22 If this is seen on a consistent basis, then the sensor may need image. This is to help keep the camera hidden from game. servicing. Please contact KeepGuard customer service. 7. Short video clips!anot recording to the length set LCD Screen Issues a.
- Page 23 <200mA(+600mA when IR-LED Lighted) new setting afterchanging it, the camera will continue to use the original default setting for that parameter. Timed Scan programmable Temperature Display programmable KeepGuard TECHNICAL SPECIFICATIONS Password programmable Moon Display programmable Image Sensor 5 Megapixel Color CMOS...
- Page 24 Operating Temperature -20-60℃(Storage temperature:-30-70℃) Operating Humidity 5%-90% Security Authentication FCC/CE/RoHs/WEEE...
Need help?
Do you have a question about the CAM and is the answer not in the manual?
Questions and answers