
Subscribe to Our Youtube Channel
Related Manuals for Assa Abloy Aperio AH15


Summary of Contents for Assa Abloy Aperio AH15
- Page 1 Aperio ® Online Mechanical Installation Manual Document No: ST-001323-C, Issue date: 21 February 2014 The global leader in door opening solutions...
-
Page 2: Table Of Contents
Table of Contents Aperio Online ® 1 Introduction ............................. 3 Purpose ....................................3 Scope .....................................3 Applicable Products .................................3 Product availability ................................3 Aperio support in the EAC system ..........................3 References ...................................3 2 System Overview ........................... 4 The Aperio system ................................4 The Aperio Programming Application ........................4 Regulatory and security information .........................4 Communication hub versions and EAC interface ....................4 3 Planning the Installation ........................ -
Page 3: Introduction
The products included in this manual may not be responsibilities. available on all markets. Please check your local ASSA ABLOY company for details. Scope Aperio support in the EAC system This manual covers information and instructions... -
Page 4: System Overview
2 System Overview Aperio Online ® Figure 1. Aperio technology overview Programming application IEEE802.15.4 (2.4GHz) Communication RS-485, Wiegand or Ethernet EAC system (Electronic Access Control) RFID Lock card The Aperio system Regulatory and security information The Aperio system is used in the following way: Refer to the Programming Application manual for The user holds an RFID card in front of the lock. -
Page 5: Planning The Installation
3 Planning the Installation Aperio Online ® It is very important to find the best possible ∙ When the external antenna is used, the radio placement of the communication hub, in coverage will be focused perpendicular to the order to get at stable and reliable radio link. direction of the antenna and in some directions Depending on the floor plan of the installation the range may decrease. -
Page 6: Evaluating Radio Interference
Aperio Online ® Evaluating radio interference Always evaluate the installation site for possible WiFi/WLAN routers and other radio transmitters ∙ sources of disturbance. Follow these installation operating in the 2.4 GHz band should be guidelines regarding disturbances to ensure kept at least 3.5 meters/12 feet from the adequate functionality: Communication Hub and lock. -
Page 7: Mechanical Installation
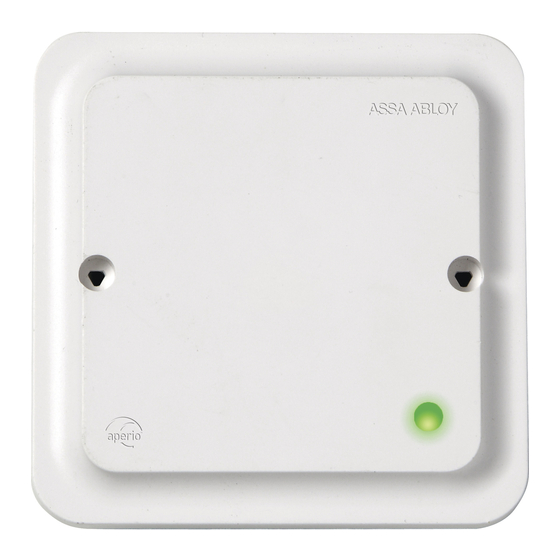
4 Mechanical Installation Aperio Online ® This chapter includes guidelines for selecting the correct installation place for communication hubs in an Aperio online EAC system. This chapter also describes how to connect the communication hubs to the power supply. Mechanical installation AH15 Minimum distance between AH15 communica- tion hubs If necessary, several communications hubs can... - Page 8 Aperio Online ® Placement options for AH15 when using E-cylinder locks When using E-cylinder locks, the AH15 must be The AH15 communication hub can be mounted placed either in the roof, on the right or left wall or according to the following figure. on the opposite wall and within a 5 meters/16 feet range from the lock.
-
Page 9: Installation Examples For Ah15 Communication Hub With E-Cylinder Locks
Aperio Online ® Installation examples for AH15 communication hub with E-cylinder locks Short/long Corridors 6 f t < 5 Alternate installation: 6 f t < 5 ® Aperio Online Mechanical Installation Guide, Document No: ST-001323-B Date: 21 februari 2014... - Page 10 Aperio Online ® High ceiling < 5 6 f t < 5 6 f t Low ceiling < 5 6 f t < 5 6 f t ® Aperio Online Mechanical Installation Guide, Document No: ST-001323-B Date: 21 februari 2014...
- Page 11 Aperio Online ® Square rooms < 5 < 5 Alternate installation with ceiling placement: < 5 < 5 < 5 < 5 ® Aperio Online Mechanical Installation Guide, Document No: ST-001323-B Date: 21 februari 2014...
- Page 12 Aperio Online ® Open space environments < 5 < 5 < 5 < 5 ® Aperio Online Mechanical Installation Guide, Document No: ST-001323-B Date: 21 februari 2014...
- Page 13 Aperio Online ® Placement options for AH15 when using other locks When using non-cylinder locks, for example The AH15 communication hub can be mounted Escutcheon locks, it is recommended that the according to the following figure. AH15 is mounted on any of the walls, and within a 5 meters/16 feet range from the lock in the zone AH15 Communication hub installed on a wall, shown in the figure.
-
Page 14: Installation Examples For Ah15 Communication Hub With Other Type Of Locks
Aperio Online ® Installation examples for AH15 communication hub with other type of locks Corridors 6 f t < 5 Alternate installation, on same wall: 6 f t < 5 ® Aperio Online Mechanical Installation Guide, Document No: ST-001323-B Date: 21 februari 2014... - Page 15 Aperio Online ® Square rooms 6 f t < 5 < 5 6 f t Alternate installation on same wall: 6 f t < 5 < 5 6 f t ® Aperio Online Mechanical Installation Guide, Document No: ST-001323-B Date: 21 februari 2014...
- Page 16 Aperio Online ® Open space environments > 5 6 f t > 5 6 f t ® Aperio Online Mechanical Installation Guide, Document No: ST-001323-B Date: 21 februari 2014...
-
Page 17: Mechanical Installation Ah20/30/40
Aperio Online ® Mechanical installation AH20/30/40 Placement options for AH20/30/40 The AH20/30/40 communication hub is designed The AH20/30/40 communication hub can be so that it can establish a reliable radio link mounted according to the following figure. regardless of the mounting position (horizontal or vertical) of the communication hub and the type AH20/30/40 Communication hub with of lock being used. - Page 18 Aperio Online ® Radio coverage for external antenna The general guideline for using an external The following figure illustrates the difference in antenna is to obtain radio coverage in a even radio pattern for external and internal antenna. globe around the external antenna. Note that (Note that this is only an simplified picture of the external antenna does not extend the the radio reception for each antenna, showing...
-
Page 19: Installation Examples For Ah20/30/40 Communication Hub
Aperio Online ® Installation examples for AH20/30/40 communication hub Short Corridors < 1 Alternate installation: < 1 ® Aperio Online Mechanical Installation Guide, Document No: ST-001323-B Date: 21 februari 2014... - Page 20 Aperio Online ® Long corridors < 3 0 f t Alternate installation: < 3 0 f t ® Aperio Online Mechanical Installation Guide, Document No: ST-001323-B Date: 21 februari 2014...
- Page 21 Aperio Online ® High ceiling < 1 Alternate installation: < 1 ® Aperio Online Mechanical Installation Guide, Document No: ST-001323-B Date: 21 februari 2014...
- Page 22 Aperio Online ® Low ceiling < 1 ® Aperio Online Mechanical Installation Guide, Document No: ST-001323-B Date: 21 februari 2014...
- Page 23 Aperio Online ® Square rooms < 1 < 1 Alternate installation with “light” wall material: < 1 < 2 ® Aperio Online Mechanical Installation Guide, Document No: ST-001323-B Date: 21 februari 2014...
- Page 24 Aperio Online ® Open space environments < 1 < 1 Alternate installation: < 0 f t 0 f t < ® Aperio Online Mechanical Installation Guide, Document No: ST-001323-B Date: 21 februari 2014...
-
Page 25: Configuration And Connection Of Cables
5 Configuration and Connection of Cables Aperio Online ® AH15 (RS-485) This chapter describes how to perform a default configuration of an AH15 communication hub using the RS-485 interface. Configuration of the communication hub to the EAC includes setting the DIP switches, connecting it to the RS-485 bus and connecting it to power supply, according to the applicable section below. - Page 26 Aperio Online ® DIP 6-8 – RS-485 bus settings DIP switch 6 and 7 activate pull up and pull If there is more than one communication hub down-resistors, which must be enabled once to connect they should be connected in a daisy per bus.
- Page 27 Aperio Online ® Connecting to the RS-485 bus 8-24V GREEN DATA0 DATA1 RS485 B RS485 A The RS-485 bus should be made up of a twisted- pair cable with characteristic impedance between 90 Ohm and 120 Ohm. Maximum bus length is about 1000 m.
-
Page 28: Ah15 (Wiegand)
Aperio Online ® AH15 (Wiegand) Configuring and connecting the AH15 communication hub to the EAC includes setting the DIP switches, connecting it to the Wiegand interface bus and connecting it to power supply, according to the applicable section below. Configuring the DIP switches Details for the Wiegand interface signals: Default configuration According to the figure, all DIP switches in position... - Page 29 Aperio Online ® Signal access Timer Data from expired? denied RFID reader to lock Signal Green LED Green LED access active? granted active? to lock Transmit via Wiegand interface On completion start timer (1.5 s) Figure 10. Dip Switch 1 – OFF: Access decision logic with single LED signal Timer Data from Exit without access...
- Page 30 Aperio Online ® If the EAC system is using output signal Red LED for other purposes than to control the lock, then this signal should not be connected to the communication hub. Set DIP switch 1 in posi- tion OFF in this case If the EAC system is using output signal Green LED for other purposes than to control the lock, then this signal should not be connected to the communication hub.
- Page 31 Aperio Online ® Connecting to the Wiegand bus The AH15 communication hub has four Wiegand signals plus ground. Purpose and connection of these signals are described in the table below. 8-24V GREEN DATA0 DATA1 RS485 B RS485 A Hub connector Description Connect to…...
-
Page 32: Ah20 (Wiegand)
Aperio Online ® AH20 (Wiegand) Configuring and connecting the communication hub to the EAC includes setting the DIP switches, connecting it to the Wiegand interface bus and connecting it to power supply, according to the applicable section below. Configuring the DIP switch Details for the Wiegand interface signals: Default configuration According to the figure, DIP switches 1-9 in... - Page 33 Aperio Online ® Signal Timer access Data from expired? denied RFID reader to lock Signal Green LED access Green LED active? granted active? to lock Transmit via Wiegand interface On completion start timer (1.5 s) Dip Switch 1 – OFF: Access decision logic with single LED signal Figure 13.
- Page 34 Aperio Online ® The communication hub must be power cycled after any changes on the DIP switch, since the state of the DIP switch is read only at startup. If the EAC system is using output signal Red LED for other purposes than to control the lock, then this signal should not be connected to the communication hub.
- Page 35 Aperio Online ® Connecting to the Wiegand bus The AH20 communication hub has four Wiegand signals plus ground. Purpose and connection of these signals are described in the table below. S100 NCL1 COM1 NOP1 NCL2 COM2 NOP2 NCL3 S101 GREEN COM3 NOP3 8-24V...
- Page 36 Aperio Online ® Connecting the relays Connecting to supply voltage The four form C relays on the AH20 version can be Connect the wires to 8-24 VDC, 2 W and GND used by the EAC to supervise door position status, (ground) on the communication hub.
-
Page 37: Ah30 (Rs-485)
Aperio Online ® AH30 (RS-485) This chapter describes how to perform a default configuration of an AH30 communication hub using the RS-485 interface. Configuration of the communication hub to the EAC includes setting the DIP switches and, if not done earlier, connecting it to the RS-485 bus and to power supply, according to the applicable section below. - Page 38 Aperio Online ® Select a unique EAC address 1-15 for each communication hub by use of the DIP switch according to the table below. (The resulting lock addresses for each communication hub address are shown to the right): DIP 4 – DIP 1 AH30 Hub address Lock addresses 0000...
- Page 39 Aperio Online ® DIP 6-8 – RS-485 bus settings If there is more than one communication hub DIP switch 6 and 7 activate pull up and pull to connect they should be connected in a daisy down-resistors, which must be enabled once chain.
- Page 40 Aperio Online ® DIP 9 DIP 10 – Internal/external antenna This DIP switch is not used. Normally the internal antenna of the communication hub is sufficient. In a difficult installation environment or if the radio signal needs to be amplified for extended range, an external antenna can be used.
-
Page 41: Ah40 (Ethernet)
Aperio Online ® AH40 (Ethernet) This chapter describes how to perform a default configuration of an AH40 communication hub using the Ethernet interface. Configuration of the communication hub to the EAC includes setting jumpers, connecting it to Ethernet and connecting it to power supply, according to applicable section below. -
Page 42: Appendix
6 Appendix Aperio Online ® Selecting the correct EAC address (AH15/AH30) Selecting EAC addresses for communication hubs Address 16-31: For AH30/AH15 communication ∙ and locks correctly during installation is important hubs in single device mode (only one lock in order not to cause address conflicts in your paired). - Page 43 Aperio Online ® Addressing table – legacy address offset Legacy addressing mode is an alternative addressing mode that can be set by the Programming Application in the configuration wizard. The lock addresses in this mode are set consecutively. For example, if communication hub has address 1, the locks will get address 1-8, 9-16, 17-24 etc.
-
Page 44: Installation Examples
Aperio Online ® Installation examples See below for examples of the most common installations and how the addressing is made and how possible address conflicts are avoided. One-to-several installation This is the default installation as described The addressing table above does not need to in section "DIP 1-5 –... -
Page 45: Upgrading Existing Installations
Aperio Online ® Single device installation A single device installation uses only AH15 communication hubs with the address range from Single device 1 to 63, according to this figure: Figure 21. installation Lock Lock Lock Lock Lock Lock Lock 0x01 0x02 0x03 0x11... -
Page 46: Led Indications
7 LED Indications Aperio Online ® Communication Hub LED indications The communication hub has a single LED. It supports an optical scheme with red, green, and yellow. The indication scheme is described by the two figures below: Commu- Figure 22. 2 sec. -
Page 47: Lock Led Indications
Aperio Online ® Lock LED indications The lock has three LEDs. They support an optical scheme with red, yellow, and green. The indication scheme is described by the figures Figure 25. Lock normal below: operation LED indica- tion EAC response Enter PIN Card+PIN access time... - Page 52 ASSA ABLOY is the global leader in door opening solutions, dedicated to satisfying end-user needs for security, safety and convenience Contact www.assaabloy.com/aperio Wireless lock technology...
Need help?
Do you have a question about the Aperio AH15 and is the answer not in the manual?
Questions and answers