Table of Contents
Advertisement
Quick Links
Advertisement
Table of Contents

Subscribe to Our Youtube Channel
Related Manuals for Cornelius VIPER (E) 2 FLAVOR


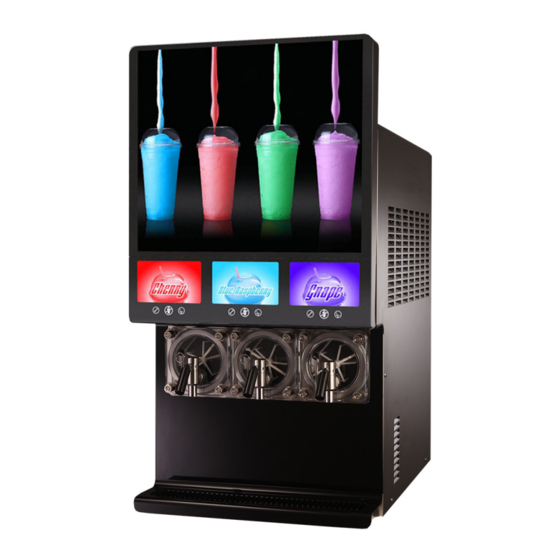
Summary of Contents for Cornelius VIPER (E) 2 FLAVOR
- Page 1 VIPER (E) 2 FLAVOR, VIPER (E) 3 FLAVOR & VIPER (E) 4 FLAVOR Installation Manual Carbon Model Classic Model Release Date: October 28, 2008 Publication Number: 621260373INS Revision Date: September 10, 2015 Revision: J Visit the Cornelius web site at www.cornelius.com for all your Literature needs.
-
Page 2: Contact Information
Commercial Warranty. Cornelius will not be responsible for any repair, replacement or other service required by or loss or damage resulting from any of the following occurrences, including but not limited to, (1) other than normal and proper use and normal... -
Page 3: Table Of Contents
TABLE OF CONTENTS Safety Instructions ............. . . 1 Read and Follow ALL Safety Instructions . - Page 4 Water Supply Requirements ..........11 Water Connections .
- Page 5 Adjusting BRIX Level ........... . 31 Filling the Barrels .
-
Page 6: Safety Instructions
Keep your unit in proper working condition and do not allow unauthorized modifications to the unit. NOTE: The dispenser is not designed for a wash-down environment and MUST NOT be placed in an area where a water jet could be used. © 2008-2015, Cornelius Inc. - 1 - Publication Number: 621260373INS... -
Page 7: Qualified Service Personnel
• bed and breakfast type environments • catering and similar non-retail applications THE APPLIANCE HAS TO BE PLACED IN A HORIZONTAL POSITION Publication Number: 621260373INS - 2 - © 2008-2015, Cornelius Inc. -
Page 8: Decommissioning And/Or Transporting The Unit
The unit must be carefully tied down or stored in such a manner that the unit will not move during shipment. TORAGE WITHIN THE ACHINE CAUTION: Do not store explosive substances such as aerosol cans with a flammable propellant in this appliance. © 2008-2015, Cornelius Inc. - 3 - Publication Number: 621260373INS... -
Page 9: Introduction
Each syrup has its own specific formulation of makeup. Fruit flavors contain citric acids that colas do not. Colas also differ in ingredients from one brand to another. Each product formulation has its own peculiarities regarding the way the product absorbs carbonation and the way it releases carbonation. Publication Number: 621260373INS - 4 - © 2008-2015, Cornelius Inc. -
Page 10: Brix Affects Overrun
Freezing causes approximately a 5-7 percent expansion in dispensed frozen carbonated drinks. The degree of freezing is limited because the finished drink is intended to be sipped through a straw. This is not possible if the product is too “solid”. © 2008-2015, Cornelius Inc. - 5 - Publication Number: 621260373INS... -
Page 11: Installation
ELIVERY NSPECTION NPACKING NOTE: Cornelius is not responsible for damaged freight. If damage is found, you must save all packaging material and contact the freight carrier. Failure to contact the carrier within 48 hours of receipt may void your claim. -
Page 12: Countertop Template Installation Instructions
FRONT OF DRIP TRAY FRONT OF UNIT SPLASH PANEL SURFACE PLAN VIEW Figure 2 A - Opening for Product Tubes B - Opening for Electrical Cables C - Opening for Drip Tray Drain © 2008-2015, Cornelius Inc. - 7 - Publication Number: 621260373INS... -
Page 13: Backroom Requirements
The electrical connection is located at the left side of the rear panel and the tubing supplies are located on the right side, as shown in Figure 4. Syrup, Water and CO Power Cord Input Lines Figure 4. Publication Number: 621260373INS - 8 - © 2008-2015, Cornelius Inc. -
Page 14: Electrical Requirements
Table 2 shows the power requirements for the various types of units. Table 2. 2-Barrel 60Hz 3-Barrel 60Hz 4-Barrel 60Hz 2-Barrel 50Hz 3-Barrel 50Hz 20 A. Circuit 30 A. Circuit 30 A. Circuit 20 A. Circuit 30 A. Circuit © 2008-2015, Cornelius Inc. - 9 - Publication Number: 621260373INS... -
Page 15: Electrical Connections
Connect the green wire to the ground terminal next to the terminal block. Replace the power box cover. DO NOT TURN ON THE POWER at this time. Strain Relief Figure 5 (60 Hz unit) Strain Relief Figure 6 (50Hz unit) Publication Number: 621260373INS - 10 - © 2008-2015, Cornelius Inc. -
Page 16: Water Supply Requirements
NOTE: Use a dedicated secondary regulator adjusted to 75 ±1 psig to supply the unit. © 2008-2015, Cornelius Inc. - 11 - Publication Number: 621260373INS... -
Page 17: Co2 Connections
Do not turn on the syrup supply to the unit. Testing Power The following procedure provides a minimal operational test of the power to the unit. Perform the procedure in Table 4. Publication Number: 621260373INS - 12 - © 2008-2015, Cornelius Inc. -
Page 18: Installing The Drip Tray
Slide the drip tray with cup rest into the two brackets protruding from the bottom of the unit until the tray contacts the two detents in the brackets then place the drip tray cladding on the drip Tray. See Figure 10. Drip Tray Mounting Brackets Figure 10 (Viper carbon model) © 2008-2015, Cornelius Inc. - 13 - Publication Number: 621260373INS... -
Page 19: Installing The Graphics Sheet
Insert the graphics from the top of the merchandiser as shown below. To remove / replace graphics slide the shutter up until it stops (2.5” approx.). The graphics will slide up along with the shutter. Behind the shutter you can access the graphics to remove it. Figure 12 (For carbon model) Publication Number: 621260373INS - 14 - © 2008-2015, Cornelius Inc. -
Page 20: Installing The Flavor Card
Lift the Merchandiser shutter until it stops (2.5” approx.) and then Insert the flavor card to the flavor card windows. After installing flavor card pull the merchandiser shutter down to its original position. Figure 14 (Viper carbon model) © 2008-2015, Cornelius Inc. - 15 - Publication Number: 621260373INS... -
Page 21: Cart Information And Mounting
OUNTING The Viper unit may be mounted on a mobile cart (Cornelius part no. 620043075 for 2-barrel unit, 620053990 for 3-barrel unit and 620046556 for 4-barrel unit) which allows some movement of the unit for service and cleaning. There are four captive nuts on the bottom of the Viper to accommodate four 3/8-16 bolts. -
Page 22: Control Panel Overview
Figure 18 During initial power up, the barrel status is off, indicating that the unit is in idle mode, with refrigeration off, product delivery off and the barrel motor off. © 2008-2015, Cornelius Inc. - 17 - Publication Number: 621260373INS... -
Page 23: Setting The System Options
Highlight the CLOCK SETUP field from the Select menu, shown in Figure 20 This displays the Clock Setup menu, shown in Figure 21 To set the time, perform the procedure in Table 5. Publication Number: 621260373INS - 18 - © 2008-2015, Cornelius Inc. - Page 24 AM/PM setting, if using 12 hour format. CLOCK TIME: 11:00 AM DATE: 01/01/00 SETUP 12:51P MAR 04 BACK CLOCK Figure 21. To set the date, perform the procedure in Table 6 and refer to Figure 21. © 2008-2015, Cornelius Inc. - 19 - Publication Number: 621260373INS...
-
Page 25: Setting Daylight Savings Time
Select FALL WEEK WEEK. Use the + or - buttons at the bottom of the display Set FALL WEEK to set the correct week. The choices are 1, 2, 3 or Publication Number: 621260373INS - 20 - © 2008-2015, Cornelius Inc. -
Page 26: Options Setup Menu
The date format can be displayed in either United States or European format. To display U.S. date format, press the USA button. This displays the date in mm/dd/yy format. Press the EURO button to display the date in dd/mm/yy format. © 2008-2015, Cornelius Inc. - 21 -... -
Page 27: Setting The Time Format
The defrost lockout affects all barrels in the unit. To set the defrost lockouts, perform the procedure in Table 9. Defrost lockouts should be overlapped by 15 minutes for sequential lockout. Publication Number: 621260373INS - 22 - © 2008-2015, Cornelius Inc. - Page 28 DEFROST LOCK 3: 12:00 PM BACK CLEAR Figure 24. When the defrost lockout settings are complete, press the BACK button to save the settings and return to the Select menu, shown in Figure 20. © 2008-2015, Cornelius Inc. - 23 - Publication Number: 621260373INS...
-
Page 29: Setting The Sleep And Wake Up Times
To set all barrels in the system to the same viscosity setting, follow Table 11, and then press the ALL button at the bottom of the display while highlighting the viscosity setting you desire for all the barrels. Publication Number: 621260373INS - 24 - © 2008-2015, Cornelius Inc. - Page 30 When the viscosity settings are complete, press the BACK button to save the settings and return to the Select menu, shown in Figure 20. NOTE: Refer to the service manual for other controller functions and features. © 2008-2015, Cornelius Inc. - 25 - Publication Number: 621260373INS...
-
Page 31: Commissioning The Unit
Foaming Agent FCB Syrup w/o 32-36 PSIG Foaming Agent NOTE: For citric syrups, adjust the CO pressures down by 2-4 PSIG from the above to compensate for the lower CO adsorption. Publication Number: 621260373INS - 26 - © 2008-2015, Cornelius Inc. -
Page 32: Pressurizing The Water System
(push up to open) Figure 26. NOTE: Remove the valve cover to access syrup and water valves. Pressurizing the Syrup System Perform the procedure in Table 15 to pressurize the syrup system. © 2008-2015, Cornelius Inc. - 27 - Publication Number: 621260373INS... -
Page 33: Setting Brix
The BRIX Setup menu facilitates the extraction of a sample of product from the unit for BRIX measurement. There is a three second dispense that produces a constant volume dispense so that BRIX comparison can be made between samples. Publication Number: 621260373INS - 28 - © 2008-2015, Cornelius Inc. - Page 34 If BRIX level needs to be adjusted, perform the Adjusting BRIX Level proce- dure in Table 17. Repeat this procedure for each barrel in the system. Replace splash panel on unit. © 2008-2015, Cornelius Inc. - 29 - Publication Number: 621260373INS...
- Page 35 Viper Installation Manual Product Product Supply Supply Valve Valve Barrel 2 Barrel 1 Valves shown in Product position w/ Splash Panel Removed Figure 28. Publication Number: 621260373INS - 30 - © 2008-2015, Cornelius Inc.
-
Page 36: Adjusting Brix Level
When BRIX adjustments are complete and all the air is purged from the sys- tem, replace the splash panel. NOTE: If any of the valve covers were removed during the process, make sure to replace them. © 2008-2015, Cornelius Inc. - 31 - Publication Number: 621260373INS... - Page 37 Viper Installation Manual Water Flow Syrup Flow Control Knob Control Knob (Do Not Adjust) Figure 29. Figure 30. Publication Number: 621260373INS - 32 - © 2008-2015, Cornelius Inc.
-
Page 38: Filling The Barrels
1. Press the BACK button at the bottom of the dis- Complete the procedure play to save the settings and return to the Setup menu. © 2008-2015, Cornelius Inc. - 33 - Publication Number: 621260373INS... - Page 39 Press the BACK button at the bottom of the dis- Complete the procedure play to return to the Maintenance menu. Select SPIN to run the motor and visually ensure Verify that the calibration reading is 20 +/- 2. Publication Number: 621260373INS - 34 - © 2008-2015, Cornelius Inc.
-
Page 40: Security Menu
Main menu, security is reactivated and the Maintenance menu is not accessible. To disable security, access the System menu, highlight Security and press the OFF button. © 2008-2015, Cornelius Inc. - 35 -... -
Page 41: Troubleshooting
C. Unit in diagnostics C. Exit diagnostics & turn barrels ON Water source not Turn on water No water pressure turned on Filter blocked Change filter C. Other C. Call Service Publication Number: 621260373INS - 36 - © 2008-2015, Cornelius Inc. -
Page 42: Specifications
Operating Temperature: ...............55° to 95 OISE EVEL This unit emits acoustical noise with an A-weighted sound pressure level no greater than 75dB, as measured in accordance with ED 60335-2-75. © 2008-2015, Cornelius Inc. - 37 - Publication Number: 621260373INS... - Page 44 Cornelius Inc. www.cornelius.com...
Need help?
Do you have a question about the VIPER (E) 2 FLAVOR and is the answer not in the manual?
Questions and answers