Advertisement
Quick Links
Advertisement

Subscribe to Our Youtube Channel
Related Manuals for Malloca MDO-80BL


Summary of Contents for Malloca MDO-80BL
- Page 1 Double Oven USER MANUAL MODEL: MDO-80BL...
-
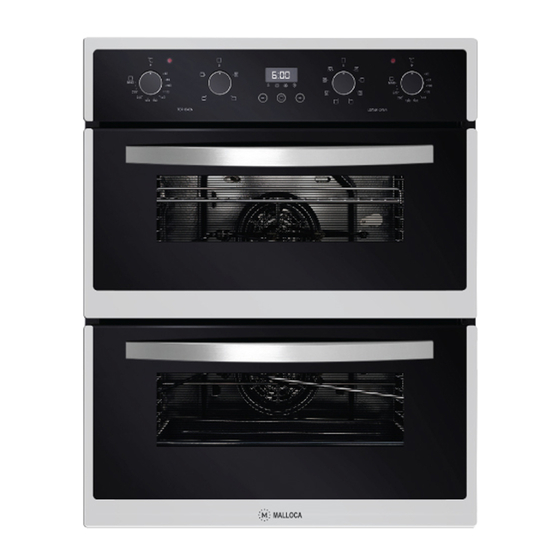
Page 2: Close-Up View
We recommend that you read the instructions in this user manual carefully before use for the best performance and to extend the life of your appliance, as it will provide you with all the instructions you require to ensure its safe installation, use and maintenance. -
Page 3: How To Use Your Oven
How to use your oven This multi-function double oven combines the advantages of traditional convection ovens with those of the more modern fan assisted models in a single appliance. It is an extremely versatile appliance that allows you to choose easily and safely between different cooking modes. - Page 4 Delicate cooking 1220-1460W/ 1170-1380W Position of thermostat knob“C”:Between 60℃and 250℃. The bottom heating element and the fan come on. Suitable for pastries, cakes and non-dry sweets in baking tins or moulds. Excellent results are also obtained in cooking requiring above all heat from the bottom. You are advised to put the pan on a low level.
- Page 5 To start the turnspit, proceed as follows: · place the oven tray on the 1st rack ; · insert the special turnspit support on the 2nd rack and position the spit by inserting it through the special hole into the turnspit at the back of the oven ; ·...
- Page 6 3-keys timer procedure baking mode Adjust the clock after switch on: Once it connected with electrical power, the display will show “12:00” with the square symbol above “ ”; Press the “+” or “-” button will increase or decrease the number until it reaches the right time;...
-
Page 7: How To Keep Your Oven In Shape
The longest time frame can be set is 23 hours and 59 minutes. For setting time, press the function button repeatedly until the square symbol above “ ” flashes, and press “+” or “-” button until the time supposed shows on the display. After setting, the proper time (hour, minute) and the square symbol above the “... - Page 8 · Rest the door on a soft surface; · To replace the door, repeat the above steps in reverse order. Removing the Inner Pane of Glass · Double oven door: Remove the seal G by unscrew the no.2 bolts (fig.1) ·...
-
Page 9: Practical Cooking Advice
What should I do if, even though the oven function and temperature have been set, the oven does not heat up? There may be problems with the internal electrical connections. Call your local service centre. What should I do if an error code appears and the oven does not heat up? There is a fault in the internal electrical circuit connection. - Page 10 meat roasts together with other food, place the roast on the 2nd rack from the bottom and the more delicate food on the 4th rack from the bottom. · When cooking foodstuffs that require differing times and temperatures ,set a temperature that is somewhere between the two temperatures required ,place the more delicate food on the 4th rack from the bottom and take the food requiring less time out of the oven first .
- Page 11 For best results when cooking pizza ,use the“Pizza Mode” · Preheat the oven for at least 10 minutes ; · Use a light aluminum pizza pan ,placing it on the grid supplied with the oven .If the dripping pan is used, this will extend the cooking time, making it difficult to get a crispy crust;...
- Page 12 Chicken (on the 70-75 spit)+potatoes 70-75 (roasted) 70-80 Lamb on the spit Tarts 20-30 Fruit cakes 40-45 Fruitcake 40-50 Sponge cake 25-30 Stuffed pancakes) on 30-35 2 racks) Small cakes 20-25 rakes) 15-20 Cheese puffs (on2 1-3-5 20-25 cakes) 1-3-5 20-25 Cream puffs...
- Page 13 · Heat will be generated during its working. Caution must be observed to avoid touch of the heating element. The following items are potentially dangerous, and therefore appropriate measures must be taken to prevent children and the disabled from coming into contact with them: Controls and the appliance in general;...
- Page 14 In order to ensure that the built-in appliance functions properly, the cabinet containing it must be appropriate .The figure below gives the dimensions of the cut-out for installation under the counter or in a wall cabinet unit. N. B :Installation in compliance with the consumption declaration In order to ensure adequate ventilation ,the back panel of the cabinet unit must be removed .
- Page 15 1.首先在橱柜侧板上按照以上安装示意图的尺寸,使用4X25的木螺钉左右两边各4个,把导轨安装到橱柜侧板上。 2.把导轨安装到烤箱外壳左右侧板的下端四个没有螺钉的安装孔上,使用4X10的自攻钉左右两边各4个,导轨上的 几个大孔是用来定位作用的。 3.把烤箱安装到橱柜里,烤箱的导轨叠放到橱柜上的导轨上 Translate into English 1.首先在橱柜侧板上按照以上安装示意图的尺寸,使用4X25的木螺钉左右两边各4个,把导轨安装到橱柜侧板上。 2.把烤箱安装到橱柜里,烤箱的外壳底板叠放到橱柜上的导轨上 Translate into English The panels of the adjacent cabinets must be made of heat-resistant material .In particular ,cabinets with a veneer exterior must be assembled with glues which can withstand temperatures of up to 100℃. In compliance with current safety standards, contact with the electrical parts of the oven must not be possible once it has...
- Page 16 been installed. All parts, which ensure the safe operation of the appliance, must be removable only with the aid of a tool. To fasten the oven to the cabinet, open the door of the oven and attach it by inserting the 4 wooden screws into the 4 holes located on the perimeter of the frame.
Need help?
Do you have a question about the MDO-80BL and is the answer not in the manual?
Questions and answers