
Subscribe to Our Youtube Channel
Related Manuals for Malloca MOV-LX74


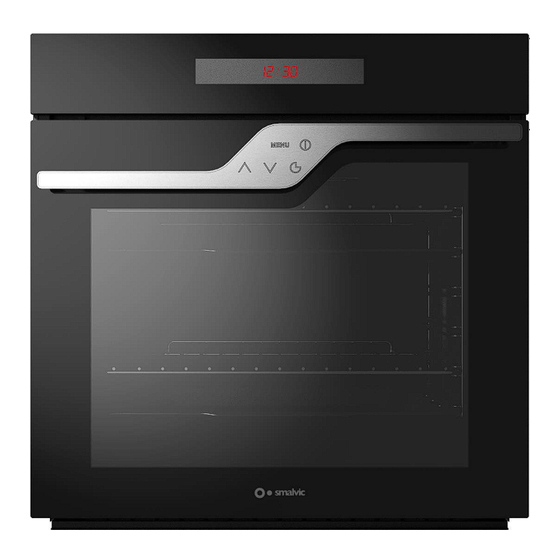
Summary of Contents for Malloca MOV-LX74
- Page 1 USER MANUAL HƯỚNG DẪN SỬ DỤNG MODEL: MOV-LX74 LÒ NƯỚNG ĐIỆN ÂM TỦ HƯỚNG DẪN LẮP ĐẶT, SỬ DỤNG VÀ BẢO DƯỠNG...
-
Page 2: Table Of Contents
PAGE General warnings Description of the product Control panel Oven user guide Noalia electronic programmer instructions Oven functions Maintenance and cleaning Removing/mounting oven door Removing/mounting interior glasses Removing/mounting lateral guides Removing/mounting sliding guides Replacing the oven light bulb Instructions for installation Introduction into the cabinet Oven electrical connection Assembly/replacement of the power supply cable... -
Page 3: General Warnings
GENERAL WARNINGS Warnings This appliance is marked in compliance with the European Directive 2012/19/EU. The crossed bin symbol indicates that the waste product must be disposed of separately from household waste. Take the product to a separate collection centre for electric or electronic appliances or face the penalties provided for by current waste management legislation, or take it back to the dealer when purchasing a new equivalent appliance. - Page 4 Do not place inflammable material inside the oven. If forgotten, it could catch fire after switch-on. Do not sit on or place weight on the open door and do not hang weights on the handle as to do so could damage the product Make sure the ventilation slots are not obstructed.
-
Page 5: Description Of The Product
DESCRIPTION OF THE PRODUCT 1) CONTROL PANEL 2) CONTROLS/HANDLE... - Page 6 TEMPERATURE DISPLAY CLOCK DISPLAY COOKING MODES DISPLAY ON/OFF MENU INCREASE DECREASE CONFIRMATION...
-
Page 7: Oven User Guide
OVEN USER GUIDE Disconnect the appliance from the power supply and remove all the accessories from the appliance. Clean them thoroughly with warm water and detergent and put them back in the initial position. Before using it for the first time, allow it to run on empty and at maximum for about 2 hours while ventilating the room well. -
Page 8: Oven Functions
Oven Functions At the first power on, the display shows the 12:00 hours flashing. At this time you can only set the oven time and then activate the oven. To set the oven time (if it was not done at first power on), press and hold the MENU symbol for at least 4 seconds. - Page 9 OVEN FUNCTIONS Oven light The oven light can be turned on independently at any time with this symbol. Ventilated cooking (Pr-01) This type of cooking is recommended for dishes placed on several levels even differing one from another without mixing their smell. Even hot air circulation allows baking slowly and homogeneously. Intensive lower cooking (Pr-02) It has a prevailing downward temperature suitable for quick cooking.
- Page 10 By inserting this function, it is possible to maintain the constant temperature of foods, which is very useful for heating or keep cooked food at the temperature. Spit (MOV-LX74) The spit is positioned transversally with the connection on the back of the oven and its functioning is automatic in all functions, even if the symbol is not present.
-
Page 11: Maintenance And Cleaning
Regularly check the state of the rubber gasket located around the oven opening. If gasket damage is noted, contact the nearest technical after-sales centre. Removing/mounting the oven door MOV-LX74 This oven door model has soft-closing hinges that amortize the closure of the door. It is possible to remove the oven door by following these instructions: -open the oven door completely. - Page 12 Carry out the same steps in reverse order to remount the oven door. Place the oven door in seat, move the zipper hook and bring it back its original position. Removing/mounting the oven door FI-95 To remove and reinsert the port, follow the instructions below: Open the door completely.
-
Page 13: Removing/Mounting Sliding Guides
REMOVAL/ ASSEMBLY OF THE LATERAL GUIDES Before proceeding, make sure that the oven is cool Tightly grip the guide at the front, lift it until it blocks and pull the front part towards the inside of the oven (fig.1) in a way that it can release itself from its front seat. Now, pulling towards yourself, the guide will slide for approx. -
Page 14: Replacing The Oven Light Bulb
Attention: respect minimum ventilation apertures of the cabinets, as given in the drawings ATTENTION! in order to guarantee good ventilation, the aperture of 80 mm is also recalled towards the outside of the cabinet and not only in the rear part, otherwise application is not compliant. Fig.1 Fig.2(MOV-LX74) -
Page 15: Oven Electrical Connection
30 kg. For the aperture in the cabinet, follow the respective dimensions indicated in fig.01, fig.02 for MOV-LX74. In the bottom of the cabinet or in the oven support shelf, to allow sufficient air to circulate for the cooling of the oven during functioning. -
Page 16: Earth Connection
EARTH CONNECTION Installation, connection and earthing of the electric system must comply with the European standard requisites and meet the provisions of the local Standards in force. This household appliance requires an earthing connection for protection against short-circuits or electric dispersions. - Page 17 Giới thiệu bên trong lò nướng Lắp đặt điện cho lò nướng Lắp đặt và thay thế cáp nguồn Kết nối tiếp đất Hỗ trợ kỹ thuật và linh kiện MODEL MOV-LX74 (MTLN) (MTN) Hướng dẫn lập trình điện tử Noalia...
- Page 18 CẢNH BÁO CHUNG Cảnh báo Thiết bị này được sản xuất dưới sự chỉ đạo của European 2012/19/EU. Biểu tượng thùng rác gạch chéo là chỉ ra chất thải phải được xử lý riêng rẽ với chất thải của gia đình.
- Page 19 Không đặt thiết bị dễ cháy bên trong lò. Nếu quên, nó có thể phát nổ khi công tắc mở. Không ngồi hoặc đặt vật nặng khi cửa lò đang mở và không treo vật nặng lên tay nắm, điều đó...
-
Page 20: Mô Tả Sản Phẩm
MÔ TẢ SẢN PHẨM BẢNG HIỂN THỊ PHÍM ĐIỀU KHIỂN... - Page 21 MÀN HÌNH HIỂN THỊ: NHIỆT ĐỘ - THỜI GIAN - CHỨC NĂNG TẮT/MỞ MENU TĂNG GIẢM XÁC NHẬN...
- Page 22 HƯỚNG DẪN SỬ DỤNG LÒ NƯỚNG Ngắt kết nối thiết bị khỏi nguồn và di chuyển các phụ kiện từ thiết bị. Vệ sinh chúng hoàn toàn bằng nước ấm và chất tẩy sạch và đặt chúng trở lại vị trí ban đầu. Trước khi sử dụng lần đầu tiên, cho phép lò nướng hoạt động trống với tối đa 2 giờ...
-
Page 23: Vận Hành
Chức năng lò nướng Khi cấp nguồn lần đầu tiên, màn hình sẽ hiển thị nhấp nháy giờ 12:00. Lúc này sau khi điều chỉnh xong phải xác nhận phiên thời gian. Để điều chỉnh thời gian lò nướng (nếu không hoạt động ở lần đầu mở... - Page 24 Chức năng lò nướng Đèn chiếu sáng giúp quan sát quá trình nướng mà không cần mở cửa lò. Nướng tuần hoàn kết hợp quạt (Pr-01) thành phần gia nhiệt xung quanh quạt sẽ hoạt động tự động làm tăng sự luân chuyển nhiệt độ...
- Page 25 Nướng điện trở tròn kết hợp quạt (Pr-16) Chức năng này cho phép thay đổi dần thức ăn có chứa nước bằng nhiệt lượng. Xiên (MOV-LX74) Xiên được bắc ngang nối với phía sau lò và chức năng này của xiên tự động với mọi chức năng của lò.
-
Page 26: Tháo Gỡ/Lắp Đặt Cửa Lò Nướng
để được hỗ trợ. Thay thế/lắp đặt cửa lò nướng MOV-LX74 Bản lề của cửa lò này được lắp đặt một cách khéo léo để giảm chấn khi đóng cửa lò. Dễ dàng thay thế... - Page 27 Tháo/ vệ sinh kính bên trong Loại cửa này cho phép tháo và vệ sinh bên trong kính mà không cần tháo cửa lò. Làm theo các bước dưới đây để loại bỏ những vết bẩn bên trong: Mở cửa lò và đóng hoàn toàn bản lề Có...
- Page 28 Tháo/ lắp lại ray trượt Trước khi tiến hành, chắc chắn rằng lò nướng nguội. Kéo ray trượt về phía trước, nhắc phần khoen giữ ray trượt về phía trên (fig.1) để tháo ray trượt ra khỏi vị trí cố định của nó. Bây giờ, kéo về phía của bạn, ray trượt sẽ trượt 1 cm. Nhắc ray trượt về...
-
Page 29: Thay Thế Đèn Lò Nướng
Chú ý: tuân thủ khẩu độ tối thiểu của tủ như trong hình vẽ. CHÚ Ý! Để đảm bảo sự thông thoáng , khẩu độ 80mm cũng được khuyến khích về phia bên ngoài tủ không chỉ ở phần sau, nếu không thiết bị sẽ không hoạt động. Fig.1 Fig.2(MOV-LX74) - Page 30 được tối đa 30kg. Đối với các khẩu độ trong tủ hãy làm theo kích thước tương ứng được chỉ ra trong hình 01, 02 của MOV-LX74. Ở đáy tủ hoặc khoang chứa, đảm bảo rằng đủ...
-
Page 31: Kết Nối Tiếp Đất
KẾT NỐI TIẾP ĐẤT Lắp đặt, kết nối và nối đất phải tuân thủ các điều kiện Châu Âu và đáp ứng các quy định của các tiêu chuẩn của địa phương có hiệu lực. Thiết bị gia dụng này yêu cầu nối đất để bảo vệ chống chập mạch hoặc phân tán điện. Vì vậy, nó phải được kết nối với một ổ... - Page 32 Email: info@malloca.com Customer Care: Hotline: 1800 12 12 Email: chamsockh@malloca.com CÔNG TY TNHH MALLOCA VIỆT NAM Showroom: 279 Đường Nguyễn Văn Trỗi, Phường 10, Quận Phú Nhuận, TP.HCM Điện Thoại: (84) 28 39975 893 / 94 Fax: (84) 28 38447 102 - (84) 28 38633 882 Email: info@malloca.com...
Need help?
Do you have a question about the MOV-LX74 and is the answer not in the manual?
Questions and answers