Table of Contents
Advertisement
Available languages
Available languages
Quick Links
Advertisement
Table of Contents

Related Manuals for Malloca MST-LX12


Summary of Contents for Malloca MST-LX12
- Page 1 USER MANUAL HƯỚNG DẪN SỬ DỤNG MODEL: MST-LX12...
-
Page 2: Table Of Contents
TABLE OF CONTENTS page USER GUIDE Presentation General warnings GUIDE TO USING THE OVEN Control panel Selectable traditional cooking functions Specific steam cooking functions Description of the oven and accessories TURNING THE OVEN ON First start-up / Reset after power outage ... - Page 3 TIME PROGRAMMING FUNCTIONS Setting the timer Setting the alarm Setting the timer and alarm Programming the cooking time Cooking duration End cooking time Automatic Cooking Delete / Edit programming time and timer COOKING INSTRUCTIONS Position of internal grills ...
- Page 4 TECHNICAL AFTER-SALES ASSISTANCE AND SPARE PARTS Touch errors Software parameters that can be changed by the user Spare parts Technical assistance TABLES OF REFERENCE...
- Page 5 NỘI DUNG trang HƯỚNG DẪN SỬ DỤNG Trình bày Cảnh báo chung HƯỚNG DẪN SỬ DỤNG LÒ NƯỚNG KẾT HỢP HẤP Vận hành Tùy chọn chức năng nướng truyền thống Chức năng hấp đặc trưng Mô...
- Page 6 CHỨC NĂNG THIẾT LẬP THỜI GIAN Thiết lập hẹn giờ Thiết lập báo thức Thiết lập hẹn giờ và báo thức Thiết lập thời gian nướng Thời gian nướng Kết thúc thời gian nướng Nướng tự...
- Page 7 HỖ TRỢ KỸ THUẬT VÀ LINH KIỆN Lỗi cảm ứng Thông số phần mềm người dùng có thể thay đổi Linh kiện Hỗ trợ kỹ thuật BẢNG THAM KHẢO...
-
Page 8: Presentation
PRESENTATION Combination electric-steam oven ideal suitable for cooking food inside common households, for non-professional use. This unit is capable of perfectly combining traditional cooking with the advantages of steam cooking, maintaining all of the flavour, aroma, freshness and sensory properties for meats, fish, vegetables and desserts. It is not suitable for other purposes. - Page 9 This household appliance is compliant with the provisions of the European Community Directives - LOW VOLTAGE DIRECTIVE – 2006/95/EC - ELECTROMAGNETIC COMPATIBILITY DIRECTIVE – 2004/108/EC The product identification data is stated on the relevant plate applied on the front of the oven.
- Page 10 Correct use of the oven - Pre-heat the oven for the strictly necessary time only; - Open the door only when necessary to avoid unnecessary heat losses; - Keep the gaskets clean and efficient to avoid heat dispersion which can cause damage; - Always turn off the oven when no longer in use;...
-
Page 11: Guide To Using The Oven
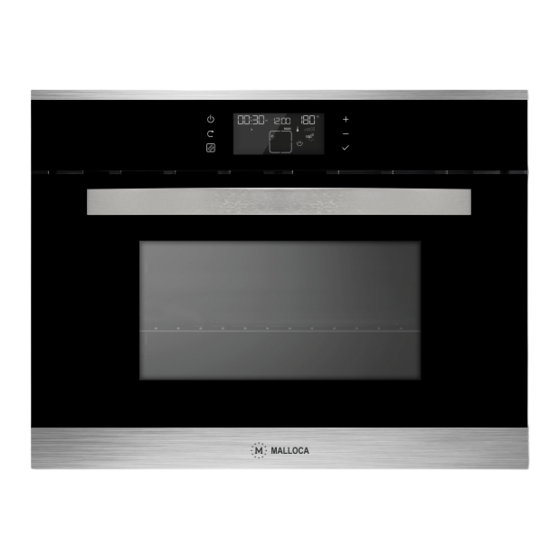
■ GUIDE TO USING THE OVEN ■ STANDARD CONTROL PANEL Graphic display KEY 1: on/off/wake KEY 4: + / temperature KEY 2: menu selection KEY 5: - / puff of steam KEY 3: start/pause KEY 6 : confirm/reset oven light / system time Whenever a button is pushed you will hear a Beep. - Page 12 Area for programming time and display the progressive cooking time. (position on the display: upper left) timer alarm progressive manual cooking time cooking duration end cooking time automatic cooking Cooking method display area (position on the display: centre) - AUTO = AUTOMATIC programming - MAN = MANUAL programming Display area/central chamber temperature setting and temperature graph.
-
Page 13: Selectable Traditional Cooking Functions
SPECIAL FUNCTIONS INDICATORS "OVEN LIGHT" mode indicator (position on the display: centre) “PAUSE” mode indicator (position on the display: lower left) "DEFROST" function indicator (position on the display: lower left) “FOOD WARMER” mode indicator (position on the display: lower right) "FOOD PROBE"... -
Page 14: Specific Steam Cooking Functions
Except for: From 50 to 160° C (Base heating element); From 50 to 150° C (Base heating element + Radial Fan); SPECIFIC STEAM COOKING FUNCTIONS STEAM "PUFF" (SUPPLY) FUNCTION IN TRADITIONAL COOKING "STEAM PUFF " mode indicator (position on the display: centre right) "STEAM PUFF OPERATING"... -
Page 15: Description Of The Oven And Accessories
DESCRIPTION OF THE OVEN AND ACCESSORIES Control panel; Water tank for steam cooking; Completely extracting guides (where applicable); Support rack; Tray for steam cooking; Drip tray; Ventilated cooking fan cover; Grill cooking heating element; Steam distribution nozzles;... -
Page 16: Turning The Oven On
■ TURNING THE OVEN ON ■ FIRST STARTUP / RESET AFTER POWER OUTAGE All of the icons stay on for 2 sec to verify oven operation. Whether it is the first electrical hookup or a reset after a power outage, the system time appears as in the figure, with the digits flashing. -
Page 17: On/Off Function
ADJUSTING THE SYSTEM TIME The system time (clock) is based on the type of power supply (50 Hz or 60 Hz). The time is adjusted with the oven OFF: Hold down the key for at least 3 sec. The hour digits on the display will flash. -
Page 18: Oven On Awaiting Commands
OVEN ON awaiting commands Pressing the 1 ON/OFF key turns the oven on, awaiting settings on the desired cooking function. The default function is ventilated cooking (Circular heating element + Radial fan) with pre-set temperature of 180° C. The display is as shown in the figure: The menu 2 key scrolls through the functions in the following order: 1- cooking functions menu;... -
Page 19: Cooking Functions Menu
■ COOKING FUNCTIONS MENU ■ TRADITIONAL COOKING FUNCTIONS After the oven is turned on using the 1 ON/OFF , it is possible to directly access the cooking function selection by immediately pressing the 2 menu key . The central icon and the interior cooking functions start to flash. Using the 4 and 5 keys you can also scroll through the available cooking functions (see "SELECTABLE TRADITIONAL COOKING FUNCTIONS"): the related... -
Page 20: Steam Cooking Functions
STEAM COOKING FUNCTIONS PREPARATION Use of the steam cooking functions requires the following operations: • Fill the tank (jug) with potable and/or tap water. • The maximum fill level is 1.5 L. • The jug must be inserted so that there is a perfect seal between the jug hose and the water circuit in the oven, so be sure to push the jug all the way in. -
Page 21: Static Steam Cooking 100°-130°C
STATIC STEAM COOKING 100°-130°C During STATIC steam cooking, the steam flows naturally in the chamber through two orifices located in the rear of the oven. The water transformed into steam by the boiler preserves the colour, flavour, freshness and sensory qualities of the foods during cooking. -
Page 22: Ventilated Steam Cooking 100°-130°C
VENTILATED STEAM COOKING 100°-130°C During VENTILATED steam cooking, the steam flows naturally in the chamber through two orifices located in the rear of the oven and is distributed uniformly by the RADIAL FAN. This function gives all of the steam cooking properties with uniform heat distribution and is particularly suitable for cooking PRE-COOKED FOODS, FROZEN FOODS or LEFTOVERS. -
Page 23: Steam Supply Function (Puff)
STEAM SUPPLY FUNCTION ("PUFF") This function lets the user supply steam at any time during traditional cooking, thus combining cooking methods that require higher temperatures with the benefits of steam cooking for softer and tastier foods. It is especially useful for ROASTS and MEAT. Activate a traditional cooking function (except Defrost and Food Warmer). -
Page 24: Steam Function Management
■ STEAM FUNCTION MANAGEMENT ■ NO WATER IN THE TANK Usually, if the tank is filled with 1.5 l of water, this should be enough for the entire steam cooking cycle. If not, the electronic system signals that the water is finished using an intermittent audible signal and the corresponding water icon flashes The oven automatically goes into Open the door, remove the tank and fill with potable water. - Page 25 Open the door, PULL THE TANK OUT A FEW CENTIMETRES TO UNHOOK THE JUG HOSE FROM THE OVEN WATER CIRCUIT, then press the 3 START When the water comes out of the circuit it is signalled by the following: After about 15-20 sec, the audible signal is interrupted, the "H2o out" indication and the corresponding icon stop flashing.
-
Page 26: Display Temperature
■ DISPLAY TEMPERATURE ■ DISPLAYS After the oven is turned on, the 1 ON/OFF key is activated along with the default "ventilated cooking" function. If cooking is started, the display shows the following information: - pre-set temperature (default); - icon: thermometer, arrow rising and progressive temperature graph; - "cooking pan"... -
Page 27: Oven Pre-Heating
SETTINGS AND TEMPERATURE CHANGES The temperature can be changed at any time after choosing a cooking function by simply pressing the 4 key On the display, the temperature and corresponding flash. Use the 4 and 5 keys to set the desired temperature and confirm with the 6 key In any case, after 7 seconds of command inactivity, the temperature chosen is automatically confirmed (auto-confirm). -
Page 28: Special Functions
■ SPECIAL FUNCTIONS ■ START/PAUSE FUNCTIONS The 3 START KEY , as already described, is active after having selected a cooking function and lets you confirm all of the cooking settings and automatic programs. Basically, it starts cooking (START function). The PAUSE function, represented by the icon, is always activated with the 3 START and can be done with the oven in cooking mode. -
Page 29: Oven Light
OVEN LIGHT CONTROL The oven light is considered a special function. It is not selected among the cooking functions. The light can be turned off and on at any time, even with the oven off, using the 6 key (except when in programming and/or function change mode). -
Page 30: Food Warmer Function
FOOD WARMER FUNCTION This function keeps the food warm at a recommended temperature of 80° C. - select using the 2 menu key in traditional cooking functions; - position it on the function indicated by the icon - confirm using the 6 key or it will be automatically confirmed after 7 sec;... -
Page 31: Time Programming Functions
■ TIME PROGRAMMING FUNCTIONS ■ SETTING THE TIMER The TIMER function is independent from the cooking functions and does not perform oven programs. can be activated at any time using the 2 menu key - oven OFF; - oven ON, awaiting commands; - oven ON, without influencing its operation;... -
Page 32: Setting The Alarm
SETTING THE ALARM The ALARM function (as for the TIMER function) is independent from the cooking functions and does not perform oven programs. can be activated at any time using the 2 menu key - oven OFF; - oven ON, awaiting commands; - oven ON, without influencing its operation;... -
Page 33: Setting The Timer And Alarm
SETTING THE TIMER AND ALARM The two functions can be set simultaneously at any time. It is like having two timers and to do so follow the same setup procedure using the 2 menu key , first for the TIMER and then for the ALARM (or vice versa). For example, with the oven off: The two icons are activated together. -
Page 34: Programming The Cooking Time
PROGRAMMING THE COOKING TIME The cooking time programming functions are: - cooking duration - automatic cooking : combination between end cooking time and cooking duration These functions can be activated: - with the oven ON, awaiting commands; - with the oven in cooking mode; The timed programming functions require the oven to be turned on and they are effective when the oven is in operation. -
Page 35: Cooking Duration
COOKING DURATION It is a function that lets you block the cooking automatically after a certain amount of time. With the oven on awaiting commands, position the 2 menu key on the icon that is flashing. Use the 4 and 5 keys to set the desired value (max time that can be set is 12h). -
Page 36: End Cooking Time
END COOKING TIME The end cooking time can only be set after having activated the cooking duration function . The combination of the two functions will perform an automatic cooking program (see relevant paragraph). The end cooking time is restricted to a maximum of 12h of postponement. Using the 2 menu key go to the flashing icon. - Page 37 If the end cooking time is not set with a time that is greater than the cooking duration, the display will only propose the cooking duration program. Set one hour cooking time that includes a time that is greater than the cooking duration for automatic programming highlighted by the single icon When finished, press the 6 or after 7 sec it will be auto-confirmed.
- Page 38 CANCELLING/CHANGING TIME AND TIMER PROGR. To cancel or reset the timed programming: - AUTO : - TIMER : Select the icon for the function you wish to cancel using the 2 menu key , while the icon is flashing, press the 6 key for at least 3 sec.
-
Page 39: Cooking Instructions
■ COOKING INSTRUCTIONS ■ POSITION OF THE INTERNAL GRILLS FOR SPECIFIC COOKING - Position n. 1 and 2 from bottom Frozen cakes, Long roasts, Turkey, Cakes, Meat Steak well done; - Position n. 2 from bottom. Cakes, Sandwich Load, Toast, Casserole, Wholemeal bread, Meat; - Position n. -
Page 40: Use Of The Grill
USE OF THE GRILL To optimise Grill cooking, switch on the grill oven and pre-heat for at least 10 minutes. Introduce the dish inside the oven in the nearest position to the Grill, depending on the type of food to cook. Always use the Grill with door closed and for a maximum time of 15 minutes. -
Page 41: Automatic Recipes
The program allow to create at your own discretion other 20 recipes totally personalized depending on your way of cooking. To utilize the programming follow the instruction here below. AUTOMATIC RECIPES A) How to enter the menu recipes turn the oven with key 1 Press the key 2 until the symbol "MAN"... -
Page 42: Customized Recipes
The oven is in pause, the display in the upper left shows the time remaining to the activation of programmed cooking. In the temporary absence of sudden power supply, the job is automatically cancelled. D) Editing a recipe than the standard factory settings. 1-Follow the four steps of section “A”... - Page 43 press the “+” key by sliding gradually all the recipes you plan to plant (the oven has a maximum of 32 programmed recipes appointed with P01 ... P02 ... P32) After the programmed recipe P32, U01 appears U01 that identifies the first recipe customizable by the user.
- Page 44 ■ REFERENCE TABLES PROGRAMS ■ AUTOMATIC PROGRAMS RECIPES USER PROGRAM SYSTEM NAME DURATION NAME DURATION COOKING Baked Lasagne User 01 ELECTRIC Baked Frozen potatoes User 02 ELECTRIC Au gratin stuffed tomatoes User 03 ELECTRIC Aubergines sauteed User 04 STEAM PUFF WHITE MEAT User 05 Roasted chicken...
-
Page 45: Maintenance And Cleaning
■ MAINTENANCE AND CLEANING ■ Disconnect the electric power supply before performing any type of maintenance on the product Do not clean the device with steam cleaners. Do not use rough, abrasive materials or sharp metal scrapers to clean the oven door, as they can scratch or damage the surfaces and cause the glass to break. -
Page 46: Cleaning The Surfaces
CLEANING THE SURFACES The enamelled or stainless steel parts must be treated with caution. Use water or specific products, accurately drying with a soft cloth. Do not use abrasive products. In case of tough deposits on enamelled parts, use a plastic sponge or similar, soaked in hot water and vinegar. -
Page 47: Descaling
DESCALING This is an oven cleaning function that is a routine maintenance process for the steam circuit and boiler to remove any limescale incrustations. For that purpose, after every 200 hours of steam generator operation, the electronics system gives the warning signal and lights up the icon This icon remains steady until the required cycle has been performed. -
Page 48: Removing The Oven Door
■ REMOVING/MOUNTING OF THE OVEN DOOR ■ To remove and insert the oven door, follow the instructions below. Fully open the door and in both hinges insert a metal rod (not supplied) with a diameter of about 3 mm in the hole shown in the figure. This blocks the hinge in the open position. -
Page 49: Removing Inner Glass
Removing inner glass (remove the oven door) For more complete cleaning, the two inner panes of glass can be removed. Remove the oven door as indicated above, unscrew the 4 mounting screws from the steel plates C (fig. 5) that block the glass surfaces in position. The glass surfaces can now be removed by slipping them out. - Page 50 REMOVING/MOUNTING THE LATERAL GUIDES To remove the lateral grill guides, use light pressure on the upper bar so the guide is released and pull it towards the inside of the oven. Then lift the guide and it unhooks from the lower blocks Attention To replace the guides, carry out the steps in reverse order.
-
Page 51: Removing/Mounting The Sliding Guides (If Any)
REMOVING/MOUNTING THE SLIDING GUIDES (IF ANY) If any, there are right and left sliding guides, which means they are not interchangeable on both sides of the oven. Proceed as follows to remove the sliding element from the lateral guide: release the lateral guide from the oven together with the sliding element, as reported in the paragraph above. -
Page 52: Replacing The Light Bulb In The Oven
REPLACING THE OVEN LIGHT BULB To prevent electric shocks and/or damage to persons, read and follow the procedure given below: Attention: Before replacing the light bulb, make sure the electricity is off at the main switch. Ensure that the oven and the light bulb are cold and then remove the protection cover A Do not touch the hot bulb with a damp cloth, the bulb may break. -
Page 53: Installation Instructions
■ INSTALLATION INSTRUCTIONS ■ The installation and technical assistance must only be performed by qualified staff. Carefully read the safety instructions in this manual before using the oven. Incorrect installation, maintenance, assistance and use can cause serious damage/injury to persons or objects This product must be installed as instructed in this manual and in compliance with National Standards and local regulations in force. -
Page 54: Dimensions Of The Oven With Food Warmer
DIMENSIONS OF THE OVEN WITH FOOD WARMER SINGLE BUILT-IN CABINET MEASUREMENTS The dimensions of the opening to be made in the cabinet for fitting the oven are indicated in the figures. Make sure the cabinet in which the oven will be installed is able to support the weight of 30 kg. -
Page 55: Inserting The Oven Into The Cabinet
MEASUREMENTS OF CABINET FOR BUILT-IN OVEN WITH FOOD WARMER UNDER WORKTOP COLUMN INSERTING THE OVEN INTO THE CABINET It is important that all operations relating to installation of the device are carried out by qualified staff. Ensure the oven is safely installed inside the cabinet. Use screws A, for fixing the oven. -
Page 56: Features Of The Cabinet
FEATURES OF THE CABINET The technical requisites of the cabinet are the following: - The cabinet and its components must be able to withstand temperatures of up to 90°C without presenting deformities and/or surface defects. - the cabinet must enable the free passage of the oven connections; - All household kitchen units must be protected with fire-resistant material in accordance with the standards in force;... -
Page 57: Assembly/Replacement Of The Power Supply Cable
ASSEMBLY/REPLACEMENT OF THE POWER SUPPLY CABLE The electric cable must be kept locked to the terminal box by the cable fix, so that it cannot come out. Connect the line cable to terminal L , the neutral cable to terminal N and the yellow/green cable to the earth terminal . - Page 58 TECHNICAL ASSISTANCE AND SPARE PARTS ■ ■ TOUCH ERRORS Error Description Cause What to do Err Sc1 Probe detection error, the Probe Check oven shuts down. failure/disconnected connection/replace Err Sb1 Boiler probe detection Probe Check error, the oven shuts down failure/disconnected connection/replace SOFTWARE PARAMETERS THAT CAN BE CHANGED BY THE...
- Page 59 PARTS Only authorised components can be used for the household appliance assistance. Do not repair or replace any oven component not recommended by this manual. All interventions and repairs must be carried out by authorised technical staff. To request a spare part, indicate the following data: 1) Model of oven (MOD.) and production number (N.L.), found on the product label positioned on the lower front part of the oven and on the first page of the booklet.
- Page 60 ■ TABLES OF REFERENCE ■ ELECTRIC DATA FOR TYPE AND MODEL Voltage 220-240 V ~ 50/60 Hz -LX12 Total power 3000 Top element 1500 Grill element Bottom element Circular 1500 element Oven light Oven fan Tangential Generator 1200 steam Micro-pump 22x2 EXTERNAL DIMENSIONS Width...
- Page 61 TRÌNH BÀY Lò nướng kết hợp hấp thích hợp cho việc nấu nướng trong các hộ gia đình không chuyên. Nó có khả năng kết hợp hoàn hảo giữa nướng truyền thống kết hợp hấp, duy trì vị, hương, độ tươi và đặc trưng của thịt, cá, rau và món tráng miệng. Không phù hợp với các mục đích khác.
- Page 62 Thiết bị gia dụng này tuân thủ các quy định của chỉ thị cộng đồng Châu Âu. - CHỈ ĐỊNH HIỆU SUẤT THẤP– 2006/95/EC - CHỈ ĐỊNH ĐIỆN THÍCH HỢP– 2004/108/EC Thông số sản phẩm được ghi trên tem thông số dán ở mặt trước lò. Không được tháo tem thông số...
- Page 63 Sử dụng lò nướng đúng cách - Làm nóng lò trong thời gian cần thiết - Mở cửa lò khi cần thiết để tránh nhiệt không cần thiết thoát ra ngoài. - Giữ gioăng cao su sạch sẽ và hiệu quả để tránh nhiệt rò rỉ ra bên ngoài gây hư hỏng. - Luôn tắt lò...
- Page 64 ■ HƯỚNG DẪN SỬ DỤNG LÒ NƯỚNG KẾT HỢP HẤP ■ VẬN HÀNH Màn hình KEY 1: phím tắt/mở lò KEY 4: phím điều chỉnh (tăng +) giờ / nhiệt độ/chức năng KEY 2: mục lựa chọn KEY 5: phím điều chỉnh (giảm -) giờ/ nhiệt độ/ chức năng KEY 3: bắt đầu/dừng KEY 6 : xác nhật/đặt lại/...
- Page 65 Khu vực lập trình thời gian và màn hình hiển thị tịnh tiến thời gian nướng. (vị trí màn hình hiển thị: phía trên bên trái) hẹn giờ báo thức thời gian nướng thủ công thời gian nướng kết thúc nướng nướng tự...
- Page 66 CHỈ THỊ CHỨC NĂNG ĐẶC BIỆT "ĐÈN LÒ" chế độ chỉ thị (vị trí hiển thị: ở giữa) “DỪNG” chế độ chỉ thị (vị trí hiển thị: phía dưới bên trái) "RÃ ĐÔNG" chỉ thị chức năng (vị trí hiển thị: phía dưới bên trái) “HÂM NÓNG”...
- Page 67 Ngoại trừ: từ 50 đến 160° C (gia nhiệt dưới); từ 50 đến 150° C (gia nhiệt dưới + quạt tuần hoàn); NHỮNG CHỨC NĂNG HẤP ĐẶC BIỆT CHỨC NĂNG HẤP "KẾT HỢP QUẠT" TRONG NẤU TRUYỀN THỐNG “HẤP” chế độ chỉ thị (vị trí hiển thị: ở giữa bên phải) “VẬN HÀNH HẤP”...
- Page 68 MÔ TẢ LÒ VÀ PHỤ KIỆN Bảng điều khiển; Khay chứa nước cho chức năng hấp; Ray trượt (nếu có); Vỉ nướng; Khay hấp; Khay hứng mỡ; Chụp quạt tuần hoàn; Bộ phận gia nhiệt; Các vòi phun hơi;...
- Page 69 ■ KHỞI ĐỘNG LÒ ■ KHỞI ĐỘNG LẦN ĐẦU TIÊN/CÀI LẠI SAU KHI MẤT ĐIỆN Tất cả biểu tượng sáng lên trong 2 giây để báo hiệu khởi động lò. Cho dù đó là lần kết nối điện đầu tiên hay thiết lập lại sau khi cúp điện, thời gian hệ thống hiển thị...
- Page 70 CÀI ĐẶT GIỜ ĐỊA PHƯƠNG Hệ thống thời gian (đồng hồ) dựa trên loại nguồn điện cung cấp (50 Hz hoặc 60 Hz). Thời gian được điều chỉnh khi lò TẮT: Nhấn phím ít nhất 3 giây. Những con số giờ trên màn hình hiển thị sẽ nhấp nháy.
- Page 71 Lệnh chờ MỞ LÒ ➢ Nhấn một lần phím TẮT/MỞ để mở lò, chờ thiết lập chức năng nướng mong muốn. Chức năng mặc định là nướng tuần hoàn (nguyên tố điện trở tròn + quạt tuần hoàn) với nhiệt độ đặt trước là 180° C. Màn hình sẽ...
- Page 72 ■ CHỨC NĂNG NƯỚNG ■ CHỨC NĂNG NƯỚNG TRUYỀN THỐNG Sau khi mở lò (nhấn một lần nút TẮT/MỞ ), có thể truy cập trực tiếp vào chức năng nướng nhờ nhấn menu 2 Biểu tượng trung tâm và chức năng nướng bên trong sẽ bắt đầu nhấp nháy. Sử...
- Page 73 CHỨC NĂNG HẤP CHUẨN BỊ Sử dụng chức năng hấp yêu cầu những hoạt động sau: • Đổ đầy khay bằng nước uống hoặc nước máy. • Đầy nhất là 1.5L. • Khay phải được lắp chặt giữa ống nước và mạch nước trong lò, do đó để chắc chắn hãy di chuyển khay để...
- Page 74 HẤP HƠI NƯỚC 100°-130°C Trong khi hấp hơi nước, hơi nước vào khoang thông qua hai lỗ phía sau lò. Nước chuyển thành hơi từ nồi sẽ không làm thay đổi hương vị, màu sắc, độ tươi và chất lượng cảm quan của thực phẩm trong khi hấp.
- Page 75 HẤP KẾT HỢP QUẠT 100°-130°C Trong khi hấp, hơi nước sẽ vào khoang thông qua hai lỗ phía sau lò và được phân bố đều bằng quạt tuần hoàn. Chức năng này cung cấp cho các tính năng hấp với sự phân bố nhiệt đồng đều và thích hợp cho việc SƠ...
- Page 76 CHỨC NĂNG HẤP KẾT HỢP QUẠT Chức năng này cho phép người dùng có thể thêm nước bất cứ khi nào trong khi nấu cơ bản, do đó kết hợp các phương pháp hấp đòi hỏi nhiệt độ cao hơn với lợi ích của việc hấp cho thức ăn mềm hơn và...
- Page 77 ■ QUẢN LÝ CHỨC NĂNG HẤP ■ KHÔNG CHỨA NƯỚC TRONG KHAY Thông thường, nếu đổ đầy khay 1.5L nước, là đủ cho toàn chu trình hấp. Nếu không, hệ thống tín hiệu điện tử sẽ báo cạn nước và biểu tượng nước tương ứng sẽ nhấp nháy Lò...
- Page 78 Mở cửa, KÉO KHAY RA VÀI CENTIMET ĐỂ THÁO MÓC KHỎI KHAY TỪ MẠCH ĐIỆN NƯỚC CỦA LÒ, sau đó nhấn nút BẮT ĐẦU 3 . Khi nước ra khỏi mạch sẽ báo những tín hiệu sau: Sau khoảng 15-20 giây, tín hiệu không liên tục sẽ dừng, chỉ thị “H2o out” và biểu tượng tương ứng dừng nhấp nháy.
- Page 79 ■ MÀN HÌNH HIỂN THỊ NHIỆT ĐỘ■ MÀN HÌNH HIỂN THỊ Sau khi mở lò (nhấn phím TẮT/MỞ 1 ) được kích hoạt với chức năng tuần hoàn mặc định. Nếu bắt đầu nướng, màn hình sẽ hiển thị thông tin như sau: - Điều chỉnh nhiệt độ...
- Page 80 CÀI ĐẶT VÀ THAY ĐỔI NHIỆT ĐỘ Nhiệt độ có thể thay đổi bất cứ lúc nào sau khi chọn chức năng hấp/nướng bằng cách nhấn phím 4 Trên màn hình, biểu tượng nhiệt độ tương ứng nhấp nháy Sử...
- Page 81 ■ CHỨC NĂNG ĐẶC BIỆT ■ CHỨC NĂNG BẮT ĐẦU/DỪNG Nhấn phím BẮT ĐẦU 3 , như đã mô tả, được hoạt động sau khi chọn chức năng hấp/ nướng và để bạn xác nhận cài đặt và chương trình tự động. Về...
- Page 82 ĐIỀU KHIỂN ĐÈN LÒ NƯỚNG Đèn lò nướng được xem như một chức năng đặc biệt. Nó được chọn quanh các chức năng nướng. Đèn có thể bật tắt bất cứ lúc nào, ngay cả khi tắt lò, sử dụng phím 6 (ngoại trừ...
- Page 83 CHỨC NĂNG HÂM NÓNG Chức năng này giữ cho thức ăn ấm ở nhiệt độ khuyến khích là 80° C. - Chọn sử dụng phím menu 2 trong chức năng nướng cơ bản; - Xác định nó trên chức năng được hiển thị bằng biểu tượng - Xác nhận sử...
- Page 84 ■ CHỨC NĂNG CHƯƠNG TRÌNH THỜI GIAN ■ CÀI ĐẶT HẸN GIỜ Chức năng HẸN GIỜ độc lập với chức năng nướng và không thực hiện các chương trình lò nướng. Có thể kích hoạt bất kì lúc nào bằng phím menu 2 - Lò...
- Page 85 CÀI ĐẶT BÁO THỨC Chức năng BÁO THỨC (cũng giống như chức năng HẸN GIỜ) nó độc lập với chức năng nướng và không thực hiện các chương trình lò nướng. Biểu tượng có thể được kích hoạt bất cứ khi nào bằng phím menu 2 - Lò...
- Page 86 CÀI ĐẶT HẸN GIỜ VÀ BÁO THỨC Hai chức năng có thể đặt đồng thời bất cứ lúc nào. Nó giống như có hai bộ tính giờ và làm theo các thủ tục thiết lập tương tự bằng cách nhấn phím menu , đầu tiên cho HẸN GIỜ...
- Page 87 CHƯƠNG TRÌNH HẸN GIỜ NƯỚNG Chức năng chương trình nướng bao gồm: - Thời gian nướng - Nướng tự động : kết hợp giữa hẹn giờ nướng và thời gian nướng Các chức năng này có thể được kích hoạt: - Với lò...
- Page 88 THỜI GIAN NƯỚNG Một chức năng cho phép bạn tự nướng trong khoảng thời gian nhất định. Khi lò đang chờ lệnh , vị trí phím menu 2 trên biểu tượng đang nhấp nháy. Sử dụng phím 4 và 5 để...
- Page 89 KẾT THÚC THỜI GIAN NƯỚNG Kết thúc thời gian nướng chỉ có thể thiết lập sau khi kích hoạt chức năng thời gian nướng . Hai chức năng kết hợp sẽ thực hiện một chương trình nướng tự động. Thời gian nướng cuối cùng được hạn chế...
- Page 90 Nếu thời gian kết thúc nướng không được thiết lập với thời gian lớn hơn thời gian nướng, màn hình chỉ đề xuất chương trình thời gian nướng. Thiết lập thời gian nướng một giờ bao gồm thời gian kết thúc lớn hơn thời gian nướng để...
- Page 91 HỦY/THAY ĐỔI THỜI GIAN VÀ CHƯƠNG TRÌNH HẸN GIỜ Để hủy và thiết lập lại thời gian: - TỰ ĐỘNG : và - HẸN GIỜ : và Lựa chọn biểu tượng cho chức năng bạn muốn hủy bằng cách sử dụng phím menu 2 khi đó...
- Page 92 ■ HƯỚNG DẪN SỬ DỤNG ■ VỊ TRÍ NƯỚNG BÊN TRONG CHO NƯỚNG ĐẶC BIỆT - Vị trí 1 và 2 từ đáy Thực hiện cho bánh đông lạnh, nướng lâu, bánh ngọt, thịt miếng; - Vị trí 2 từ đáy Bánh ngọt, bánh mì...
- Page 93 HƯỚNG DẪN NƯỚNG Để tối ưu hóa nướng, làm nóng lò trước khi nướng 10 phút. Cho vỉ nướng vào trong lò ở vị trí nướng gần nhất, tùy thuộc vào loại thức ăn nướng. Luôn đóng lò khi nướng và thời gian nướng tối đa là...
- Page 94 Chương trình cho phép tạo ra 20 phương pháp nấu ăn hoàn toàn cá nhân tùy theo ý thích của bạn. Để sử dụng chương trình theo dõi hướng dẫn dưới đây. CÔNG THỨC NƯỚNG TỰ ĐỘNG A) Làm thế nào để nhập công thức Mở...
- Page 95 D) Chỉnh sửa công thức hơn cài đặt nhà máy tiêu chuẩn 1-theo các bước của phần “A” Nhấn phím 2 Nhấn phím 6 Bắt đầu nhấp nháy P và P01 Nhấn phím + để chọn công thức (lò được trang bị với 32 công thức lập trình (P01 ...
- Page 96 CÔNG THỨC TÙY BIẾN Lò cho phép tạo ra và lưu trữ 20 công thức (từ U01 đến U20); Để loại bỏ công thức, theo hướng dẫn ở phần E. Tạo ra công thức tùy ý mà không cần thay đổi chương trình nhà máy 1-Theo hướng dẫn trong đoạn a) từ...
- Page 97 ■ BẢNG CHƯƠNG TRÌNH THAM KHẢO ■ CHƯƠNG TRÌNH CÔNG THỨC TỰ ĐỘNG CHƯƠNG TRÌNH NGƯỜI DÙNG TÊN HỆ THỐNG TÊN THỜI GIAN THỜI GIAN NƯỚNG phút phút Baked Lasagne User 01 NƯỚNG Baked Frozen potatoes User 02 NƯỚNG Au gratin stuffed tomatoes User 03 NƯỚNG User 04...
- Page 98 ■ BẢO TRÌ VÀ VỆ SINH ■ Ngắt kết nối nguồn điện trước khi bảo trì sản phẩm Không vệ sinh thiết bị bằng máy làm sạch hơi nước. Không sử dụng vật liệu mài mòn, sắc nhọn hoặc chà nhám để lau chùi cửa lò, vì chúng có...
- Page 99 VỆ SINH BỀ MẶT Các bộ phận tráng men hoặc thép không gỉ phải được xử lý cẩn thận. Sử dụng nước hoặc các sản phẩm riêng biệt, lau khô bằng khăn mềm. Không sử dụng sản phẩm mài mòn.
- Page 100 VỆ SINH GỈ Đây là một chức năng làm sạch lò là quy trình bảo dưỡng thường xuyên cho mạch hơi nước và nồi hơi để loại bỏ bất kì cặn vôi nào. Vì mục đích đó, sau mỗi 200 giờ hoạt động hấp, hệ thống điện phải cung cấp dấu hiệu cảnh báo và...
- Page 101 ■ LẮP RÁP/THAY THẾ CỬA LÒ ■ Để thay thế và lắp lại cửa lò, làm theo hướng dẫn bên dưới. Mở cửa lò hết cỡ và bên trong bản lề lắp một thanh kim loại (không được cung cấp) có đường kính khoảng 3mm ở...
- Page 102 Thay thế kính bên trong (thay thế cửa lò) Để làm sạch hơn, hai tấm kính bên trong có thể được tháo ra. Thay thế cửa lò như đã nêu ở trên, tháo 4 vít ra khỏi tấm kim loại (hình 5) để tháo bề mặt kính.
- Page 103 THAY THẾ/LẮP ĐẶT KỆ INOX Để thay thế kệ inox, sử dụng lực ép nhẹ ở thanh trên để kê inox di chuyển và đẩy nó lên bên trong lò. Sau đó nhấc kệ inox và tháo móc ra khỏi khóa bên dưới. Chú...
- Page 104 THAY THẾ/LẮP RÁP RAY TRƯỢT (NẾU CÓ) Nếu có, ray trượt được lắp trên kệ inox ở bên phải và bên trái, chúng không thể hoán đổi cho nhau. Tiến hành như sau để thay thế phần trượt từ ray trượt: Tháo kệ...
- Page 105 THAY THẾ BÓNG ĐÈN LÒ Để tránh chập điện và gây nguy hiểm cho người, đọc và theo dõi các bước bên dưới: Chú ý: trước khi thay thế bóng đèn lò, chắc chắn rằng điện đã được ngắt khỏi công tắc chính.
- Page 106 ■ HƯỚNG DẪN LẮP ĐẶT ■ Việc lắp đặt và hỗ trợ kỹ thuật phải được thực hiện bởi nhân viên có trình độ. Đọc kỹ hướng dẫn sử dụng trước khi sử dụng lò. Lắp đặt, bảo trì, hỗ trợ và sử dụng không đúng cách có...
- Page 107 KÍCH THƯỚC LÒ KHI GẮN THÊM NGĂN GIỮ ẤM THỨC ĂN KÍCH THƯỚC KHOANG ÂM ĐƠN Kích thước của khe hở lắp lò được chỉ ra trong hình. Đảm bảo khoang đó tủ sẽ lắp đặt có thể hỗ trợ trọng lượng 30kg. Cần phải tạo một khe hở ở phần sau đáy tủ hoặc kệ đỡ tủ, cho phép không khí...
- Page 108 KÍCH THƯỚC KHOANG ÂM KHI GẮN THÊM NGĂN GIỮ ẤM THỨC ĂN DƯỚI KỆ BẾP KHOANG LẮP ĐẶT LÒ VÀO KHOANG CHỨA Điều quan trọng là tất cả các hoạt động liên quan đến lắp đặt thiết bị phải được thực hiện bởi nhân viên kỹ...
- Page 109 ĐẶC ĐIỂM KHOANG CHỨA LÒ Các yêu cầu kỹ thuật của khoang chứa lò như sau: - Khoang chứa lò và các bộ phận của nó phải chịu được nhiệt độ lên đến 90°C không bị khuyết bề mặt. - Khoang phải đảm bảo các kết nối điện của lò...
- Page 110 LẮP RÁP/THAY THẾ DÂY CÁP NGUỒN Cáp điện phải được giữ cố định vào thiết bị đầu cuối, bằng kẹp dây cáp, do đó nó không thể lòi ra ngoài. Kết nối dây cáp đến đầu cuối L, cáp trung tính đến đầu N và dây cáp vàng/xanh lá...
- Page 111 HỖ TRỢ KỸ THUẬT VÀ LINH KIỆN ■ ■ LỖI CẢM ỨNG Lỗi Mô tả Nguyên nhân Cách khắc phục Chỉ thị lỗi, lò tắt. Phát hiện lỗi/ ngắt Kiểm kết Err Sc1 kết nối nối/thay thế Err Sb1 Chỉ...
- Page 112 LINH KIỆN Chỉ có các linh kiện chính hãng mới có thể sử dụng để hỗ trợ cho thiết bị gia dụng. Không sửa chữa và thay thế bộ phận lò không được đề cập trong hướng dẫn sử dụng này.
- Page 113 ■ BẢNG THAM KHẢO ■ KIỂU DÁNG VÀ MẪU MÃ CHO DỮ LIỆU ĐIỆN Hiệu suất 220-240 V ~ 50/60 Hz MST-LX12 Tổng công suất W 3000 Top element W 1500 Grill element Bottom element Circular 1500 element Oven light...
- Page 114 Email: info@malloca.com Customer Care: Hotline: 1800 12 12 Email: chamsockh@malloca.com CÔNG TY TNHH MALLOCA VIỆT NAM Showroom: 279 Đường Nguyễn Văn Trỗi, Phường 10, Quận Phú Nhuận, TP.HCM Điện Thoại: (84) 28 39975 893 / 94 Fax: (84) 28 38447 102 - (84) 28 38633 882 Email: info@malloca.com...
Need help?
Do you have a question about the MST-LX12 and is the answer not in the manual?
Questions and answers