Table of Contents
Advertisement
Available languages
Available languages
Quick Links
Advertisement
Chapters
Table of Contents

Subscribe to Our Youtube Channel
Related Manuals for Malloca MOV-726 MC


Summary of Contents for Malloca MOV-726 MC
- Page 1 OVEN USER GUIDE MODELS OVEN MOV-726 MC...
- Page 2 MALLOCA VIETNAM COMPANY LIMITED Showroom: 279 Nguyen Van Troi Street, Ward 10, Phu Nhuan Dist, HCM City Telephone: (+84) 28 39975 893 / 94 Fax: (+84) 28 38447 102 - (+84) 28 38633 882 E-mail: info@malloca.com Customer Care: Hotline: 1800 12 12 E-mail: chamsockh@malloca.com...
-
Page 3: Table Of Contents
Table of contents Table of contents PREFACE....................4 IMPORTANT INFORMATION REGARDING SAFETY........ 5 SPECIFICATIONS OF THE OVEN............10 INSTALLATION OF APPLIANCE............. 12 INSTALLATION OF THE OVEN TO THE CABINET......... 14 POWER CONNECTION................17 6.1 Energy Efficiency of the Oven............20 INTRODUCTION OF APPLIANCE............ -
Page 4: Preface
PREFACE PREFACE DEAR COSTUMER We sincerely thank you for purchasing our product. This product has been manufactured at modern facilities respectful to the environment without harming nature. Please read all instructions and warn- ings in this user manual carefully. This manual includes important information for safe installation, use and mainte- nance of your product and necessary... -
Page 5: Important Information Regarding Safety
IMPORTANT INFORMATION REGARDING SAFETY IMPORTANT INFORMATION REGARDING SAFETY Operating voltage of your oven is Use oven gloves when you are 220 to 240 Volts. taking hot food or utensils such as trays, etc. from the oven or the Connect your oven to a fuse with a grill. - Page 6 IMPORTANT INFORMATION REGARDING SAFETY Cleaning and maintenance of the Accessible parts may be hot. Keep appliance shall not be carried out away from children while grilling. by children without supervision. Spilt food stains shall be removed The device may heat up during before cleaning.
- Page 7 IMPORTANT INFORMATION REGARDING SAFETY Do not operate the appliance until Never attempt to remove the plug it is repaired by an authorized by pulling it from the cord. service if the door or the gaskets Never touch the appliance if your on the door of the appliance are hands or feet are wet or damp.
- Page 8 IMPORTANT INFORMATION REGARDING SAFETY Keep the original package of the appliance. CAUTION! Use the original packaging to transport the appliance, follow the Do not use the oven handle on handling signs on the package. the front door to carry the oven or to remove it from its pack- If the original packaging is aging.
- Page 9 IMPORTANT INFORMATION REGARDING SAFETY ance disposal must be conducted Do not place heavy loads on the in accordance with local environ- appliance. ment regulations. You can obtain During transporting, place your detailed information on disposing appliance parallel to the ground of the appliance, reusing and recy- (with the upper side facing up).
-
Page 10: Specifications Of The Oven
SPECIFICATIONS OF THE OVEN SPECIFICATIONS OF THE OVEN These appliances are designed to operate with a single phase supply voltage of 220-240V at 50-60Hz. Fig. 1 25.08.2020 OVEN USER GUIDE ENG... - Page 11 SPECIFICATIONS OF THE OVEN OVEN MOV-726 MC Function Oven Lamp 15 W Product Dimensions (Width) Product Dimensions (Depth) Product Dimensions (Height) Product Installation Cabinet Dimen- sions (Width) Product Installation Cabinet Dimen- sions (Depth) Product Installation Cabinet Dimen- sions (Height) 66 lt...
-
Page 12: Installation Of Appliance
INSTALLATION OF APPLIANCE INSTALLATION OF APPLIANCE Installation of the appliance shall be Walls of furniture where the appliance performed by Silverline Authorized is installed shall be resistant to heat. Service. Our company shall not be Particularly if the side walls are made held responsible for damages that may of coated particleboard, the coating occur on people, surroundings or other... - Page 13 INSTALLATION OF APPLIANCE Dimensional information pro- vided in the drawings are given in mm. 25.08.2020 OVEN USER GUIDE ENG...
-
Page 14: Installation Of The Oven To The Cabinet
INSTALLATION OF THE OVEN TO THE CABINET INSTALLATION OF THE OVEN TO THE CABINET (m!n 577 max 594) Fig. 3 25.08.2020 OVEN USER GUIDE ENG... - Page 15 INSTALLATION OF THE OVEN TO THE CABINET Visuals in the manual are for reference Fig. 4 Place the appliance by centering it inside the built-in appliance cabinet. Open the door of the appliance and drill holes by aligning with the holes on the body of the oven using a drill with a screw diameter of 3.9x22, and install the screw.
- Page 16 INSTALLATION OF THE OVEN TO THE CABINET Be careful not to damage the installation holes by applying too much pressure on the screws during installation. The appliance may be installed on a high-placed cabinet or under the counter as desired. We recommended you to provide a minimum clearance of 70 mm from the rear of the kitchen unit where the oven is installed Parts that provide insulation and protection shall be installed so that they...
-
Page 17: Power Connection
POWER CONNECTION POWER CONNECTION The appliance shall be connected to the main electrical installation as per the current rules and legislation and by an authorized service only. Ensure that the power received from the mains meet the power specified in the nameplate placed on the bottom front of the appliance. - Page 18 POWER CONNECTION sarı-yeş l / yellow-green mav / blue 3 ad. M4x6 V da kahvereng / brown 3 pcs. M4x6 Screw Fig. 5 25.08.2020 OVEN USER GUIDE ENG...
- Page 19 POWER CONNECTION SUPPLY Mchncl red (1x1.50 mm TIMER brown brown (1x1.50 mm (1x1.50 mm LIMIT NC 110°C THER yellow-green (1x1.50 mm blue (1x1.50 mm MOSTAT brown (1x1.50 mm ROTARY SWITCH blue (1x1.50 mm wh te (1x0.50 mm red (1x0.50 mm THERMOSTAT SIGNAL LAMP yellow-green (1x1.50 mm...
-
Page 20: Energy Efficiency Of The Oven
POWER CONNECTION Energy Efficiency of the Oven At this time, a smell and smoke caused by the insulation materials and heating elements may occur for once. In such a case, wait until the smell and smoke wears off before putting any food inside the oven. Clean the inside of the oven using a soft cloth slightly dampened with soapy water. -
Page 21: Introduction Of Appliance
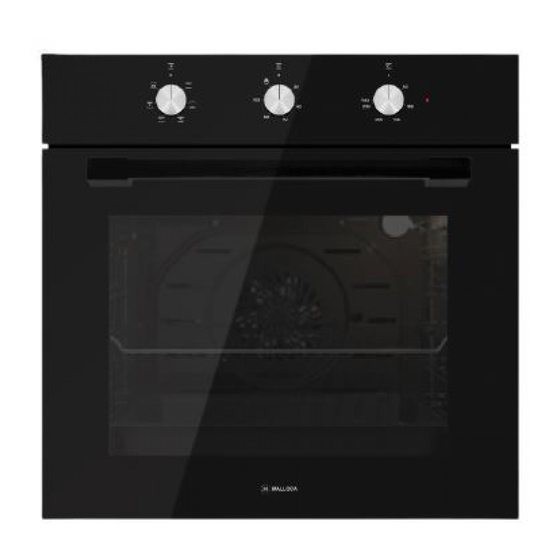
INTRODUCTION OF APPLIANCE Accessories of the Oven INTRODUCTION OF APPLIANCE Fig. 8 Function Selection Button 10- Oven Grill Manual Display Timer 11- Deep Tray (Option) Oven Temperature Setting Knob 12- Lower Resistance (Concealed) Warning Lamp 13- Internal Glass Upper Resistance 14- Oven Door Lamp 15- Door Top Plastic... - Page 22 INTRODUCTION OF APPLIANCE Accessories of the Oven 7.1 Accessories of the Oven Clean the accessories of the oven before first operation. After cleaning and washing with a sponge, wipe them dry. Remove any accessories you do not need from the cooking compartment. Oven Grill Fig.
-
Page 23: Before First Use
BEFORE FIRST USE BEFORE FIRST USE You shall make some settings first before using your new appliance. Cleaning of the cooking compart- ment and the accessories Clean the cooking compartment and the accessories first before cooking a meal for the first time. Cleaning of the cooking compart- ment Heat the cooking compartment while it... -
Page 24: Specifications And Operation Of The Appliance
SPECIFICATIONS AND OPERATION OF THE APPLIANCE Specifications of the Oven SPECIFICATIONS AND OPERATION OF THE APPLIANCE 9.1 Specifications of the Oven Fig. 11 Before starting the oven, set the mechanical timer setting, temperature setting and program setting. Your oven will not start until you set these three operations. You can set the mechanical timer system to a minimum of 10 minutes and a max- imum of 100 minutes. -
Page 25: Temperature Setting Of The Appliance
SPECIFICATIONS AND OPERATION OF THE APPLIANCE Temperature Setting of the Appliance When the cooking time is expired, the timer button will turn in anticlockwise. An audible warning indicating the time has expired and the power is cut off. If you do not want to use the timer function, turn the knob counterclockwise to the 'M' icon. -
Page 26: Cleaning And Maintenance Of The Appliance
CLEANING AND MAINTENANCE OF THE APPLIANCE CLEANING AND MAINTENANCE OF THE APPLIANCE General Cleaning You can obtain Silverline's oven cleaner from our authorised serv- Always allow the appliance to cool ices and use it to remove spilled, after operating it. Ensure that no dried waste oil stains and for per- residues are left on the door at this fect cleaning. - Page 27 CLEANING AND MAINTENANCE OF THE APPLIANCE Removal of the Oven Door DANGER! Ensure that the appliance cooled down prior to coming to contact with it. Risk of burns. Cleaning of the Interior of the Oven Be sure to clean your oven after each operation.
- Page 28 CLEANING AND MAINTENANCE OF THE APPLIANCE Close the oven door so that it contacts Cleaning of the Oven Glass the hinge lock as shown in (Fig. 14). Fig. 16 Open the door of the appliance slightly. Fig. 15 Push on the left and right-hand sides Hinge of the door top plastic (Fig.
- Page 29 CLEANING AND MAINTENANCE OF THE APPLIANCE Remove the door top plastic (Fig. 17). Reverse the same procedure to install the oven glass. Oven Door Gasket Condensation may occur inside the front door and on the door gasket when the oven is operated for a long period.
-
Page 30: Replacement Of The Lamp
REPLACEMENT OF THE LAMP REPLACEMENT OF THE LAMP The bulb used in this product is not suitable for illumination of households. The purpose of this lamp is to help the user to see the food. Disconnect power supply and wait for the oven to cool down to eliminate the risk of electro- cution before replacing the oven lamp. - Page 31 REPLACEMENT OF THE LAMP Remove and replace the oven lamp by rotating it counter-clockwise (Fig. 21). Reverse the procedure provided in (Fig. 20) for the installation of the lamp cover. 25.08.2020 OVEN USER GUIDE ENG...
-
Page 32: Main Function Description
MAIN FUNCTION DESCRIPTION MAIN FUNCTION DESCRIPTION The main function descriptions are below. Function Explanation of function No program is selected in your appli- ance. Upper and lower heaters are on. Food is heated from the bottom and top simultaneously. This is suitable for cakes, patties or cakes and stews cooked in pans. - Page 33 MAIN FUNCTION DESCRIPTION Hot air heated with the bigger grill is distributed rapidly inside the oven thanks to the fan. This is suitable grilling more meat. Place the large or medium sized portions on the correct rack position under the grill heater to grill.
-
Page 34: Cooking Chart
COOKING CHART COOKING CHART Turn the timer button clockwise to set the cooking time. Place your food in the oven. Select the operation mode and the temperature. The oven is heated up to the pre-set temperature and preserves this temperature until the end of selected cooking time. - Page 35 COOKING CHART Cake in Single level 2 40...50 Cake in Single level 3 25...30 sheet Sponge Single level 3 5...10 cake Cookie Single level 3 25...30 Filo pastry Single level 2 30...40 Buns Single level 2 25...35 Leaven Single level 2 35...45 dough Lasagne...
- Page 36 COOKING CHART Fish Single level 3 20...30 Place the deep tray on the upper rack and the shallow tray on the lower rack while cooking with 2 trays. Pre-heating is recommended for all kinds of food. For cooking operations which require pre-heating, perform the pre-heating until the oven reaches the desired temperature at the start of the cooking.
- Page 37 COOKING CHART If the vegetable dish loses its juice and gets dry, cook inside a closed pot instead of the tray. Closed pots contain the juice of the dish. If the vegetable dish is undercooked, boil the vegetables or prepare them as preserved food first, and then put them inside the oven.
- Page 38 Nội dung Nội dung LỜI NÓI ĐẦU....................39 THÔNG TIN QUAN TRỌNG VỀ AN TOÀN............. 40 THÔNG SỐ KỸ THUẬT................... 45 LẮP ĐẶT THIẾT BỊ..................47 LẮP ĐẶT THIẾT BỊ VÀO KHOANG TỦ............49 KẾT NỐI NGUỒN ĐIỆN................... 52 6.1 Hiệu quả năng lượng................. 55 TỔNG QUAN THIẾT BỊ..................
-
Page 39: Lời Nói Đầu
LỜI NÓI ĐẦU 1 LỜI NÓI ĐẦU KÍNH GỬI QUÝ KHÁCH HÀNG Chúng tôi xin cảm ơn bạn đã mua sản phẩm của chúng tôi. Sản phẩm này đã được sản xuất tại các nhà máy hiện đại và không gây ô nhiễm đến môi trường. -
Page 40: Thông Tin Quan Trọng Về An Toàn
THÔNG TIN QUAN TRỌNG VỀ AN TOÀN 2 THÔNG TIN QUAN TRỌNG VỀ AN TOÀN Điện áp hoạt động lò từ 220V đến Sử dụng găng tay lò nướng khi bạn lấy thức ăn từ lò nướng. Các 240V. bộ phận của lò nướng, dụng cụ Kết nối lò... - Page 41 THÔNG TIN QUAN TRỌNG VỀ AN TOÀN Thiết bị có thể nóng lên trong CẢNH BÁO TRƯỚC KHI LẮP ĐẶT quá trình hoạt động. Cẩn thận VÀ TRONG KHI LẮP ĐẶT khi chạm vào các bộ phận Thiết bị sẽ luôn được lắp đặt bởi nóng bên trong lò.
- Page 42 THÔNG TIN QUAN TRỌNG VỀ AN TOÀN Không vận hành thiết bị cho đến Không bao giờ chạm vào thiết bị khi thiết bị được sửa chữa bởi nếu tay hoặc chân của bạn đang dịch vụ kỹ thuật nếu có bất kỳ ẩm ướt.
- Page 43 THÔNG TIN QUAN TRỌNG VỀ AN TOÀN Giữ gói ban đầu của thiết bị. THẬN TRỌNG! Sử dụng bao bì ban đầu để vận chuyển thiết bị, tuân theo các dấu Không sử dụng tay nắm lò hiệu xử lý trên bao bì. Nếu thiếu để...
- Page 44 THÔNG TIN QUAN TRỌNG VỀ AN TOÀN Biểu tượng này trên sản phẩm Không đặt các vật nặng lên thiết bị. miêu tả thiết bị không phải rác thải Trong khi vận chuyển, hãy đặt thiết sinh hoạt, để xử lý phải giao cho bị...
-
Page 45: Thông Số Kỹ Thuật
THÔNG SỐ KỸ THUẬT 3 THÔNG SỐ KỸ THUẬT Các thiết bị này được thiết kế để hoạt động với điện áp cung cấp một pha là 220-240V ở tần số 50-60Hz. Hình 1 HƯỚNG DẪN SỬ DỤNG 25.08.2020... - Page 46 THÔNG SỐ KỸ THUẬT MOV-726 MC Chức năng Đèn lò 15 W Kích thước sản phẩm (W) Kích thước sản phẩm (D) Kích thước sản phẩm (H) Kích thước khoang tủ (W) Kích thước khoang tủ (D) Kích thước khoang tủ (H) 66 lít...
-
Page 47: Lắp Đặt Thiết Bị
LẮP ĐẶT THIẾT BỊ 4 LẮP ĐẶT THIẾT BỊ Việc lắp đặt thiết bị sẽ được thực hiện Tường của đồ nội thất nơi thiết bị được bởi dịch vụ kỹ thuật. Công ty chúng lắp đặt phải chịu nhiệt. Đặc biệt nếu tôi sẽ... - Page 48 INSTALLATION OF APPLIANCE Thông tin kích thước được cung cấp trong bản vẽ được tính bằng mm. 25.08.2020 HƯỚNG DẪN SỬ DỤNG...
-
Page 49: Lắp Đặt Thiết Bị Vào Khoang Tủ
LẮP ĐẶT LÒ VÀO KHOANG TỦ 5 LẮP ĐẶT LÒ VÀO KHOANG TỦ (m!n 577 max 594) Fig. 3 HƯỚNG DẪN SỬ DỤNG 25.08.2020... - Page 50 LẮP ĐẶT LÒ VÀO TỦ Hình ảnh trong sách hướng dẫn mang tính chất tham khảo Hình 4 Đặt thiết bị bằng cách đặt thiết bị vào giữa khoang tủ. Mở cửa của thiết bị và khoan lỗ bằng cách căn chỉnh với các lỗ vít trên thân lò bằng cách sử...
- Page 51 LẮP ĐẶT LÒ VÀO TỦ Cẩn thận để không làm hỏng các lỗ vít bằng cách tác động quá nhiều áp lực lên các vít trong quá trình lắp đặt. Thiết bị có thể được lắp đặt ở khoang tủ cao hoặc thấp tùy theo ý muốn. Chúng tôi khuyên bạn nên cung cấp khoảng hở...
-
Page 52: Kết Nối Nguồn Điện
KẾT NỐI NGUỒN ĐIỆN 6 KẾT NỐI NGUỒN ĐIỆN Thiết bị phải được kết nối với hệ thống lắp đặt điện chính theo các quy tắc và luật pháp hiện hành và chỉ bởi một dịch vụ được ủy quyền. Đảm bảo rằng nguồn điện đáp ứng được chỉ... - Page 53 KẾT NỐI NGUỒN ĐIỆN sarı-yeş l / yellow-green mav / blue 3 ad. M4x6 V da kahvereng / brown 3 pcs. M4x6 Screw Hình 5 HƯỚNG DẪN SỬ DỤNG 25.08.2020...
- Page 54 KẾT NỐI NGUỒN ĐIỆN SUPPLY Mchncl red (1x1.50 mm TIMER brown brown (1x1.50 mm (1x1.50 mm LIMIT NC 110°C THER yellow-green (1x1.50 mm blue (1x1.50 mm MOSTAT brown (1x1.50 mm ROTARY SWITCH blue (1x1.50 mm wh te (1x0.50 mm red (1x0.50 mm THERMOSTAT SIGNAL LAMP yellow-green (1x1.50 mm...
-
Page 55: Hiệu Quả Năng Lượng
KẾT NỐI NGUỒN ĐIỆN Hiệu quả năng lượng Tại thời điểm này, mùi và khói do vật liệu cách nhiệt và các bộ phận làm nóng có thể xuất hiện một lần. Trong trường hợp này, hãy đợi cho đến khi hết mùi và... -
Page 56: Tổng Quan Thiết Bị
TỔNG QUAN THIẾT BỊ Phụ kiện lò nướng 7 TỔNG QUAN THIẾT BỊ Hình 8 1- Núm vặn lựa chọn chức năng 10- Vỉ nướng 2- Núm vặn điều chỉnh hẹn giờ 11- Khay hứng mỡ (nếu có) 3- Núm vặn điều chỉnh nhiệt độ lò 12- Thanh nhiệt dưới (được giấu) 4- Đèn cảnh báo 13- Kính trong... -
Page 57: Phụ Kiện Lò Nướng
TỔNG QAUN THIẾT BỊ Phụ kiện lò nướng 7.1 Phụ kiện lò nướng Làm sạch các phụ kiện của lò trước khi vận hành lần đầu. Sau khi làm sạch và rửa bằng một miếng bọt biển, hãy lau chúng thật khô. Tháo bất kỳ... -
Page 58: Trước Khi Sử Dụng Lần Đầu Tiên
TRƯỚC KHI SỬ DỤNG LẦN ĐẦU TIÊN 8 TRƯỚC KHI SỬ DỤNG LẦN ĐẦU TIÊN Trước tiên, bạn phải thực hiện một số thao tác trước khi sử dụng thiết bị mới của mình. Vệ sinh khoang lò và các phụ kiện Trước tiên hãy làm sạch khoang lò... -
Page 59: Thông Số Kỹ Thuật Và Vận Hành Thiết Bị
THÔNG SỐ KỸ THUẬT VÀ VẬN HÀNH THIẾT BỊ Thông số kỹ thuật 9 THÔNG SỐ KỸ THUẬT VÀ VẬN HÀNH THIẾT BỊ 9.1 Thông số kỹ thuật Hình 11 Trước khi khởi động lò, hãy cài đặt hẹn giờ cơ học, cài đặt nhiệt độ và cài đặt chương trình. -
Page 60: Cài Đặt Nhiệt Độ Lò Nướng
THÔNG SỐ KỸ THUẬT VÀ VẬN HÀNH THIẾT BỊ Cài đặt nhiệt độ lò nướng Khi hết thời gian nướng, nút hẹn giờ sẽ quay ngược chiều kim đồng hồ. Cảnh báo bằng âm thanh cho biết thời gian đã hết và nguồn điện đã bị ngắt. Nếu bạn không muốn sử... -
Page 61: 10 Vệ Sinh Và Bảo Trì Thiết Bị
VỆ SINH VÀ BẢO TRÌ THIẾT BỊ 10 VỆ SINH VÀ BẢO TRÌ THIẾT BỊ Vệ sinh chung Luôn để thiết bị nguội sau khi vận Không để lại vết ăn mòn và vết hành. Đảm bảo rằng không còn axit (nước chanh, giấm, v.v.) cặn bẩn bám dính trên cửa vào. - Page 62 VỆ SINH VÀ BẢO TRÌ THIẾT BỊ Tháo cửa lò NGUY HIỂM! Đảm bảo rằng thiết bị đã nguội trước khi tiếp xúc với nó. Nguy cơ bỏng. Làm sạch bên trong lò nướng Đảm bảo vệ sinh lò sau mỗi lần vận hành.
- Page 63 VỆ SINH VÀ BẢO TRÌ THIẾT BỊ Đóng cửa lò để nó tiếp xúc với khóa Vệ sinh kính lò nướng bản lề như trong (Hình 14). Hình 16 Mở nhẹ cửa thiết bị. Đẩy vào bên trái Hình 15 và...
- Page 64 VỆ SINH VÀ BẢO TRÌ THIẾT BỊ Tháo lớp nhựa phía trên (Hình 17). Làm ngược lại quy trình tương tự để lắp cửa kính lò. Gioăng cửa lò Có thể xảy ra hiện tượng ngưng tụ bên trong cửa trước và trên gioăng cửa khi lò...
-
Page 65: Thay Thế Bóng Đèn
THAY THẾ ĐÈN LÒ THAY THẾ ĐÈN LÒ Bóng đèn được sử dụng trong thiết bị này chỉ phù hợp cho mục đích hỗ trợ chiếu sáng thực phẩm bên trong lò. Ngắt nguồn điện và đợi lò nguội để tránh điện giật trước khi thay thế... - Page 66 THAY THẾ ĐÈN LÒ Tháo và thay đèn lò bằng cách xoay ngược chiều kim đồng hồ (Hình 21). Đảo ngược quy trình trong (Hình 20) để lắp đặt chuôi đèn. 25.08.2020 HƯỚNG DẪN SỬ DỤNG...
-
Page 67: 12 Mô Tả Chức Năng Chính
MÔ TẢ CHỨC NĂNG CHÍNH MÔ TẢ CHỨC NĂNG CHÍNH Chức năng chính được mô tả bên dưới. Chức năng Diễn giải chức năng Không có chức năng nào được chọn. Chức năng nướng trên và dưới. Thức ăn được làm nóng từ trên và dưới. Thích hợp với các món bánh nướng, bánh nhiều lớp hoặc bánh ngọt và... - Page 68 MÔ TẢ CHỨC NĂNG CHÍNH Chức năng nướng điện trở đôi phía trên kết hợp quạt. Thích hợp để nướng một lượng thịt lớn hơn. Đặt thức ăn có lượng lớn hoặc trung bình, sử dụng đúng vị trí giá nướng dưới. Đặt nhiệt độ...
-
Page 69: Biểu Đồ Nấu Ăn
BIỂU ĐỒ NẤU NƯỚNG 13 BIỂU ĐỒ NẤU NƯỚNG Xoay nút hẹn giờ theo chiều kim đồng hồ để cài đặt thời gian nướng. Đặt thức ăn của bạn vào lò nướng. Chọn chế độ hoạt động và nhiệt độ. Lò... - Page 70 BIỂU ĐỒ NẤU NƯỚNG Bánh trên Khay đơn 40...50 khay Khay đơn Bánh 25...30 nguyên tấm Bánh bông Khay đơn 5...10 Khay đơn Cookie 25...30 Bánh tart Khay đơn 30...40 Bánh mì Khay đơn 25...35 nhỏ Bánh mì Khay đơn 35...45 Mì...
- Page 71 BIỂU ĐỒ NẤU NƯỚNG Cá Khay đơn 20...30 Đặt khay sâu ở giá trên và khay nông ở giá dưới khi nướng bằng 2 khay. Nên làm nóng sơ bộ cho tất cả các loại thực phẩm. Đối với các hoạt động nướng yêu cầu gia nhiệt trước, thực hiện gia nhiệt trước cho đến khi lò...
- Page 72 BIỂU ĐỒ NẤU NƯỚNG Gợi ý cho các món rau Nếu món rau mất nước và bị khô, hãy nấu trong vật chứa đậy kín thay vì khay. Vật chứa kín giúp giữ nước cốt của món ăn. Nếu món rau chưa chín, hãy luộc rau hoặc chế biến như thực phẩm bảo quản trước, sau đó...
Need help?
Do you have a question about the MOV-726 MC and is the answer not in the manual?
Questions and answers