Advertisement
Quick Links
Advertisement

Subscribe to Our Youtube Channel
Related Manuals for Malloca MOV-65T5


Summary of Contents for Malloca MOV-65T5
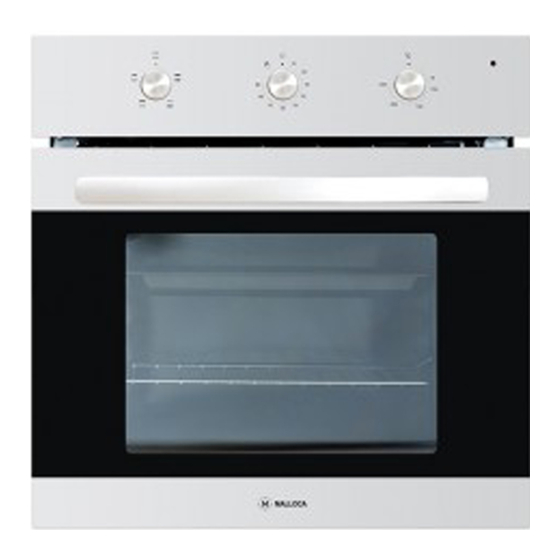
- Page 1 BUILT-IN OVEN USER MANUAL MODEL: MOV-65T5...
- Page 2 CONTENTS SAFETY PRECAUTIONS ..................WARNINGS FOR PROPER TRANSPORTATION..........TECHNICAL SPECIFICATIONS ................INSTALLATION INSTRUCTIONS ................ PRODUCT SPECIFICATIONS AND USAGE ............CLEANING AND MAINTENANCE ..............TROUBLESHOOTING ..................Dear Customer, We would like to thank you and congratulate you on your choice. This new product has been carefully designed and built using top quality materials, and meticulously tested to ensure that it meets all your culinary requirements.
- Page 3 SAFETY PRECAUTIONS This Built-in electrical oven is manufactured for use in the preparation of normal home meals. Please do not use for other purposes. Installation: This appliance must be installed by qualified personnel, according to the manufacturer’s instructions and the relevant Safety Standards. ...
- Page 4 Connection diagram can be found on the rear of the appliance Please reset the timer when in the event of a power failure. The oven will not operate until the timer is properly set. The oven door must always close properly. Keep the door seal areas clean.
- Page 5 WARNINGS FOR PROPER TRANSPORTATION Keep the original package of the appliance. To move the appliance properly, use the original package with consideration to the markings on the package. In cases where the original package could not be kept; o Care for any possible measures to prevent any impact to the appliance.
- Page 6 BEFORE SCRAPPING, make it unusable by cutting the electrical cord. TECHNICAL SPECIFICATIONS MOV-65T5 TECHNICAL SPECIFICATIONS 4 functions Function 2500 W...
- Page 7 INSTALLATION INSTRUCTIONS Installation must be completed by an authorised technician Dimensions and materials of cabinet must be suitable and capable of withstanding heat radiation from oven. Correctly Installation - Cabinet should not come into contact with any of the ovens electrical parts.
- Page 8 PRODUCT SPECIFICATIONS AND USAGE The Knobs control power and setting of each heating element. Turn Knobs clockwise to activate oven and set at required cooking temperature. Turn Knob anti-clockwise to decrease cooking temperature and to deactivate oven. Thermostatic Control of Oven The indicator lamp will switch on together with the thermostat.
- Page 9 Usage of Oven For initial operation of your oven, a smell arising from insulation materials and heating elements will be generated. To help avoid it, operate your oven at 250 C for 45 minutes without putting any trays in oven. Suggested Settings 1.
- Page 10 WARNING To ensure the oven shelves operate safely, correct placement of the shelves between the side rails (figure 1, 2, 3, 4) is imperative. This will ensure that during careful removal of the shelf or tray, hot food items should not slide out.
- Page 11 NOTE: The values given in cooking table are the values obtained in our laboratories. You can obtain various results to satisfying your tastes depending on your cooking and use habits. Cooking times depend on quantity of ingredients. Using cake forms gives better results for making cakes.
- Page 12 Grill Function of Oven - Closed Door Grilling Turn the oven control knob to position • We advise you to use trivet shelf placed into grill tray when you are grilling. This will help avoid spills and help keep your oven clean •...
- Page 13 CLEANING AND MAINTENANCE Cleaning your Oven 1. Before you start cleaning, switch off power-supply at the socket. If the oven is hot, wait it to cool off. 2. Do not use the abrasive cleaning agents on enamel, ceramic or painted surfaces.
- Page 14 3. Open the glass door to the back slightly and insert the locking part to its place on hinge. Make sure that this is done on both for left and right hinges. 4. Lift the door slightly and pull the door with your two hands to separate from the oven.
- Page 15 5. Ensure the appliance is switched off before replacing the lamp to avoid the possibility of electric shock. TROUBLESHOOTING...
- Page 16 Showroom: 279 Nguyen Van Troi St., Ward 10, Phu Nhuan Dist., HCM City Tel: (+84) 8 39975 893 / 94 – (+84) 8 39975 294 / 95 Fax: (+84) 8 38447 102 – (+84) 8 39974 633 Email: info@malloca.com 2016-1.Rev.
Need help?
Do you have a question about the MOV-65T5 and is the answer not in the manual?
Questions and answers