Advertisement
Advertisement
Table of Contents

Related Manuals for Proline PCH465T-U


Summary of Contents for Proline PCH465T-U
- Page 1 Instruction Manual for Ceramic Cooker Hob Model : PCH465T-U...
- Page 2 Dear Customer, Thank you for purchasing this PROline Ceramic Hob. The safety precautions and recommendations in these instructions are for your own safety and that of others. They will also provide a means by which to make full use of the features offered by your appliance.
-
Page 3: Important Safeguards & Recommendations
BEFORE USING FOR THE FIRST TIME • Read the instructions carefully before installing and using the appliance • After unpacking the appliance, make sure it is not damaged. In case of doubt, do not use the appliance and contact your supplier or a qualified engineer. •... -
Page 4: Product Introduction
Product Introduction This microcomputer ceramic hob can meet different kinds of cuisine demands because of resistance wire heating, micro-computerised control and multi-power selection, really the optimal choice for modern families. Working Principle The microcomputer ceramic hob employs resistance wire heating, and power regulation with the microcomputer controlling different heating time and closing time of the resistance wire. - Page 5 The default working timers for various power levels are shown in the table below: Power level Default working time(hour) ADVICE FOR THE INSTALLER IMPORTANT Appliance installation and maintenance must only be carried out by QUALIFIED TECHNICIANS and in compliance with the local safety standards. Failure to observe this rule will invalidate the warranty.
- Page 6 2. When installing, make sure the ceramic hob is well ventilated and the air inlet and outlet are not blocked. Ensure the ceramic hob is installed correctly. As shown in Figure (2) Air exit mini 5 cm mini 5 mm mini 2 cm Air intake Figure (2)
-
Page 7: Electrical Connection
ELECTRICAL CONNECTION: Installation must be carried out according to the manufacturer's instructions. Incorrect installation may cause harm and damage to people, animals or property, for which the manufacturer accepts no responsibility. Before carrying out any work on the electrical section of the appliance, it must be disconnected from the mains. -
Page 8: Power Line Connection
Cautions 1. The ceramic hob must be installed by qualified personnel or technicians. Never conduct the operation by yourself. 2. Do not install the hob close to refrigeration appliances or dishwashers and rotary dryers. 3. The ceramic hob shall be installed such that good ventilation can be achieved to assist reliability. -
Page 9: Instructions For Use
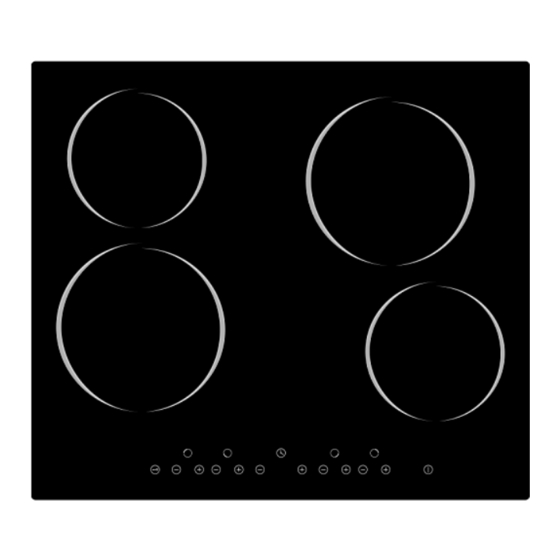
The ceramic hob appearance Glass plate Power cord Control panel ON/OFF iagram of the control panel Power regulating key ON/OFF Lock key Timer regulating key Instructions for Use Put the pot in the center of the heating zone. Preparation before using After power on, the buzzer beeps once, all the indicators light up for 1 second then go out, indicating the ceramic hob enters into standby mode. -
Page 10: Timer Function
Operation Instructions: Press the “On/Off” key, the hob goes to stanby mode,all the indicators show “-”.If the ceramic plate is hot,the indicator shows “-” and “H” alternately. Press the “-” or “+“ to decrease or increase the power level. If the ON/OFF power level returns to 0, the zone switch off. - Page 11 Lock function : To ensure the safety of children, the hob is provided with a lock function. Activating the lock function : When the lock is deactivated, touch the “Lock” key to activate the Lock key Lock function, and the timer indicator shows “Lo”,and the indicator lamp will light up.
-
Page 12: Cleaning The Ceramic Hob
CLEANING THE CERAMIC HOB Before you begin cleaning make sure that the hob is switched off. • Remove spillages and other types of incrustations. • Dust or food particles can be removed with a damp cloth. • If you use a detergent, please make sure that it is not abrasive or scouring. Abrasive or scouring powders can damage the glass surface of the hob. - Page 13 If something doesn't seem to work If there is something about your appliance which you do not understand and you live in the UK you can phone our help line during normal office hours on: 0844 8009595. Calls are charged at standard rates. We apologise for any inconvenience caused by minor inconsistencies in these instructions, which may occur as a result of product improvement and development.
Need help?
Do you have a question about the PCH465T-U and is the answer not in the manual?
Questions and answers