Table of Contents
Advertisement
Available languages
Available languages
Advertisement
Chapters
Table of Contents

Related Manuals for Proline PCH460T-E


Summary of Contents for Proline PCH460T-E
- Page 1 PCH460T-E OPERATING AND INSTALLATION INSTRUCTIONS BUILT-IN VITROCERAMIC HOB...
-
Page 2: Table Of Contents
CONTENTS 1. DESCRIPTION OF THE HOB 2. SAFETY INSTRUCTIONS 3. INSTALLATION 4. ELECTRICAL CONNECTION 5. USAGE 6. TOUCH CONTROL SAFETY FUNCTIONS 7. CLEANING AND CARE... - Page 3 Dear Customer, Thank you for purchasing this Proline Cooking Hob.The safety precautions and recommendations in these instructions are for your own safety and that of others. They will also provide a means by which to make full use of the features offered by your appliance.
-
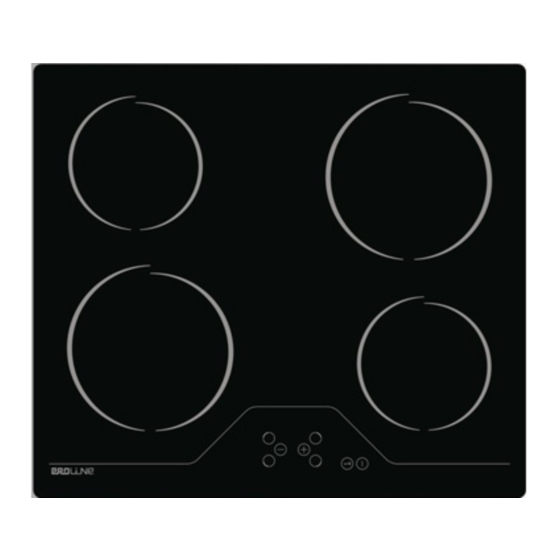
Page 4: Description Of The Hob
DESCRIPTION OF THE HOB BEFORE USING FOR THE FIRST TIME Read the instructions carefully before installing and using the appliance. After unpacking the appliance, make sure it is not damaged. In case of doubt, do not use the appliance and contact your supplier or a qualified engineer. -
Page 5: Safety Instructions
SAFETY INSTRUCTIONS Please comply with these instructions. If you do not, any damage resulting from improper, incorrect or negligent use or improper connection or installation is not covered by the warranty. · This appliance is intended for domestic use only, any other use may i n v a l i d a t e t h e wa r r a n t y... - Page 6 · Be careful when using small household appliances, such as irons, near the elements. · Do not use the cooking zones with empty cookware or without cookware. · Make sure all the controls are in the off position when not in use. ·...
-
Page 7: Installation
INSTALLATION The electrical connection of this hob should be carried out by an authorised service personal or a qualified electrician, according to the instructions in this guide and in compliance with the current regulations. · Prior to installation, ensure that the local distribution conditions and the adjustment of the appliance are compatible. - Page 8 · Apply the one-sided self-adhesive sealing tape supplied all the way round the lower edge of the cooking surface along the outer edge of the glass ceramic panel. Do not stretch it. · Screw the 4 worktop mounting brackets on the side walls of product. worktop mounting bracket...
-
Page 9: Electrical Connection
ELECTRICAL CONNECTION Electrical connection of your hob · Before proceeding with the electrical connection, verify that the current carrying capacity of the system and the socket is adequate for the maximum power rating of the hob. · Electrical installation of the residence and the electrical current plug in use must be earthed and conform with safety regulations. -
Page 10: Usage
USAGE The appliance is operated by touching buttons and the functions are confirmed by displays and acoustic signals. NOTE: See the section on HOB RESET if you see a flashing H in any of the displays. The mains are applied to the hob control Stand-By-Mode S-Mode and all heater displays are off or a residual... - Page 11 Turning the appliance on / off . If the appliance is in Stand-By-Mode, it is put in Operating-Mode by pressing the On/Off button at least 1 second. A beep indicates a successful operation. On all heaters a ´0` appears and all Decimal Point of the heater flashes. If there is no operation within 10 sec, the display of all heaters will turn off.
- Page 12 Set Cooking Level With and Without Heat Boost Al l h e a te r s a re e q u i pp e d wi t h h ea t b o ost f u n ct i o n al i t y. If the heat boost is active, then the heater will be operated with maximum power for the period of the heat boost time, which is dependent on the selected heat setting.
- Page 13 The heater can also be turned off by reducing the heat setting to ´0`. When Heater Display indicates ´0`, the Decimal Point of the selected heater will also turn off. If there is a residual heat for this heater remaining, this will be indicated by a static display ´H` in the heat setting display.
-
Page 14: Touch Control Safety Functions
TOUCH CONTROL SAFETY FUNCTIONS The following safety functions are available to avoid unintended operations of the hob control. Sensor Safety Cut Off To prevent the appliance from unwanted, random sensor operation, sensor monitoring is included. In case of one or more buttons are pressed longer than 12 sec, the sensor monitoring routine indicates with a beep, that wrong operation (pot or other object placed on the button, sensor failure, etc.) and switches off the appliance. - Page 15 After the hob cools the ´t` displays will be erased and the hob control enters standby mode. This means that the user can reactivate the appliance by touching Residual Heat Functions After the hob is turned off when cooking is finished, there is some heat stored in the vitroceramic glass called residual heat.
-
Page 16: Cleaning And Care
CLEANING AND CARE Cookware with rough bottoms should not be used since these can scratch the ceramic surface. The bottom of the cookware should be as thick and flat as possible. Before use, make sure that cookware bottoms are clean and dry. - Page 17 This is especially true in the case of sugar/syrup mixtures which could pe rmanen tly pit the surf ace of t he h ob i f l eft to burn on it. If any of these products has melted on the ceramic surface, you should remove it immediately (when the surface is still hot) by using a scraper to avoid any permanent damage to the surface of the hob (available from the s t o r e...
- Page 18 Disposal Waste electrical and electronic products must not be disposed of with household waste. Please refer to the retailer from whom you purchased this item for disposal instructions. Packaging materials should be recycled using local facilities. If something doesn't seem to work If there is something about your appliance which you do not understand and you live in the UK you can phone our help line during normal office hours on: 0113 2793520 If you require service, call the number on your...
- Page 19 PCH460T-E INSTRUCTIONS RELATIVES A L'UTILISATION ET A L'INSTALLATION TABLE DE CUISSON VITROCÉRAMIQUE ENCASTRABLE...
- Page 20 TABLE DES MATIÈRES 1. DESCRIPTION DE L'APPAREIL 2. CONSIGNES DE SÉCURITÉ 3. INSTALLATION 4. BRANCHEMENT ELECTRIQUE 5. UTILISATION 6. FONCTIONS SECURITAIRE DU BOUTON DE COMMANDE 7. NETTOYAGE ET ENTRETIEN...
- Page 21 Chère cliente, cher client, Merci d'avoir acheté la présente table de cuisson de marque Proline. Les précautions de sécurité et les recommandations contenues dans les présentes instructions sont destinées à votre propre sécurité et à celle de vos proches. Elles vous donneront par ailleurs un moyen avec lequel utiliser entièrement toutes les fonctions offertes par votre appareil.
-
Page 22: Description De L'appareil
DESCRIPTION DE L'APPAREIL AVANT D'UTILISER VOTRE APPAREIL POUR LA PREMIERE FOIS Lisez attentivement les instructions avant d'installer cet appareil et de l'utiliser. Après l'avoir enlevé de son emballage, assurez-vous qu'il n'est pas endommagé. En cas de doute, n'utilisez pas l'appareil mais contactez plutôt votre fournisseur ou un technicien qualifié. -
Page 23: Consignes De Sécurité
CONSIGNES DE SÉCURITÉ Veuillez respecter ces consignes. Si vous ne le faites pas, tout dommage lié à une utilisation inadaptée, incorrecte, ou négligente, voire d'un branchement ou d'une installation inadaptés, ne sera pas couvert pas la garantie. · Le présent appareil est réservé uniquement à une utilisation domestique. Toute autre utilisation peut rendre la garantie nulle et de nul effet, et constituer un danger. - Page 24 · Soyez prudent lorsque vous utilisez de petits appareils électroménagers, comme les fers à repasser, tout près des éléments. · N'utilisez pas les zones de cuisson sans ustensiles ou avec des ustensiles vides. · Assurez-vous que toutes les commandes se trouvent à la position Off (Arrêt) lorsque l'appareil n'est pas en cours d'utilisation.
-
Page 25: Installation
INSTALLATION Le branchement électrique de cette table de cuisson doit être effectué par un personnel du service agrée ou par un électricien qualifié, selon les instructions contenues dans ce guide et conformément aux réglementations en vigueur. · Avant toute installation, assurez-vous que les conditions de distribution et le réglage de l'appareil sont compatibles. - Page 26 · Appliquez le ruban d'étanchéité autocollant unilatéral fourni tout autour du côté inférieur de la surface de cuisson, le long du côté extérieur du panneau vitrocéramique. Ne l'étirez pas. · Vissez les 4 crochets de montage du plan de travail sur les parois latérales du produit.
-
Page 27: Branchement Electrique
BRANCHEMENT ELECTRIQUE Branchement électrique de votre table de cuisson · Avant de procéder au branchement électrique, vérifiez que la capacité de transport actuelle du système et la prise sont appropriées pour la puissance nominale maximale de la table de cuisson. ·... -
Page 28: Utilisation
UTILISATION Pour faire fonctionner votre appareil, appuyez sur les touches et les fonctions sélectionnées seront confirmées par des affichages et des signaux acoustiques. REMARQUE: Reportez-vous à la section relative au REGLAGE DE LA TABLE DE CUISSON dans le cas où vous voyez un H clignotant dans l'un des affichages. - Page 29 Allumer/Eteindre l'appareil. Si l'appareil est en mode de veille, vous pouvez le mettre en mode de fonctionnement si vous appuyez sur la touche On/Off (Marche/Arrêt) pendant au moins 1 seconde. Un bip sera émis pour indiquer que l'opération a été effectuée avec succès. Sur tous les éléments chauffants, un ´0` apparaît et tout point décimal de l'élément chauffant clignote.
- Page 30 Réglez le niveau de cuisson avec ou sans pompe à chaleur Tous les éléments chauffants comportent la fonctionnalité de la pompe à chaleur. Si la pompe à chaleur est active, le fonctionnement de l'élément chauffant se fera alors avec une puissance maximale pendant la période de la durée de la pompe à...
- Page 31 Vous pouvez également éteindre l'élément chauffant en réduisant le réglage de chaleur à ´0`. Lorsque l'écran d'affichage indique 0`, le point décimal de l'élément chauffant sélectionné s'éteindra aussi. S'il y a un reste de chaleur résiduelle pour cet élément chauffant, celui-ci sera indiqué...
-
Page 32: Fonctions Securitaire Du Bouton De Commande
FONCTIONS SECURITAIRE DU BOUTON DE COMMANDE Les fonctions sécuritaires suivantes sont disponibles pour éviter les fonctionnements non voulus de la commande de la table de cuisson. Coupure du capteur de sécurité Pour éviter au capteur de l'appareil de rencontrer un fonctionnement involontaire et hasardeux, un détecteur de contrôle est inclus. - Page 33 Après refroidissement de la table de cuisson, ´t` est effacé et la commande de ladite table passe en mode de veille. Ceci signifie que l'utilisateur peut réactiver l'appareil en appuyant sur la touche Fonctions de la chaleur résiduelle Après que la table de cuisson soit éteinte à la fin de l'opération, il y a une quantité...
-
Page 34: Nettoyage Et Entretien
NETTOYAGE ET ENTRETIEN Les ustensiles de cuisson aux fonds durs ne doivent pas être utilisés dans la mesure où ils peuvent rayer la surface en céramique. Le fond de l'ustensile de cuisson doit être aussi épais et plat que possible. Avant toute utilisation, assurez-vous que les fonds de l'ustensile en question sont propres et secs. - Page 35 Il s'agit notamment des produits comme le sucre/les mélanges de sirop qui pourraient ronger en permanence la surface de la table de cuisson si un nettoyage préalable n'est pas effectué avant la prochaine utilisation. Si l'un de ces produits a fondu sur la surface en céramique, vous devez l'enlever immédiatement (lorsque la surface est encore chaude) en utilisant un grattoir afin d'éviter tout dommage permanent à...
- Page 36 Mise au rebut Les appareils électriques et électroniques ne doivent pas être mis au rebut avec les déchets ménagers. Veuillez vous renseigner auprès du détaillant chez qui vous avez acheté ce produit afin d'en savoir plus sur les consignes relatives à...
- Page 37 PCH460T-E Bedienungs- und Installationsanleitung Glaskeramik-Einbauherd...
- Page 38 INHALT 1. Übersicht über das Gerät 2. Sicherheitshinweise 3. Installation 4. Elektrischer Anschluss 5. Betrieb 6. Touch Control-Sicherheitsfunktionen 7. Reinigung und Pflege...
- Page 39 Lieber Kunde! Vielen Dank für den Kauf unseres Proline-Kochfeldes. Die Sicherheitshinweise und Empfehlungen in dieser Anleitung dienen Ihrer eigenen Sicherheit und der Sicherheit anderer Personen. Hier erfahren Sie auch, wie Sie die Funktionen Ihres neuen Gerätes optimal nutzen können. Bitte bewahren Sie diese Anleitung an einem sicheren Ort auf. Eventuell möchten Sie zukünftig darin nachschlagen - zum Beispiel, wenn Fragen...
-
Page 40: Übersicht Über Das Gerät
Übersicht über das Gerät Vor der ersten Inbetriebnahme Lesen Sie die Anleitung aufmerksam durch, bevor Sie das Gerät installieren und benutzen. Vergewissern Sie sich nach dem Auspacken, dass nichts beschädigt ist. Im Zweifelsfall wenden Sie sich bitte an Ihren Händler oder an einen qualifizierten Techniker. Entfernen Sie sämtliches Verpackungsmaterial, lassen Sie das Verpackungsmaterial (Kunststoffbeutel, Bänder und ähnliche Dinge) nicht in Kinderhände geraten;... -
Page 41: Sicherheitshinweise
Sicherheitshinweise Bitte halten Sie sich an diese Hinweise. Andernfalls werden jegliche Schäden, die durch unangemessene, falsche oder fahrlässige Nutzung sowie durch falschen Anschluss oder unsachgemäße Installation entstehen, nicht durch die Garantie abgedeckt. · Dieses Gerät ist ausschließlich für den Einsatz im Haushalt ausgelegt; jeglicher anderer Einsatz kann die Garantie erlöschen lassen und kann darüber hinaus gefährlich sein. - Page 42 · Geben Sie gut Acht, wenn Sie kleine Haushaltsgeräte wie Bügeleisen in der Nähe der Glaskeramik verwenden. · Benutzen Sie die Kochzonen nicht, wenn sich leeres Kochgeschirr oder überhaupt kein Kochgeschirr darauf befindet. · Vergewissern Sie sich, dass sämtliche Bedienelemente abgeschaltet sind, wenn Sie das Gerät nicht benutzen.
-
Page 43: Installation
Installation Der elektrische Anschluss dieses Kochfeldes sollte von einer autorisierten Fachkraft oder einem qualifizierten Elektriker ausgeführt werden; dabei sind die Anweisungen in dieser Anleitung sowie zutreffende Richtlinien zu beachten. · Überzeugen Sie sich vor der Installation, dass örtliche Stromversorgung und Einstellung des Gerätes aufeinander abgestimmt sind. - Page 44 · Verlegen Sie das einseitig klebende Dichtungsband um die gesamte äußere Unterseitenkante des Kochfeldes. Dehnen Sie das Band nicht. · Schrauben Sie die 4 Arbeitsplattenklemmen an die Seitenflächen des Produktes. Arbeitsplattenklemme...
-
Page 45: Elektrischer Anschluss
Elektrischer Anschluss Elektrischer Anschluss · Bevor Sie mit dem elektrischen Anschluss beginnen, überzeugen Sie sich zunächst davon, dass Stromversorgung und Steckdose für den maximalen Leistungsbedarf des Kochfeldes ausgelegt sind. · Die elektrische Installation im Haus sowie der Netzstecker müssen geerdet sein und den Vorschriften zur elektrischen Sicherheit entsprechen. -
Page 46: Betrieb
Betrieb Das Gerät wird über Sensortasten ("Touch Control") bedient, sämtliche Funktionen werden durch optische und akustische Signale bestätigt. HINWEIS: Falls in den Anzeigen ein blinkendes "H" angezeigt werden sollte, lesen Sie bitte im Abschnitt "Kochfeld zurücksetzen" nach. Kochste lle Dezimalpu nkt einsch alten/a usschalten K ochstufenan zei ge Kochstufe neinstellung:... - Page 47 Gerät ein- und ausschalten. Wenn sich das Gerät im Bereitschaftsmodus befindet, können Sie es in den Betriebsmodus versetzen, indem Sie die Ein-/Austaste mindestens 1 Sekunde lang gedrückt halten. Der Vorgang wird durch ein akustisches Signal bestätigt. Bei sämtlichen Kochstellen wird die Kochstufe 0 angezeigt, die Dezimalpunkte in sämtlichen Kochstufenanzeigen blinken.
- Page 48 Kochstufe mit und ohne Zusatzhitze einstellen Sämtliche Kochstellen sind mit einer Zusatzhitze-Funktion ausgestattet. Wenn die Zusatzhitze aktiv ist, heizt sich die Kochstelle über einen bestimmten Zeitraum, der von der gewählten Kochstufeneinstellung abhängt, mit Maximalleistung auf. Dies wird durch ein blinkendes A, das abwechselnd mit der Kochstufeneinstellung angezeigt wird (z.
- Page 49 Sie können eine Kochstelle auch abschalten, indem Sie die Kochstufe auf 0 reduzieren. Wenn "0" in der Kochstufenanzeige angezeigt wird, erlischt auch der Dezimalpunkt in der Anzeige der ausgewählten Kochstelle. Falls bei dieser Kochstelle noch Restwärme vorhanden ist, wird dies durch ein blinkendes "H"...
-
Page 50: Touch Control-Sicherheitsfunktionen
Touch Control-Sicherheitsfunktionen Die folgenden Sicherheitsfunktionen wirken, um unbeabsichtigte Betätigung der Kochfeld-Bedienelemente zu unterbinden. Sensor-Sicherheitsabschaltung Um unerwünschte, zufällige Betätigung von Sensortasten zu vermeiden, werden die Sensortasten auf bestimmte Weise überwacht. Falls eine oder mehrere Tasten länger als 12 Sekunden lang betätigt werden, wird dieser Zustand (zum Beispiel ausgelöst durch Kochgeschirr, das auf der Sensortaste abgestellt wurde oder Fehlfunktionen des Sensors) durch ein akustische Signal angezeigt und das Gerät abgeschaltet. - Page 51 Nachdem das Kochfeld abgekühlt ist, verschwindet das "t" aus der Anzeige, das Gerät wechselt in den Bereitschaftsmodus. Dies bedeutet, dass Sie das Gerät durch Berühren von wieder einschalten können. Restwärmeanzeige Wenn das Kochfeld nach dem Einsatz abgeschaltet wird, bleibt die Glaskeramik noch einige Zeit heiß...
-
Page 52: Reinigung Und Pflege
Reinigung und Pflege Kochgeschirr mit unebenem Boden (oder mit Rückständen am Boden) sollte nicht benutzt werden, da dies die Glaskeramik v erkratzen kann. Der Boden des Kochgeschirrs sollte so dick und flach wie nur möglich sein. Bevor Sie Kochgeschirr benutzen, überzeugen Sie sich davon, dass der Boden sauber und trocken ist. Stellen Sie das Kochgeschirr grundsätzlich zuerst auf die Kochstelle auf, bevor Sie sie einschalten. - Page 53 Dies gilt insbesondere für Zucker, Sirup und ähnliche stark zuckerhaltige Lebensmittel, die irreparable Beschädigungen der Oberfläche verursachen können, wenn sie sich einbrennen. Falls solche Produkte auf der Glaskeramik schmelzen, sollten diese sofort (solange die Glaskeramik noch heiß ist) mit einem Schaber entfernt werden, damit es nicht zu irreparablen Beschädigungen der Oberfläche kommt.
- Page 54 Entsorgung Elektrische und elektronische Altgeräte dürfen nicht mit dem regulären Hausmüll entsorgt werden. Zur Entsorgung wenden Sie sich bitte an den Händler, bei dem Sie das Gerät erworben haben. Verpackungsmaterialien sollten über örtliche Recycling- Sammelstellen entsorgt werden. Falls etwas nicht funktionieren sollte Falls Sie in Großbritannien leben und Fragen zu Ihrem Gerät haben sollten, können Sie unseren Kundendienst während der üblichen Bürozeiten erreichen: 0113 2793520.
- Page 55 PCH460T-E GEBRUIKS- EN INSTALLATIEHANDLEIDING VITROKERAMISCHE INBOUWKOOKPLAAT...
- Page 56 INHOUD 1. BESCHRIJVING VAN DE KOOKPLAAT 2. VEILIGHEIDSINSTRUCTIES 3. INSTALLATIE 4. ELEKTRISCHE AANSLUITING 5. GEBRUIK 6. TOUCH CONTROL VEILIGHEIDSFUNCTIES 7. REINIGING EN ONDERHOUD...
- Page 57 Geachte klant, Wij danken u voor de aankoop van deze Proline Kookplaat. De veiligheidsmaatregelen en aanbevelingen in deze handleiding zijn bedoeld voor uw eigen veiligheid en die van anderen. De handleiding biedt u tevens een middel om de functies van het apparaat ten volle te kunnen gebruiken.
- Page 58 BESCHRIJVING VAN DE KOOKPLAAT VÓÓR HET EERSTE GEBRUIK Gelieve de instructies vóór gebruik of installatie van het apparaat zorgvuldig te lezen. Controleer na het uitpakken van het apparaat of het niet beschadigd is. In geval van twijfel: het apparaat niet in gebruik nemen en contact opnemen met uw leverancier of een gekwalificeerd technicus.
- Page 59 VEILIGHEIDSINSTRUCTIES Gelieve deze instructies op te volgen. Indien u de instructies niet opvolgt, wordt schade die is ontstaan door onjuist, verkeerd of onoplettend gebruik of een verkeerde aansluiting of installatie niet door de garantie gedekt. · Dit apparaat is uitsluitend bedoeld voor huishoudelijk gebruik. Gebruik voor andere doeleinden kan gevaarlijk zijn en de garantie doen vervallen.
- Page 60 · Wees voorzichtig met het gebruik van kleine huishoudelijke apparatuur, zoals strijkijzers in nabijheid van het apparaat. · De kookzones niet zonder of met leeg kookgerei gebruiken. · Zorg ervoor dat alle bedieningstoetsen uitgeschakeld zijn wanneer het apparaat niet wordt gebruikt. ·...
- Page 61 INSTALLATIE De elektrische aansluiting van deze kookplaat mag uitsluitend worden uitgevoerd door erkend onderhoudspersoneel of een gekwalificeerd elektricien en overeenkomstig de instructies van deze handleiding en conform de geldende voorschriften. · Vóór installatie controleren of de plaatselijke distributie-omstandigheden en de afstelling van het apparaat compatibel zijn. ·...
- Page 62 · Breng de bijgeleverde eenzijdige zelfklevende tape aan rond de onderkant van het kookoppervlak, langs de buitenrand van de keramische plaat. Rek het niet uit. · Schroef de 4 bevestigingshaakjes voor het werkblad aan de zijwanden van het product. bevestigingshaakje werkblad...
- Page 63 ELEKTRISCHE AANSLUITING Elektrische aansluiting van de kookplaat · Voordat u verder gaat met de elektrische aansluiting, eerst controleren of het actuele draagvermogen van het systeem en de stekker geschikt zijn voor de maximum spanning van de kookplaat. · De elektrische huisinstallatie en de elektrische stekker die wordt gebruikt moeten geaard zijn en conform de veiligheidsvoorschriften zijn aangesloten.
- Page 64 GEBRUIK Het apparaat wordt bediend via tiptoetsen en de functies worden via het display en geluidssignalen bevestigd. OPMERKING: Zie het hoofdstuk RESETTEN VAN DE KOOKPLAAT als u in het scherm een knipperende H ziet. Kookzone Actieve/in actie Ko mma display ve koo kzone In dicator Warmtestan d /...
- Page 65 Zet het apparaat aan / uit. Als het apparaat in standby staat, wordt deze bedieningsstand gezet door ten minste 1 seconde op de Aan/Uit knop te drukken. Een piepje geeft aan dat dit is gelukt. Op alle kookzones verschijnt een '0' en alle komma's van de kookzones knipperen.
- Page 66 Instellen Kookniveau Met en Zonder Aankookbooster Alle kookzones zijn uitgerust met de functie aankookbooster. Als de aankookbooster actief is, wordt de betreffende kookzone bepaalde tijd op het hoogste niveau ingeschakeld, afhankelijk van de geselecteerde warmtestand. Dit wordt in het kookzonedisplay aangegeven door een knipperende 'A' die wordt afgewisseld met de waarde van de warmtestand (bijv.
- Page 67 De kookzone kan ook worden uitgeschakeld door de warmtestand naar '0' te brengen. Als het Kookzonedisplay ´0` aangeeft, wordt ook de Komma van de geselecteerde kookzone uitgeschakeld. Als deze kookzone nog heet is, wordt restwarmte aangegeven door een stilstaande 'H' in het overeenkomstige kookzonedisplay. Toetsvergrendeling De functie toetsvergrendeling wordt gebruikt om het apparaat te blokkeren en tijdens bediening in een veiligheidsstand te zetten.
- Page 68 TOUCH CONTROL VEILIGHEIDSFUNCTIES Het apparaat is voorzien van de volgende beveiligingen om onbedoelde bediening van de kookplaat te voorkomen. Sensorbeveiliging Om te voorkomen dat het apparaat door ongewenste, willekeurig sensorbediening, is het voorzien van sensorbewaking. Als één of meer toetsen langer dan 12 seconden worden ingedrukt, geeft de sensorbewaking een piepsignaal.
- Page 69 Nadat de kookplaat is afgekoeld verdwijnt 't' en gaat de bediening van de kookplaat over in de standby-stand. Dit betekent dat de gebruiker het apparaat opnieuw kan activeren door aan te raken. Restwarmte-functies Als de kookplaat na het koken wordt is uitgeschakeld, wordt er warmte opgeslagen in het keramische glas.
-
Page 70: Reiniging En Onderhoud
REINIGING EN ONDERHOUD Gebruik nooit kookgerei met ruwe bodem aangezien dit krassen kan veroorzaken op het keramisch oppervlak. De onderkant van het kookgerei moet zo dik en plat mogelijk zijn. Controleer voor het gebruik of de onderkant van het kookgerei schoon en droog is. Plaats het kookgerei altijd op de kookzone voordat u deze ingeschakeld. - Page 71 Dit is het in het bijzonder van toepassing op suiker/siroopmengsels die het oppervlak van de kookplaat permanent kunnen beschadigen wanneer ze inbranden. Als één van deze producten op het keramisch oppervlak gesmolten is, moet u dit onmiddellijk met een schraper verwijderen (zolang de plaat nog heet is) om permanente beschadiging van de kookplaat te voorkomen.
- Page 72 Afvoeren Oude elektrische en elektronische apparaten mogen niet met het huishoudelijk afval worden afgevoerd. Raadpleeg de winkelier waar u dit apparaat heeft gekocht voor instructies voor het afvoeren van het apparaat. Verpakkingsmateriaal moet via de plaatselijke dienst worden gerecycled. Als iets niet lijkt te werken Als er iets met uw apparaat aan de hand is dat u niet begrijpt en u woont in het Verenigd Koninkrijk, bel dan onze hulplijn tijdens kantooruren via: 0113 2793520 Als u service nodig heeft, bel dan het nummer op...
- Page 73 PCH460T-E ISTRUZIONI PER L'INSTALLAZIONE ED IL FUNZIONAMENTO PIANO COTTURA IN VETROCERAMICA INCASSATO...
- Page 74 INDICE 1. DESCRIZIONE DEL PIANO COTTURA 2. ISTRUZIONI PER LA SICUREZZA 3. INSTALLAZIONE 4. COLLEGAMENTI ELETTRICI 5. USO 6. FUNZIONI DI SICUREZZA TOUCH CONTROL 7. PULIZIA E MANUTENZIONE...
- Page 75 Gentile Cliente, Grazie per aver acquistato il piano cottura Proline. Le precauzioni e i consigli per la sicurezza in queste istruzioni sono per la sicurezza propria e quella degli altri. Offrono anche uno strumento per utilizzare al meglio le funzioni offerte da questo elettrodomestico.
- Page 76 DESCRIZIONE DEL PIANO COTTURA PRIMA DI USARLO LA PRIMA VOLTA Leggere le istruzioni con attenzione prima di installare e usare questa apparecchiatura. Dopo aver tolto l'imballaggio, assicurarsi che l'elettrodomestico non sia danneggiato. In caso di dubbi, non usare l'elettrodomestico e contattare il fornitore o un tecnico qualificato.
- Page 77 ISTRUZIONI PER LA SICUREZZA Rispettare queste istruzioni. In caso contrario, i danni risultanti da un uso improprio, scorretto o negligente o da collegamento o installazioni non adatti non sono coperti dalla garanzia. · Questo elettrodomestico è inteso solo per uso domestico, ogni altro uso potrebbe invalidare la garanzia e potrebbe essere pericolo.
- Page 78 · Fare attenzione quando si usano piccoli elettrodomestici, come ferri da stiro, vicino agli elementi. · Non usare le aree di cottura con pentole vuote o senza pentole. · Assicurarsi che tutti i comandi siano in posizione off quando non sono in uso.
- Page 79 INSTALLAZIONE La connessione elettrica di questo piano cottura deve essere eseguita da un tecnico autorizzato per l'assistenza o da un elettricista qualificato, secondo le istruzioni in questa guida e in conformità con i regolamenti correnti. · Prima dell'installazione, assicurarsi che le condizioni locali di distribuzione e il regolamento dell'elettrodomestico siano compatibili.
- Page 80 · Applicare il nastro sigillante autoadesivo in dotazione intorno al bordo inferiore della superficie del piano cottura lungo tutto il bordo esterno del pannello in vetroceramica. Non tirarlo troppo. · Avvitare le 4 staffe per il montaggio del piano di lavoro sulle pareti laterali del prodotto.
- Page 81 COLLEGAMENTI ELETTRICI Collegamento elettrico del piano cottura · Prima di procedere con la connessione elettrica, verificare che la capacità elettrica del sistema e la presa siano adeguate al valore massimo di alimentazione del piano cottura. · L'installazione elettrica domestica e la presa della corrente elettrica devono essere messe a terra conformi ai regolamenti di sicurezza.
- Page 82 L'apparecchio è azionato grazie ai pulsanti e le funzioni sono confermate dai display e dai segnali acustici. NOTA: vedere la sezione sulla REIMPOSTAZIONE DEL PIANO COTTURA se si vede una H che lampeggia in uno dei display. Displa y Attiva /disatti va Pu nto risca ldatore riscaldatore...
- Page 83 Accensione/spegnimento dell'apparecchio. Se l'apparecchio è in modalità stand-by, viene portato in modalità operativa premendo il pulsante di accensione/spegnimento per almeno 1 secondo. Un bip indica che l'operazione è riuscita. Su tutti i riscaldatori compare uno '0' e ogni punto decimale del riscaldatore lampeggia.
- Page 84 Impostazione del livello di cottura con e senza la funzione boost calore Tutti i riscaldatori sono dotati con la funzione boost calore. Se la funzione boost calore è attiva, il riscaldatore funzionerà con la massima potenza per il periodo indicato, che dipende dall'impostazione di calore selezionata.
- Page 85 Il riscaldatore può anche essere spento riducendo l'impostazione del calore a '0'. Quando il display del riscaldatore indica ´0`, anche il punto decimale del riscaldatore selezionato si spegne. Se c'è calore residuo per questo riscaldatore, ciò sarà indicato da un display statico 'H' nel display di impostazione del calore.
- Page 86 FUNZIONI DI SICUREZZA TOUCH CONTROL Le funzioni di sicurezza che seguono sono disponibili per evitare operazioni non volute dei comandi del piano cottura. Isolamento di sicurezza del sensore Per evitare che l'apparecchio esegua operazioni indesiderate e casuali, è incluso il monitoraggio del sensore. Se uno o più...
- Page 87 Dopo che il piano cottura si è raffreddato, la 't' scompare e il piano cottura entra in modalità stand-by. Questo vuol dire che l'utente può riattivare l'apparecchio toccando Funzioni calore residuo Dopo che il piano cottura viene spento quando la cottura è finita, c'è del calore che resta nel vetroceramica, e questo calore è...
-
Page 88: Pulizia E Manutenzione
PULIZIA E MANUTENZIONE Pentole con fondi duri non devono essere usate poiché possono graffiare la superficie in ceramica. Il fondo delle pentole deve essere quanto più spesso e piatto possibile. Prima dell'uso assicurarsi che i fondi siano puliti e asciutti. Mettere sempre le pentole sull'area per la cottura prima dell'accensione. - Page 89 Questo vale soprattutto per le miscele di zucchero/sciroppi che potrebbero macchiare in modo permanente la superficie del piano cottura se lasciate bruciare. Se questi prodotti si sono fusi sulla superficie in ceramica, è necessario rimuoverli immediatamente (quando la superficie è ancora calda) usando un raschietto per evitare danni permanenti alla superficie del piano cottura (disponibile presso il rivenditore dove è...
- Page 90 Smaltimento I rifiuti di prodotti elettrici ed elettronici non devono essere smaltiti con quelli domestici. Chiedere al rivenditore presso il quale è stato acquistato l'articolo informazioni sullo smaltimento. I materiali di imballaggio devono essere riciclati usando le strutture locali. Se qualcosa non funziona Se c'è...
- Page 127 PCH460T-E INSTRUCCIONES DE INSTALACIÓN Y FUNCIONAMIENTO HORNILLA VITROCERÁMICA INCORPORADA...
- Page 128 ÍNDICE 1. DESCRIPCIÓN DE LA HORNILLA 2. INSTRUCCIONES DE SEGURIDAD 3. INSTALACIÓN 4. CONEXIÓN ELÉCTRICA 5. USO 6. FUNCIONES DE SEGURIDAD DEL CONTROL MANUAL 7. LIMPIEZA Y MANTENIMIENTO...
- Page 129 Estimado cliente, Le agradecemos la adquisición de esta Hornilla de Cocina Proline. Las precauciones y recomendaciones de seguridad contenidas en estas instrucciones son para su propia seguridad y la de las demás personas. Le proporcionan también los medios para hacer uso pleno de las características ofrecidas por el electrodoméstico.
- Page 130 DESCRIPCIÓN DE LA HORNILLA ANTES DE UTILIZARLA POR PRIMERA VEZ Lea las instrucciones cuidadosamente antes de instalar o utilizar el aparato. Después de desempacar el aparato, asegúrese de que no esté dañado. En caso de duda, no utilice el aparato y contacte a su proveedor o técnico calificado.
- Page 131 INSTRUCCIONES DE SEGURIDAD Por favor cumpla con estas instrucciones. Si usted no lo hace, cualquier daño resultante de un uso negligente, incorrecto o no apropiado de conexión o instalación no estará cubierto por la garantía. · Este aparato debe utilizarse únicamente para el fin para el que fue diseñado, cualquier otro uso puede invalidar la garantía y ser peligroso.
- Page 132 · Tenga cuidado cuando utilice aparatos electrodomésticos pequeños, tales como planchas, cerca de los elementos. · No utilice las zonas de cocción con utensilios de cocina vacíos o sin utensilios de cocina. · Asegúrese de que todos los controles estén en posición de apagado cuando no los utilice.
- Page 133 INSTALACIÓN La conexión eléctrica de esta hornilla debe llevarse a cabo por personal de servicio autorizado o un electricista calificado, de acuerdo con las instrucciones de esta guía y en conformidad con las regulaciones vigentes. · Antes de la instalación, asegúrese de que las condiciones de distribución locales y el ajuste del electrodoméstico sean compatibles.
- Page 134 · Aplique la cinta de sellado de un solo lado autoadhesiva provista alrededor de todo el borde inferior de la superficie de cocción a lo largo del borde externo del panel vitrocerámico. No la estire. · Atornille los 4 soportes de montaje de la superficie de trabajo en las paredes laterales del producto.
- Page 135 CONEXIÓN ELÉCTRICA Conexión eléctrica de su hornilla · Antes de proceder con la conexión eléctrica, verifique que la capacidad de transporte de corriente del sistema y el tomacorriente sean adecuados para la máxima potencia de salida de la hornilla. · La instalación eléctrica de la residencia y enchufe de energía eléctrica en uso deben estar conectados a tierra y cumplir con las normas de seguridad.
- Page 136 El aparato es operado presionando botones y las funciones se confirman por visualizaciones y señales acústicas. NOTA: Vea la sección de REINICIO DE HORNILLA si ve una H brillando en cualquiera de las pantallas. Estufa Pu nto Pantalla de la Activa da/Desactiva da Decimal Estufa...
- Page 137 Apagando/Encendiendo el aparato. Si el aparato está en modo de reposo, se coloca en modo de operación presionando el botón de Encendido/Apagado por lo menos durante 1 segundo. Un pitido indica una operación exitosa. En todas las estufas aparece un "0" y un Punto Decimal de la estufa brilla. Si no hay operación dentro de 10 segundos, se apagará...
- Page 138 Ajuste de Nivel de Cocción Con o Sin Intensificación de Calor Todas las estufas están equipadas con una función de intensificación de calor. Si la intensificación de calor se encuentra activa, entonces la hornilla funcionará con la máxima potencia para el período de tiempo de intensificación de calor, el cual dependerá...
- Page 139 La estufa también se puede apagar reduciendo el ajuste calor a "0". Cuando la Pantalla de la Estufa indica "0" el Punto Decimal de la estufa seleccionada también se apagará. Si aún queda un calor residual para esta estufa, esto se indicará por una "H"...
- Page 140 FUNCIONES DE SEGURIDAD DEL CONTROL MANUAL Las siguientes funciones de seguridad están disponibles para evitar operaciones inesperadas del control de la hornilla. Sensor de Corte de Seguridad Para prevenir al aparato de una operación no deseada y aleatoria del sensor, se incluye un control del sensor. En caso de que uno o más botones se presionen por más de 12 segundos, el sensor que controla la rutina indica con un pitido dicha operación (una olla u otro objeto colocado sobre el botón, falla del sensor, etc.) y apaga...
- Page 141 Luego de que la hornilla se enfría las pantallas con la "t" se borran y el control de la hornilla entra al modo de reposo. Esto significa que el usuario puede reactivar el aparato tocando Funciones de Calor Residual Luego de que se apaga la hornilla cuando se termina la cocción, queda algo de calor almacenado en el cristal vitrocerámico denominado calor residual.
-
Page 142: Limpieza Y Mantenimiento
LIMPIEZA Y MANTENIMIENTO No de deben utilizar utensilios de cocina con fondos ásperos ya que estos pueden rasgar la superficie de la cerámica. El fondo del utensilio de cocina debe estar tan grueso y plano como sea posible. Antes de utilizarse, asegúrese de que los fondos de los utensilios estén limpios y secos. - Page 143 Esto sobre todo en el caso de las mezclas de almíbar/azúcar, que podrían dejar marcas permanentes en la superficie del aparato si se deja que se queme. Si cualquiera de estos productos se ha derretido sobre la superficie cerámica, debe quitarlos inmediatamente (cuando la superficie aún está caliente) utilizando una espátula para evitar cualquier daño permanente a la superficie de la hornilla (disponible en la tienda donde compró...
- Page 144 Eliminación Los productos eléctricos y electrónicos de desecho no deben arrojarse a la basura junto con los residuos caseros. Solicite las instrucciones para el desecho al establecimiento en donde adquirió el aparato. Los materiales de embalaje deben reciclarse a través de las instalaciones locales.
Need help?
Do you have a question about the PCH460T-E and is the answer not in the manual?
Questions and answers