Table of Contents
Advertisement
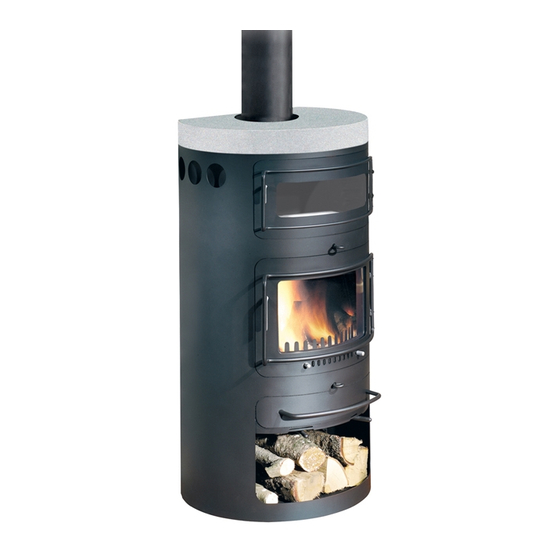
HWAM Classic 7 Wood Cook Stove
User's Manual and Installation Guide
HWAM Classic 7 with baking
HWAM Classic 7 with soapstone top
door
and baking door
This manual covers all versions of the HWAM Classic 7
Manufactured by:
HWAM AS
Nydamsvej 53
Hørning, 8362
Denmark
TEL: +45 86 92 18 33
Web Site: www.hwam.com
Distributed in the United States and Canada by:
HWAM North America
211 Reservoir Rd.
Plymouth, New Hampshire 03264
TEL: 603-236-7045
www.hwamna.com
Advertisement
Table of Contents

Related Manuals for HWAM Classic 7


Summary of Contents for HWAM Classic 7
- Page 1 HWAM Classic 7 Wood Cook Stove User’s Manual and Installation Guide HWAM Classic 7 with baking HWAM Classic 7 with soapstone top door and baking door This manual covers all versions of the HWAM Classic 7 Manufactured by: HWAM AS Nydamsvej 53 Hørning, 8362 Denmark TEL: +45 86 92 18 33 Web Site: www.hwam.com...
-
Page 2: Table Of Contents
Table of Contents 1. Introduction ................3 WARNINGS ................3 2. Installation ................4 Pre Installation Check List ............5 Clearance to combustibles ...........6 Floor protection ..............6 Ceiling Height ..............6 Combustible Wall Clearance for top vent installation ..6 Combustible Wall Clearance for rear vent installation ..7 Draft Requirements ..............7 Chimney Installation .............8 Top vent installation ..............9... -
Page 3: Introduction
1. I ntroduction We welcome you as a new owner of a HWAM wood-burning stove. This manual will explain the installation, operation and maintenance of the HWAM wood-burning stove. Please familiarize yourself with the owner’s manual before operating your stove and save the manual for future reference. -
Page 4: Installation
Chimney fire damage and repair normally is covered by homeowner insurance policies. 2. I nstallation WARNING IF YOUR HWAM WOOD-BURNING STOVE IS NOT PROPERLY INSTALLED, OPERATED AND MAINTAINED, A HOUSE FIRE MAY RESULT. FOR YOUR SAFETY, FOLLOW ALL INSTALLA- TION, OPERATION AND MAINTENANCE DIRECTIONS. Page 4... -
Page 5: Pre Installation Check List
Building Heating Appliance, UL 103, or 2) a code-approved masonry chimney with a flue liner. Due to the height if the HWAM Classic 7 flue outlet it is not possible to connect the Classic 7 through an existing masonary or factory built fireplace. -
Page 6: Clearance To Combustibles
inspected by a local fire marshal or qualified installer. Remember that the chimney and its location on the roof heavily influents the stoves performance. An oversized flue may not provide effective draft and a flue liner may be required. (Observe draft requirements). Consult your dealer or qualified installer before final selection is made. -
Page 7: Combustible Wall Clearance For Rear Vent Installation
Combustible Wall Clearance for top vent installation In placing to stove the following clearances to combustible materials must be kept. Combustible Wall Clearance for rear vent installation In placing to stove the following clearances to combustible materials must be kept. Refer to the chimney connector manufacturer’s instructions concerning installation of listed connector pipe, wall thimble and chimney. -
Page 8: Draft Requirements
Draft Requirements HWAM Classic 7 is only one component of the total system. The venting system is equally important for achieving the required flow of combustion air to the firebox and for safely removing unwanted combustion by-products from the appliance. If the venting system’s design does not promote these ends, the system may not function properly. -
Page 9: Top Vent Installation
24 gauge black steel or 26 gauge blued steel Aluminum and galvanized steel pipe is not acceptable for use with the HWAM wood-burning stove. These materials cannot withstand the extreme temperatures of a wood fire and can give off toxic fumes when heated. -
Page 10: Rear Vent Installation
18" below a combustible ceiling. From the factory the stove is prepared for top mounting of the flue collar, but all HWAM wood-burning stoves have an optional rear flue outlet, therefore the flue collar can be fitted either on the top or at the rear as required. -
Page 11: Mounting The Connector Pipe
Required installation components: Chimney cap Insulated chimney Tee section Tee support bracket Chimney connector pipe Wall thimble Wall strap Mounting the connector pipe to the stove Pipe is placed in smoke outlet. The 3 screws are screwed into the pipe to make a mark in the pipe. - Page 12 Combustible Wall Chimney Connector Pass-Throughs Method A 12” (304.8 mm) Clearance to Combustible Wall Member: Using a minimum thickness 3.5" (89 mm) brick and a 5/8" (15.9 mm) minimum wall thickness clay liner, construct a wall pass-through. The clay liner must conform to ASTM C315 (Standard Specification for Clay Fire Linings) or its equivalent.
- Page 13 Method C 6" (152.4 mm) Clearance to Combustible Wall Member: Starting with a minimum 24 gage (.024" [.61 mm]) 6" (152.4 mm) metal chimney connector, and a minimum 24 gage ventilated wall thimble which has two air channels of 1 in. (25.4 mm) each, construct a wall pass-through.
-
Page 14: Chimney Height Requirements
Notes Connectors to a masonry chimney, excepting method B, shall extend in one continuous section through the wall pass-through system and the chimney wall, to but not past the inner flue liner face. A chimney connector shall not pass through an attic or roof space, closet or similar concealed space, or a floor, or ceiling. - Page 15 Page 15...
-
Page 16: Check The Loose Parts
The smoke outlet is therefore hidden behind the plate. Cover plate Your HWAM wood-burning stove is supplied with a loose cover plate for the shaking grate. .This is a 3 mm thick iron plate. .It is placed on top of the shaking grate and prevents the embers from falling into the ash pan. - Page 17 Drawing A1: HWAM Classic 7 with baking door Exploded view of the Skamol re- fractory plates. Skamol is a very heat resistant and highly insulat- ing material made of processed vermiculite. This material is ca- pable of service temperatures up to 1150 C (2101 F) It is however somewhat fragile.
- Page 18 Handle The handle for the door is removable. Please note that it will fall off when the door is closed. Hang the handle on the lower door frame when not in use. Do not hang the handle on the oven door frame. It may become too hot. Always use a stove mitt when refueling the stove.
-
Page 19: Instructions For Use
Automatic Control (Drawing G) Brilliant solutions are often simple little details which nevertheless make a huge difference in our everyday lives. HWAM’s patented automatic system consists of a small spring which automatically regulates the supply of air to the combustion chamber. -
Page 20: Baffle Plates & Skamol Refractory
Skamol Skamol refractory plates are delivered in all HWAM wood-burning stoves. When mounting a baffle plate place it according to the description on page 25: Removing Baffle for Cleaning. Make sure that it is placed symmetrically in the stove, i.e. with even amounts of free air space on each side. -
Page 21: Room Ventilation & Draft Requirements
Please refer to your local building codes. Draft Requirements The HWAM wood-burning stove is only one component of the total system. The venting system is equally important for achieving the required flow of combustion air to the firebox and for safely removing unwanted combustion by-products from the appliance. -
Page 22: Operation
(If your wood supply is not seasoned, ask your authorized HWAM dealer where to obtain seasoned fuel in your area). Wood should be stored in a dry place for at least two years before being used for fuel. Some trees have very high moisture content and it is necessary to thoroughly dry the wood. -
Page 23: Starting The Stove
Starting the Stove Do not elevate the fire on a grate. Build fire directly on the hearth inside the stove. Open the door and pull out the by-pass damper (4) Both air controls(1 and 2) at the base of the stove as far right as possible and fully open the air wash control in the in door (3). -
Page 24: Maintenance
Insufficient firing If the fireproof materials in the combustion chamber are blackened after a heating session, the stove is polluting, and the automatic air flow regulation system is not functioning properly. It will be necessary, therefore, to open the temperature control and, possibly, also to open the sliding damper in the door. -
Page 25: Removing Skamol Smoke Plate For Cleaning
WARNING! DO NOT OPERATE WOOD-BURNING STOVE WITHOUT BAFFLE PLATES PROPERLY INSTALLED OR WARRANTY WILL BE VOID. WARNING! DO NOT USE SUBSTITUTE MATERIALS. ALWAYS USE LISTED SPARE PARTS FROM HWAM A/S. Door Glass A glass cleaner designed for wood-burning stoves is recommended for cleaning the glass. -
Page 26: Replacing Broken Door Glass
Replacing Door Glass Use only HWAM ceramic replacement glass 5 mm in thickness. The use of any other glass is prohibited. Do not remove the door before installing new glass. When replacing the glass all gaskets must be installed correctly. Make note of the gasket locations as you take the door apart. -
Page 27: Troubleshooting
7. T roubleshooting Smoke - Insufficient chimney draft. - Check if the chimney has the right dimension. - Check if the smoke pipe or chimney is blocked. - Check if the chimney has the right height compared to the surroundings. - Wood with too high moisture content. -
Page 28: Automatic Air Control System Diagram
Automatic Air Control Parts and Assembly Diagram 1. Self-adhesive gaskets fixed to the stove body. 2. 6 mm diameter washer to be placed between stove body and automatic system. 3. Slide gate assembly 4. 6 mm screws 5. Sensor system 6. -
Page 29: Spare Part List
Page 29...
Need help?
Do you have a question about the Classic 7 and is the answer not in the manual?
Questions and answers