Table of Contents
Advertisement
Quick Links
Advertisement
Table of Contents

Related Manuals for Eneo HDR-4004AM


Summary of Contents for Eneo HDR-4004AM
- Page 1 English French German Polish Quick Guide for FULL HD DVR H.264 HD SDI Digital Video Recorder (Ver 1.0) Before installing and using this unit, please read this quick guide carefully. For more detail information, please read a user manual in the enclosed CD.
-
Page 2: Table Of Contents
Table of Contents 1. Main Features ........................................3 Powerful & Flexible......................................3 Easy To Use .......................................... 3 2. Entry HD SDI DVR 4CH ..................................... 4 2-1. Product Components ..................................4 2-2. Specifications......................................5 2-3. Front Panel ........................................ 6 2-4. Rear Panel ........................................8 3. -
Page 3: Main Features
1. Main Features Powerful & Flexible Quadplex Recording + Search + Archiving + Network Dual Stream Dual Stream is the most powerful technology to encode the recording and network frames of the DVR separately. The recording and network frames are able to be selected respectively by DVR setup. -
Page 4: Entry Hd Sdi Dvr 4Ch
2. Full HD SDI DVR 4CH 2-1. Product Components The package contains the main unit and its components as specified below. When you purchase the unit, please check to ensure the components specified below are included. DVR Set Mouse (Option) Client Software CD / Remote Control / Quick Guide... -
Page 5: Specifications
2-2. Specifications ITEM HDR-4004AM1.0 Video Input Channel Input Level 4CH HD-SDI (720p25/30/50/60, 1080p25/30, 1080i50/60) Output Main Monitor HDMI (Max. 1920x1080) Sub Monitor VGA (Max. 1920x1080) HD-SDI Monitor SDI (1920x1080 60i) CVBS SPOT Audio Input 4CH Line Input Output 1CH Line and HDMI Output Audio Codec G.711 Alarm... -
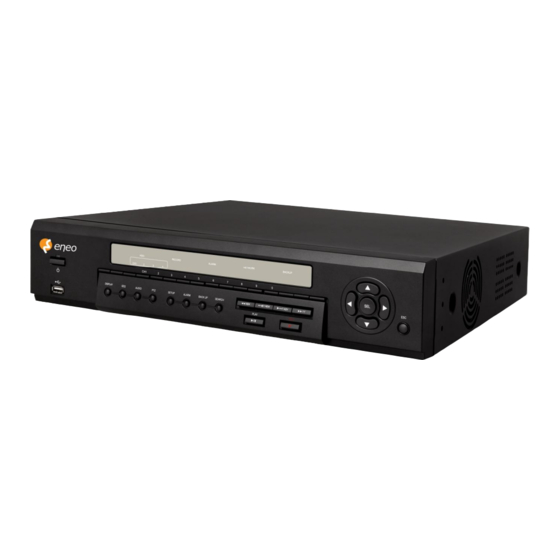
Page 6: Front Panel
Network Ethernet RJ-45, 10/100/1000Base-T, Auto MDI/MDIX Network Web Viewer Live, Search/Playback, Backup, PTZF, Remote Access Setup/Upgrade Single-site monitoring software Live, Search/Playback, Backup, PTZF, Remote Setup/Upgrade Multi-sites monitoring software Live, Search/Playback, Backup, PTZF, Remote Setup/Upgrade Features DST (Daylight Saving Time) Internal Beep By Video Loss, HDD Error Multi Language Yes (more than 20 languages) - Page 7 Front panel buttons Name Description Channel keys. For channel 10, press the 0 key. For channel 11, press the +10 and 1 key. For channel 16, press the +10 and 6 key. Press to rewind the footage in playback mode. Press to select audio mode such as SINGLE, MIX and MUTE.
-
Page 8: Rear Panel
Press for temporary storage of the changed value or to return to the previous menu screen. USB Port To archive still-image or video into a USB memory or upgrade firmware with USB memory stick, connect a USB memory to the USB terminal. 2-4. -
Page 9: Basic Function Of Remote Control
4. Basic function of Remote Control ① ID: When a remote control ID number is set in DVR, press it before number. ② REC: To start and stop manual recording. ③ Number: To select channel (1, 2, 3, & 4) or to enter DVR ID number. ④... -
Page 10: Mounting The Hard Disk
5. Mounting the HARD DISK 1. Remove the unit’s cover. 2. Fix the supplied rubber pads to the supplied HDD mounting bracket. Then fix the hard disk to the mounting bracket using the supplied screws (A). 3. Connect the unit’s power cable (B) and the supplied S-ATA cable (C) to the hard disk. Then fix the hard disk to the unit using the supplied HDD fixing screws (D). -
Page 11: Quick Setup
6. Quick Setup When booting a system at first, the following messages display. After initializing, select a language and set the time. To enter the setup menu, select a right button of the mouse or press the SETUP button on the remote control. - Page 12 For more detail information about a setup, search, playback and so on, please read a user manual in the enclosed CD. eneo ® is a registered trademark of Videor E. Hartig GmbH Exclusive distribution through specialised trade channels only.
Need help?
Do you have a question about the HDR-4004AM and is the answer not in the manual?
Questions and answers