Table of Contents
Advertisement
Quick Links
Advertisement
Table of Contents

Subscribe to Our Youtube Channel
Related Manuals for Eneo HDR-4004AM1


Summary of Contents for Eneo HDR-4004AM1
-
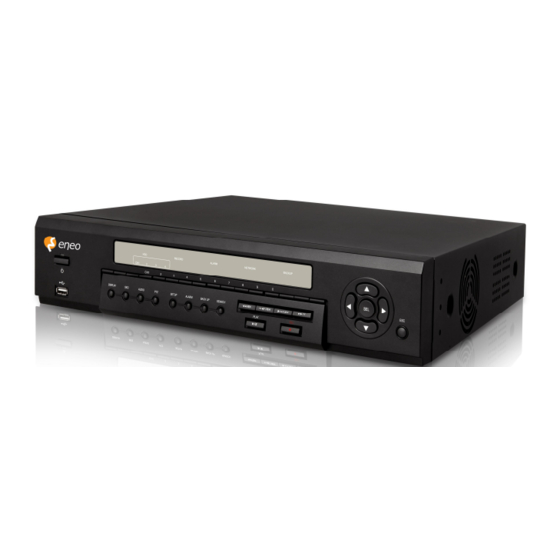
Page 1: Digital Video Recorder
INSTRUCTION MANUAL (HDR-4004AM1.0_User Guide_V1.0) H.264 Video Compression Digital Video Recorder About this user guide Before installing and using this unit, please read this user guide carefully. Be sure to keep it handy for later reference... -
Page 2: Safety Precautions
Safety Precautions Explanation of Graphical Symbols This symbol indicates the presence of important operating and maintenance (servicing) instructions in the literature accompanying the product. This symbol indicates the presence of uninsulated ”dangerous voltage” within the product’s enclosure that may be of sufficient magnitude to constitute a risk of electric shock to persons. - Page 3 These precautions must be followed for safety reasons. Warning Do not use if the unit emits smoke, strange sounds are heard or odor is emitted. Continued use may cause electrocution and/or fire. Immediately remove the power plug from the outlet. Once the unit stops emitting smoke, consult the dealership where this unit was purchased or factory shop for repairs.
- Page 4 In the event that a foreign object is inside the unit, turn off and unplug the unit. Consult the dealership where this unit was purchased or factory shop. Continued use may result in fire and/or electrocution. Do not place a container holding water or other liquids above the unit when it is connected to power.
- Page 5 Doing so may cause the unit to fall, be damaged and/or result in injury. Make sure the cables are connected properly. Connect and install the power cable and connection cable very carefully. Tripping over the cable may result in the unit capsizing or falling and cause injury. ...
- Page 6 . Areas where the unit will be exposed to constant vibration (in trains, cars, etc.) Cautionary points on condensation Droplets may form on the outside when very cold water is poured into a cup. In the same way, droplets may form around the internal components of his unit. This is called condensation. Do not use this unit if condensation has formed.
-
Page 7: Product Components
Product Components The package contains the main unit and its components as specified below. When you purchase the unit, Please check to ensure the components specified below are included. DVR Set Client Software CD, User Guide Remote Control , Battery1.5V, Mouse HDD SATA data cable HDD mounting bracket &... -
Page 8: Mounting The Hard Disk
Mounting the HARD DISK 1. Remove the unit’s cover. 2. Fix the supplied rubber pads to the supplied HDD mounting bracket. Then fix the hard disk to the mounting bracket using the supplied screws (A). 3. Connect the unit’s power cable (B) and the supplied S-ATA cable (C) to the hard disk. Then fix the hard disk to the unit using the supplied HDD fixing screws (D). -
Page 9: Compatible Hdd Models
Compatible HDD Models Seagate ST32000542AS (Barracuda LP) 2 TB 5900 RPM 32 MB Seagate ST31000340SV (Surveillance) 1 TB 7200 RPM 32 MB Seagate ST3100528AS (Barracuda) 1 TB 7200 RPM 32 MB Seagate ST3500830SCE 500 GB 7200 RPM 8 MB Seagate ST3500418AS (Barracuda) 500 GB 7200 RPM... -
Page 10: Booting The Dvr And Basic Time Setting
Booting the DVR and Basic Time Setting 1. During the first start up, the following message will be displayed. Setting Daylight Saving Time If the DVR is to be set Day Light Saving Time and be synchronized NTP (Network Time Protocol), Take next steps. Enter the SETUP mode. -
Page 11: Setting Ntp (Network Time Protocol)
Select DAYLIGHT SAVING. Setting NTP (Network Time Protocol) 1. When the DVR is connected with internet and the DVR need to be syncronized with NTP (Network Time Protocol), set SETUP>SYSTEM>NTP ON. 2. Select proper TIME ZONE time. - Page 12 NOTE: If you want the unit to automatically synchronize the local time, the Time Zone must be properly set according to your local Time Zone. Specification ITEM HDR-4004AM1.0 Input Channel Input Level 4CH HD-SDI (720p25/30/50/60, 1080p25/30, 1080i50/60) Main Monitor HDMI (Max. 1920x1080) Sub Monitor VGA (Max.
- Page 13 x2, x4, x8, x16 and x32 Search Mode Timeline, Event, Archive, Log, Specific Time File Format JPEG/Proprietary Format Backup Media USB/External HDD/DVD/Network Built-in Viewer Dual Streaming for Live 1280x720/640x360 120/100fps Playback H.264 HD 120/100fps Network Streaming RTP/RTSP/RTCP Protocols HTTP, DDNS, NTP, SMTP Interface SATA, e-SATA Max.
-
Page 14: Table Of Contents
Table of Contents Name, Function and Connection ......................16 1-1. Front Panel ........................... 16 1-2. Rear Panel ........................... 18 1-3. Remote control ..........................19 Setting up the DVR ..........................20 2-1. Setup – Main Screen ........................20 2-2. Setup – Display Mode ........................23 2-3. - Page 15 6. Back up ..............................53 6-1. Still Image backup onto USB flash memory .................. 53 6-2. Video backup onto USB flash memory ..................54 6-3. Transferring still images or video from the ARCHIVE list .............. 55 6-4. Playback of Backup Video ......................56 7.
-
Page 16: Name, Function And Connection
APPENDIX: How to connect network ......................99 A. How to set IP address of the DVR and open TCP port of the router? ..........99 B. How to access DVR from Remote PC? ..................101 C. How to access DVR with iPhone? ....................104 D. - Page 17 Press to rewind the footage in playback mode. Jump/Step backward. In playback mode, the playback position moves 60 seconds backward. Press to fast forward the footage in playback mode. Jump/Step forward. In playback mode, the playback position moves 60 seconds forward. Set the alarm output mode.
-
Page 18: Rear Panel
Press for temporary storage of the changed value or to return to the previous menu screen. Press to start or stop manual recording. Display Key for split the channel screen from single to all. USB Port To archive still-image or video into a USB memory or upgrade firmware with USB memory stick, connect a USB memory to the USB terminal. -
Page 19: Remote Control
POWER SOCKET Connect for AC110V~250V (Input Voltage) (Select Input voltage according to local electricity standard) 1-3. Remote control ① ID: When a remote control ID number is set in DVR, press it before number. ② REC: To start and stop manual recording. ③... -
Page 20: Setting Up The Dvr
2. Setting up the DVR The following sections detail the initial setup of a DVR. 2-1. Setup – Main Screen To enter the setup menu, select MENU and SETUP on the screen using the mouse or press the SETUP button on the front panel. Then select a user type. User can select one of user types (ADMIN, USER1, ◀... - Page 21 HD VIDEO INPUT: Display a channel, total time, elapsed time, error count, active pixels, total pixels, active lines, total lines and frame rate of HD channel (9~10). CONTROL BAR AUTO HIDE: Set to hide automatically or display continuously a control bar on the bottom side in a Live mode.
- Page 22 MOTION SENSITIVITY – KEY TONE – REMOTE CONTROL ID – SENSOR TYPE STORAGE – OVERWRITE – DISK FORMAT – DISK INFO – RECORDING LIMIT RECORDING LIMIT DAYS – S.M.A.R.T SYSTEM – DVR-ID – DESCRIPTION – LANGUAGE – DATE FORMAT –...
-
Page 23: Setup - Display Mode
2-2. Setup – Display Mode Press the SETUP button and enter the password. The setup menu is displayed as picture below. Select DISPLAY icon and press SEL button to enter the setup menu item. Navigate through the menu items using ◀... -
Page 24: Setup - Recording Mode
COVERT Enable/disable display of the video channel in live display mode. VIDEO Select a video output type for HDMI/VGA. (720p 50Hz, 720p 60Hz, 1080i 50Hz, 1080i OUTPUT 60Hz, 1080p 50Hz, 1080p 60Hz). Default value is 720p 60Hz. If the monitor doesn’t (HDMI/VGA) support some output type, it would be returned to the previous value. -
Page 25: Recording Schedules
RESOLUTION Set the resolution for the specified channel: 1920x1080, 1920x540, 1280x720 and 640x360. You can see the 1920x1080 and 1920x540 menu when 2M HD-SDI camera is connected. FRAME RATE Set the frame rate for the specified channel. The sum of the frame rate values from each channel cannot exceed the maximum frame rates for a specific recording resolution. - Page 26 ◀ ▲ ▶ ▼ control button ( ) and set the recording mode using the SEL button repeatedly Figure 2.3.2. Schedule recording setup screen C: CONTINUOUS recording, when you select the color will change to Blue Color M: MOTION recording, when you select the color will change to Yellow Color S: SENSOR recording, when you select the color will change to Red Color -: Does not record...
-
Page 27: Setup - Device Mode
[ALL]: Move the cursor to ALL and select a recording mode C,M or S using the SEL button to set the same setting for every day. [SUN to SAT]: Move the cursor to SUN to SAT and select a recording mode C,M or S using the SEL button to set the same setting for the whole day. -
Page 28: Alarm-Out
ALARM OUT Set the sensor, motion, and video loss for each alarm. CONTROLLER & PTZ Set the Controller and PTZ camera speed, number, type and CHANNEL Select specified channel for motion zone setup. MOTION ZONE Select either Full Zone or Partial Zone for motion sensing. MOTION SENSITIVITY Set the motion sensitivity for the specified channel. -
Page 29: Controller & Ptz Setup
Available NO: 4ch (1) SENSOR IN Enable Alarm Out by Sensor up to 4 Inputs. MOTION ON Enable Alarm Out by Camera Motion up to 4 cameras. VIDEO LOSS ON Enable Alarm Out by Video Loss up to 4 cameras. ALARM DURATION Set the alarm dwell time from 5 to 60 seconds. -
Page 30: Motion Zone Setup
2-4-3. Motion Zone Setup ◀ ▲ ▶ ▼ Select MOTION ZONE using the control button ( ) and select either PARTIAL ZONE or FULL ◀ ▲ ▶ ▼ ZONE using the control button ( ). And press the SEL button. If FULL ZONE is selected, the motion setting screen is not displayed. - Page 31 Figure 2.5.1. STORAGE setup screen Table 2.5.1. Menu items in STORAGE Setup screen Item Description OVERWRITE When enabled, the DVR will continue recording and overwrite the oldest existing recorded data once the hard drive is full. When disabled, recording will stop once the hard drive is full.
- Page 32 DISK INFO Hard drive information RECORDING Enable/disable recording limit. LIMIT RECORDING Set the recording limit days.(1- 90 days) LIMIT DAYS The data will remove by the hour. S.M.A.R.T. Set the alarm and buzzer by setting HDD temperature limit.
-
Page 33: Setup - System Mode
2-6. Setup – System Mode Press the SETUP button and enter the password. The setup menu is displayed as picture below. Select SYSTEM icon and press SEL button to enter the menu item. Navigate through the menu items using the ◀... - Page 34 ◀ ▲ ▶ ▼ LANGUAGE Select the display language using the control button ( ). Once a language is selected, the display language changes. ◀ ▲ ▶ ▼ DATE Select the date display format using the control button ( ). Options are: FORMAT YYYY/MM/DD, MM/DD/YYYY, DD/MM/YYYY, YYYY-MM-DD, MM-DD-YYYY, DD-MM- YYYY...
- Page 35 daylight saving period. ◀ ▲ ▶ ▼ Select BEGIN or END using the control button ( ) and press the SEL button. ◀ ▲ ▶ ▼ Select the item using the control button ( ), select the setting ◀ ▲ ▶ ▼ value using the control button ( ) and press the ESC button to return to SET DATE &...
-
Page 36: Setup - Security Mode
TRANSMISSION MODE: Sending an image only of the channel that triggered the alarm when an alarm event is triggered. IP NOTIFICATION: Enable/disable sending e-mail when the IP address of your DVR is changed. EVENT ALARM: Enable/disable sending e-mail reports on the channel that triggered the alarm when an alarm event is triggered. - Page 37 Figure 2.7.1. SECURITY setup screen Table 2.7.1. Menu Items in SECURITY Setup Screen Item Description USER PASSWORD CHECK: AUTHENTICATION Check either V or blank for the functions such as Setup, Playback(PB), PTZ, Record OFF(R/OFF), and Network. V: Ask for a password when the given function is selected for all users. Blank: Does not ask for a password when the given function is selected for all users.
-
Page 38: Setup - Network Mode
AUTHORITY OF Enable/disable a covert function in playback mode. PLAYBACK V: No covert. Blank: Covert 2-8. Setup – Network Mode Press the SETUP button and enter the password. The setup menu is displayed as picture below. Select NETWORK icon and press SEL button to enter the setup menu item. Navigate through the menu items ◀... -
Page 39: Port And Web Port
Table 2.8.1. Menu items in Network Setup screen Item Description PORT Port number (Default: 5445) WEB PORT Web Sever Port number (Default: 80) NETWORK TYPE Select a type of network connection. Options are: DHCP and STATIC Note. Other parts of the network setup screen change depending on what network type you select. -
Page 40: Network Types
Web viewer Network access beyond Router In order to access beyond Router (Firewall), user must open 1 TCP port that is set on NETWORK > WEB PORT. If this port is not open properly, user can not access DVR using direct Web viewer (Example: When NETWORK >... -
Page 41: Network Stream
Figure 2.8.2. Network setup screen – DDNS Server 1 Figure 2.8.3. Network setup screen – DDNS Server 2 If user wants to use other general-purpose DDNS Server, select a Sever 2. Then, user has to input the server name, ID and password using a virtual keyboard. 2-8-4. -
Page 42: Setup - Config Mode
2-9. Setup - CONFIG Mode Press the SETUP button and enter the password. The setup menu is displayed as picture below. Select CONFIG icon and press SEL button to enter the setup menu item. Navigate through the menu items using ◀... -
Page 43: Quick Setup
2-10. Quick Setup In the MENU, select the QUICK SETUP tab. Then, the QUICK SETUP menu is displayed as pictured below. ◀ ▲ ▶ ▼ Navigate through the menu items using the mouse or the control button ( ) on the remote control and change the value of the menu item. -
Page 44: Saving Setup
DUAL User can set the DUAL STREAM. The DUAL STREAM setting takes STREAM precedence over the network stream setting of Network menu. 3. Saving Setup To preserve the setup values that you have changed, select YES. 4. Live, Search, and Playback 4-1. - Page 45 Click the AUDIO icon when you want to activate the audio using a mouse Click this SEARCH icon when you want to play back and search from the recorded data using a mouse Click this PTZ icon when you want to control the PTZ cams using a mouse Click this SEQUENCE icon when you want to activate the sequential screen...
-
Page 46: Search Screen
Audio mute. To set audio mute, press the Audio button on the front panel. Single audio display. To set audio single for highlighted channel only, press the Audio button on the front panel. Indicates that alarm is set. To set the alarm function, press the Alarm button on the front panel. -
Page 47: Time-Line Search
Figure 4.2.1. Search Screen There are 7 ways of search menu such as TIMELINE, EVENT, GO TO FIRST TIME, GO TO LAST TIME, GO TO SPECIFIC TIME, ARCHIVE and LOG on the screen. 4-2-1. TIME-LINE Search The TIME-LINE search window is used to find the stored video by using the time line bar. -
Page 48: Event Search
When it clicks a Timeline menu, user can see a calendar which has recording data. Select a specific date and time. Use a drag-and-drop function of the mouse control. User can select a specific minutes using a button in the above red box. Press a PLAY button after setting a specific time. Press the PREV to return to the SEARCH window. -
Page 49: Go To Specific Time
4-2-5. Go To Specific Time Figure 4.2.3. Go To Specific Time User can search for video data from a specific instance by setting the date and time in the Go To ◀ ▲ ▶ ▼ Specific Time menu. Use the mouse or the control button ( ) on the remote control to change the date and time value and press the PLAY button after setting. -
Page 50: Log Search
Figure 4.2.4. Archive Search Screen When it clicks an Archive menu, user can see a calendar which has recording data. Select a specific date and then user can see all data. When it presses a Display button, the still image or the first frame of the selected video is opened and user can save the data. - Page 51 Figure 4.3.1. PLAY Mode Screen The following status bar hides automatically and appears again when putting a mouse pointer to the bar. Button Description Return to the previous menu screen, search window, or exit from the Menu Press to rewind the footage at 1x, 2x and 4x speeds. Reverse playback speed is shown as -1x(normal), -2x (2 times normal) and -4x (4 times normal) at the bottom right of the screen.
-
Page 52: Ptz Control
Press to backup the video. Table 4.3.1. Button functions in PLAY Mode 5. PTZ Control To control the PTZ functions of the camera, select PTZ menu on the screen using the mouse. Select the ◀ ▲ item you wish to control the PTZ camera and control them using the mouse or the control button ( ▶... -
Page 53: Back Up
number (3 digits) to go to the preset number. ▶) TOUR Select the TOUR and press the right key ( on the control button. Then, number input window will appear. Set the number (1 digit) using the number key and press SEL to make the group number work. -
Page 54: Video Backup Onto Usb Flash Memory
Figure 6.1.1. Still Image Archiving and Backup Screen NOTICE For a backup using a USB stick, a format of the USB stick has to be set to FAT32. 6-2. Video backup onto USB flash memory Video can be captured and archived onto the USB stick or hard drive while playing back recorded video. In playback mode, press the BACKUP button to launch the archiving function. -
Page 55: Transferring Still Images Or Video From The Archive List
6-3. Transferring still images or video from the ARCHIVE list The stored data onto hard drive will be found in the ARCHIVE list in SEARCH window. User can back up still images or video into the storage device from the ARCHIVE list. 1. -
Page 56: Playback Of Backup Video
6-4. Playback of Backup Video H.264 format: H.264 format video can be played back by the player (the HD player) that the DVR copies on USB thumb drive with video. Three files are copied on USB thumb drive - H.264 file: H.264 format video file. - INDEX file: Title file of date and time. - Page 57 2. You can see the following message when pressing the software upgrade menu after putting the USB memory stick on the system. 3. You can see the following message when pressing the scan button. Please check the current firmware version and the firmware version which you want to upgrade.
- Page 58 4. You can see the following progressive message when pressing the upgrade button. 5. You can see the following message when finishing the upgrade. After upgrading, the system should be restarted. At that time, the USB memory stick has to be pulled out. 6.
- Page 59 Remote Firmware Upgrade User can upgrade the firmware via Network as follows. 1. Go to the Remote Setup menu on the UMS Multi or Web Viewer.
- Page 60 2. Press the password for admin. Just admin is possible to connect to the remote setup menu. 3. Go to the Remote Upgrade menu. Then, you can see the current F/W version as follows. To upgrade a new F/W, insert the F/W in your PC and press the UPGRADE button.
- Page 61 4. Then, you can see the following progress bar and it would be taken around 150 seconds to upgrade. 5. When finishing the upgrade, the network streaming would be connected again automatically and you can see the following screen. Please check the current F/W version if the upgrade is succeeded.
-
Page 62: Network Access Using The Exclusive Network Viewer, Ums Single
8. Network access using the Exclusive network viewer, UMS single The DVR provides a live remote monitoring feature. Remote monitoring requires installation of the network viewer on your PC. NOTICE In a high bandwidth network, a maximum of four users can access one DVR simultaneously. In a low bandwidth network it is recommended that only one user access the DVR at a time. -
Page 63: Live Monitoring Mode And Functions
4. Select the program folder and click 5. The setup status screen is displayed. “Next”. After the installation is completed, “UMS Client” icon is displayed on the desktop. 8-3. Live monitoring mode and functions. Button Function Description DATE & TIME Displays the current date and time. - Page 64 CONNECT/DISCONNECT Connect/disconnect network connection. SEARCH Switches the live mode to search mode. DISPLAY MODE Select a channel and screen display mode. PAN/TILT/ZOOM/ FOCUS Control the PAN/TILT/ZOOM/FOCUS features on the remote camera. CAPTURE Capture a still image from live screen. PLAY/PAUSE Play/pause live video.
-
Page 65: Bi Directional Audio
QUAD/-screen display - Click the QUAD button to switch to quad-screen display Full screen display - Click the maximize button to display only screen and hidden the operation panel. Image capture of live screen Still-image of live screen can be captured and saved as BMP or JPEG file. 1. -
Page 66: Remote Search Mode And Functions
8-5. Remote search mode and functions Button Function Description DATE & TIME Displays the recording time of the data selected on the time bar at the bottom of the main user interface. DISCONNECT Disconnect network connection.. LIVE Switches the search mode to live mode. CAPTURE Capture a still image from live screen. - Page 67 PLAYBACK The playback buttons. BUTTON DISPLAY MODE Select a channel and screen display mode. Searching and playing video in the remote DVR Video recorded in the remote DVR or Video recorded on the PC can be searched and played back. 1.
-
Page 68: Pc System Configuration
Backup of video in the remote DVR Video recorded in the remote DVR cab be backed up on the PC HDD as AVI format. 1. Connect the network to the remote DVR and play the video recorded in the remote DVR. 2. - Page 69 Setting General Set the Security Option, Save Path, and Miscellaneous. Security Option: Set a password for security options. When you access any of the selected functions, you will need to enter the password. Save Path: Specify the location to record for backup and still image capture. ...
- Page 70 LOG – Select to save event log into ‘log file’. ICON – Select to display the event on live video. EVENT LIST – Select to show the event in the ‘Event List” window of live mode. Search and check the recorded log data. Setting Record Set the recording conditions and select channels to record.
-
Page 71: Network Access Using The Exclusive Network Viewer, Ums Multi
Select the local disk to use and the amount of disk space you want to allow the program to use for recording. 9. Network access using the Exclusive network viewer, UMS multi 9-1. Overview The UMS Multi-Client is a multiple site monitoring client software with; video, audio, and alarm signals from the DVRs over networks. -
Page 72: Installing The Program
9-3. Installing the program 1. Insert the provided CD in the CD drive and double-click “UMSMultiClient (XXXX).exe” 2. Select a destination folder and click “Next”. 3. Select the program folder and click “Next”. 4. The setup status screen is displayed. 5. -
Page 73: Live Window
9-4. Live Window When installation is completed, double click the “UMS Multi Client” icon on your desktop to start the program. 9-4-1. Main user interface 9-4-2. Control buttons Button Description Click this icon to run a playback window to search and play videos that are recorded in local PC. -
Page 74: Search And Playback Window
Click this icon to capture a still image CAPTURE EVENT LIST Click this icon to play/pause live video. PAUSE ALARM ON Enable or disable recording of live video to local disk which has RECORD ON set in setup menu. Use the volume control bar to set the audio level. AUDIO Use the micro phone volume control bar to set the micro phone level. -
Page 75: Main Control Panel
9-5-2. Main control panel Button Description Click this icon to run a playback window to search and play videos that are recorded in local PC. LOCAL PLAYBACK Click this icon to run a playback window to search and play videos that are recorded in remote DVR. REMOTE PLAYBACK Directory window shows site/sites that are pre-registered. - Page 76 Click this icon to connect the selected site/sites. CONNECT Click this icon to disconnect the selected site/sites. DISCONNECT Click this icon to setup configuration of UMS MULTI CLIENT. SETUP Click this icon to capture a still image. CAPTURE EVENT LIST Click this icon to set the beginning time for backup of the MARK IN recorded video in AVI format.
-
Page 77: Setup Of Ums Multi Client
To change a time line scale from 24 hours to 60 minutes or vise versa. The timeline shows recorded data in color on the bar. You can adjust the time line scale and move it to the time you wish to playback. -
Page 78: Event
Automatic reconnection: If a user selects this function, client S/W will automatically try to connect the finally connected IP address, after the network is disconnected. Always On Top: If a user selects this function, client S/W will display continuously at the very front than other software on the PC. -
Page 79: Record
9-6-2-2. Archiving Event Log: Event log can be searched from selected time. 9-6-3. Record 9-6-3-1. Record setup: You can set the recording conditions for Always, Event, or Auto record. And you can also select target DVR/DVRs and channel/channels. When you set the recording condition to event, you can set event for motion or alarm with duration. 9-6-3-2. -
Page 80: Osd
recording when the maximum amount of disk space is full. 9-6-4. OSD You can select the OSD to be display 9-6-5. Language You can select a language to be display. -
Page 81: About
9-6-6. About “About” provides network client version information. 9-7. Remote Setup The menu settings for the DVR unit can be set from a PC, via network. Put the cursor of the mouse on the channel which is connected to the site and press the right. Then the following window is displayed. - Page 82 9-7-1. Display User can set the value on this remote setup page. After setting the value, please press the APPLY button. Then the value would be applied to the system without the system rebooting. RELOAD button is used when user want to bring the value in the system.
- Page 83 9-7-2. RECORD 9-7-3. DEVICE...
- Page 84 9-7-4. STORAGE 9-7-5. SYSTEM...
- Page 85 9-7-6. NETWORK 9-7-7. UPGRADE Please refer to page 54 for the Remote Upgrade.
-
Page 86: Operation
9-8. Operation 9-8-1. Addition, Delete, and modify of DVR sites 9-8-1-1. Addition of sites 1. Click SITE ADDITION button. And then the following window displays. o Model: User has to select surely a suitable type. SDVR series, H series DVR N series DVR, HD DVR IP Camera o Site Name: Input a name that properly describes a site. - Page 87 2. Click SITE DELETE button. And then the selected site/sites is/are deleted. 9-8-1-3. Modify of sites 1. Select the site/sites to modify from the directory window. 2. Click NET FINDER button. And then the following window displays.
-
Page 88: Connect And Disconnect
3. Click MODIFY button. And then the modified information is applied. 9-8-2. Connect and Disconnect 9-8-2-1. Connect 1. Select site/sites to connect from the directory window. 2. Click CONNECT button, and then site/sites displays/display as connected. -
Page 89: Still-Image Capture During Live
9-8-2-2. Disconnect 1. Select site/sites to disconnect from the directory window. 2. Click DISCONNECT button, and then selected site/sites disconnected. 9-8-3. Still-image capture during Live 1. Double-click a channel to capture from the display screen. (Otherwise all channels will be captured.). 2. -
Page 90: Recording Video On Local Pc During Live
3. Set Save path, File Name, and File Format. And then click OK button. 4. Still image is saved as set in Capture window. 9-8-4. Recording video on local PC during Live 1. Click SETUP button. And then a setup window display. 2. -
Page 91: Local Playback And Remote Playback
4. Click RECORD ON button. And the color of button is changed. 5. Live video data is recorded as set in Record and Disk setup. These video data can be searched and play-backed with Local Playback. 9-8-5. Local Playback and Remote Playback 9-8-5-1. - Page 92 3. Click CONNECT button. And then Green bar displays on Search calendar and slide window. 4. Move scroll bar on where there is video data and Play button. 5. Video data that is recorded on local PC will be play-backed. 9-8-5-2.
-
Page 93: Avi Backup During Playback
4. Move scroll bar on where there is video data and Play button. 5. Video data that is recorded on a remote DVR is play-backed. 9-8-6. AVI Backup during playback You can back up the recorded videos in AVI format during playback. 1. - Page 94 4. Set the ending time on the blue timeline by dragging the scale on the target time as the ending time of backup and clicking MARK OUT button. Then, color of the timeline between the beginning time and ending time will be changed into dark Green. 5.
-
Page 95: Network - By An Web-Browser Viewer
Notice When it does a backup with NSF format, user can do a playback using the DVR player. The DVR player is installed with the S/W in user’s PC. 10. Network – By an web-browser viewer The DVR provides a live remote monitoring feature by web-browser viewer. 1. - Page 96 6. Click CONNECT button on the Left upper corner of web-viewer. Then “Connect” dialog is displayed. Enter IP address (or Domain name address that you pre-registered on www.bestddns.com, www.okddns.com or www.ddnscenter.com, Port number and Password and click “Connect” Server address: Input IP address of the DVR from SETUP>SYSTEM>DESCRIPTION>IP ADDRESS or Domain name address that you pre-registered on www.bestddns.com, www.okddns.com or www.ddnscenter.com, ...
- Page 97 ID: Input ID of DVR. Password: Input network password of DVR. (The number is set on SETUP>SYSTEM>NETWORK PASSWORD.) 7. Then the cameras connected to the DVR are displayed on the screen. 8. SETUP: The menu settings for the DVR unit can be set from a PC, via network. Refer to the detail of Remote Setup description of UMS Multi Client.
-
Page 99: Appendix: How To Connect Network
APPENDIX: How to connect network A. How to set IP address of the DVR and open TCP port of the router? The port forwarding is dependent on the brand and model of the router. The port forwarding is required to allow access to the DVR beyond a router. - Page 100 Open your web browser. Enter the router IP address in the address bar (The router IP address are different with the brand and model.), click GO. 4. Enter the user name and password (admin is default) and press the OK button. 5.
-
Page 101: How To Access Dvr From Remote Pc
7. Select the Save settings button located on the bottom of the window. Then Port forwarding is finished. Network access beyond a router In order to access the DVR remotely beyond a router (firewall), the user must open TCP port for command level, live channels and storage channels. - Page 102 4. Input Site Name, Site Address(IP address), Port No., and Password on the connect window. And click OK. Then, press button after checking the left check box. Internet (ADSL) Connection using DDNS Connect to the system, using an Router or ADSL modem and an Ethernet cable (10BASE-T/100BASE-TX CAT 5 LAN cable) 1.
- Page 103 7. If you see the screen “You can use the Domain name you entered” then click RETURN and click REGISTER button to complete the registration. 8. Run the pre-install the network client software on the supplied CD. (Refer to Chapter 8. Network access using the Exclusive network viewer) 9.
-
Page 104: How To Access Dvr With Iphone
C. How to access DVR with iPhone? 1. Run App Store. 2. Search “iums” 3. Touch “iums” icon. 4. Install “iums” 5. Run “iums” icon. 6. Touch “+” icon. - Page 105 7. Input the information. 8. Touch “Save” icon. 9. Touch the added site. 10. Select Channels and Connect 11. 4CH splitted Image 12 Single Channel...
-
Page 106: How To Access Dvr With Android
D. How to access DVR with Android? 1.Run Android Market. 2. Search “iUMS” 3.Search “iUMS”. 4.Install “iUMS”. 5. Run “iUMS” 6. Register user. 7. Touch Live View. 8. Add the Site or Device. 9. Select Channels. - Page 108 Videor E. Hartig GmbH ® Exclusive distribution through specialised trade channels only. Videor E. Hartig GmbH Carl-Zeiss-Straße 8 · 63322 Rödermark, Germany Tel. +49 (0) 6074 / 888-0 · Fax +49 (0) 6074 / 888-100 www.videor.com...
Need help?
Do you have a question about the HDR-4004AM1 and is the answer not in the manual?
Questions and answers