Table of Contents
Advertisement
Quick Links
Advertisement
Table of Contents

Related Manuals for advidia P-3360-OD


Summary of Contents for advidia P-3360-OD
-
Page 1: Installation Guide
Installation Guide Included Installation Instructions Network Camera P-3360-OD Model No. Before attempting to connect or operate this product, please read these instructions carefully and save this manual for future use. The model number is abbreviated in some descriptions in this manual. - Page 2 For U.S.A WARNING: NOTE: This equipment has been tested and found to comply with the limits for a Class A digi- • To prevent injury, this apparatus must be tal device, pursuant to Part 15 of the FCC Rules. securely attached to the wall/ceiling in These limits are designed to provide reasonable accordance with the installation instructions.
-
Page 3: Table Of Contents
Contents Important safety instructions ......................4 Limitation of liability ........................5 Disclaimer of warranty ........................5 Preface ............................5 Main functions ..........................6 About the user manuals ........................ 6 System requirements for a PC ...................... 7 Trademarks and registered trademarks..................8 Copyright ............................ -
Page 4: Important Safety Instructions
Important safety instructions 1) Read these instructions. 2) Keep these instructions. 3) Heed all warnings. 4) Follow all instructions. 5) Do not install near any heat sources such as radiators, heat registers, stoves, or other appara- tus (including amplifiers) that produce heat. 6) Only use attachments/accessories specified by the manufacturer. -
Page 5: Limitation Of Liability
(7) LOSS OF REGISTERED DATA CAUSED BY ANY FAILURE. Preface The network camera P-3360-OD is designed to operate using a PC on a network (10BASE- T/100BASE-TX), and can be installed under eaves (sheltered outdoor). By connecting to a network (LAN) or the Internet, images and audio from the camera can be moni- tored on a PC via a network. -
Page 6: Main Functions
*3 NEMA: Dust resistance and waterproof performance standards set by National Electrical Manufacturers Association (United States). About the user manuals There are 2 sets of operating instructions for the P-3360-OD as follows. • Installation Guide: Explains how to install and connect devices. • Operating Instructions (included in the CD-ROM): Explains how to perform the settings and how to operate this camera. -
Page 7: System Requirements For A Pc
IMPORTANT: • F or information on the operation verification of the supported operating systems and web browsers, refer to our website at http://advidia.com/cameras/. • When using a PC that does not meet the above requirements, displaying of images may become slower or the web browser may become inoperable. -
Page 8: Trademarks And Registered Trademarks
Trademarks and registered trademarks • Microsoft, Windows, Windows Vista, Windows Media, Internet Explorer, and ActiveX are either registered trademarks or trademarks of Microsoft Corporation in the United States and/or other countries. • Microsoft product screen shot(s) reprinted with permission from Microsoft Corporation. • Intel and Intel Core are trademarks of Intel Corporation in the U.S. and other countries. • Adobe, Acrobat Reader, and Reader are either registered trademarks or trademarks of Adobe Systems Incorporated in the United States and/or other countries. • SDXC Logo is a trademark of SD-3C, LLC. • iPad, iPhone, and iPod touch are trademarks of Apple Inc., registered in the U.S. and other countries. -
Page 9: Precautions
Precautions Refer installation work to the dealer. Avoid installing this product in the loca- tions where salt damage occurs or corro- Installation work requires technique and experi- ences. Failure to observe this may cause fire, sive gas is produced. electric shock, injury, or damage to this prod- Otherwise, the mounting portions will deterio- uct. - Page 10 Do not damage the power cable. About the battery Do not damage, fabricate, twist, stretch, bun- A battery is installed inside the camera. Do not dle, or forcibly bend the power cable. Do not leave the battery exposed in environments of place heavy objects on it, and keep it away excessive heat as a result of sunlight or fire.
-
Page 11: Code Label
Periodically images on the screen appear About the MOS image sensor to be distorted • When continuously shooting a bright light When the camera is installed in a location source such as a spotlight, the color filter of where it is subject to small vibrations (for the MOS image sensor may have deteriorat- example, when it is installed near devices that ed and it may cause discoloration. - Page 12 About the dehumidifying device • This product has dehumidifying device to keep the inside at low moisture level, pre- venting condensation and quickly dissipat- ing dew if produced. • Dew may be produced depending on the conditions of temperature, humidity, winds, and rain, and it may take time to dehumidify.
-
Page 13: Precautions For Installation
Precautions for installation Advidia assumes no responsibility for injuries or property damage resulting from failures arising out of improper installation or operation inconsistent with this documentation. This product is designed to be installed • Locations where corrosive gas is pro- under eaves. - Page 14 Procure fixing screws separately. Router The screws that secure this product are not When connecting this product to the Internet, use a broadband router with the port forward- supplied. Prepare them according to the mate- rial and strength of the area where the product ing function (NAT, IP masquerade).
-
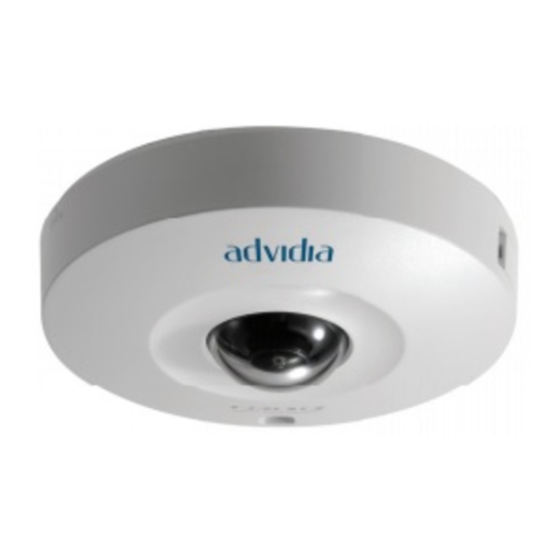
Page 15: Major Operating Controls
Major operating controls Dome cover * Do not touch the dome cover with your bare hands. Enclosure Camera fixing screw SD memory card slot cover Network cable RJ45 connector (female) Alarm input/output cable Power cable (12 V DC) Microphone/line input cable (white) Audio output cable (black) Direction marker for installation Base bracket (accessory) - Page 16 SD memory card slot cover SD memory card slot SD memory card error indicator INITIAL SET button Link indicator (lit when linking) Access indicator (blinks when accessing) About the [INITIAL SET] button After turning off the power of the camera, turn on the power of the camera while holding down this button, and wait for about 5 seconds or more without releasing the button.
-
Page 17: Preparations
Preparations When installing the camera on a ceiling or a wall, there are 3 methods as specified below. ☞ • Using a two-gang junction box ( pages 18) ☞ • Using the supplied base bracket ( pages 19 to 22) IMPORTANT: • Procure 4 screws (M4) to secure the attachment plate (accessory) or the base bracket (acces- sory) to a ceiling or a wall according to the material of the installation area. Do not use wood screws and nails. - Page 18 Method of camera installation Using a two-gang junction box Secure the attachment plate (accessory) to the two-gang junction box built in a ceiling or wall using the fixing screws (locally procured). [Mounting hole pattern] 46 mm {1-13/16 inches} 83.5 mm {3-9/32 inches} Two-gang junction box Attachment plate (accessory) Direction marker for installation...
- Page 19 Using the base bracket (accessory) Note: • When the camera is mounted on the ceiling or wall with a hole for cable running, or the camera is mounted using open wiring, the base bracket (accessory) is used. IMPORTANT: • If open wiring is conducted, be sure to use conduits and run the cables inside the tubes to protect the cables from direct sunlight.
-
Page 20: Base Bracket
Determine the direction of the base bracket according to the installation environment (how the cables are wired, etc.) before mounting it to a ceiling or a wall by fixing 4 screws (locally pro- cured). The direction of the camera in relation to the base bracket is the 4 directions as shown in the illustration. - Page 21 <Using a conduit> Align the direction of the conduit to the direction of the female thread for the conduit on the base Ⓐ Ⓑ bracket, and mount the base bracket to hole or hole on the ceiling or wall. Ⓐ [For use of the hole Conduit Base bracket...
- Page 22 In the direction determined in , fix the attachment plate (accessory) on the base bracket using the fixing screws (accessory). (Recommended tightening torque: 0.78 N·m {0.58 lbf·ft}) Direction marker for installation Attachment plate (accessory) Fixing screws (accessory) Note: • T he direction of “⇧TOP” on the attachment plate (accessory) determines the upwards direction of the image on the PC monitor.
-
Page 23: Insert/Remove An Sd Memory Card
Insert/remove an SD memory card IMPORTANT: • When inserting an SD memory card, make sure the direction. • Before removing the SD memory card, select “Not use” for “SD memory card” on the [SD memory card] tab of the “Basic” page first. Turn off the power after “Not use” selection, and then unload the SD memory card. -
Page 24: Connection
Connection Caution: • ONLY CONNECT 12 V DC CLASS 2 POWER SUPPLY (UL 1310/CSA 223) or LIMITED POWER SOURCE (IEC/EN/UL/CSA 60950-1). • A READILY ACCESSIBLE DISCONNECT DEVICE SHALL BE INCORPORATED TO THE EQUIPMENT POWERED BY 12 V DC POWER SUPPLY. Turn off a circuit breaker before making a connection. - Page 25 IMPORTANT: • C onnect/disconnect the external speaker cables or audio cables after turning off the power of the camera and the amplifier. Otherwise, loud noise may come out from the speaker. • M ake sure that the stereo mini plug is connected to this cable. When a monaural mini plug is connected, audio may not be heard. When connecting a monaural speaker with amplifi- er, use a locally procured conversion cable (mono-stereo).
- Page 26 Connect a LAN cable (category 5e or better, straight) to the network connector. IMPORTANT: •Use all 4 pairs (8 pins) of the LAN cable. •The maximum cable length is 100 m {328 feet}. •Make sure that the PoE device in use is compliant with IEEE802.3af standard. •When connecting both the 12 V DC power supply and the PoE device for power supply, 12 V DC will be used for power supply. * If a 12 V DC power supply and a PoE hub or router are used at the same time, network connections may not be possible.
- Page 27 Waterproof treatment for the cable joint sections Adequate waterproof treatment is required for the cables when installing the camera with cables exposed or installing it under the eaves. The camera body is waterproof, but the cable ends are not waterproof. Be sure to use the supplied waterproof tape at the points where the cables are connected to apply waterproof treatment in the following procedure.
- Page 28 Connection example when connecting to a network using a PoE hub Powered speaker (option) PoE device (hub) LAN cable (category 5e or better, straight) Microphone LAN cable (option) (category 5e or better, straight) Powered speaker (option) LAN cable (category 5e or better, straight) Microphone (option) <Required cable>...
-
Page 29: Installation
Installation Camera mounting Installation shall be conducted after turning off each device. Attach the attachment plate (accessory) on the ceiling or wall. <Using a two-gang junction box> Secure the attachment plate (accessory) to the two-gang junction box (locally procured). (☞ Pages 18) ☞... - Page 30 Using the base bracket Using the attachment plate position marker as a guide, attach the camera onto the attachment plate (accessory) while aligning the “OPEN” mark of the camera with the projection of the attachment plate (accessory). Projection IMPORTANT: • W hen mounting the camera body, cables shall be run between the attachment plate (accessory) and base bracket as indicated by the arrows in the illustration.
- Page 31 Engage the attachment plate fixing screws of Projection the camera with the screw hole of the attachment plate (accessory) and rotate the camera in the direction of the arrow to secure the camera to the attachment plate (accessory). Rotate the camera until a click is heard so that the projection of the attachment plate (accessory) will be set to the “LOCK”...
- Page 32 Accommodate the connected cables inside the cable guide of the camera base bracket. IMPORTANT: • T o prevent the cables from being caught when the base cover (accessory) is attached, keep the cables inside the cable guide. Cable guide Connected cable Cable guide Attach the base cover (accessory) that was removed according the steps in page 19.
-
Page 33: Configure The Network Settings
Configure the network settings Configuring the camera so that it can be accessed from a PC The following are descriptions for when the camera with default settings is configured. If you are using firewall software on your PC, the Setup Program may not be able to find any cameras on your network. - Page 34 MAC address as the MAC address printed on the camera that you want to configure. If the installation screen of the viewer software “Advidia WebViewer Plugin” is displayed, follow the instructions of the wizard to start the installation. (The viewer software is installed from the camera.)
-
Page 35: Troubleshooting
Troubleshooting Before asking for repairs, check the symptoms with the following table. Contact your dealer if a problem cannot be solved even after checking and trying the solution in the table or a problem is not described below. Reference Symptom Cause/solution pages When using DC power supply... -
Page 36: Specifications
Specifications • Basic Power source: 12 V DC, PoE (IEEE802.3af compliant) Power consumption: DC 12 V: 540 mA/ Approx. 6.5 W PoE DC 48 V: 125 mA/ Approx. 6.0 W (Class 2 devices) Ambient operating temperature: -40 °C to +50 °C {-40 °F to 122 °F} Ambient operating humidity: 10 % to 90 % (no condensation) Waterproof:... - Page 37 Super-Dynamic: On/Off Dynamic range: 52 dB typ. (only at Super-Dynamic On) Gain (AGC): On (High)/ On (Mid)/ On (Low)/ Off Adaptive black stretch: On/Off (only at Super-Dynamic Off) Light control mode setting: Indoor scene (50 Hz/60 Hz)/ ELC •With Super Dynamic On (Maximum exposure time): ELC (1/30 s) •With Super Dynamic Off ELC (1/30 s), ELC (3/100 s), ELC (3/120 s),...
- Page 38 Resolution: 1M Panorama [16:9]/ 1M Double Panorama [16:9]: H.264(1) 1280x720/640x360/320x180 max.30 fps H.264(2) 640x360/320x180 max.30 fps JPEG 1280x720/640x360/320x180 max.30 fps 1.3M Fisheye [4:3]/ 1.3M Quad PTZ [4:3]/ 1.3M Single PTZ [4:3]: H.264(1) 1280x960/640x480/320x240 max.30 fps H.264(2) 640x480/320x240 max.30 fps JPEG 1280x960/640x480/320x240 max.30 fps Panorama + Quad PTZ/ Panorama + Single PTZ/ Double Panorama + Quad PTZ/ Double Panorama + Single PTZ/...
- Page 39 Image compression method* H.264 Image quality: Low/Normal/Fine Transmission type: Unicast/Multicast JPEG (MJPEG) Image quality: 0 SUPER FINE/ 1 FINE/ 2/ 3/ 4/ 5 NORMAL/ 6/ 7/ 8/ 9 LOW (10 steps: 0-9) Transmission type: PULL/PUSH Refresh interval: 0.1 fps – 30 fps (JPEG frame rate will be restricted when displaying both JPEG and H.264 images.) Audio compression method:...
-
Page 40: Standard Accessories
*1 The CD-ROM contains the operating instructions and different kinds of tool software programs. *2 This label may be required for network management. The network administrator shall retain the code label. advidia 5120 Woodway, Suite 5006 Houston TX, 77056 (832) 240-1768 http://advidia.com/ © advidia 2015 avs0615-0 PGQX1918ZA Printed in China...