Table of Contents
Advertisement
GPS VEHICLE TRACKER
USER MANUAL
Preface
Thank you for purchasing GPS Vehicle Tracker. This manual shows how to operate the device
smoothly and correctly. Make sure to read this manual carefully before using this product. Please note
that specification and information are subject to changes without prior notice in this manual. Any
change will be integrated in the latest release. The manufacturer assumes no responsibility for any
errors or omissions in this document.
1
Advertisement
Table of Contents

Related Manuals for Xexun TK-103


Summary of Contents for Xexun TK-103
- Page 1 GPS VEHICLE TRACKER USER MANUAL Preface Thank you for purchasing GPS Vehicle Tracker. This manual shows how to operate the device smoothly and correctly. Make sure to read this manual carefully before using this product. Please note that specification and information are subject to changes without prior notice in this manual. Any change will be integrated in the latest release.
-
Page 2: Table Of Contents
Content 1 Summary ------------------------------------------------------------------------------------------------- 2 Application ------------------------------------------------------------------------------------------------ 3 Hardware Description 3.1 Connectors ---------------------------------------------------------------------------------------- Wires Connection -------------------------------------------------------------------------- ------- 3.3 External Relay Connection ---------------------------------------------------------- ------- 4 Specifications ---------------------------------------------------------------------------------------- 5 SIM Card Installation -------------------------------------------------------------------------- 6 Startup ------------------------------------------------------------------------------------- ----------- 7 Usage --------------------------------------------------------------------------------------------------- 8 Fortifying Mode --------------------------------------------------------------------------------- --------- 8.1 Engine Started Alert ---------------------------------------------- --------- -------- 8.2 Movement Alert --------------------------------------------------------- --------- -------- 8.3 Power Cutoff Alert-------------------------------------------------------- --------- --------... -
Page 3: Summary
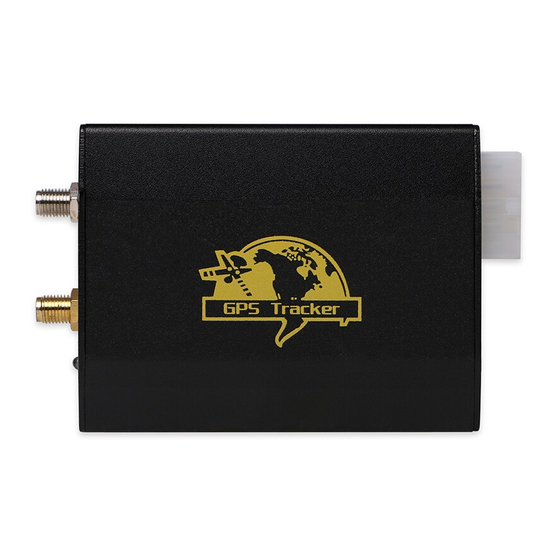
1 Summary Working based on existing GSM/GPRS network and GPS satellites, this product can locate and monitor any remote targets by SMS or GPRS,and guard against theft of Vehicle. 2 Applications Rental vehicle / Fleet management etc Covert tracking 3 Hardware Description 3.1 Connectors SIM card lockhole SIM card slot... -
Page 4: Wires Connection
Wires Connection 1. Black wire:-12V; 2. Red wire:+12V; 3. Purple wire:ACC; 4.White wire:connecting guard against theft implement(reserve-wire,it can be connected or not.) 5.Microphone 6.External-relay connector 7.SOS button External relay Connection External relay Connect here with the tracker (re. 3.2 Wire 6 ) Wires for car oil connecting... -
Page 5: Specifications
4 Specification. Content Specs. Dimension. 80mm x 60mm x 25mm Weight 100g Network GSM/GPRS Band 850/900/1800/1900Mhz or 900/1800/1900Mhz GPS chip SIRF3 chip GPS sensitivity -159dBm GPS accuracy Reacquisition 0.1s Cold status 45s Time To First Fix Warm status 35s Hot status 1s 12—24V input Car charger output... -
Page 6: Startup
Put a SIM card into the slot. Insert the slot with SIM card into the tracker. 6 Startup Put the SIM card in place,the LED indicator will flash after several seconds.(NOTE:The tracker turns on atuomatically while the sim card slot be inserted,and the tracker turns off automatically while the sim card slot take out.) After connecting the wires with the tracker and the car,then you can see the LED indicator flashs green arounds the wires connector(re.3.1 wires connector) -
Page 7: Engine Started Alert
flash every 4 seconds when the “protection “ is activated. While the “protection” will be deactivated when you dial up the tracker again, the indicator will flash every 1 second when the deactivation is done. Remark: If ACC is connected, then you can not activate the “protection” for your car. The tracker will be triggered to send an alert under one of following conditions: 8.1 Engine Started Alert In fortifying mode, the tracker will start the ACC examine automatically. -
Page 8: Application In The Car Alarm System
It will keep sending such an alert every 3 minutes, you can send”fortify123456” to stop NOTE: These three alerts only occurred when the “ protection ” is activated in fortifying mode. 8.4 Application in the Car Alarm System If your car is equipped with a car alarm system,you can connect the white wire(re.3.2 wire4) to the positive wire of microphone on the car alarm.The authorized number will receive an alert if the car alarm sounds more than 10 seconds Alert SMS format:... -
Page 9: Change Password
settings. (default password: 123456) 9.2 Change the Password Send SMS password+old password+space+new password to change the password. (default password: 123456) Remark: 9.2.1 Be sure keep the new password in mind, you have to upload the software to restore the original setting in case of losing the new password. 9.2.2 Make sure the new password is in 6 digits, or else the tracker can not recognize the password. -
Page 10: Auto-Track
imei:354776031555474 Lat: 22.566901 long: 114.051258==Coordinate 0.00 == speed 14/08/09 06.54== Date&Time bat:F == battery power is full,while ‘L’means battery power is low Signal:F == Full GPS signal ‘L’ means no GPS signal help me == the SOS message, this section is blank for tracking message 354776031555474== IMEI 9.4 Auto-Track This function is using for the user to receive SMS with Geo-info in a certain time. -
Page 11: Movement Alert
9.5.1 Setup:Send SMS stockade+password+space+latitude,longitude;latitude,longitude to the unit to set the restricted district. Remark :The first latitude&longitude is coordinate of the top left corner of the Geo-fence, while the second latitude&longitude is the coordinate of the bottom right corner. 9.5.2 Cancel:Send SMS nostockade+password to deactivate this function.. 9.5.3 Response SMS format: stockade!+geo-info. -
Page 12: Imei Checking
The tracker will check the speed in 3 minutes interval and alarm if it is overspeed. 9.8 IMEI Checking: Send SMS imei+password to the unit to check the IMEI number of the unit. 9.9 SOS Button Press the SOS for 3 second, it will send “help me !+ Geo-info” to all the authorized numbers every 3 minutes. -
Page 13: Monitoring Mode
◆Power on the tracker outdoor when use the tracker for the first time, it can search the GPS signal nearby, it also greatly shorten the time of searching the GPS signal for the future use. 10 Monitoring Mode(voice surveillance mode) Send SMS monitor+password, the response from the tracker is “monitor ok”... - Page 14 Cancel: Send SMS noadminip+123456 12.2 Set APN Setup: Send SMS apn+123456+space+specify apn content. If setup successful, the tracker will reply SMS “APN ok”. Cancel: The old APN will be invalid automatically when a new APN is set. 12.3 Set APN’s User Name Setup: Send SMS apnuser+123456+space+the APN’s user name.
- Page 15 13145826175=== authorized number GPRMC,070718.000,A,2234.0228,N,11403.0764,E,0.00,,070909,,,A*73,==GPS module’s Original GPRMC sentences F=== Full GPS signal L=== No GPS signal help me == the SOS message imei:354776030042714==the tracker’s IMEI number 132=== The length of the GPRS string 40512===CRC16 Checksum For example, it will send GPS coordinates as below illustrated Notes: ◆Our gprs supports TCP or UDP protocol, so please confirm whether your GPRS webserver supports TCP or UDP protocol before having the order.
-
Page 16: Cautions
13 Cautions Please comply with the instructions to extend the unit life: 1. Keep the unit dry. Any liquid, i.e. rain, moisture, may destroy or damage the inside circuitry. 2. Don’t use & store the unit in dusty places. 3. Don’t put the unit in overheated or overcooled places. 4.
Need help?
Do you have a question about the TK-103 and is the answer not in the manual?
Questions and answers