CyberData 011272 Operation Manual
Voip flush-mount indoor intercom
Hide thumbs
Also See for 011272:
- Operation manual (86 pages) ,
- Installation quick reference (2 pages) ,
- Installation quick reference (2 pages)

Related Manuals for CyberData 011272


Summary of Contents for CyberData 011272
- Page 1 The IP Endpoint Company VoIP Flush-Mount Indoor Intercom Operations Guide Part #011272 Document Part #930853H for Firmware Version 11.4.2 CyberData Corporation 3 Justin Court Monterey, CA 93940 (831) 373-2601...
- Page 2 CyberData Corporation. This manual, and the products, software, firmware, and/or hardware described in this manual are the property of CyberData Corporation, provided under the terms of an agreement between CyberData Corporation and recipient of this manual, and their use is subject to that agreement and its terms.
- Page 3 Note: While Enable DTMF Push to Talk is enabled, the *, #, and 0 keys cannot be used in the DTMF activation code. • Updates Section C.3, "Contact Information" with “http://support.cyberdata.net/” • Updates Section C.4, "Warranty and RMA Information" with “http://support.cyberdata.net/”...
- Page 4 Potential safety hazards are identified in this manual through the use of words Danger, Warning, and Caution, the specific hazard type, and pictorial alert icons. CyberData Corporation 930853H Operations Guide...
-
Page 5: Important Safety Instructions
Electrical Hazard: To prevent injury, this apparatus must be securely attached to the floor/wall in accordance with the installation instructions. GENERAL ALERT Warning The PoE connector is intended for intra-building connections only and does not route to the outside plant. GENERAL ALERT CyberData Corporation 930853H Operations Guide... -
Page 6: Table Of Contents
B.1.1 In a LINUX Environment ....................92 B.1.2 In a Windows Environment ..................92 Appendix C Troubleshooting/Technical Support C.1 Frequently Asked Questions (FAQ) ..................93 C.2 Documentation ........................93 C.3 Contact Information ........................94 C.4 Warranty and RMA Information ....................94 Operations Guide 930853H CyberData Corporation... - Page 7 Index Operations Guide 930853H CyberData Corporation...
-
Page 8: Chapter 1 Product Overview
To identify the VoIP Flush-Mount Indoor Intercom, look for a model number label similar to the one shown in Figure 1-1. Confirm the following: • The model number on the label should be 011272. • The serial number on the label should begin with 2721. Figure 1-1. Model Number Label WWW.CYBERDATA.NET... -
Page 9: Typical System Installation
Relay Module Intercom IP Phone IP PBX Server Figure 1-3. Typical Installation—Networked Door Strike Intermediate Relay Module 802.3af Compliant Ethernet Switch Networked Door Strike Door Strike Intermediate Relay Module Intercom IP Phone IP PBX Server Operations Guide 930853H CyberData Corporation... -
Page 10: Product Features
The VoIP Flush Mount Indoor Intercom has the following features: • Supports SRST (Survivable Remote Site Telephony) in a Cisco environment. SRST parameters are entered statically into the CyberData product's internal webpage. • • Dual speeds of 10 Mbps and 100 Mbps •... -
Page 11: Supported Protocols
Packet Time 20 ms 1.5 Supported SIP Servers Go to the following link to find the VoIP Flush-Mount Indoor Intercom product page which will have information on how to configure the device for various supported SIP servers: http://www.cyberdata.net/support/server/index.html Operations Guide 930853H CyberData Corporation... -
Page 12: Product Specifications
FCC Class A, UL 60950 Auxiliary Relay 1A at 30 VDC Dimensions 5.118” x 5.118” x 2.25” (H x W x D) Weight 0.71 lbs./shipping weight of 1.1 lbs. (0.32 kg/shipping weight of 0.5 kg) Part Number 011272 Operations Guide 930853H CyberData Corporation... -
Page 13: Chapter 2 Installing The Voip Flush-Mount Indoor Intercom
VoIP Flush Mount Indoor Intercom parts. Note Appendix A, "Mounting the Intercom" for physical mounting information. Table 2-1. Parts List Quantity Part Name Illustration Intercom Assembly Installation Quick Reference Guide Intercom Mounting Accessory Kit Operations Guide 930853H CyberData Corporation... -
Page 14: Intercom Components
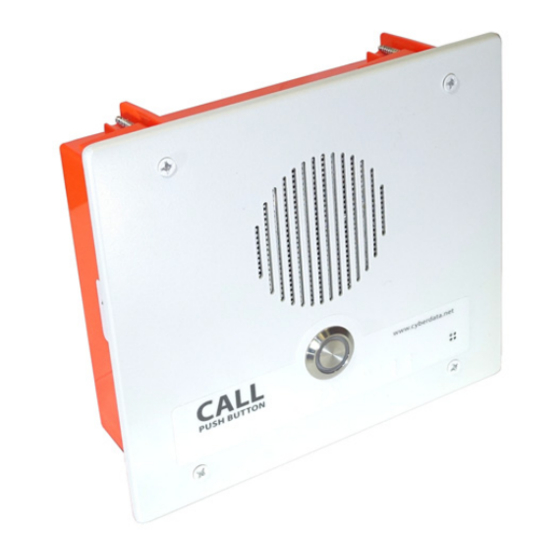
Intercom Components 2.2 Intercom Components Figure 2-1 shows the components of the Intercom. Figure 2-1. Intercom Components Speaker Drain Hole Call Button Section 2.3, "Intercom Setup" for information about the functionality of the Call Button. Operations Guide 930853H CyberData Corporation... -
Page 15: Intercom Setup
Intercom from a non-PoE 12VDC power source as an alternative to Network PoE power. Use of these contacts for any other purpose will damage the J3 Terminal Block Intercom and void the product warranty. can accept 16 AWG wire Operations Guide 930853H CyberData Corporation... -
Page 16: Using The On-Board Relay
This relay interface also has a general purpose input port that can be used to monitor an external switch and generate an event. For more information on the sensor options, see the Sensor Configuration Page on the web interface. Operations Guide 930853H CyberData Corporation... -
Page 17: Wiring The Circuit
When configuring with an inductive load, please use an intermediary relay with a High PIV Ultrafast Switching Diode. We recommend using the CyberData Door Strike Intermediate Relay Module (CD# 011269) (see Section 2.3.3.2, "Connecting the Door Strike Intermediate Relay Module"). - Page 18 Section 2.4.12, "Configure the Door Strike Relay" for configuration options. AC Source DC Source Door Lock Sense Input If you have questions about connecting door strikes or setting up the web configurable options, please contact our support department. http://www.cyberdata.net/support/voip/index.html Operations Guide 930853H CyberData Corporation...
- Page 19 Section 2.4.12, "Configure the Door Strike Relay" for configuration options. CyberData Device Sense Input Aux Button If you have questions about connecting door strikes or setting up the web configurable options, please contact our support department. http://www.cyberdata.net/support/voip/index.html Operations Guide 930853H CyberData Corporation...
-
Page 20: Intercom Connectors
Table 2-2. Connector Functions Connector Function Call Button LED Interface Microphone Interface Speaker Interface Keypad Interface — Not Used Auxiliary Strobe Connector — Not Used Proximity Sensor Interface — Not Used JP10 Disables the intrusion sensor when installed. Operations Guide 930853H CyberData Corporation... - Page 21 JTAG (Factory Use Only) Reserved (Factory Use Only) Section 2.3.6, "RTFM Button" a.Do not install a jumper. Momentary short to reset. Permanent instal- lation of a jumper would prevent the board from running all together. Operations Guide 930853H CyberData Corporation...
-
Page 22: Activity And Link Leds
Activity LED blinks when there is network activity (see Figure 2-8). • The square, GREEN Link LED above the Ethernet port indicates that the network connection has been established (see Figure 2-8). Figure 2-8. Activity and Link LED Link Activit Operations Guide 930853H CyberData Corporation... -
Page 23: Rtfm Button
10.10.10.10 if a DHCP server is not present). Note Pressing and holding the RTFM button for longer than five seconds will restore the device to the factory default settings. Figure 2-10. RTFM Button (SW1) Operations Guide 930853H CyberData Corporation... -
Page 24: Adjusting The Intercom Volume
10.10.10.10 if a DHCP server is not present). Figure 2-11. RTFM Button 2.3.7 Adjusting the Intercom Volume You can adjust the Intercom volume through the Volume, Multicast Volume, Ring Volume, and Sensor Volume settings on the Device Configuration Page. Operations Guide 930853H CyberData Corporation... -
Page 25: Call Button And The Call Button Led
Call Button LED will still blink during initialization and calls. • The Call Button LED flashes briefly at the beginning of RTFM mode. Figure 2-12. Call Button and Call Button LED Call Button and Call Button LED Operations Guide 930853H CyberData Corporation... -
Page 26: Configure The Intercom Parameters
Table 2-4. Factory Default Settings Parameter Factory Default Setting IP Addressing DHCP IP Address 10.10.10.10 Web Access Username admin Web Access Password admin Subnet Mask 255.0.0.0 Default Gateway 10.0.0.1 a. Default if there is not a DHCP server present. Operations Guide 930853H CyberData Corporation... -
Page 27: Intercom Web
Link to the Multicast page. Link to the Sensor page. Link to the Audiofiles page. Link to the Events page. Link to the Door Strike Relay page. Link to the Autoprovisioning page. Link to the Firmware page. Operations Guide 930853H CyberData Corporation... -
Page 28: Using The Toggle Help Button
2. You will see a question mark ( ) appear next to each web page item that has been provided with a short description by the Help feature. See Figure 2-14. Figure 2-14. Toggle Help Button and Question Marks Question mark appears next to the web page items Toggle Help button Operations Guide 930853H CyberData Corporation... - Page 29 3. Move the mouse pointer to hover over the question mark ( ), and a short description of the web page item will appear. See Figure 2-15. Figure 2-15. Short Description Provided by the Help Feature A short description of the Question mark web page item will appear Operations Guide 930853H CyberData Corporation...
-
Page 30: Log In To The Configuration Home Page
Note You may also download CyberData’s VoIP Discovery Utility program which allows you to easily find and configure the default web address of the CyberData VoIP products. CyberData’s VoIP Discovery Utility program is available at the following website address: http://www.cyberdata.net/support/voip/discovery.html... - Page 31 Installing the VoIP Flush-Mount Indoor Intercom Intercom Setup Figure 2-16. Home Page CyberData Indoor Intercom 272101456 v11.4.2 Operations Guide 930853H CyberData Corporation...
- Page 32 Import Settings Use this button to select a configuration file to import. After selecting a configuration file, click Import to import the configuration from the selected file. Then, click Save and Reboot to store changes. Operations Guide 930853H CyberData Corporation...
- Page 33 ( ) appear next to some of the web page items. Move the mouse pointer to hover over a question mark to see a short description of a specific web page item. Operations Guide 930853H CyberData Corporation...
-
Page 34: Configure The Device
Installing the VoIP Flush-Mount Indoor Intercom Intercom Setup 2.4.5 Configure the Device 1. Click the Device menu button to open the Device page. See Figure 2-17. Figure 2-17. Device Configuration Page CyberData Indoor Intercom Operations Guide 930853H CyberData Corporation... - Page 35 The acoustic echo canceller also has a harder time maintaining full duplex operation when in the Boost Mode. The product may drop from full duplex operation into half/duplex mode while in Boost Mode. Contact CyberData support for additional information if needed. Operations Guide 930853H...
- Page 36 Posix Timezone String to specify time zone and daylight savings time where applicable. Enter up to 63 characters. Periodically sync time with server When selected, the time is periodically updated with the NTP server at the configured interval below. Operations Guide 930853H CyberData Corporation...
- Page 37 HTTPS for security reasons. Click on the Test Audio button to do an audio test. When the Test Audio button is pressed, you will hear a voice message for testing the device audio quality and volume. Operations Guide 930853H CyberData Corporation...
- Page 38 Note You can change the Volume, Multicast Volume, Ring Volume, Sensor Volume, and Microphone Gain without rebooting the device. You must save and reboot the device for other changes to take effect. Operations Guide 930853H CyberData Corporation...
- Page 39 Time of day to change M11.1.0/2:00:00 The date and time when daylight savings ends. The eleventh month (November) The 1st occurrence of the day (next item) in the month Sunday /2:00:00 Time of day to change Operations Guide 930853H CyberData Corporation...
- Page 40 CST, Central US GMT-5 EST, Eastern US GMT-4 Atlantic, Canada GMT-3 Brazilia, Buenos Aries GMT-2 Mid-Atlantic GMT-1 Cape Verdes Greenwich Mean Time, Dublin GMT+1 Berlin, Rome GMT+2 Israel, Cairo GMT+3 Moscow, Kuwait GMT+4 Abu Dhabi, Muscat Operations Guide 930853H CyberData Corporation...
- Page 41 Time Zone City or Area Zone Crosses GMT+5 Islamabad, Karachi GMT+6 Almaty, Dhaka GMT+7 Bangkok, Jakarta GMT+8 Hong Kong, Beijing GMT+9 Tokyo, Osaka GMT+10 Sydney, Melbourne, Guam GMT+11 Magadan, Soloman Is. GMT+12 Fiji, Wellington, Auckland Operations Guide 930853H CyberData Corporation...
-
Page 42: Configure The Network Parameters
Installing the VoIP Flush-Mount Indoor Intercom Intercom Setup 2.4.6 Configure the Network Parameters 1. Click the Network menu button to open the Network page (Figure 2-19). Figure 2-19. Network Configuration Page CyberData Indoor Intercom Operations Guide 930853H CyberData Corporation... - Page 43 Subnet Mask Shows the current Subnet Mask address. Default Gateway Shows the current Default Gateway address. DNS Server 1 Shows the current DNS Server 1 address. DNS Server 2 Shows the current DNS Server 2 address. Operations Guide 930853H CyberData Corporation...
- Page 44 Move the mouse pointer to hover over a question mark to see a short description of a specific web page item. Note You must click on the Save button and then the Reboot button for the changes to take effect. Operations Guide 930853H CyberData Corporation...
-
Page 45: Configure The Sip Parameters
Installing the VoIP Flush-Mount Indoor Intercom Intercom Setup 2.4.7 Configure the SIP Parameters 1. Click on the SIP menu button to open the SIP page (Figure 2-20). Figure 2-20. SIP Configuration Page CyberData Indoor Intercom Operations Guide 930853H CyberData Corporation... - Page 46 This parameter also becomes the host portion of the SIP-URI for the device's extension on the second backup SIP server. This field can accept entries of up to 255 characters in length. Operations Guide 930853H CyberData Corporation...
- Page 47 SIP server. Any calls made to this extension will play a ringtone (corresponds to Night Ring on the Audiofiles page). By design, it is not possible to answer a call to the Nightringer extension. Operations Guide 930853H CyberData Corporation...
- Page 48 A Caller identification string added to outbound calls. Enter up to 64 alphanumeric characters. Call Disconnection Terminate Call After Delay Automatically terminate an active call after a given delay in seconds. A value of 0 will disable this function. Enter up to 8 digits. Operations Guide 930853H CyberData Corporation...
- Page 49 DTMF tone '2', send out DTMF tone 5, wait 6 seconds, send out DTMF tone 4, wait 4 seconds, send out DTMF tone 1 Note The maximum number of total characters in the dial-out field is 64. Operations Guide 930853H CyberData Corporation...
- Page 50 Point-to-Point calls. The delayed DTMF functionality is available in the Point-to-Point Mode. Note Receiving point-to-point SiP calls may not work with all phones. Figure 2-21. SIP Page Set to Point-to-Point Mode CyberData Indoor Intercom Device is set to NOT register with a SiP server Operations Guide 930853H CyberData Corporation...
- Page 51 DTMF tone '2', send out DTMF tone 5, wait 6 seconds, send out DTMF tone 4, wait 4 seconds, send out DTMF tone 1 Note The maximum number of total characters in the dial-out field is 25. Operations Guide 930853H CyberData Corporation...
-
Page 52: Configure The Multicast Parameters
RTP audio streams. A paging zone can consist of one or many CyberData multicast group-enabled products. There is no limit to how many speakers can be in a given paging zone. Each multicast group is defined by a multicast address and port number. - Page 53 SIP calls, multicast streams, ring tones, ringback tones, and nightring tones are all prioritized. Ringtones and Ringtones all play at the same priority level. This means that it is possible to have a nightring tone Nightringtones and a normal ringtone playing at the same time. Operations Guide 930853H CyberData Corporation...
-
Page 54: Configure The Sensor Configuration Parameters
Calling a preset extension can be set up as a point-to-point call, but currently can't send delayed DTMF tones. 1. Click Sensor menu button to open the Sensor page (Figure 2-23). Figure 2-23. Sensor Configuration Page CyberData Indoor Intercom Operations Guide 930853H CyberData Corporation... - Page 55 When selected, the device will call the Dial Out Extension and play an audio file (corresponds to Intrusion Sensor Triggered on the Audiofiles page) to the phone answering the SIP call when the intrusion sensor is activated. Operations Guide 930853H CyberData Corporation...
- Page 56 Move the mouse pointer to hover over a question mark to see a short description of a specific web page item. Note You must click on the Save button and then the Reboot button for the changes to take effect. Operations Guide 930853H CyberData Corporation...
-
Page 57: Configure The Audio Configuration Parameters
The Audiofiles page is used to add custom audio to the board. User uploaded audio will take precedence over the audio files shipped with the Intercom. 1. Click on the Audiofiles menu button to open the Audiofiles page (Figure 2-24). Figure 2-24. Audiofiles Configuration Page CyberData Indoor Intercom Operations Guide 930853H CyberData Corporation... - Page 58 '0' corresponds to the spoken word “zero.” '1' corresponds to the spoken word “one.” '2' corresponds to the spoken word “two.” '3' corresponds to the spoken word “three.” '4' corresponds to the spoken word “four.” Operations Guide 930853H CyberData Corporation...
- Page 59 '9' corresponds to the spoken word “nine.” Corresponds to the spoken word “dot.” (24 character limit) Audiotest Corresponds to the message “This is the CyberData IP speaker test message...” (24 character limit) Page tone Corresponds to a simple tone used for beep on initialization and beep on page (24 character limit).
- Page 60 RIFF (little-endian) data, WAVE audio, Microsoft PCM, 16 bit, mono 8000 Hz You can use the free utility Audacity to convert audio files into this format. See Figure 2-26 through Figure 2-28. Figure 2-26. Audacity 1 Figure 2-27. Audacity 2 Operations Guide 930853H CyberData Corporation...
- Page 61 Intercom Setup When you export an audio file with Audacity, save the output as: • WAV (Microsoft) signed 16 bit PCM. Figure 2-28. WAV (Microsoft) signed 16 bit PCM WAV (Microsoft) signed 16 bit PCM Operations Guide 930853H CyberData Corporation...
-
Page 62: Configure The Events Parameters
The Events page specifies a remote server that can be used to receive HTTP POST events when actions take place on the board. 1. Click on the Events menu button to open the Events page (Figure 2-29). Figure 2-29. Event Configuration Page CyberData Indoor Intercom Operations Guide 930853H CyberData Corporation... - Page 63 Event Server Server IP Address The IPv4 address of the event server in dotted decimal notation. Server Port Specify the event server port number. The supported range is 0- 65536. Enter up to 5 digits. Operations Guide 930853H CyberData Corporation...
- Page 64 Move the mouse pointer to hover over a question mark to see a short description of a specific web page item. Note You must click on the Save button and then the Reboot button for the changes to take effect. Operations Guide 930853H CyberData Corporation...
- Page 65 Here are example packets for every event: POST xmlparse_engine HTTP/1.1 Host: 10.0.3.79 User-Agent: CyberData/1.0.0 Content-Length: 197 Content-Type: application/x-www-form-urlencoded <?xml version="1.0" encoding="ISO-8859-1"?> <cyberdata NAME='CyberData VoIP Device' MAC='0020f70015b6'> <event>POWERON</event> </cyberdata> POST xmlparse_engine HTTP/1.1 Host: 10.0.3.79 User-Agent: CyberData/1.0.0 Content-Length: 199 Content-Type: application/x-www-form-urlencoded <?xml version="1.0"...
- Page 66 Installing the VoIP Flush-Mount Indoor Intercom Intercom Setup User-Agent: CyberData/1.0.0 Content-Length: 205 Content-Type: application/x-www-form-urlencoded <?xml version="1.0" encoding="ISO-8859-1"?> <cyberdata NAME='CyberData VoIP Device' MAC='0020f70015b6'> <event>CALL_TERMINATED</event> </cyberdata> POST xmlparse_engine HTTP/1.1 Host: 10.0.3.79 User-Agent: CyberData/1.0.0 Content-Length: 197 Content-Type: application/x-www-form-urlencoded <?xml version="1.0" encoding="ISO-8859-1"?> <cyberdata NAME='CyberData VoIP Device' MAC='0020f70015b6'>...
- Page 67 Installing the VoIP Flush-Mount Indoor Intercom Intercom Setup User-Agent: CyberData/1.0.0 Content-Length: 234 Content-Type: application/x-www-form-urlencoded <?xml version="1.0" encoding="ISO-8859-1"?> <cyberdata NAME='CyberData VoIP Device' MAC='0020f70015b6'> <event>RELAY_DEACTIVATED</event> </cyberdata> POST xmlparse_engine HTTP/1.1 Host: 10.0.3.79 User-Agent: CyberData/1.0.0 Content-Length: 234 Content-Type: application/x-www-form-urlencoded <?xml version="1.0" encoding="ISO-8859-1"?> <cyberdata NAME='CyberData VoIP Device' MAC='0020f70015b6'>...
-
Page 68: Configure The Door Strike Relay
Windows application. 1. Click on the DSR menu button to open the DSR page (Figure 2-30). Figure 2-30. DSR Page CyberData Indoor Intercom Operations Guide 930853H CyberData Corporation... - Page 69 When selected, the device's on-board relay will be activated until the remote (DSR) door sensor is deactivated. Play Audio Locally When selected, the device will loop an audio file out of the speaker until the remote (DSR) door sensor is deactivated. Operations Guide 930853H CyberData Corporation...
- Page 70 Use this button to view the settings of a remote relay that has been “discovered” after pressing the Discover button. Use this button to associate the remote relay with the device. Only one relay may be associated with a device. Operations Guide 930853H CyberData Corporation...
- Page 71 (active/inactive) and door (open/closed). Note You must click on the Save button and then the Reboot button for the changes to take effect. Figure 2-31. Relay Status Section Operations Guide 930853H CyberData Corporation...
-
Page 72: Configure The Device (On The Dsr Page)
Installing the VoIP Flush-Mount Indoor Intercom Intercom Setup 2.4.13 Configure the Device (on the DSR page) 1. Click the View button on the DSR page to open the Configure Device page (Figure 2-32). Figure 2-32. DSR Page Configure Device Page Operations Guide 930853H CyberData Corporation... - Page 73 .1 is the first occurrence of the day in the month. .0 is Sunday. /02:00:00 is the time. Note: When the occurrence is set to 5, the final occurrence of the day in the specified month is used. Operations Guide 930853H CyberData Corporation...
- Page 74 Click on the Upgrade button to upgrade the firmware of the door strike relay. Note You must click on the Save button and then the Reboot button for the changes to take effect. Operations Guide 930853H CyberData Corporation...
-
Page 75: Configure The Autoprovisioning Parameters
Note By default, the device will try to set up its configuration with autoprovisioning. 1. Click the Autoprov menu button to open the Autoprovisioning page. See Figure 2-33. Figure 2-33. Autoprovisioning Page CyberData Indoor Intercom Operations Guide 930853H CyberData Corporation... - Page 76 Set Time with NTP Server on boot setting on the Device Configuration Page page (see Table 2-7). Click the Save button to save your configuration settings. Note: You need to reboot for changes to take effect. Operations Guide 930853H CyberData Corporation...
- Page 77 3. Option 150 - an IP address to a tftp server 4. Option 66 - an IP address to a tftp server or if the entry starts with 'http', a FQDN to a http server. Operations Guide 930853H CyberData Corporation...
- Page 78 Autoprovisioning files can contain the whole configuration or a subset of this file. The first autoprovisioning file can also contain links to other autoprovisioning files. The <MiscSettings> section contains some examples of additional autoprovisioning files: <MiscSettings> <DeviceName>CyberData VoIP Intercom</DeviceName> <!-- <AutoprovFile>common.xml</AutoprovFile>--> <!-- <AutoprovFile>sip_reg[macaddress].xml</AutoprovFile>-->...
- Page 79 When one of these options is set, the Files after Boot device will download its autoprovisioning files again, and if it finds any differences from the files it downloaded on boot, it will force a reboot and reconfigure. Operations Guide 930853H CyberData Corporation...
- Page 80 The autoprovisioning filename is set to “cyberdata/” On boot, the device will try to download: https://www.example.com/cyberdata/0020f7123456.xml ...and if this fails: https://www.example.com/cyberdata/000000cd.xml Audio files and firmware files will also add “cyberdata” to the URL before downloading. Operations Guide 930853H CyberData Corporation...
- Page 81 In this way, a generic autoprovisioning file can specify unique firmware for a range of products. The list of valid product strings: <ProductString>CallButton31</ProductString> <ProductString>EmergencyIntercom31</ProductString> <ProductString>EmergencyIntercom31SW</ProductString> <ProductString>IndoorIntercom31</ProductString> <ProductString>IndoorIntercom31SW</ProductString> <ProductString>IndoorKeypad31</ProductString> <ProductString>IndoorKeypad31SW</ProductString> <ProductString>OfficeRinger31</ProductString> <ProductString>OfficeRinger31SW</ProductString> <ProductString>OutdoorIntercom31</ProductString> <ProductString>OutdoorIntercom31SW</ProductString> <ProductString>OutdoorKeypad31</ProductString> <ProductString>OutdoorKeypad31SW</ProductString> <ProductString>Strobe31</ProductString> <ProductString>Strobe31SW</ProductString> Operations Guide 930853H CyberData Corporation...
- Page 82 000000cd.xml. This file exists, and Device1 parses the three elements. 1. Device1 changes its device name to CyberData Autoprovisioned. 2. Device1 finds an AutoprovFile element containing the filename sip_common.xml. The device downloads sip_common.xml from “https://autoprovtest.server.net,”...
- Page 83 TFTP server at 10.0.1.3. and imports these settings. The device name is set to CyberData Autoprovisioned, the SIP server is set to 10.0.0.253, and the port is set to 5060. Device2 does the same except it downloads 0020f7020002.xml on boot and imports these values instead.
- Page 84 You can force a change to the audio files on the board by clicking Restore Default on the Audio Configuration page or by changing the autoprovisioning file with “default” set as the file name. Operations Guide 930853H CyberData Corporation...
- Page 85 "http://test.cyberdata.net"; # OPTION 66 option option-150 10.0.0.252; # OPTION 150 # These two lines are needed for option 43 vendor-option-space VendorInfo; # OPTION 43 option VendorInfo.text "http://test.cyberdata.net"; # OPTION 43 range 10.10.0.1 10.10.2.1; } Operations Guide 930853H CyberData Corporation...
- Page 86 4. At this point, you can open and edit the autoprovisioning template to change the configuration settings in the template for the unit. 5. You can then upload the autoprovisioning file to a TFTP or HTTP server where the file can be loaded onto other devices. Operations Guide 930853H CyberData Corporation...
-
Page 87: Upgrade The Firmware And Reboot The Intercom
2. Unzip the firmware version file. This file may contain the following: • Firmware file • Release notes 3. Log in to the Intercom home page as instructed in Section 2.4.4, "Log in to the Configuration Home Page". Operations Guide 930853H CyberData Corporation... - Page 88 4. Click the Firmware menu button to open the Firmware page. See Figure 2-35. Caution Equipment Hazard: CyberData strongly recommends that you first reboot the device before attempting to upgrade the firmware of the device. See Section 2.5.2, "Reboot the Device".
-
Page 89: Reboot The Device
Section 2.4.4, "Log in to the Configuration Home Page". 1. Click on the Reboot button on the Home page (Figure 2-36). A normal restart will occur. Figure 2-36. Reboot System Section CyberData Indoor Intercom 272101456 v11.4.2 Reboot Operations Guide 930853H CyberData Corporation... -
Page 90: Command Interface
--user admin --password admin --auth-no-challenge --no- check-certificate --quiet -O /dev/null "https://10.0.3.71/cgi-bin/ audioconfig.cgi" --post-data "play_2=yes" Play the "3" audio file wget --user admin --password admin --auth-no-challenge --no- check-certificate --quiet -O /dev/null "https://10.0.3.71/cgi-bin/ audioconfig.cgi" --post-data "play_3=yes" Operations Guide 930853H CyberData Corporation... - Page 91 --user admin --password admin --auth-no-challenge --no- check-certificate --quiet -O /dev/null "https://10.0.3.71/cgi-bin/ audioconfig.cgi" --post-data "play_intrusionsensortriggered=yes" Play the "Door Ajar" audio file wget --user admin --password admin --auth-no-challenge --no- check-certificate --quiet -O /dev/null "https://10.0.3.71/cgi-bin/ audioconfig.cgi" --post-data "play_doorajar=yes" Operations Guide 930853H CyberData Corporation...
- Page 92 --user admin --password admin --auth-no-challenge --no- check-certificate --quiet -O /dev/null "https://10.0.3.71/cgi-bin/ audioconfig.cgi" --post-data "delete_rebooting=yes" Delete the "Restoring Default" audio file wget --user admin --password admin --auth-no-challenge --no- check-certificate --quiet -O /dev/null "https://10.0.3.71/cgi-bin/ audioconfig.cgi" --post-data "delete_restoringdefault=yes" Operations Guide 930853H CyberData Corporation...
- Page 93 --user admin --password admin --auth-no-challenge --no- check-certificate --quiet -O /dev/null "https://10.0.3.71/cgi-bin/ sensorconfig.cgi" --post-data "intrusiontest=yes" a.Type and enter all of each http POST command on one line. b. Must be in point-to-point mode see Section 2.4.7.2, "Point-to-Point Configuration" Operations Guide 930853H CyberData Corporation...
-
Page 94: Appendix A Mounting The Intercom
Table A-1. Mounting Components (Part of the Accessory Kit) Quantity Part Name Illustration T15 Security Pin Torx Key #6 X 3/8-inch,100 Deg., Flat Head, Self-Tapping Screw #6 X 3/8-inch,100 Deg., Flat Head T15 Security Pin Torx Screw Operations Guide 930853H CyberData Corporation... -
Page 95: Dimensions
(Maxi u ) 0.118 [3.0] Mini u Distance 0.551 [14.0] Maxi u Distance Instrusion Sensor 4.700 [119.4] Ø0.150 [Ø3.8] 82° Countersunk 6.840 [173.7] (4 Places) Di ensions are in Inches [Milli eter]; Projection: Third Angle Operations Guide 930853H CyberData Corporation... - Page 96 Figure A-3. PCB Dimensions and Intrusion Sensor Range 0.118 [3.00] ø0.138 [ø3.51] Fits #6-32 Machine Screw 0.551 [14.00] (4 Places) Effective Range for Instrusion 1.083 [27.52] Intrusion Sensor to Function Sensor JP10 TOP SIDE fro 3 to 14 BOTTOM SIDE 4.200 [106.68] 2.300 [58.42] DIMENSIONS ARE IN INCHES [MILLIMETER]...
-
Page 97: Wall Mounting
6. Make sure that the arrow labels are pointing up. This will ensure that the intrusion sensor functions properly. 7. Fold down all of the flagnuts, and then insert the gang box into the wall cutout. Operations Guide 930853H CyberData Corporation... -
Page 98: Ground Cable Installation
Figure A-5. Ground Cable Installation Create Service Loop Knock Out inside Gang Box #6 Ring Ter inal Ground Wire Star Washer (Not Provided) Ground Lug Note: To mount the intercom, use methods compliant with local electrical codes. Operations Guide 930853H CyberData Corporation... -
Page 99: Appendix B Setting Up A Tftp Server
1. Install and start the software. 2. Select File Configure Security tab Transmit Only. 3. Make a note of the default directory name, and then move the firmware files to be uploaded to that directory. Operations Guide 930853H CyberData Corporation... -
Page 100: Appendix C Troubleshooting/Technical Support
Select the support page for your product to see a list of frequently asked questions for the CyberData product: C.2 Documentation The documentation for this product is released in an English language version only. You can download PDF copies of CyberData product documentation from the VoIP Flush-Mount Indoor Intercom product page at: http://www.cyberdata.net/products/voip/digitalanalog/intercomindoorflush/docs.html Operations Guide... -
Page 101: Contact Information
Monterey, CA 93940 Attention: RMA "your RMA number" RMA Status Form If you need to inquire about the repair status of your product(s), please use the CyberData RMA Status form at the following website address: http://support.cyberdata.net/ C.4 Warranty and RMA Information The most recent warranty and RMA information is available at the following website address: http://support.cyberdata.net/... - Page 102 LED 15 configurable parameters 28, 36, 66 address, configuration login 23 contact information 94 announcing a device’s IP address 16 contact information for CyberData 94 audio configuration 50 current network settings 36 night ring tone parameter 52 CyberData contact information 94...
- Page 103 POST command 83 service loop cable routing 91 http web-based configuration 4 mounting components 87 Mozilla Firefox (web browser) 3 multicast configuration 50 Multicast IP Address 46 identifier names (PST, EDT, IST, MUT) 33 Operations Guide 930853H CyberData Corporation...
- Page 104 40 product features 3 user ID, SIP 39 product specifications 5 SIP registration 39 supported protocols 4 SIP remote SIP port 40 supported SIP servers 4 SIP server 39 typical system installation 2 Operations Guide 930853H CyberData Corporation...
- Page 105 28 multicast volume 28 ring volume 28 sensor volume 28 SIP volume 28 volume boost 28 warranty policy at CyberData 94 web access password 19 web access username 19 web configuration log in address 23 web page Operations Guide...
Need help?
Do you have a question about the 011272 and is the answer not in the manual?
Questions and answers