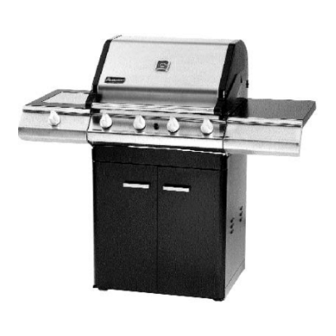
Aussie 8452-5-SS1 Assembly And Use Manual

Aussie 8452-5-SS1 Assembly And Use Manual

Uluru lp gas grill elite

Advertisement

Aussie
ULURU
Assembly and Use Manual
MODELS: 8452-5-SS1 Liquid Propane
8452-5-SL1 Liquid Propane
FOR OUTDOOR HOUSEHOLD USE ONLY. NOT FOR COMMERCIAL USE.
For Customer Service, call 1-800-251-7558 or visit our web site at www.meco.net
• Failure to follow these instructions could result in fire or explosion which could cause death,
serious personal injury, or property damage.
• Read and follow instructions carefully before assembly or use.
• Do not use this product for any other purpose than which it is intended.
• These instructions must be kept with the user. SAVE THESE INSTRUCTIONS.
DANGER
If you smell gas:
1. Shut off gas to the appliance.
2. Extinguish any open flame.
3. Open lid.
4. If odor continues, keep away from the
appliance and immediately call your gas
supplier or your fire department.
®
b b y y M M e e c c o o
LP Gas Grill
TM
®
MODEL 8452-5-S11 Liquid Propane
WARNING
1. Do not store or use gasoline or other
flammable vapors and liquids in the vicinity
of this or any other appliance.
2. An LP cylinder not connected for use shall
not be stored in the vicinity of this or any
other appliance.
Elite

Advertisement

Table of Contents
loading
Need help?

Need help?

Do you have a question about the 8452-5-SS1 and is the answer not in the manual?

Questions and answers

Subscribe to Our Youtube Channel

Summary of Contents for Aussie 8452-5-SS1

  • Page 1 8452-5-SL1 Liquid Propane FOR OUTDOOR HOUSEHOLD USE ONLY. NOT FOR COMMERCIAL USE. For Customer Service, call 1-800-251-7558 or visit our web site at www.meco.net • Failure to follow these instructions could result in fire or explosion which could cause death, serious personal injury, or property damage.
  • Page 2: Table Of Contents

    B) LP Gas Cylinder...13 C) LP Hose & Regulator...13 MECO CORPORATION STRIVES TO BE A QUALITY SUPPLIER OF CONSUMER PRODUCTS. IF WE OMITTED ANY PARTS NEEDED FOR ASSEMBLY, OR YOU NEED TROUBLESHOOTING INFORMATION, PLEASE CONTACT US USING OUR TOLL FREE NUMBER. THANK YOU FOR PURCHASING A MECO CORPORATION PRODUCT.
  • Page 3: Parts Illustrations

    If you need replacement parts, refer to the Parts Illustrations and the Parts List to find the exact parts you need. If you have any questions which require help, contact Customer Service and be sure to mention the model number of your grill. (2) SILVER BACK PANEL (3) BLACK BACK PANEL (1) OWNERS MANUAL...
  • Page 4: Item Description

    PARTS ILLUSTRATIONS (Cont’d) (51) FOIL PAN (52) GREASE PAN (60) HEAT INDICATOR (59) LP HOSE AND REGULATOR (61) IGNITOR SWITCH ITEM DESCRIPTION Owner's Manual Back Panel-Silver Back Panel-Black LP Cylinder Clamp Bottom Panel-Silver Bottom Panel-Black Screw, M6 x 15 Nut, M6 Brace, Bottom Panel Silver Brace, Bottom Panel Black Brace, Back Panel Silver...
  • Page 5: Step 1) Cylinder Clamp/Back Panel Assembly

    Bowl Assembly SS/Black Hood Assembly 430 SS/Silver Hood Assembly 430 SS/Black Spring Pin, Hood Hinge Clevis Pin, Hood Hinge Side Table, Left Burner SS/Silver Side Table, Left Burner SS/Black Screw, M4x15mm (Side Table Front) Side Table, Right SS/Silver Side Table, Right SS/Black Valve, Side Burner Screw, M5x10mm (Side Burner Valve Bracket) Nut, M5 Hex...
  • Page 6: Step 2) Cart Sides And Bottom Assembly

    STEP 2) Cart Sides and Bottom Assembly: Lay Back Panel (2/3) on floor. (FIG. 2) Place Bottom Panel (5/6) against Back Panel edge and align the holes. (FIG. 2) Install two M6x15 Bolts (7) through the holes and secure with two M6 Nuts (8). Attach Bottom Panel Brace (9/10) to Bottom Panel (5/6) with two M6x15 Bolts and M6 Nuts.
  • Page 7: Step 4) Caster Cart Assembly

    STEP 4) CASTER ASSEMBLY: Lay cart on the floor with Back Panel side down. Assemble Fixed Casters (23) to the LEFT Side of Bottom Panel and Swivel Lock Casters (24) to the RIGHT Side of Bottom Panel. Insert eight M6x15 Bolts (7) through the caster bracket holes into the threaded holes in the Bottom Panel.
  • Page 8: Step 6) Hood/Bowl To Cart Assembly

    To reduce the risk of injury from lifting: The following assembly will require 2-people. STEP 6) HOOD/BOWL TO CART ASSEMBLY: Lift the Hood/Bowl Assembly (30) over the cart assembly and set it down until it rests on the inside top flanges of the cart. (FIG. 6A) Align the holes in the side of the Hood/Bowl with the holes in the cart brackets.
  • Page 9: Step 7) Burner Side Table Assembly

    To reduce the risk of an injury: The following assembly will require 2-people. STEP 7) BURNER SIDE TABLE ASSEMBLY: Align the four holes of the LEFT Side Burner Table (36/37) bracket with the threaded inserts in the side of the Bowl. Insert four M6x15 Bolts (7) into the holes and screw them in with a screwdriver, but do not tighten.
  • Page 10: Step 9) Side Burner Assembly

    STEP 9) SIDE BURNER ASSEMBLY: Insert the Side Burner (44) and the Electrode Wire through the front of the large hole in the Side Table. (FIG. 9A) Install the burner tube end over the valve nozzle. (FIG. 9B) Secure the Burner to the bracket with two M4x8mm Screws (45).
  • Page 11: Step 11) Burner Removal/Re-Assembly

    STEP 11) BURNER REMOVAL/RE-ASSEMBLY: The Burners (49) are already installed in the grill. There is some cardboard packing underneath each burner; it will burn off the first time of use. If you wish to remove it: 1. Remove the burner pin. (FIG. 11A) 2.
  • Page 12: Step 13) Flame Diffuser/Cooking Grid/Warming Rack Assembly

    STEP 13) FLAME DIFFUSER/GRID/ WARMING RACK ASSEMBLY: Lay a Flame Diffuser (54) over each Burner on the lower Body ridges from front to back. Place each Flame Diffuser in the individual guides to keep from sliding. (FIG. 13A) Place the Cooking Grids (55) over the Burner Diffusers on the upper Body ridges.
  • Page 13: C) Lp Hose & Regulator

    O.P.D. cylinder. (See page 23) Use only a licensed LP gas cylinder dealer. · The LP gas cylinder, for use with this LP gas grill, must meet the following requirements: 1) 12” diameter x 18” tall, 20 lb maximum capacity...
  • Page 14: Connecting Lp Gas Cylinder

    · Do not perform a leak test on a grill while it is hot or in use. · Do not use the gas grill if you detect a gas leak that cannot be corrected by using the leak test procedures.
  • Page 15 How to perform a leak test: Supplies Needed for a Leak Test: Clean paint brush, water, and dish washing liquid. 1) Use an LP Cylinder equipped with an OPD (Overfill Prevention Device) and have it filled at an authorized LP gas dealer by a qualified attendant.
  • Page 16: Lighting The Grill Using The Pulse-Spark Ignitor

    LIGHTING THE GRILL USING THE PULSE-SPARK IGNITOR To reduce the risk of serious bodily injury or death: · Open Hood before lighting the grill to prevent an explosion from gas build-up. · During failed lighting attempts, or if the burners go out during operation, turn control knobs “Off”...
  • Page 17: F) Manual Lighting Of The Grill

    MANUAL LIGHTING THE GRILL To reduce the risk of serious bodily injury or death: · Open Hood before lighting the grill to prevent an explosion from gas build-up. 1. Open the Hood. 2. Important: Make sure control knobs are turned “Off”. (See FIG.
  • Page 18: I) Manual Lighting The Side Burner

    OPERATING THE GAS GRILL To reduce the risk of serious bodily injury or death: · Never use charcoal in your gas grill. Keep this outdoor cooking appliance clear and free from combustible materials, gasoline and other flammable vapors and liquids.
  • Page 19: D) End Of Cooking Session

    (See Performing a Leak Test.) · Do not operate a gas grill if you have knowledge of or suspect a gas leak. · Do not wear loose clothing (example: hanging shirt tails, clothing with frills, etc.) around a gas grill while in...
  • Page 20 To reduce the risk of a fire beneath the grill: · Inspect and clean burner/venturi tubes for insects and insect nests. · Be sure burners are re-installed properly before using grill. How to Clean the Burners: A) Make sure the LP cylinder grill control knobs are turned OFF;...
  • Page 21: B) Storage

    STORAGE To reduce the risk of serious bodily injury or death: · Store your LP gas grill in a cool dry place. Do not store an LP gas cylinder in a space greater than 125 degrees Fahrenheit. Do not store an LP gas cylinder in a building ,garage or any enclosed area.
  • Page 22 Turn control knobs to “off” position and turn LP gas cylinder handle clockwise until it stops. Wait five minutes. Relight LP gas grill. If flame continues to be low, turn off gas at cylinder and grill. Disconnect the regulator from the LP gas cylinder.
  • Page 23: Important Notice-Lp Cylinder With Opd

    IMPORTANT NOTICE The Gas Grill is setup to operate with a LP Gas Cylinder equipped with an OPD (Overfill Prevention Device). This is a secondary device to prevent the overfill of your LP Gas cylinder. The proper methods for the filling of your LP Gas cylinder are by weight or volume, as described in NFPA 58.
  • Page 24: Limited Warranty

    Stainless steel parts are warranted for a period of one (1) year (for rust-through only) from the date of purchase. All other parts are warranted for a period of one (1) year from the date of purchase. MECO CORPORATION DOES NOT warrant in any way the propane cylinder (see label on cylinder for cylinder manufacturer’s warranty.) The LP cylinder manufacturer is responsible for the materials, workmanship...

This manual is also suitable for:

AussieUluru8452-5-sl18452-5-s11

Table of Contents