Table of Contents
Advertisement
Quick Links
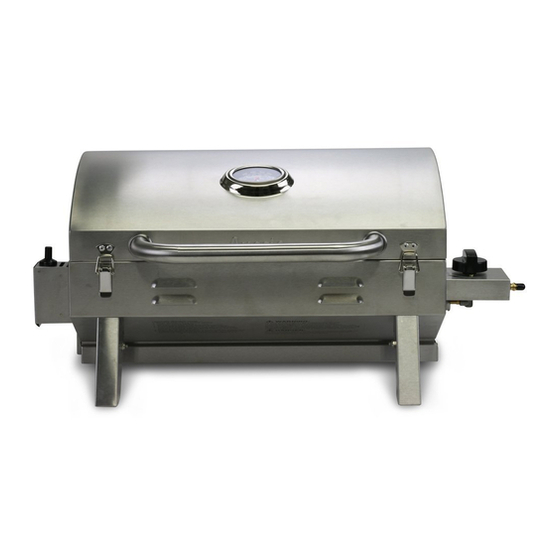
Table Top Grill
6T01U00SS1
For Outdoor Household Use Only. Not for Commercial Use.
D A N G E R
!
If you smell gas:
1. Shut off gas to the appliance.
2. Extinguish any open flame.
3. Open lid.
4. If odor continues, keep away from
the appliance and immediately call
your gas supplier or your fire
department.
Failure to follow these instructions could
result in fire or explosion which could
cause property damage, personal in-
jury or death.
Need Help? Need to Register Your Grill? Looking for Aussie Parts & Accessories?
Visit us online at www.AussieGrills.com Or call Aussie Customer Service at 1-800-251-7558
LP Gas Grill Users Manual
WARNING
!
• This instruction manual contains im-
portant information necessary for
the proper assembly and safe use of
this appliance. Failure to follow these
instructions could result in death or
serious injury from explosion or fire.
• Read and follow all warnings and in-
structions carefully before assembling
or using this appliance.
• Follow all warnings and instructions
when using this appliance.
• Keep this manual for future reference.
SAVE THESE INSTRUCTIONS.
Advertisement
Table of Contents

Related Manuals for Aussie 6T01U00SS1


Summary of Contents for Aussie 6T01U00SS1
- Page 1 • Keep this manual for future reference. jury or death. SAVE THESE INSTRUCTIONS. Need Help? Need to Register Your Grill? Looking for Aussie Parts & Accessories? Visit us online at www.AussieGrills.com Or call Aussie Customer Service at 1-800-251-7558...
- Page 2 D A N G E R CARBON MONOXIDE HAZARD This appliance can produce carbon monoxide, an odorless toxic gas. Us- ing it in an enclosed space can kill you. Never use this appliance in an enclosed space, such as a camper, tent, car, boat or home. This appli- ance is not intended for and should never be used as a heater.
-
Page 3: Table Of Contents
Packing List Grill Body Regulator Housing Assembly Warming Rack (inside) Cooking Grid (inside) Flavor Activator (inside) Owner’s Manual and Warranty Card (not pictured) Detailed Parts List and Illustrations may be found on pages 18 and 19. When ordering parts, it is VERY important to have the complete Model Number to receive the correct replacement parts for your grill. -
Page 4: Preparation For Assembly
Preparation for Assembly Remove grill and all packaging materials from the carton and place on a clean level surface. Some parts are packed inside the grill body. Remove, unpack and inspect these parts as well. NOTE: Before using your grill, read the instructions and your manual. For easier set-up and assembly, follow instructions of each step in the order they are written as you look at the dia- grams. -
Page 5: Drip Tray Access
WARNING To reduce the risk of serious injury or death from fire or explosion: • Be sure the grill has cooled completely before removing the drip tray. • Be sure to empty and re-install the drip tray after each use. CAUTION To reduce the risk of a laceration hazard, wear protective gloves when handling parts that have sharp edges. -
Page 6: Using Gas
Using Gas LP Gas Cylinder D A N G E R If you see, smell, or hear the hiss of LP gas escaping from the cylinder: 1. Do not attempt to light appliance. 2. Extinguish any open flame. 3. Disconnect from fuel supply. Carbon Monoxide Hazard •... -
Page 7: Connecting Lp Gas Cylinder
NOTE: If the regulator assembly is not working properly and you need a replacement, contact: Customer Service at 1-800-251-7558 or go to www.aussiegrills.com. Be sure to have the grill model number and serial number printed on the label located on the inside surface of the rear leg. If you need a replacement part under warranty, a proof of purchase will be necessary. -
Page 8: Before Using Your Lp Gas Grill
Before Using Your LP Gas Grill Installation Codes WARNING To reduce the risk of serious bodily injury or death from fire or explosion: • This installation must conform with local codes or, in the absence of local codes, with either the National Fuel Gas Code, ANSI Z223.1/NFPA 54 Natural Gas and Propane Installation Code, CSA B149.1, or Propane Storage and Handling Code, B149.2 or the Standard for Recreational Vehicles, ANSI A 119.2/NFPA 1192 and CSA Z240 RV Series, recreational Vehicle Code, as applicable. -
Page 9: How To Perform A Leak Test
How to Perform A Leak Test - “FIRST TIME USE” and as recommended on previous page Supplies Needed for a Leak Test: • Clean paint brush • Water • Dish washing liquid • Empty clean bowl or can for solution 1. -
Page 10: Lighting The Grill
Lighting the Grill WARNING To reduce the risk of serious bodily injury or death from fire or explosion: • Open Hood before lighting the grill to release trapped gas. • During failed lighting attempts, or if the Burner goes out during operation, turn Control Knob “Off” to dissipate any accumulated gas. -
Page 11: Manually Lighting The Grill
Manually Lighting the Grill Match 1. Open the Hood. IMPORTANT: Make sure Regulator Knob is turned “Off.” 2. While holding a lit match near the burner (Fig. 4), push the Regulator Knob in and turn 270 degrees (or 3/4 turn) counterclockwise to the High position (Fig. -
Page 12: Cooking On The Gas Grill
Cooking On the Gas Grill WARNING To reduce the risk of serious injury or death from fire, explosion or burn hazard: • Never use charcoal or lighter fluid in your gas grill. Keep this outdoor cooking appliance clear and free from combustible materials, gasoline, and other flammable vapors and liquids. -
Page 13: Warming Rack
Controlling Flare-ups: Flare-ups are part of cooking meats on a grill. This adds to the unique flavor of barbequed food. However, excessive flare-ups can overcook your food and create a dangerous situation for you and your grill. Excessive flare-ups may result If excessive flare-ups from large amounts of fat on the food being cooked or the build up of grease in the grill. -
Page 14: Care And Maintenance
Care and Maintenance Cleaning the Grill CAUTION To reduce risk of injury from laceration hazard, wear protective gloves when handling parts with sharp edges. Drip Tray: Remove the Drip Tray under the grill bowl after the grill has cooled completely. Scrape away food and fat residue from the Drip Tray. - Page 15 5. Use a pipe cleaner to clear insect nests or debris from the inlet hole of Main Burner (Fig. 9) 6. Open up the Burner holes (Fig. 9) with a small nail or wire. Use a non-metallic brush to remove food particles and corrosion from the Burner surfaces.
-
Page 16: Emergencies
Emergencies Problem Possible Cause Solution Gas leaking from Mechanical failure due to rust Replace LP Gas Cylinder. LP Gas Cylinder or mishandling Gas leaking between Improper installation, con- Remove LP Gas Cylinder. Re-install correctly and LP Gas Cylinder and regula- nection not tight, failure of tighten. -
Page 17: Troubleshooting
Troubleshooting Problem Possible Cause Solution Burners will not light using Burners not assembled correctly See re-assembly after cleaning in the ignitor “Care and Maintenance.” Not pressing igniter in enough Push Regulator Knob in and turn counterclockwise to the for spark. “High”... -
Page 18: Parts Illustration
Parts Illustration... -
Page 19: Parts List
Parts List Description Quantity Thermometer Thermometer Bezel Hood Hood Pivot Pin Hood Pivot Pin Nut (not shown) Hood Handle Bezel Hood Handle Warming Rack Cooking Grid Flavor Activator Piezo Igniter Igniter Housing Electrode (wire not shown) Burner Regulator/Valve Grill Firebowl Regulator Housing Leg Nut Leg Bolt... -
Page 20: Limited Warranty
Limited Warranty MECO CORPORATION - LIMITED WARRANTY This product is warranted to the original consumer purchaser against defects in material and workmanship under normal outdoor household use and correct assembly (if assembled by the consumer purchaser). Burners are warranted for a period of two (2) years from the date of purchase. Stainless steel parts are warranted for a period of one (1) year (for rust-through only) from the date of purchase.
Need help?
Do you have a question about the 6T01U00SS1 and is the answer not in the manual?
Questions and answers