Table of Contents
Advertisement
Quick Links
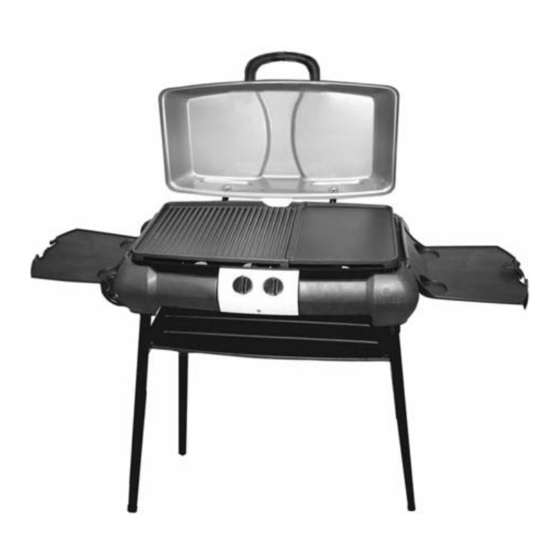
Aussie
PORTABLE LP Gas Grill
Assembly and Use Manual
FOR OUTDOOR HOUSEHOLD USE ONLY. NOT FOR COMMERCIAL USE.
For Customer Service, call 1-800-251-7558 or visit our web site at www.meco.net
• Failure to follow these instructions could result in fire or explosion which could cause death,
serious personal injury, or property damage.
• Read and follow instructions carefully before assembly or use.
• Do not use this product for any other purpose than which it is intended.
• These instructions must be kept with the user. SAVE THESE INSTRUCTIONS.
If you smell gas:
1. Shut off gas to the appliance.
2. Extinguish any open flame.
3. Open lid.
4. If odor continues, keep away from the
appliance and immediately call your gas
supplier or your fire department.
®
b b y y M M e e c c o o
MODEL 2200
®
1. Do not store or use gasoline or other
flammable vapors and liquids in the vicinity
of this or any other appliance.
2. An LP cylinder not connected for use shall
not be stored in the vicinity of this or any
other appliance.
Advertisement
Table of Contents

Related Manuals for Aussie Aussie Portable LP 2200


Summary of Contents for Aussie Aussie Portable LP 2200
- Page 1 MODEL 2200 FOR OUTDOOR HOUSEHOLD USE ONLY. NOT FOR COMMERCIAL USE. For Customer Service, call 1-800-251-7558 or visit our web site at www.meco.net • Failure to follow these instructions could result in fire or explosion which could cause death, serious personal injury, or property damage.
-
Page 2: Table Of Contents
— NOTICE — MECO CORPORATION STRIVES TO BE A QUALITY SUPPLIER OF CONSUMER PRODUCTS. IF WE OMITTED ANY PARTS NEEDED FOR ASSEMBLY, OR YOU NEED TROUBLESHOOTING INFORMATION, PLEASE CONTACT US USING OUR TOLL FREE NUMBER. THANK YOU FOR PURCHASING A MECO CORPORATION PRODUCT. - Page 3 PARTS ILLUSTRATIONS (Cont’d) PARTS LIST ITEM DESCRIPTION PART # QTY. Owners Manual 03.6380.00 Leg Shelf 03.6360.00 Handle 03.6361.00 6mm x 1 1/8" Threaded Screw 03.6362.00 Handle Spacer 03.6363.00 # 6 Lockwasher 03.6338.00 Stove Grate 03.6365.00 Smooth Cooking Surface 03.6366.00 Ribbed Cooking Surface 03.6367.00 Regulator Hose Assy 03.6364.00...
-
Page 4: B) Assembly
ASSEMBLY TOOLS REQUIRED: Phillips Screwdriver STEP 1. Lay Grill on floor or a level surface. Pull Right Handle Bar all the way out, until it clicks into place. (Fig. 1) (There are three positions). STEP 2. Pull grill off the floor while tilting against your foot or lean it against a wall. Pull the leg shelf away from the Body snap locks at the top. -
Page 5: C) Connecting/Disconnecting The Gas
Leg Spring Lock FIG. 7 FIG. 8 FIG. 9 Unlock Strap Open Side Tables FIG. 10 FIG. 11 Remove Hood Handle Open side Handle on toward you outside of grill FIG. 12 FIG. 13 FIG. 14 CONNECTING/DISCONNECTING THE GAS Using Gas ·... -
Page 6: Lp Gas Cylinder
LP Gas Cylinder LP Hose and Regulator The LP gas cylinder, for use with Aussie LP gas grills, must meet the following requirements: 1) Only use cylinders marked “Propane Fuel” To reduce the risk of serious bodily injury or death: 2) 1lb. -
Page 7: Connecting/Disconnecting 20 Lb. Lp Cylinder
· If an external electrical source is utilized, the outdoor Connecting/Disconnecting 20 lb. LP Cylinder cooking appliance, when installed, must be electrically grounded in accordance with local codes or, in the STEP 1. Turn the Grill Control Knobs to the “OFF” position. absence of local codes, with the National Electrical (FIG. -
Page 8: Lighting The Grill Using The Ignitor
6) (For 1lb. Disposable Cylinders)-Check for leaks by Leak Test at Control brushing the soap solution around the connections Valve Nozzle between the gas cylinder and the regulator (FIG. 17A), the hose connection to the control valve (FIG. 17B), and the Control valve nozzle. -
Page 9: Manual Lighting Of The Grill
4) Match light the burner with the supplied match holder 6) If burner does not light or ignitor does not work, turn and a match near the burner. (FIG. 20B & FIG. 20C) Control Knob to “OFF”. Close the valve on the 20 lb. LP 5) If burner does not light, turn Control Knob to “OFF”. -
Page 10: Cooking On The Gas Grill
Cooking on the Gas Grill · Do not pre-heat over 10 min. or the cooking surface coatings may be destroyed. To reduce the risk of serious bodily injury or death: · Do not leave any utensils on the Cooking Surface while ·... -
Page 11: Check Your Flame
7) When cooking, remove food with long-handled heat CARE AND MAINTENANCE resistant, plastic or wooden utensils. Never use metal tongs, forks or knives that can scratch, cut or damage the coating of the Cooking Surfaces. Check Your Flame To reduce the risk of a cut injury: ·... -
Page 12: Transport And Storage
4) Pull the Control Knobs off the valve stems. Remove the 5-screws, Grid Insert Guide, Control Panel and the Chain/Match Holder. (FIG. 23A) 5) Remove 2-Control Valve Spring Clips with screwdriver. (FIG. 23B) 6) Remove Electrode Spring Clip by holding end of clip with pliers and pushing down away from the notch in burner bracket. -
Page 13: Troubleshooting
1) Disconnect the LP gas cylinder from the gas grill. (See 4) Swing the Gas Regulator up into its storage position page 6). Store LP cylinder outside, in a dry, well-ventilated behind the front panel of the Grill and clip it into place. area, away from sources of heat or ignition. - Page 14 TROUBLESHOOTING (cont’d) Problem Possible Cause Solution Excess flow valve tripped in Turn Control Knob to “OFF” position. Wait five minutes. Relight Regulator LP gas grill. If flame remains to be low, turn off gas. Disconnect the Lp gas cylinder from the Regulator. Reconnect the LP gas cylinder to the Regulator.
-
Page 15: Important Notice-Lp Cylinder With Opd
IMPORTANT NOTICE (Only if using a 20 lb. LP Cylinder and an adapter hose) The Gas Grill is can be setup to operate with a LP Gas Cylinder equipped with an OPD (Overfilling Prevention Device). This is a secondary device to prevent the overfilling of your LP Gas cylinder. The proper methods for the filling of your LP Gas cylinder are by weight or volume, as described in NFPA 58. -
Page 16: Limited Warranty
The Grill and its components are warranted for a period of one (1) year from the date of purchase. Meco Corporation DOES NOT warrant in any way the propane cylinder (see label on cylinder for cylinder manufacturer’s warranty.) The LP cylinder manufacturer is responsible for the materials, workmanship and performance of the cylinder.
Need help?
Do you have a question about the Aussie Portable LP 2200 and is the answer not in the manual?
Questions and answers