Table of Contents
Advertisement
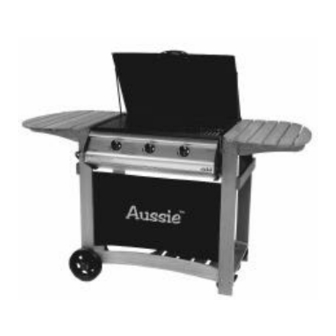
Aussie
LP Gas Grill
Assembly and Use Manual
©Aussie™ Grill Company 2001
For Customer Service, call
1-800-251-7558
www.aussiegrill.com
FOR YOUR SAFETY
If you smell gas:
1. Shut off gas to the appliance.
2. Extinquish any open flame.
3. Open Lid.
4. If odor continues, immediately call your gas
supplier or your fire department.
TM
Bonza
•READ AND FOLLOW INSTRUCTIONS CAREFULLY BEFORE ASSEMBLY
OR USE. FAILURE TO FOLLOW THESE INSTRUCTIONS COULD RESULT
IN DEATH, SERIOUS BODILY INJURY, AND/OR PROPERTY LOSS.
•FOR OUTDOOR HOUSEHOLD USE ONLY. NOT FOR COMMERCIAL USE.
•SOME PARTS MAY CONTAIN SHARP EDGES - ESPECIALLY WHERE
NOTED IN THIS MANUAL! WEAR PROTECTIVE GLOVES IF NECESSARY.
•THESE INSTRUCTIONS MUST BE KEPT WITH THE CONSUMER AND
RETAINED FOR FUTURE USE.
•PORCELAIN COATING CAN CHIP DURING ASSEMBLY. WEAR SAFETY
GLASSES WHILE ASSEMBLING GRILL.
Bonza Deluxe
This owners manual is intended for the following models:
7462, 7402, 7362, 7302, 7262, 7202
1. Do not store or use gasoline or other
flammable vapors and liquids in the
vicinity of this or any other appliance.
2. An LP cylinder not connected for use
shall not be stored in the vicinity of this
or any other appliance.
FOR YOUR SAFETY
Kanga
Advertisement
Table of Contents

Subscribe to Our Youtube Channel
Related Manuals for Aussie Bonza


Summary of Contents for Aussie Bonza
- Page 1 Aussie LP Gas Grill Assembly and Use Manual Bonza ©Aussie™ Grill Company 2001 For Customer Service, call 1-800-251-7558 www.aussiegrill.com •READ AND FOLLOW INSTRUCTIONS CAREFULLY BEFORE ASSEMBLY OR USE. FAILURE TO FOLLOW THESE INSTRUCTIONS COULD RESULT IN DEATH, SERIOUS BODILY INJURY, AND/OR PROPERTY LOSS.
-
Page 2: Table Of Contents
Step 4 - Bottom Shelf/Leg & Caster assembly...12 Step 5 - Wheel/LP Cylinder Bracket assembly...13 Step 6 - Grill Body/Cart assembly (Kanga model)...14 Step 7 - Grill Body/Cart assembly (Bonza model)...16 Step 8 - Attach Decorative Privacy Panel to Cart...18 Step 9 - Install Burners...18 Step 10- Install Bottom Body Panel/Grease Tray...20... - Page 3 23. If any burner goes out during operation, turn off all gas control knobs. Open the hood (on Bonza™) and wait five minutes before attempting to light. 24. Excercise reasonable care when using this LP gas grill.
- Page 4 AUSSIE GRILL COMPANY STRIVES TO BE A QUALITY SUPPLIER OF CONSUMER PRODUCTS. IF WE INADVERTENTLY OMITTED ANY PARTS NEEDED FOR ASSEMBLY, OR YOU NEED TROUBLESHOOTING INFORMATION, PLEASE CONTACT US USING OUR TOLL FREE NUMBER.
-
Page 5: Parts Lists And Assembly Instructions
Before starting assembly, read the instructions and your manual. This manual covers several Aussie Grill models. Use only the steps that pertain to your model. Remove all the parts from the carton and lay them on a smooth, clean surface. (You may cut the carton, spread it out, and use it as a pad to protect part finishes.) Look in the Parts List below under your model num-... -
Page 6: Part Description
03.6093.00 03.5042.00 All Models 03.5043.00 All Models 03.6279.00 03.5990.00 All Models 03.5991.00 All Models 03.5992.00 All Models 03.5993.00 All Models 03.5994.00 All Models BONZA BONZA DELUXE Birch Kempas Birch Kempas Sterling Sterling Birch Kempas Birch Birch Kempas Kempas Chocolate All Models... - Page 7 Bolt, 1/4” x 1/2” Bottom Body Panel Grill Body Kanga Spacer Bolt, 6mm x 110mm Wing Nut Grill Body Bonza Privacy Panel Burner Cotter Pin Screw #8 x 1/2” Foil Pan Grease Tray Ceramic Tray *Note: Call Customer Service for correct part # and color for your Model.
- Page 8 03.5854.00 All Models 03.5854.02 03.6026.00 03.5031.00 03.6027.00 03.5918.00 2, 3, All Models or 4 2-Burner 03.6028.00 3-Burner 03.5048.00 4-Burner 03.6029.00 BONZA BONZA DELUXE 2-Burner 2-Burner 3-Burner 3-Burner 4-Burner All Models All Models 2-Burner 2-Burner 3-Burner 3-Burner 4-Burner All Models All Models...
-
Page 9: Step 1 - Wheel Leg/Side Table Assembly
(1/4” X 1 3/8” Deluxe Models) (ITEM 9) ACTUAL SIZE 1/4” x 1” BOLT 8 pcs AXLE HOLES (WHEEL LEGS) REAR WHEEL LEG KANGA, BONZA - WOOD BONZA DELUXE - METAL FIG. A FOUR LARGE RECESSED HOLES (Wooden Legs Only) -
Page 10: Step 2 - Fixed Leg/Side Table Assembly
Table (Fig. C) and the two threaded holes in edge of each leg pointing outward. (Fig. D) Do not tighten bolts completely. (Metal Tubing Legs can be oriented either way.) FRONT FIXED LEG KANGA, BONZA - WOOD BONZA DELUXE - METAL REAR FIXED LEG... -
Page 11: Step 3- Legbrace Assembly
STEP 3- LEGBRACE ASSEMBLY NOTE: Bonza Deluxe Model with metal legs does not use the legbrace. (ITEM 9 ) ACTUAL SIZE 1/4” x 1” BOLT 8 pcs •Attach Legbraces onto each Side Table assembly using 1/4” x 1” Bolts. Do not tighten bolts completely. -
Page 12: Step 4-Bottom Shelf/Leg & Caster Assembly
Legs will use 1/4” x 1 3/8” Bolts. Tighten Wheel Leg bolts before proceeding. •For Bonza Deluxe, align the Bottom Shelf and Leg holes and fasten using 1/4” x 1 3/8” bolts. Attach Bonza Deluxe Wheel Legs the same way. Thread casters into end of leg. -
Page 13: Step 5 - Wheel/Lp Cylinder Bracket Assembly
•Slide Axle back into position and push a Wheel Assembly onto each end of axle until the spring clip locks into place. •On Deluxe Models, slide end caps onto each Fixed Leg. •GO TO STEP 7 FOR BONZA AND BONZA DELUXE MODELS. CYLINDER BRACKET TOOLS: (ITEM 27) 4 pcs 1/4”... -
Page 14: Step 6 - Grill Body/Cart Assembly (Kanga Model)
TOOLS: STEP 6-GRILL BODY/CART ASSEMBLY- KANGA MODELS (ITEM 28) BOTTOM BODY (ITEM 29) GRILL BODY-KANGA (ITEM 30) Spacer 8 pcs PANEL (ITEM 31) 6mm x 110mm BOLT 8 pcs (ITEM 32) 6mm WING NUT ACTUAL SIZE 8 pcs CAUTION: Some parts inside the Grill Body may have sharp edges or corners Remove Bottom Body Panel from underneath of Grill Body . - Page 15 STEP 6-(CONTINUED) ASSEMBLE GRILL BODY TO CART- KANGA MODELS •Turn Grill Body upside down and position between cart legs with the Hose and Regulator on the Wheel Leg end. Do not lay Grill Body on, or step on, the Hose and Regulator. 6mm X 110mm BOLT •Align slotted holes on sides of Grill Body with...
-
Page 16: Bottom Body Panel
STEP 7-GRILL BODY/CART ASSEMBLY- BONZA & BONZA DELUXE MODELS Note: Assembly of Grill Body will require two people. (ITEM 32) 6mm WING NUT 8pcs (ITEM 30) SPACER 8 pcs CAUTION: Some parts inside of Grill Body may have sharp edges or corners. - Page 17 STEP 7-(CONTINUED) GRILL BODY/CART ASSEMBLY- BONZA MODELS •Lay Grill Body on its back side with control panel up. Place Grill Body between legs and Side Tables with Hose and Regulator on Wheel Leg end. Do not lay Grill Body on, or step on Hose and Regulator.
-
Page 18: Step 8 - Attach Decorative Privacy Panel To Cart
PRIVACY PANEL •Using the 3 Velcro patches found on the inside of each front leg, attach the Privacy Panel with the Aussie logo fac- ing forward. STEP 9-INSTALL BURNER (ITEM 35) BURNER 2, 3, OR 4 PCS •Remove plastic covering from Burner and remove Cotter Pin from Burner Peg. - Page 19 •Fit venturi end of Burner through hole in the inside firewall (behind control panel) and onto Gas Control Valve Nozzle (Fig. G & Fig. H). Be careful not to bend or force gas collector plates. Holes in Front firewall. Gas Nozzle Control Vavle FIG.
-
Page 20: Step 10- Install Bottom Body Panel/Grease Tray
STEP 10-INSTALL BOTTOM BODY PANEL/GREASE TRAY- (ALL MODELS) •In upright position and drain hole toward the rear, slide Bottom Body Panel into guides (See Arrows) at bottom of Grill Body. Insert two #8 x 1/2” screws through the holes in guides and Bottom Body Panel;... -
Page 21: Step 12- Attach Handle To Lid (Kanga Lid)
STEP 12-ATTACH HANDLE TO WEATHER COVER (LID) - KANGA MODELS TOOLS: (ITEM 42) (ITEM 43) SCREW, #10 X 3/8” HANDLE, WEATHER COVER 2 pcs •Insert two #10 x 3/8” Screws through bottom of Weather Cover into Handle and tighten. HANDLE WEATHER COVER #10 X 3/8”... -
Page 22: Step 13- Attach Handle & Heat Indicator (Bonza)
STEP 13-ATTACH HANDLE AND HEAT INDICATOR TO HOOD - BONZA MODELS (ITEM 44 ACTUAL SIZE) 6mm x 90mm BOLT 2 pcs (ITEM 46) HANDLE SPACER 2 pcs (ITEM 49) LOCKWASHER 2 pcs •Insert two 6mm x 90mm Bolts through recessed holes of Hood Handle, through Handle Spacers, into front of hood and secure with 6mm Locknuts. -
Page 23: Step 14- Attach Lp Cylinder To Grill
•Make sure Regulator hose does not contact hot metal surfaces. WARNING: Do not use grill if this connection can not be completed. Be sure to test this connection for gas leaks before operation of Gas Grill. ROUTE HOSE UNDER BRACE ON MODELS... -
Page 24: Step 15- Leak Testing (All Models)
8) Always turn off LP cylinder valve after performing a leak test. (Turn clockwise to a full stop.) 9) If your LP gas grill has been in storage or has not been used for a period of time, the burners should be maintained. -
Page 25: Operating And Maintaining Your Lp Gas Grill
LP gas grill. · The LP gas cylinder, for use with the Aussie LP gas grills, must meet the following requirements: LP Gas Cylinder ·... -
Page 26: B) Before Using Your Grill
· When moving or lifting your Aussie LP gas grill, its recommended that you grasp the cross supports under the side tables. Do not lift the grill with only the individual side table slats. -
Page 27: Leaktesting
Open the hood carefully (Bonza model only) when cooking to avoid burns from the hot air and steam trapped inside. · Do not wear loose clothing (example: hanging shirt tails, clothing with frills, etc.) around a LP... -
Page 28: Preparation Before Cooking
WARNING: If a burner goes out during the cooking cycle, turn all knobs to the off position and close the valve on the LP cylinder. Open hood (Bonza™ series only) and wait five minutes before attempting to relight the grill. -
Page 29: Manual Lighting Of The Grill
3-5 minutes in order to preheat the grill. This process should be done before every cooking session. The hood (Bonza™ series only) should be closed during preheating. The lid (Kanga™ series only) must never be covering the cooking surface while the grill is in use or hot. -
Page 30: Check Your Flame
· Never leave your LP gas grill unattended during use or cleaning. After each cooking session, close the hood (Bonza™ series only) and turn the grill burners to the “high” position and burn for five minutes. This procedure will burn off cook- ing residue, thus making cleaning easier. -
Page 31: Porcelain Coated Cooking Surfaces
Porcelain coated Cooking Surfaces And Hood (Bonza™ Series Only) Most residue on the Cooking Grids can be cleaned with a baking soda and water solution. For stubborn stains, use a non abrasive scouring powder. -
Page 32: Ceramic Briquettes
Failure to remove grease may result in grease dripping onto the cart and/or a grease fire in the tray. · Never light the LP gas grill without the foil pan and grease tray in place. · Before each use, check your Bottom Panel, Grease Tray, and Foil Pan. -
Page 33: Troubleshooting
Turn control knobs to “off” position and turn LP gas cylinder handle clockwise until it stops. Wait five minutes. Relight LP gas grill. If flame remains to be low, turn off gas at cylinder and grill. Disconnect the regulator from the LP gas cylinder. - Page 34 Trim fat from meat before grilling Turn control knobs “off” and turn handle of LP cylinder clock- wise until it stops. Open hood carefully (Bonza™ series only) and let fire burn out. After the grill cools, remove and clean all parts.
-
Page 35: Important Notice - Lp Cylinder With Opd
IMPORTANT NOTICE IMPORTANT NOTICE The gas grill is setup to operate with a LP Gas Cylinder equipped with an OPD (Overfilling Prevention Device). This is a secondary device to prevent the overfilling of your LP Gas cylinder. The proper methods for the filling of your LP Gas cylinder are by weight or volume, as described in NFPA 58. -
Page 36: Limited Warranty
If defective, the part or product will be repaired or replaced at the option of Aussie Grill Company without charge. This warranty does not include the cost of any inconvenience or property damage due to failure of the...
Need help?
Do you have a question about the Bonza and is the answer not in the manual?
Questions and answers