Table of Contents
Advertisement
Advertisement
Table of Contents

Related Manuals for BlackVue DR650GW-1CH


Summary of Contents for BlackVue DR650GW-1CH
-
Page 3: Table Of Contents
Product Features 11 Package Components 12 Names of Each Part 13 How to Attach & Detach the Mounting Bracket How to Install the BlackVue 14 Checking Installation Position 14 How to Insert & Remove the microSD Card 15 Installation Video Recording... - Page 4 Introduction to the Manual Thank you for purchasing a BlackVue by Pittasoft Co., Ltd. This instruction manual contains information on how to operate your BlackVue. Before using the product, make sure to read through this manual so as to use the product in the correct way.
-
Page 5: Cautions For Safety
Otherwise it can cause explosion, fire, or malfunction. y Do not operate the product with wet hands. It can cause electric shock. y Do not install it in an environment with high humidity, or combustible gases or liquids. It can cause explosion & fire. DR650GW-1CH... - Page 6 Death or serious injury can be caused for users if the WARNING following directions are not followed: y Do not leave the product where infants, children, or pets can reach it. They might swallow small components, or their saliva could get into it and cause an explosion due to a short circuit.
- Page 7 It is recommended to install the product at the BlackVue installation center. You can check the the BlackVue installation center from the BlackVue homepage (www.blackvue.com). y It is recommended to remove the power cord if the product (BlackVue/ Battery Discharge Prevention Device) is not used for a long time. DR650GW-1CH...
-
Page 8: Checks For Gps
If there is an error with the GPS time when checking recorded video with a viewer program or the BlackVue application, turn the GPS off and on after a signal is received. Make sure to observe the following for an uninterrupted GPS signal. -
Page 9: Product Features
Collect the vehicle speed and recording location etc. with GPS data and the detailed driving route and recording can be checked with BlackVue viewer VOD & real-time live view function With built-in Wi-Fi and the BlackVue App, video can be played regardless of place and time DR650GW-1CH... - Page 10 BlackVue App Watch recorded videos and live view through BlackVue App (support Android, iOS) Diverse recording options (Normal/Event/Parking) Event recording and automatic conversion & deactivation of parking mode High-compression recording mode to extend microSD card life Efficient memory usage with high-compression storage method...
-
Page 11: Package Components
Cable Clips (5 EA) Double-sided Tape for the Mounting microSD Card Bracket (Including BlackVue Software) microSD Card Reader Note y Pictures of the components may differ from the actual ones. y To enhance the performance of the product, components may be changed without prior notice. -
Page 12: Names Of Each Part
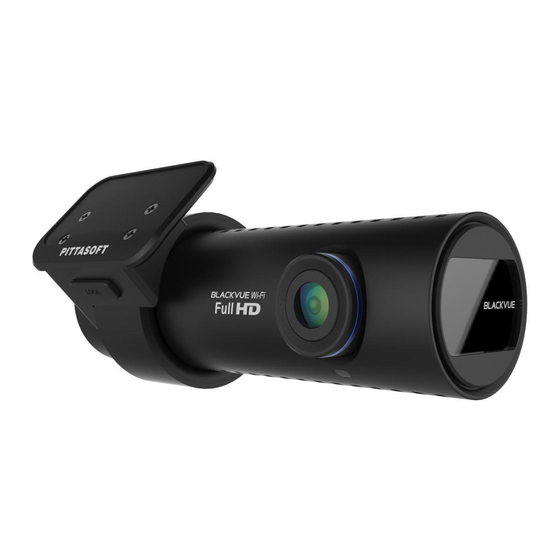
Names of Each Part Lock Button Camera Lens Mounting Bracket Security LED Recording LED GPS LED Speaker Wi-Fi LED Power Socket microSD Card Slot Cover MIC on/off Button Wi-Fi Button (Format Button: Press for 10 seconds for Formatting) -
Page 13: How To Attach & Detach The
PC. How to Attach & Detach the Mounting Bracket Pull the unit out of the mounting bracket with the LOCK button pressed. Insert the unit into the mounting bracket until you hear clicking sound, to attach it. DR650GW-1CH 13... -
Page 14: Checking Installation Position
How to Install the BlackVue Checking Installation Position It is recommended to install it at the back of rear view mirror. Clean any foreign matter and moisture from the place where the product will be installed. Note y Do not install the product where it can interfere with the driver's vision. -
Page 15: Installation
It is necessary to use the Battery Discharge Prevention Device(ex. Power Magic Pro) to record video while the car is parked. y To use BlackVue with other equipment that uses a power cable, purchase and use a dual power outlet adaptor. - Page 16 (20 Page) Start the engine and check if the product works properly. Caution y Set the time (time zone) when you use BlackVue for the first time. (32 Page) Note y After a test drive, check if video was correctly recorded.
-
Page 17: Normal Recording
Video Recording Normal Recording When the engine is started, the BlackVue is turned on automatically. When the BlackVue is turned on, normal recording is automatically started. Note y The normal recording function can be disabled in the BlackVue software setting. (32 Page) -
Page 18: Event Recording
It records video for 5 seconds before and 55 seconds after the impact. Note y Sensitivity to impact can be adjusted in the BlackVue software setting. (34 Page) y Event recording time can be adjusted in the BlackVue software setting. -
Page 19: How To Playback Using A Pc
Note y For how to play back using the BlackVue software, refer to Video Playback. (25 Page) y If there are many recorded videos in the microSD card, it may take a long time to load the file. -
Page 20: How To Playback Using A
BlackVue application can be downloaded from the Google Play store, Apple App Store, and Windows store. Note y The BlackVue app is enabled in Android 2.3 or higher, iOS 6.0 or higher, or Windows 8.0 or higher. y Depending on your smartphone, some of the BlackVue application functions might not be supported. - Page 21 (e.g. DR550GW- A682DE) If you touch the Join button, it is connected to the selected device. The initial password is blackvue, but the user can change it. If the connection is done, press the BlackVue icon to run the App.
- Page 22 Wi-Fi and recording Full HD (1920x1080) @30fps, the recording frame is reduced to 20 fps. y For the details about the BlackVue App, please refer to the BlackVue App manual. You can download the BlackVue App manual from the...
-
Page 23: Screen Description
How to use the BlackVue Software Screen Description Double-click the BlackVue Viewer icon in the microSD card to run BlackVue Viewer. In order to install BlackVue Viewer on the PC, connect to the BlackVue website (www.blackvue.com) and download it. Name... - Page 24 Name Description G-Sensor G-sensor information can be checked, at the time Information the video was recorded. GPS information can be checked, at the time the Information video was recorded. Using the file list and map tab, the recorded video list, and where a video was recorded can be checked.
-
Page 25: Video Playback
Double-click the screen again or press ESC to return to default view. y While playing back a recorded video, use the mouse wheel to zoom in/out. y While playing back a recorded video, right-click the screen to view 100 % zoom-in screen. DR650GW-1CH 25... - Page 26 Note y You can use the Magnifier function only in BlackVue Viewer for Windows. Timeline Video can be explored with the date, hr, min, and sec of when a video was recorded.
- Page 27 When you select Sound Off, the voice is removed from the recorded video to be saved. Press the OK button and select the file name you want, together with the path. Press the Save button to finish. DR650GW-1CH 27...
- Page 28 How to Verify Files With the recorded video list, a file can be verified forgery. Select a file from the recorded video list and right-click it. Click Verification and click OK button.
- Page 29 With the +/- button or mouse wheel, the map can be zoomed in/out. Speed Unit Change Map Type Map Zoom- Selection In/Out Car Location Note y To use the map service, an Internet connection is required. y Only for the recorded file with GPS information, the data can be checked. DR650GW-1CH 29...
- Page 30 How to Check MyWay Viewer The driving route of a recorded video can be checked. (GPS Tracking) Select a file from the recorded video list and play it back. Press the button. The driving route will be displayed on the map. Double-click the map to play back the recorded video of the nearest driving route from the clicked point.
- Page 31 Select a file from the recorded video list and play it back. From the image to be saved, press the button. Note y Using the timeline or press the button to explore detailed images. Press the button. Select the printer and click the OK button. DR650GW-1CH 31...
-
Page 32: Basic Settings
Recording Time. (44 Page) Normal Record, Voice Record, Date and Time Display and Auto Switching to Parking Mode Recording function can be turned on/off. Setting Speed Display and Record File Unit can be changed. Language The language of BlackVue can be changed. Setting... - Page 33 Access the BlackVue website (www.blackvue.com) and download the time setting program. Run the time setting program before setting the time. Note y The time should be set to the time BlackVue turns on. Booting time for BlackVue is about 15 seconds after power is connected. DR650GW-1CH 33...
- Page 34 Sensitivity Setting In recording mode, the G-sensor sensitivity(impact sensitivity) and motion detection sensitivity can be set for each start event recording. The speed alert can be set to start event recording when vehicle exceeds the set speed level. button and click the Sensitivity tab. Click the After changing the configuration, click Save &...
- Page 35 You can enter the number of speed limit that triggers the speed warning. Note y In normal recording mode, 0 level indicates the minimum of impact ensitivity. y In parking recording mode, 0 level of motion detection sensitivity indicates that motion recognition is off. DR650GW-1CH 35...
- Page 36 Advanced Sensitivity Settings The sensitivity can be configured while watching a recorded video. button and click the Sensitivity tab. Click the Click the Advanced Setting button of the setting you want. Play back a recorded video. Saved G-sensor information is displayed at the bottom of the recorded video which is played back.
- Page 37 Function Description You can change Autorun Wi-Fi feature, SSID and your password for the Wi-Fi connection. The BlackVue App Wi-Fi Setting can be accessed with the SSID and password chosen by the user and you can also reset the password if you have forgotten it.
- Page 38 How to Apply Configuration The user's configuration can be applied to the product. Insert the microSD card into the product. For details on how to insert the microSD card, refer to How to Insert & Remove the microSD Card. (14 Page) When the power is turned on, the user's configuration is automatically applied.
-
Page 39: Upgrade Via Pc Connection
Firmware Upgrade Connect the microSD card via PC, or BlackVue application via Wi-Fi to upgrade firmware. Upgrade via PC Connection Connect the microSD card to the PC. For details on how to connect, refer to How to Playback using a PC. (19 Page) Format the microSD card, and connect to BlackVue website (www.blackvue. -
Page 40: Upgrade Via Blackvue Application
Select Model Name and Language Name and press OK. When firmware information to download is displayed, press OK to download. Connect BlackVue via Wi-Fi. For details on how to connect, refer to How to Playback using a Smartphone. (20 Page) Select Config > Firmware Upgrade in BlackVue application. -
Page 41: Product Specifications
※ Resolution/frame can be changed Image Quality Highest, High, Normal Video Compression Mode Wi-Fi Built-in (802.11b/g/n(2.4~2.4835GHz) Built-in Microphone Built-in Built-in Speaker ※ Voice Directions LED Indicators Recording LED, GPS LED, Wi-Fi LED, Security LED Sensor 3-Axis Acceleration Sensor DR650GW-1CH 41... - Page 42 KC, FCC, CE, RoHS, Telec, WEEE BlackVue Viewer Software ※ Windows XP or higher (Windows 8 supported) and Mac Leopard OS X(10.5) or higher BlackVue Application (Android 2.3 or higher, iOS 6.0 or Application higher, and Windows 8.0 or higher)
-
Page 43: Led Indicators
White Blinking Blinking Record- Event Red Blinking Fast White Blinking Parking Green Blinking White Blinking Wi-Fi ON Light White Blinking Wi-Fi ON/OFF Blinking White Blinking Change GPS ON Blue Light White Blinking Software Control Available Available Unavailable Available DR650GW-1CH 43... -
Page 44: Recording Time
Recording Time Full HD Full HD Memory Image (1920x1080) (1920x1080) (1280x720) (1280x720) Capacity Quality 30fps 15fps 30fps 15fps 4 HR 5 HR 10 MIN 5 HR 10 MIN 6 HR 10 MIN Highest 16GB High 4 HR 30 MIN 6 HR 10 MIN 6 HR 10 MIN 7 HR 40 MIN Normal... - Page 45 Before Requesting A/S Service It is required for users to back up important data regularly from the storage device (to other separate media). Depending on the situation, it will be necessary to delete the data from the internal storage device (component).
- Page 46 FCC Compliance Information THIS DEVICE COMPLIES WITH PART 15 OF THE FCC RULES. Operation is subject to the following two conditions; (1) This device may not cause harmful interference, and (2) This device must accept any interference received, including interference that may cause undesired operation. CAUTION : Changes or modifications not expressly approved by the party responsible for compliance could void the user’s authority to operate the equipment.
- Page 47 To check the BlackVue viewer, Please turn on the device first! 208-150023 MSIP-CMM-PTA-DR550GW-2CH YCK-DR550GW-2CH...
Need help?
Do you have a question about the DR650GW-1CH and is the answer not in the manual?
Questions and answers