Table of Contents
Advertisement
Quick Links
Advertisement
Table of Contents

Related Manuals for Pace DS810


Summary of Contents for Pace DS810
- Page 1 DS810 HIGH DEFINITION DIGITAL-RECEIVER...
- Page 2 ELECTRICAL INFORMATION (UK AND EIRE ONLY) Mains plug and its fuse WARNING The supplied mains plug is a non-rewireable type. If you need to replace the fuse, you must use an If the supplied mains plug is not suitable for ASTA- or BSI-approved BS 1362 fuse, rated at 3 A and your mains socket-outlet, DO NOT plug it in.
-
Page 3: Table Of Contents
Contents Recommendations. . . . . . . . . . . . . . . . . . . . . . . . . . . . . . .2 Using.the.EPG.. -
Page 4: Recommendations
–25 °C Pace Micro Technology plc . and +55 °C . Before use, wait until your set-top box © Pace Micro Technology 2006 . All rights reserved . has reached room temperature . MaInTEnanCE... -
Page 5: Using.equipment.safely
ImPoRtAnt USInG.EqUIPMEnT.SaFELY Do not put anything on your set-top box which might drip or spill into it . Never stand objects Your set-top box has been manufactured to meet filled with liquids, such as vases, on top of your international safety standards, but you must take set-top box . -
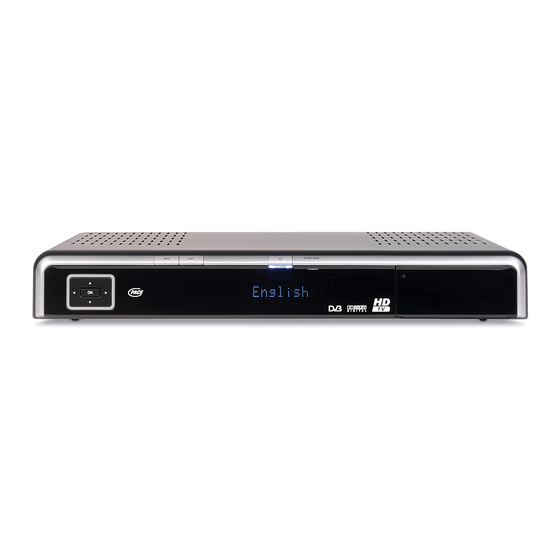
Page 6: Your.set-Top.box's.front.panel
YouR PACe set-toP Box YOUR.SET-TOP.bOx’S.FROnT.PanEL ExIT.button. Standby.button.(S). To remove the EPG or channel list To switch your set-top box on and off from the screen Indicator.light = in standby Blue = switched on and out of standby EPG.button. IR.RECEIVE.light To display the EPG... -
Page 7: Your.set-Top.box's.rear.panel
YouR PACe set-toP Box YOUR.SET-TOP.bOx’S.REaR.PanEL SaTELLITE.In Mains.input aUDIO.L.+.R Connect the LNB lead from your Do not connect the mains plug (Left.and.right.stereo.audio) satellite dish here to the wall socket until you have Connect phono leads (not made ALL the other connections... -
Page 8: Connecting.your.set-Top.box
ConneCtInG uP COnnECTInG.YOUR.SET-TOP. Connect the supplied HDMI lead to the HDmI socket on your set-top box, then use an HDMI- DVI adapter (not supplied) between the HDMI Before starting, choose a suitable position for your lead and the DVI socket on your HDTV . set-top box, observing the ventilation requirements set out on page 3 . -
Page 9: Standard-Definition (Sd) Video Connections
ConneCtInG uP STanDaRD-DEFInITIOn.(SD).VIDEO. COnnECTIOnS If you have a standard-definition TV, a VCR or a DVD recorder, use the connection methods described below . • Connect the supplied SCART lead between the tV sCARt socket on your set-top box and the SCART socket on your TV . -
Page 10: Audio Connections
ConneCtInG uP aUDIO.COnnECTIOnS Lnb.anD.MaInS.COnnECTIOnS • To make the most of your set-top box and digital Connect the LNB lead from your satellite dish to the connector marked sAteLLIte In on your television, you may also wish to connect your set- top box to audio equipment, such as a hi-fi amplifier set-top box . -
Page 11: Inserting.your.remote.control's.batteries
GettInG stARteD InSERTInG.YOUR.REMOTE. SWITCHInG.On.YOUR.SET-TOP. COnTROL’S.baTTERIES. Insert the two batteries into your remote control . When you have connected your set-top box to the mains supply, its indicator light, just below the Make sure you insert them the correct way round, standby button (S), will light up . -
Page 12: Opening.the.ci-Module.door
GettInG stARteD OPEnInG.THE.CI-MODULE. YOUR.SET-TOP.bOx.TOMORROW DOOR Your set-top box comes with the latest digital TV technology . To keep up with new technology, Push on the top left-hand side of the CI-module new features may be developed which may then door to open it, as shown below . be transmitted to your set-top box as software updates . -
Page 13: Resolution Settings Screen
GettInG stARteD RESOLUTIOn.SETTInGS.SCREEn HD.resolution You can also choose the method that your set-top On this screen, you set up your set-top box to match box uses to handle different video resolutions . Use your HDTV with regard to resolution (how crisp the U D buttons to highlight the HD resolution and clear the picture appears) . -
Page 14: Reception Screen
GettInG stARteD RECEPTIOn.SCREEn ImPoRtAnt: If you are uncertain about any of the settings you wish to make, consult a On this screen you must select the method competent installer of satellite dishes. you have used to connect your set-top box to Press the oK button to save your settings . -
Page 15: Network Scan
GettInG stARteD nETWORK.SCan The Network scan screen appears, with the type of scan highlighted in yellow . If you need to go back to the previous screen, press exIt . Press the L R buttons until the type of scan you want (Fast scan, nIt scan, exhaustive or Frequency) is displayed . -
Page 16: Using.your.remote.control
YouR Remote ContRoL USInG.YOUR.REMOTE. COnTROL This page shows the buttons on your remote control that you need to set up your set-top LIST TIMERS box . All the other buttons are described on page 15 . V-FORMAT TV / RADIO After you have set up your set-top box, you use your remote control as follows: EXIT... -
Page 17: Remote Control Buttons
YouR Remote ContRoL REMOTE.COnTROL.bUTTOnS To confirm a choice S (standby) To save settings To put your set-top box into, or take it out of standby P + / – LIst To change channel up or down To display (or hide) the on-screen Channel List + / –... -
Page 18: Tv.and.radio.channels
tunInG to CHAnneLs TV.anD.RaDIO.CHannELS WHaT.aRE.FaVOURITE. CHannELS? Your set-top box offers not only TV channels, but also radio channels (along with information about You can use numbers 0 to 99 to create ‘short-cuts’ to them, displayed on the TV screen) . your Favourite channels, so that you can select them more quickly . -
Page 19: What.is.the.channel.list
tunInG to CHAnneLs WHaT.IS.THE.CHannEL.LIST? VIEWInG.CHannEL.InFORMaTIOn To view information about the highlighted channel Your set-top box uses a Channel List as a way of in the Channel List, press the i button . The channel organising channels . To display the list on your TV information appears to the right of the Channel List . -
Page 20: Using.the.zapping.window
FInDInG out moRe ABout WHAt’s on USInG.THE.ZaPPInG.WInDOW When you change channel, the Zapping Window appears briefly on the screen . To display the Zapping Window at any other time, press the i button . Current date and time Number and name of the channel currently showing on the TV The channel’s ‘short-... -
Page 21: Navigating Around
FInDInG out moRe ABout WHAt’s on naVIGaTInG.aROUnD If one or more features or options are available, these are indicated by bold symbols that display in Use the D button to move the highlight down the Zapping Window (when features or options are to the next programme, and use the U button to unavailable, their symbols display in a much paler move the highlight back up again . -
Page 22: Using.the.epg
USInG.THE.EPG. The ePG is your Electronic Programme Guide to what’s on . To see the EPG, press the ePG button on your remote control . naVIGaTInG.aROUnD.THE.EPG.GRID Use the L R buttons to move the highlight to see what programmes are on at different times . Use the D U buttons to move the highlight through the list of channels . -
Page 23: Symbols And Codes That Display
SYMbOLS.anD.CODES.THaT.DISPLaY symbol/Code meaning Shows that you can press the i button for further information about the programme SHOWInG.InFORMaTIOn If the symbol is showing next to a programme, you can press the i button to display the programme’s Information Window . To remove the Information Window and redisplay the EPG Grid, press i again, or press oK or exIt . -
Page 24: Using.the.options.window
oPtIons USInG.THE.OPTIOnS.WInDOW When you press the oPt button from the Zapping Window, an options Window appears, showing the Options for that programme (if options are available) . note: If options are available, you can also display the options Window while you are watching a programme, by pressing the oPt button. -
Page 25: Using.the.main.menu
usInG tHe mAIn menu USInG.THE.MaIn.MEnU USInG.THE.SETTInGS.SCREEnS On a screen where you can change the setting You gain access to some of your set-top box’s for an item, use the U D buttons to highlight the features, particularly those which you use only setting, then use the L R buttons to change the occasionally, by means of the main menu . -
Page 26: The.setup.menu
usInG tHe setuP menu THE.SETUP.MEnU DIGITaL.aUDIO.OUTPUT You can use this screen to automatically send In the setup menu you can find important Dolby Digital audio (if it is available for the current information concerning the reception of channels . programme) to any equipment you have connected Within the Setup menu you can change the settings to the oPtICAL AuDIo out connector . -
Page 27: Displaying The Setup Menu
usInG tHe setuP menu DISPLaYInG.THE.SETUP.MEnU To display information about the software version number, press the blue button . To remove this Press the menu button to display the Main menu, screen and redisplay the System screen, press the then press oK to display the Setup menu . blue button again . -
Page 28: Changing The Tv Settings
usInG tHe setuP menu CHanGInG.THE.TV.SETTInGS SD.settings This screen allows you to specify the type of standard-definition (SD) TV you have connected to your set-top box . Making the correct settings at this screen will ensure you have the best picture available . - Page 29 usInG tHe setuP menu Resolution.settings From the Setup menu (see page 24), highlight ‘TV settings’ then press oK . Then highlight ‘Lip Sync From the Setup menu (see page 24), highlight ‘TV settings’ and press oK . The Lip Sync settings screen settings’...
-
Page 30: Changing The Digital-Audio Output Settings
usInG tHe setuP menu CHanGInG.THE.DIGITaL-aUDIO. OUTPUT.SETTInGS This screen allows you to set your set-top box to automatically send Dolby Digital audio (if it is available for the current programme) to any equipment you have connected to the oPtICAL AuDIo out connector . From the Setup menu (see page 24), highlight ‘Digital Audio Output’... -
Page 31: Using.the.other.menus
usInG tHe otHeR menus USInG.THE.OTHER.MEnUS The Scan satellite screen appears, with the type of scan highlighted in yellow . TYPES.OF.SCan Each of the types of scan described below scans only one satellite at a time . If your system can receive channels from more than one satellite, you must select and scan each satellite in turn . -
Page 32: Organising Your Favourites
usInG tHe otHeR menus ORGanISInG.YOUR.FaVOURITES Removing.a.channel.from.your.Favourites. List You use the Favourites screen to organise your Press the blue button to move the highlight to the Favourite channels . Favourites List . (To move the highlight back to the Displaying.the.Favourites.screen full channel list, press the blue button again . ) Press the menu button to display the Main menu Use the U D buttons to highlight the channel you (see page 23) . -
Page 33: Selecting The Switch-On Channel
usInG tHe otHeR menus SELECTInG.THE.SWITCH-On.CHannEL CHanGInG.THE.DISPLaY.SETTInGS This screen allows you to select the channel your You can change the length of time the Zapping set-top box tunes to whenever it comes out of Window appears on your screen and the standby . -
Page 34: Changing The Local Time Setting
usInG tHe otHeR menus CHanGInG.THE.LOCaL.TIME.SETTInG CHOOSInG.a.LanGUaGE This is the local time for the country where you live . You can change the display language for menus and on-screen displays such as the Zapping Window Press the menu button to display the Main menu and EPG Grid . -
Page 35: Updating.the.software
uPDAtInG tHe soFtWARe UPDaTInG.THE.SOFTWaRE If, in future, you are able to use a satellite that is not listed above, you may need to change one or more To keep you up-to-date with the latest of these settings: developments in digital television, new features may •... -
Page 36: Troubleshooting
tRouBLesHootInG TROUbLESHOOTInG If you are experiencing difficulty with your set-top box, check the troubleshooting table below – this may provide the answer you are looking for . Problem Possible cause suggested remedy The standby light on the Your set-top box is not Make sure that the mains lead is properly front panel of your set-top receiving power . - Page 37 tRouBLesHootInG Problem Possible cause suggested remedy You cannot see the Zapping The Display time setting has Set it to ‘3’ , ‘5’ or ‘10’ seconds (as required) Window . been set to instead (see page 31) . ‘0 seconds / Off’ . You see the on-screen You have selected a channel In the future, this channel number may be...
- Page 38 tRouBLesHootInG Problem Possible cause suggested remedy The picture sometimes (i) If you have other devices (i) Try connecting your satellite dish directly breaks up into ‘blocks’ . connected to your dish, to your set-top box . If this stops the picture there may not be enough breaking up, then there is not enough signal signal strength for the...
-
Page 39: Hdcp.content.protection
DIGItAL RIGHts mAnAGement (DRm) HDCP.COnTEnT.PROTECTIOn This is a type of Digital Rights Management (DRM) that prevents or restricts the copying of high-definition content . Some high-definition programmes may be transmitted with HDCP content protection enabled . The DVI and/or HDMI inputs on your HDTV must support HDCP Content Protection, in order for you to view protected programmes . -
Page 40: Technical.specification
sPeCIFICAtIon TECHnICaL.SPECIFICaTIOn Due to continued product improvement, this specification may change without notice . GEnERaL Operating voltage 230 V AC ± 15%; 50 Hz Power consumption 35 W (max) Dimensions (W x H x D) 389 mm x 58 mm x 265 mm Weight 4 . - Page 41 502-1008123...
Need help?
Do you have a question about the DS810 and is the answer not in the manual?
Questions and answers